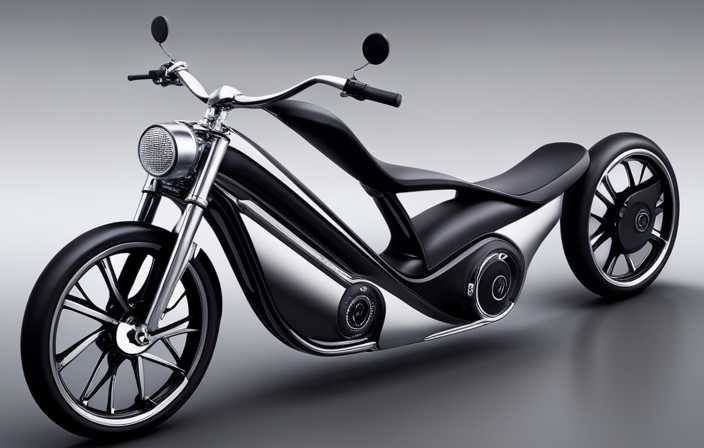

I’ve always been fascinated by the efficiency and power of electric bikes, so when I learned that installing a crank shaft electric bike motor can increase the speed and performance of my bike, I was hooked.
In this article, I will guide you through the step-by-step process of installing a crank shaft electric bike motor, providing you with all the necessary tools and materials, as well as tips for maintenance and fine-tuning.
Get ready to transform your regular bike into a high-performing electric machine.
Key Takeaways
- Regularly check and tighten components
- Inspect motor casing for damage or loose screws
- Ensure secure wiring connections
- Troubleshoot motor’s performance regularly

Under Armour Squeeze Water Bottles, 32 oz Water Bottles, Sideline Sports Water Bottle with Quick-Shot Lid, Quick & Easy Hydration, Gym Water Bottles, Squeeze Bottle, 1 32oz Bottle
- Easy Hydration: Quick-shot lid and one-way valve
- On-the-Go Use: One-hand operation for active hydration
- Measurement Markings: Ounces and milliliters for tracking
As an affiliate, we earn on qualifying purchases.
Gather the Necessary Tools and Materials
Before starting the installation process, make sure you have all the necessary tools and materials on hand.
To successfully install a crank shaft electric bike motor, you will need a set of Allen wrenches, a torque wrench, a crank puller tool, a bottom bracket tool, a chain breaker tool, a pedal wrench, and a wire cutter/stripper. These tools and equipment are essential for a smooth and efficient installation.
Additionally, it is important to prioritize safety precautions. Make sure to wear protective gloves and goggles to prevent any injuries. Always work in a well-ventilated area to avoid inhaling any fumes. It is also recommended to secure your bike in a sturdy bike stand to ensure stability during the installation process.
With all the necessary tools and safety precautions in place, you can now proceed to prepare your bike for installation.
Prepare Your Bike for Installation
Make sure you’ve got all the necessary tools and equipment ready to prepare your bike for the installation. Before you start, it’s crucial to ensure your bike is compatible with the electric bike motor. Check the frame compatibility by examining the bottom bracket area. Measure the width and diameter of the bottom bracket shell to ensure it matches the motor’s specifications.
Additionally, inspect the frame for any cracks or damage that could affect the installation process or compromise the integrity of the bike. If everything checks out, clean the bottom bracket area thoroughly to remove any dirt or debris that could interfere with the installation.
Once the bike is properly prepped, you can proceed to the next step of removing the crank and bottom bracket.
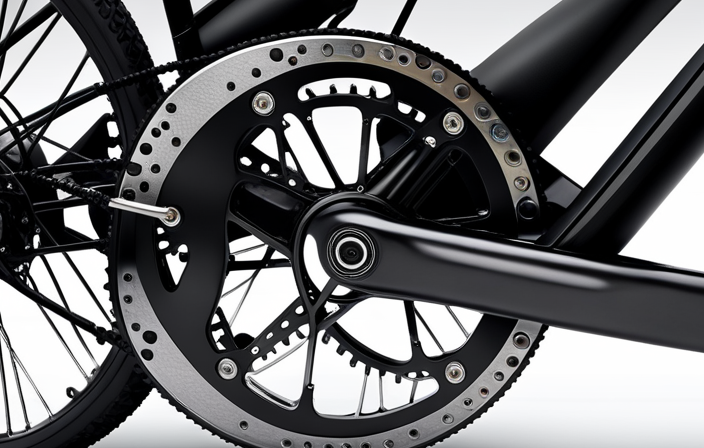
Remove the Crank and Bottom Bracket
To remove the crank and bottom bracket, you’ll need to use a crank puller tool. Here’s a step-by-step guide to help you with the process:
-
Start by removing the crank bolts on both sides of the crankset using a hex wrench. Make sure to turn the bolts counterclockwise to loosen them.
-
Once the bolts are removed, attach the crank puller tool to the crank arm. The tool will have a threaded shaft that fits into the crank arm’s spindle hole.
-
Turn the handle of the crank puller tool clockwise to push the crank arm away from the bottom bracket spindle. Keep turning until the crank arm comes off completely.
-
After removing both crank arms, you can proceed to remove the bottom bracket by using a bottom bracket tool. Insert the tool into the bottom bracket cups and turn it counterclockwise to loosen and remove them.
With the crank and bottom bracket successfully removed, you are now ready to install the electric bike conversion kit, which will be discussed in the next section.
To prepare for the installation of the electric bike conversion kit, you need to remove the crank and bottom bracket from your bike.
Install the Electric Bike Conversion Kit
Once you’ve successfully removed the crank and bottom bracket, it’s time to begin installing the conversion kit for your electric bike. This kit will transform your regular bike into a powerful and efficient electric bike, offering numerous benefits such as extended range, increased speed, and reduced effort while riding.
To ensure a smooth installation process, it’s important to be aware of common issues that may arise. One common issue is misalignment of the motor with the bike frame. To troubleshoot this, double-check that all mounting brackets are securely fastened and aligned properly.
Another common issue is wiring complications. Make sure to carefully follow the instructions provided with your conversion kit and double-check all connections.
Now, let’s move on to securing the electric bike motor and components.
Secure the Electric Bike Motor and Components
Now that you’ve successfully installed the conversion kit, it’s time to secure the motor and components onto your bike frame. This step ensures that everything stays in place and functions properly during your electric bike rides.
Here’s how you can do it:
- Begin by placing the electric bike motor onto the designated mounting bracket on the bike frame.
- Use the provided bolts and screws to securely fasten the motor to the bracket, ensuring a tight fit.
Next, attach the battery pack onto the bike frame, positioning it in a way that provides easy access and doesn’t interfere with your pedaling motion.
- Use the included straps or brackets to secure the battery pack firmly in place, minimizing any unwanted movement.
Properly securing the motor and components is crucial for the longevity and efficiency of your electric bike. It also simplifies future maintenance and troubleshooting common issues related to the motor or battery.
Now that everything is securely in place, it’s time to test the electric bike conversion kit’s performance and functionality.
Test the Electric Bike Conversion Kit
After securing the motor and components, you can begin testing the performance and functionality of the electric bike conversion kit. This step is crucial to ensure that everything is working properly before taking your electric bike for a ride.
To test the conversion kit, follow the instructions provided by the manufacturer. You may need to connect the battery, controller, and throttle to the motor and make sure they are properly wired. Once everything is connected, turn on the power and observe the performance of the motor. Check if the motor is spinning smoothly and if the throttle is responsive.
Troubleshoot common issues such as poor acceleration, unusual noises, or overheating. By thoroughly testing the electric bike conversion kit, you can identify and resolve any issues before proceeding to the next section, where you will adjust and fine-tune the motor settings.
Adjust and Fine-Tune the Motor Settings
To optimize your ride, you’ll want to fine-tune the settings of your newly installed motor. Adjusting the motor settings is crucial for achieving the best performance and efficiency.
Start by adjusting the pedal assist level to match your desired level of assistance. Most electric bike motors offer multiple levels, allowing you to choose the one that suits your needs.
Additionally, you can adjust the maximum speed of the motor to comply with local regulations.
Troubleshooting tip: if you experience any issues with the motor, such as excessive noise or vibration, check the alignment of the motor and make sure it is securely attached to the bike frame.
By mastering these adjustment techniques and troubleshooting tips, you can ensure that your electric bike motor is operating at its full potential.
Now, enjoy your new electric bike and experience the thrill of effortless riding.
Enjoy Your New Electric Bike
Get ready to have a blast on your new e-bike and experience the joy of effortless riding! Electric biking offers a multitude of benefits that will make every ride an absolute delight. Here are a few reasons why electric biking is so amazing:
- Increased speed and range: With the help of the electric motor, you can effortlessly reach higher speeds and cover longer distances, making your rides more efficient and enjoyable.
- Reduced effort and fatigue: The electric motor provides assistance when pedaling, reducing the strain on your muscles and allowing you to ride for longer periods without feeling exhausted.
- Eco-friendly transportation: Electric bikes produce zero emissions, making them an environmentally friendly alternative to traditional vehicles.
While electric biking is incredibly fun, it’s important to follow these tips for safe electric bike riding:
- Always wear a helmet and other protective gear to ensure your safety.
- Observe traffic rules and be aware of your surroundings at all times.
- Regularly check and maintain your e-bike’s brakes, lights, and tires to ensure optimal performance and safety.
By taking these precautions, you can fully enjoy the benefits of electric biking.
Now, let’s transition into the next section on how to maintain and care for your electric bike motor.
Maintain and Care for Your Electric Bike Motor
When it comes to maintaining and caring for your electric bike motor, there are a few key points to keep in mind.
First, it’s important to regularly check and tighten all components to ensure they are secure and functioning properly.
Second, cleaning and lubricating moving parts will help prevent wear and tear and keep your motor running smoothly.
Lastly, monitoring battery life and charging is crucial to ensure optimal performance and avoid unexpected power outages.
Regularly Check and Tighten Components
Make sure you regularly check and tighten the components of your electric bike motor. Regular maintenance is essential to keep your motor running smoothly and prevent any potential issues.
Start by inspecting the motor casing for any signs of damage or loose screws. Tighten them if necessary using a screwdriver.
Next, check the wiring connections to ensure they are secure and free from corrosion. If you notice any loose connections or frayed wires, address them immediately. Additionally, examine the battery connections and make sure they are tight and clean.
Troubleshooting tips include checking the motor’s performance regularly to identify any abnormal noises or vibrations.
By regularly checking and tightening the components of your electric bike motor, you can ensure its optimal performance and avoid any potential problems.
Transitioning into the next section, it’s also crucial to clean and lubricate moving parts to maintain the motor’s efficiency.
Clean and Lubricate Moving Parts
After ensuring that all components are properly tightened, it is crucial to clean and lubricate the moving parts of the electric bike motor. This maintenance step is essential for the longevity and optimal performance of the motor.
Cleaning techniques for different parts may vary, so it is important to refer to the manufacturer’s guidelines. Regular cleaning of the motor casing helps prevent the buildup of dirt and debris that can affect its efficiency. Additionally, lubrication is vital to reduce friction and wear on the moving parts.
Applying a high-quality lubricant to the chain, gears, and bearings ensures smooth operation and prolongs the lifespan of these components. Neglecting proper cleaning and lubrication can lead to premature wear and even motor failure.
Transitioning into the next section, it is vital to monitor battery life and charging to maintain the electric bike’s performance and functionality.
Monitor Battery Life and Charging
It’s important to regularly check the battery life and charging status of your electric bike to ensure optimal performance. To monitor battery usage, start by turning on your bike and accessing the battery display on the handlebar. This display will show you the current battery level, allowing you to track its usage over time.
Additionally, keep an eye on the charging status when you plug in your bike for charging. If you encounter any issues with charging, such as the battery not charging or taking longer than usual, you may need to troubleshoot the charging system. This can involve checking the power source, ensuring the charger is properly connected, and examining the charging port on your bike.
By regularly monitoring battery life and troubleshooting any charging issues, you can ensure a smooth and reliable electric biking experience.
Now that we’ve covered how to monitor battery life and troubleshoot charging issues, let’s explore and experience the benefits of electric biking.
Explore and Experience the Benefits of Electric Biking
You’ll love the convenience and efficiency of electric biking. Electric bikes, also known as e-bikes, have become increasingly popular due to the numerous benefits they offer. Not only do they provide a greener alternative to traditional bikes and cars, but they also make commuting and recreational riding more enjoyable. Thanks to advancements in electric bike technology, e-bikes now have longer battery life, improved motor power, and enhanced pedal assist capabilities. This means you can ride longer distances without worrying about running out of battery, tackle steep hills with ease, and effortlessly maintain a higher speed. Take a look at the table below to see the key benefits and technological advancements of electric biking.
| Benefits of Electric Biking | Electric Bike Technology Advancements |
|---|---|
| Eco-friendly transportation | Longer battery life |
| Health and fitness benefits | Improved motor power |
| Cost-effective | Enhanced pedal assist capabilities |
With these advancements, electric biking has become a viable option for daily commuting and recreational activities. Whether you’re looking to reduce your carbon footprint, improve your fitness level, or simply enjoy a smoother and more efficient ride, electric biking is the way to go. So hop on an e-bike and experience the future of transportation firsthand.
Frequently Asked Questions
How long does it typically take to install a crank shaft electric bike motor?
Typically, the installation of a crank shaft electric bike motor takes around 2-3 hours. The installation process involves disassembling the bike’s crankset, attaching the motor to the bottom bracket, and reassembling the crankset with the motor in place.
Are there any special tools required for the installation process?
Installing a crank shaft electric bike motor requires specialized tools. The installation process is precise and detailed, ensuring a seamless integration. Without these tools, the installation becomes challenging, hindering the overall performance and functionality of the motor.
Can I install an electric bike conversion kit on any type of bike?
Yes, an electric bike conversion kit can be installed on most types of bikes. Electric bike conversion kits are compatible with a variety of bike frames, allowing you to easily transform your regular bike into an electric one. The benefits of installing an electric bike conversion kit include increased speed, reduced effort while pedaling, and extended range.
What are the potential risks or challenges I might face during the installation?
During the installation of an electric bike conversion kit, potential risks and challenges may arise. These include compatibility issues with the bike frame, difficulty in routing cables, and the need for specialized tools. Proper research and careful attention to instructions can help overcome these challenges.
Are there any specific maintenance tips or recommendations for prolonging the lifespan of the electric bike motor?
To ensure a long lifespan for your electric bike motor, follow regular maintenance routines such as cleaning and lubricating the components. Stay vigilant for common troubleshooting issues like loose connections or worn-out parts.
Conclusion
Well, after going through all the steps and putting in the time and effort, I finally have my crank shaft electric bike motor installed.
It’s like a dream come true, having the power of an electric motor behind me as I pedal my way through the streets.
The irony is, all this work was done to make my bike easier to ride, but now I find myself pedaling harder than ever before.
But hey, at least I can say I put in the work to earn my electric bike.