In a world where efficiency and sustainability are crucial, converting your bicycle into an electric powerhouse is a significant move towards a more environmentally friendly future. By utilizing the appropriate tools and expertise, you can utilize the power of electricity to elevate your bike to new levels.
This comprehensive guide will equip you with the technical know-how to convert your bike into an electric marvel. From understanding the benefits of electric bikes to selecting the perfect conversion kit, get ready to embark on a journey towards a more eco-friendly and exhilarating ride.
Key Takeaways
- Testing and troubleshooting electric components is crucial to ensure proper functioning and identify any faulty connections or damaged parts.
- Adjusting and fine-tuning the conversion process is important for smooth power transmission, optimum performance, and efficiency.
- Installing additional accessories and features can enhance the convenience and style of the electric bike, such as cargo racks, lights, and Bluetooth speakers.
- Learning how to operate and maintain the electric bike properly is essential for a customized riding experience and prolonging its lifespan.

Under Armour Squeeze Water Bottles, 32 oz Water Bottles, Sideline Sports Water Bottle with Quick-Shot Lid, Quick & Easy Hydration, Gym Water Bottles, Squeeze Bottle, 1 32oz Bottle
- Easy Hydration: Quick-shot lid and one-way valve
- On-the-Go Use: One-hand operation for active hydration
- Measurement Markings: Ounces and milliliters for tracking
As an affiliate, we earn on qualifying purchases.
Understand the Benefits of Electric Bikes
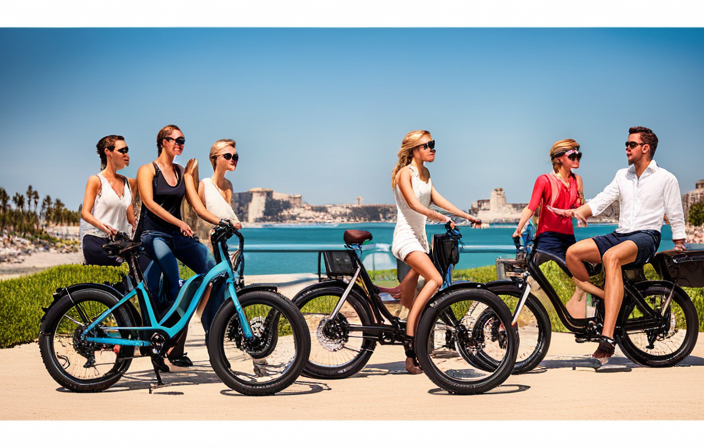
Electric bikes offer a myriad of advantages that make them an appealing option for both leisurely rides and daily commutes. The benefits of electric bikes are numerous, making them an increasingly popular choice among cyclists.
One of the main reasons to choose an electric bike is the ease of pedaling. With the assistance of an electric motor, you can effortlessly conquer hills and long distances, making your ride more enjoyable and less strenuous.
Another benefit is the ability to travel at higher speeds without exerting excessive effort. Electric bikes also provide a greener mode of transportation, as they produce zero emissions and reduce your carbon footprint.
Moreover, they are cost-effective, saving you money on fuel and parking fees. When considering your next bike, these reasons to choose an electric bike should be at the forefront of your decision-making process.
Now, let’s move on to determining your budget and needs.
Determine Your Budget and Needs
Determining your budget and needs will help you create a game-changing ride that awakens your inner adventurer. When it comes to making your bike electric, it’s crucial to consider your financial limitations and what features are essential for your riding experience.
Here’s a comprehensive list to guide you in this process:
-
Set a budget: Determine how much you’re willing to spend on converting your bike into an electric one.
-
Assess your daily commute: Consider the distance you need to cover and the terrain you’ll be riding on.
-
Battery range: Decide on the desired range of your electric bike to ensure it meets your commuting needs.
-
Additional features: Determine if you need extras like lights, fenders, or a cargo rack.
By carefully evaluating your budget and needs, you can make informed decisions about the conversion kit that suits you best. This will lead us to the next step of research and choosing the right conversion kit.
Research and Choose the Right Conversion Kit
To truly transform your ride, it’s time to dive into researching and selecting the perfect conversion kit that aligns with your specific needs and desires. When it comes to conversion kit options, there are several factors to consider such as motor power, battery capacity, and compatibility with your bike. To help you make an informed decision, I have created a table below outlining five popular conversion kits available on the market:
| Conversion Kit | Motor Power | Battery Capacity | Compatibility | Price Range |
|---|---|---|---|---|
| Kit A | 500W | 36V | Mountain bike | $400-$500 |
| Kit B | 750W | 48V | Road bike | $600-$700 |
| Kit C | 1000W | 52V | Fat bike | $800-$900 |
| Kit D | 1500W | 72V | Folding bike | $1000-$1200 |
| Kit E | 2000W | 72V | Cruiser bike | $1200-$1500 |
Once you have chosen the conversion kit that suits your needs, the installation process typically involves removing the existing bike components, such as the front wheel or bottom bracket, and replacing them with the kit components. It’s important to carefully follow the manufacturer’s instructions to ensure a proper installation. With the conversion kit selected, it’s time to gather the necessary tools and equipment to begin the installation process seamlessly.
Gather the Necessary Tools and Equipment
Once you’ve selected the perfect conversion kit, it’s time to gather all the tools and equipment necessary for a seamless installation process. Here are the essential items you’ll need to gather:
- Wrench set: A comprehensive set of wrenches will be required to disassemble and reassemble various components of your bike.
- Screwdriver set: A set of screwdrivers with different sizes and types will help you remove and install screws and bolts during the conversion process.
- Wire cutters/strippers: These tools are essential for cutting and stripping wires, ensuring proper electrical connections.
- Multimeter: A multimeter is crucial for testing electrical connections and troubleshooting any issues that may arise.
- Torque wrench: This tool will help you achieve the proper amount of tightening torque on bolts and nuts, ensuring everything is secure.
With these tools and equipment gathered, you can now move on to preparing your bike for the conversion by following the next section.
Prepare Your Bike for the Conversion
Before diving into the conversion process, it’s important to ensure your bicycle is in tip-top shape, ready to embark on its electrified journey.
Start by inspecting the frame for any cracks or damage that could compromise its structural integrity. Check the brakes, gears, and chain to make sure they are functioning properly and are in good condition.
Next, remove any accessories or components that may interfere with the conversion, such as water bottle holders or bike racks. Clean the bike thoroughly to remove any dirt or debris that could hinder the installation process.
Finally, take some time to research and understand the benefits of converting your bike to electric. It offers increased speed and range, making your commute easier and more enjoyable.
With your bike prepared, it’s time to install the electric motor and battery, taking your bike to the next level of performance.
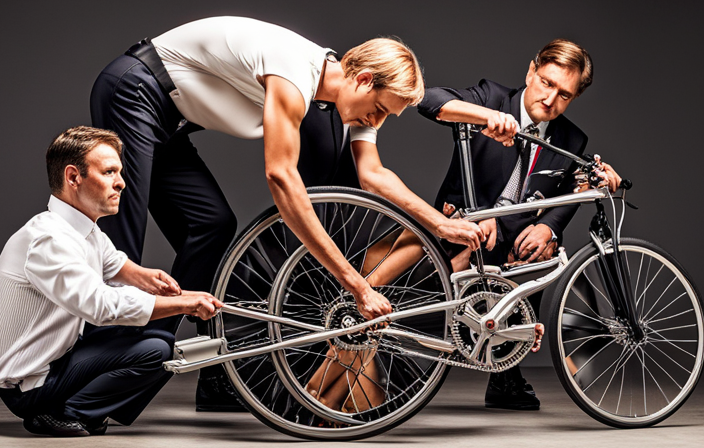
Install the Electric Motor and Battery
Now is the time to take your ride to new heights by installing the electric motor and battery, transforming your bicycle into a thrilling and powerful machine.
To begin, carefully unpack the electric motor and ensure that all the necessary components are present.
Next, locate the ideal position for the motor on your bike’s frame and securely attach it using the provided mounting brackets.
Once the motor is in place, you can start the battery installation process. Choose a suitable location for the battery pack, ensuring that it is easily accessible and well-protected from the elements. Attach the battery securely using the included mounting hardware.
Finally, connect the wiring and controls to the motor and battery, carefully following the manufacturer’s instructions. This will allow you to seamlessly transition into the subsequent section about connecting the wiring and controls, ensuring a smooth and efficient installation process.
Connect the Wiring and Controls
Get ready to connect the wiring and controls, guiding your ride towards an electrifying experience. To ensure a seamless transition to electric power, follow these steps:
-
Wiring Connections:
Begin by identifying the necessary wires for connecting the electric motor, battery, and control panel. Use wire connectors to securely attach the positive and negative wires, ensuring proper insulation and avoiding any potential short circuits. Pay close attention to the manufacturer’s instructions for specific wire placements. -
Control Panel Installation:
Mount the control panel securely on your bike’s handlebars, ensuring easy access while riding. Connect the control panel to the wiring system, ensuring a snug fit and secure connection. Double-check that all wires are properly connected and insulated. -
Final Checks:
Before moving on, carefully inspect the wiring connections and control panel installation to ensure everything is secure and correctly positioned. This will prevent any potential issues while on the road.
With the wiring and controls successfully connected, it’s time to test the electric components and see the power come to life.
Test the Electric Components
Once the wiring and controls are successfully connected, it’s time to witness the electric components come alive with a test run. Testing the electric components is crucial to ensure a smooth and efficient conversion. There are several testing methods available to evaluate the functionality of the electric system. One reliable method is to use a multimeter to measure voltage and continuity across the various components. This helps identify any faulty connections or damaged parts that may impede the performance of the electric bike. Additionally, troubleshooting tips can be employed to address any issues that arise during the testing process. For example, checking for loose connections, inspecting wiring for damage, and verifying proper grounding can help identify and resolve potential problems. By thoroughly testing the electric components and addressing any issues, you can ensure a successful conversion. Now, it’s time to adjust and fine-tune the conversion for optimal performance.
Adjust and Fine-tune the Conversion
To optimize the performance of your converted vehicle, it’s important to make subtle adjustments and fine-tune the modifications.
When it comes to adjustment techniques, there are a few key areas to focus on.
First, take a close look at the belt tension. It should be firm but not too tight, allowing for smooth power transmission.
Additionally, check the alignment of the motor and wheel sprockets to ensure they are properly aligned and engaged.
Troubleshooting tips include inspecting all connections and wires for any loose or damaged components, as well as testing the throttle response and motor power under different load conditions.
By carefully fine-tuning these aspects, you can enhance the overall performance and efficiency of your electric bike conversion.
Now, let’s move on to the next section and discuss how to install additional accessories and features.
Install Additional Accessories and Features
Now let’s dive into adding extra accessories and features to amp up the functionality and style of your converted ride.
Once you have successfully adjusted and fine-tuned your electric bike conversion, it’s time to consider installing additional accessories and features. These add-ons can enhance your riding experience and make your electric bike even more convenient and practical.
Some popular accessories to consider are a cargo rack or basket for carrying items, fenders to protect against splashes and dirt, lights for improved visibility, and a bell or horn for safety. Additionally, you may want to install a GPS or phone mount for navigation purposes, a comfortable saddle for long rides, or even a Bluetooth speaker for some entertainment on the go.
By incorporating these additional accessories and features, you can customize your electric bike to better suit your needs and preferences.
Moving forward, it’s important to learn how to operate and maintain your electric bike, ensuring its longevity and optimal performance.
Learn How to Operate and Maintain Your Electric Bike
Mastering the operation and upkeep of your e-bike is essential for ensuring a smooth and exhilarating ride every time. To operate your electric bike, start by familiarizing yourself with the controls, such as the power switch, throttle, and pedal-assist levels. Understanding how to adjust these settings will allow you to customize your riding experience based on your preferences and terrain.
Additionally, it is important to regularly maintain your electric bike to prolong its lifespan. This includes checking and inflating the tires, cleaning the chain and gears, and lubricating moving parts. Regularly inspect the battery and charger for any signs of damage or wear. By following these maintenance practices, you can ensure optimal performance and safety.
Transitioning to the next section about practicing safe riding habits, it is crucial to always wear a helmet and obey traffic laws.
Practice Safe Riding Habits
Ensure your safety on the road by always wearing a helmet and following traffic laws like a pro. To practice safe riding techniques on your electric bike, it’s important to familiarize yourself with the rules of the road and adopt defensive riding strategies.
Here are four essential tips to enhance your safety:
-
Maintain a steady speed: Avoid sudden acceleration or deceleration to maintain control and stability on your electric bike.
-
Be visible: Wear bright clothing and use lights at night to increase your visibility to other road users.
-
Signal your intentions: Use hand signals to indicate your turns and lane changes, allowing drivers to anticipate your actions.
-
Choose the right gear: Wear proper protective gear, such as gloves and knee pads, to minimize injuries in case of a fall.
By incorporating these safe riding techniques and choosing the right gear, you can confidently navigate the roads on your electric bike.
Transition into the subsequent section to learn how to enjoy the benefits of electric bike commuting.
Enjoy the Benefits of Electric Bike Commuting
Experience the numerous advantages of commuting with an electric bike and witness the transformation in your daily travels. Electric bike commuting offers a range of benefits that make it an appealing option for both short and long-distance trips. Not only does it provide a faster and more efficient mode of transportation, but it also helps reduce carbon emissions and promotes a healthier lifestyle. To fully enjoy the benefits of electric bike commuting, it is crucial to maintain your bike properly. Regularly check the battery, tires, and brakes for optimal performance. Additionally, keep the bike clean and lubricate the chain regularly. By following these maintenance tips, you can ensure a smooth and safe ride every time. As you explore scenic trails and bike paths, you will discover new adventures and opportunities for outdoor enjoyment.
Explore Scenic Trails and Bike Paths
Discovering scenic trails and bike paths is like embarking on an exciting outdoor adventure that unveils breathtaking views and endless opportunities for exploration. As you navigate through these picturesque routes, it’s essential to ensure that your electric bike is in optimal condition.
Regular bike maintenance is key to a smooth and enjoyable ride. Start by inspecting the tires, checking for any signs of wear or punctures. Additionally, make sure the brakes are functioning properly and the gears are shifting smoothly. It’s also crucial to keep the chain lubricated and clean to prevent rust and ensure efficient pedaling.
By maintaining your electric bike diligently, you can confidently tackle any scenic route, knowing that your bike is in top shape.
Transitioning into the subsequent section, sharing your electric bike experience with others can be an enriching and inspiring way to spread the joy of electric biking.
Share Your Electric Bike Experience with Others
Sharing your e-bike adventures with others can be a thrilling way to ignite a passion for outdoor exploration and inspire a sense of eco-friendly transportation. When it comes to electric bike modifications, it’s important to troubleshoot common electric bike issues to ensure a smooth and enjoyable ride.
Here are four key points to consider:
-
Battery maintenance: Regularly check the battery’s charge level and ensure it is properly connected. Clean the battery terminals and keep them free from corrosion to maximize performance.
-
Motor troubleshooting: If your electric bike’s motor is not functioning properly, check the wiring connections, throttle, and controller settings. Look for loose connections or damaged components that may need replacement.
-
Brake adjustment: Electric bikes require efficient braking systems. Regularly inspect the brake pads for wear and adjust them as needed. Ensure the brakes are responsive and provide sufficient stopping power.
-
Tire pressure and alignment: Proper tire pressure and alignment are crucial for a smooth and safe ride. Check the tire pressure regularly and adjust it according to the manufacturer’s recommendations. Inspect the tires for any signs of wear and replace them if necessary.
By sharing your knowledge and experiences, you can help others troubleshoot common electric bike issues and enjoy the benefits of eco-friendly transportation.
Frequently Asked Questions
How much does it cost to convert a bike into an electric bike?
Converting a bike into an electric one can be compared to unlocking a hidden power. The cost factors of DIY vs professional conversion depend on battery type, motor power, and additional features. A detailed analysis is crucial to make an informed decision.
What are the advantages of using an electric bike over a regular bike?
The cost of electric bikes can be expensive, but converting a regular bike into an electric one can be more cost-effective. The benefits of electric bike conversion include increased speed, reduced effort, and the ability to tackle hilly terrains with ease.
Are there any legal requirements or restrictions for using an electric bike?
There are numerous safety regulations and insurance requirements that must be followed when using an electric bike. It is crucial to be knowledgeable about these rules to ensure a safe and legal riding experience.
How long does it take to complete the conversion process?
The conversion process time depends on the complexity of the bike and the chosen conversion kit. The best conversion kits typically take around 4-6 hours to install, but it may vary.
Can any type of bike be converted into an electric bike?
Bike conversion is possible for most types of bikes. The process involves adding electric bike components such as a motor, battery, and controller. However, consider compatibility and structural integrity before proceeding with the conversion.
Conclusion
In conclusion, converting a regular bike into an electric bike can be a rewarding and cost-effective way to enhance your cycling experience.
By understanding the benefits of electric bikes, determining your budget and needs, researching the right conversion kit, gathering the necessary tools and equipment, and preparing your bike for the conversion, you can create a powerful and efficient electric bike.
For example, John, a daily commuter, converted his bike into an electric one and saw a significant reduction in his travel time, allowing him to arrive at work faster and more energized.
With safe riding habits, you can enjoy the benefits of electric bike commuting, explore scenic trails, and share your electric bike experience with others.