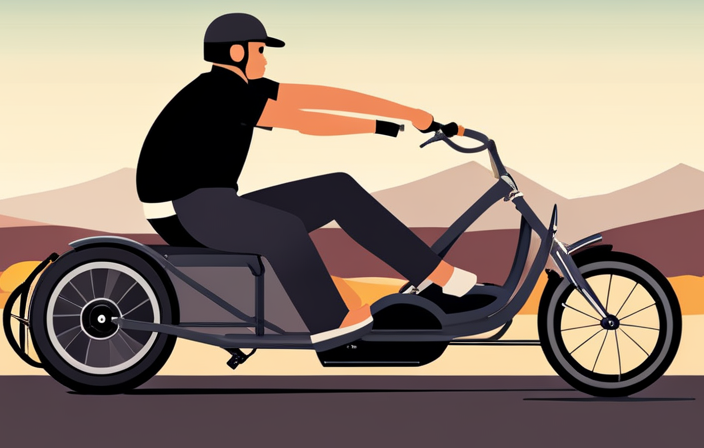
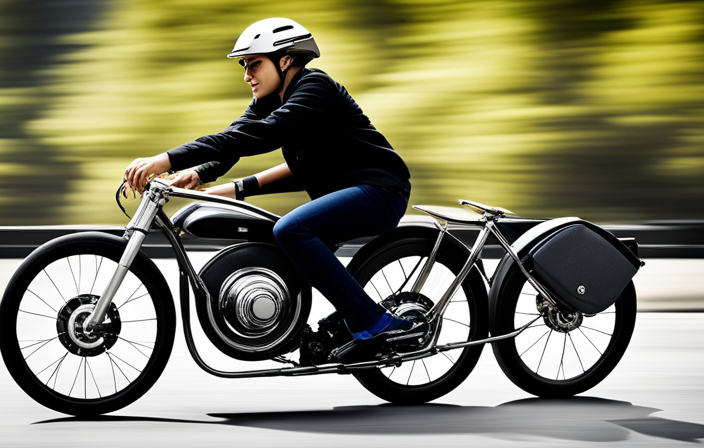
I love biking, but sometimes I wish I had a little extra power to help me up those hills. That’s why I decided to install an electric bike conversion kit on my trike.
In this step-by-step guide, I’ll show you how to:
- Assess your trike
- Choose the right kit
- Prepare for installation
- Actually install the electric conversion kit
We’ll also cover:
- Safety precautions
- Maintenance
- Cool accessories to enhance your electric trike experience
Let’s get started!
Key Takeaways
- Assess trike compatibility and necessary modifications
- Choose the appropriate motor type and evaluate power output, torque, and battery capacity
- Prepare the trike by cleaning and organizing necessary tools and adjusting brakes
- Attach the motor, battery, and connect the wiring securely, ensuring proper alignment and connection
Assess Your Trike and Gather the Necessary Tools
Before you start, make sure to assess your trike and gather all the necessary tools.
Assessing trike compatibility is crucial to ensure a smooth installation process. Check if your trike has a suitable frame and enough space to accommodate the electric bike conversion kit. Look for any modifications or adjustments needed to ensure a proper fit.
Next, gather the essential tools needed for the installation. These may include a wrench, screwdriver, pliers, and Allen keys. Additionally, you may require a torque wrench, wire cutters, and electrical tape. Having these tools on hand will make the installation process much easier and efficient.
Now that you have assessed your trike and gathered the necessary tools, let’s move on to choosing the right electric bike conversion kit.
Choose the Right Electric Bike Conversion Kit
When selecting the appropriate conversion kit for your trike, make sure you choose one that meets your specific needs and preferences. Electric bike conversion kits offer several benefits, such as increased speed and efficiency, reduced effort during rides, and the ability to tackle hilly terrains with ease.
However, there are factors to consider when choosing an electric bike conversion kit. Firstly, determine the type of motor you want, whether it’s a front-wheel, rear-wheel, or mid-drive motor. Consider the power output, torque, and battery capacity as well. Additionally, think about the installation process and whether you have the required skills and tools. Lastly, take into account the overall cost and warranty offered by the manufacturer.
By carefully considering these factors, you can select the right electric bike conversion kit for your trike and ensure a successful installation.
Now, let’s move on to preparing your trike for installation without delay.
Prepare Your Trike for Installation
To get your trike ready for the installation, start by cleaning and organizing all the necessary tools. Here are the steps to prepare your trike for the electric conversion kit:
-
Adjust the brakes: Before installing the kit, ensure that your trike’s brakes are working properly. This will help you have better control over your trike once the conversion is complete.
-
Choose the right tools: Make sure you have all the tools required for the installation. This may include wrenches, screwdrivers, pliers, and wire cutters. Having the right tools will make the installation process easier and more efficient.
-
Clean the trike: Remove any dirt, debris, or rust from your trike. This will ensure a clean surface for the kit installation and prevent any interference or damage to the components.
-
Organize the workspace: Set up a clean and organized workspace where you can work on your trike comfortably. This will help you stay focused and prevent any accidental damage to the kit or trike.
Install the Electric Conversion Kit
Before we can dive into the installation process, there are three key points we need to cover: attaching the motor and battery, connecting the wiring, and mounting the controller.
To begin, secure the motor to the trike frame using the provided brackets and bolts, making sure it is properly aligned with the rear wheel.
Next, attach the battery to a designated spot on the trike, ensuring it is secure and properly connected.
Attach the Motor and Battery
Start by attaching the motor and battery to your electric bike conversion kit trike. To do this, follow these steps:
-
Secure the mounting bracket to the frame of the trike. This will provide a stable base for the motor and battery.
-
Position the battery on the mounting bracket, ensuring that it is securely attached. Make sure the battery is positioned in a way that allows for easy access and minimizes interference with other components.
-
Attach the motor to the mounting bracket, aligning it properly with the wheel. Use the provided screws or bolts to secure the motor in place.
With the motor and battery attached, you are now ready to connect the wiring. This step will allow the motor to receive power from the battery and control the movement of the trike.
Connect the Wiring
Now that the motor and battery are attached, it’s time to connect the wiring. This step is crucial to ensure that the electric bike conversion kit functions properly.
Here’s a step-by-step guide on how to connect the wiring:
-
Locate the wiring harness included with your kit. It should consist of various connectors and cables.
-
Identify the corresponding connectors on the motor, battery, and controller.
-
Connect the wires by matching the colors and shapes of the connectors.
-
Ensure that the connections are secure and tight to prevent any loose connections.
-
Once all the connections are made, double-check for any loose or disconnected wires.
-
Troubleshoot common issues such as loose connections, faulty connectors, or damaged wires.
-
To extend battery life, consider using a battery management system (BMS) and regularly charge the battery.
With the wiring properly connected, we can now move on to the next step of the installation process: mounting the controller.
Mount the Controller
To properly mount the controller, start by locating a suitable location on your bicycle frame. Ensure that the chosen area is free from obstructions and easily accessible for operation.
Once you have identified the spot, gather the necessary mounting hardware, such as zip ties or brackets. These will be used to securely attach the controller to the frame.
Position the controller in the desired location and use the mounting hardware to firmly secure it in place. Tighten all screws and zip ties to prevent movement while riding.
To troubleshoot common issues with controller mounting, check for loose connections, ensure proper alignment, and confirm that the controller is not interfering with any other components on the bicycle.
Once the controller is securely mounted, you are now ready to test the electric trike and experience the benefits of your conversion kit.
Test the Electric Trike
First, make sure you take the electric trike for a test ride to ensure everything is functioning properly. Testing the electric trike is an important step in the installation process of the conversion kit.
Here are some test techniques and troubleshooting tips to help you out. Start by checking the brakes to ensure they are working effectively. Test the throttle response and make sure it is smooth and consistent. Check the battery charge and monitor the range to ensure it meets your expectations. Pay attention to any unusual noises or vibrations during the test ride.
If you encounter any issues, refer to the troubleshooting section of the instruction manual for guidance. By thoroughly testing the electric trike, you can identify and address any potential problems before moving on to the next section: fine-tune and adjust.
Fine-Tune and Adjust
Before taking my electric trike for a ride, I need to fine-tune and adjust a few key components.
First, I’ll adjust the seat and handlebars to ensure a comfortable and ergonomic riding position.
Next, I’ll check and adjust the brakes to ensure they’re responsive and functioning properly.
Adjust the Seat and Handlebars
Adjust your seat and handlebars to ensure a comfortable riding position. Proper adjustment of these components is crucial for a pleasant and safe riding experience. First, let’s start with the seat height. Sit on the bike and place your feet on the ground. The ideal seat height allows your legs to be slightly bent when the pedal is at its lowest position. Adjust the seat post accordingly and tighten the clamp securely. Moving on to the handlebars, loosen the stem bolt and position the handlebars at a comfortable angle. Ensure they are aligned with the front wheel and tighten the bolt. Here is a table summarizing the steps:
| Steps | Seat Height Adjustment | Handlebar Position Adjustment |
|---|---|---|
| 1. Sit on the bike. | Feet should be flat on the ground. | Comfortable angle for your wrists. |
| 2. Adjust the seat | Legs slightly bent when pedal is down. | Aligned with the front wheel. |
| 3. Tighten the clamp | Securely tighten the clamp. | Tighten the bolt to secure the position. |
Now that we have adjusted the seat and handlebars, let’s move on to the next step: checking and adjusting the brakes.
Check and Adjust the Brakes
Now that the seat and handlebars are properly adjusted, it’s time to move on to the next crucial step in installing an electric bike conversion kit trike: checking and adjusting the brakes.
Ensuring that your brakes are in top-notch condition is essential for your safety and the overall performance of your trike. Common brake problems include squeaking, lack of responsiveness, and uneven braking.
To address these issues, start by inspecting the brake pads for wear and tear. If necessary, replace them with new ones. Next, check the brake cables for any fraying or kinks. Adjust the tension of the brake cables using the barrel adjuster until the brakes engage smoothly.
Lastly, test the brakes by applying gradual pressure to the brake levers and ensure proper stopping power.
Transitioning into the subsequent section about ensuring proper tire inflation, let’s move on to the next step in our installation process.
Ensure Proper Tire Inflation
To ensure your safety and optimal performance, it’s important to regularly check the tire pressure on your trike. Proper tire pressure is crucial for maintaining stability, handling, and traction. Follow these step-by-step instructions to ensure proper tire inflation and tire maintenance.
- Start by locating the valve stem on each tire.
- Remove the valve cap and attach a tire pressure gauge to the valve stem.
- Read the pressure displayed on the gauge. Compare it to the recommended tire pressure specified by the manufacturer.
- If the pressure is too low, use an air compressor or hand pump to inflate the tire to the recommended level.
- If the pressure is too high, use the gauge’s release valve to gradually release air until the desired pressure is reached.
- Repeat these steps for each tire on your trike.
By regularly checking and maintaining proper tire pressure, you can ensure a safe and smooth ride.
In the next section, we will discuss important safety precautions and additional maintenance steps to keep your trike in top condition.
Safety Precautions and Maintenance
When it comes to riding a trike, safety should always be a top priority.
To ensure a safe and enjoyable ride, it is essential to wear protective gear such as a helmet, knee pads, and elbow pads.
Additionally, regularly inspecting and maintaining the trike is crucial to prevent any mechanical issues that could compromise safety.
Wear Protective Gear
Make sure you’re wearing the necessary protective gear before attempting to install the electric bike conversion kit for your trike. Wearing protective gear is crucial for your safety throughout the installation process.
There are several types of protective gear available that can provide different levels of protection. The most basic gear includes a helmet, goggles, and gloves. These items will protect your head, eyes, and hands from potential injuries. Additionally, you may want to consider wearing knee and elbow pads to protect your joints, especially if you’re working on a hard surface.
Wearing protective gear not only reduces the risk of injury but also provides peace of mind, allowing you to focus on the installation process. Once you have the necessary gear on, you can proceed to regularly inspect and maintain the trike to ensure optimal performance and safety.
Regularly Inspect and Maintain the Trike
Ensure you regularly inspect and maintain your trike to keep it in optimal condition for safe and smooth rides. Regular maintenance is essential to prevent common issues that can arise with an electric trike.
Start by checking the tires for any signs of wear or damage. Inflate them to the recommended pressure if needed.
Next, examine the brakes and ensure they are functioning properly. Adjust them if necessary.
Inspect the chain and gears for any signs of rust or excessive wear. Lubricate them regularly to prevent friction and ensure smooth operation.
Finally, check the battery and connections to ensure they are secure and free from corrosion.
Enjoy Your Electric Trike
When it comes to enjoying your electric trike, it’s important to start slow and get comfortable with the new ride.
Begin by riding in a safe and open area, gradually increasing your speed as you become more familiar with the trike’s handling.
Once you feel confident, explore different speeds and terrains to fully experience the versatility of your electric trike.
Start Slow and Get Comfortable
Take your time and get used to riding the electric trike before increasing your speed. As a first-time rider, it’s important to get comfortable and build confidence with your new trike. Here are some steps to help you get started:
- Adjust the seat height to ensure a comfortable riding position.
- Familiarize yourself with the trike’s controls, including the throttle and brakes.
Start by riding in an open and flat area to get a feel for the trike’s handling. Practice starting, stopping, and turning at a slow pace to build your balance and control. Gradually increase your speed as you become more comfortable with the trike’s handling.
Once you feel confident, you can start exploring different speeds and terrains.
Explore Different Speeds and Terrains
Now that I have become comfortable riding my electric bike trike at slower speeds, it’s time to explore different speeds and terrains. This will allow me to fully experience the versatility and capabilities of my electric bike conversion kit trike.
To explore different speeds, I can start by gradually increasing the power assistance level on my electric bike. This will give me a sense of how the bike responds and how it feels to ride at higher speeds. I should also practice using the throttle to increase the speed without pedaling.
When it comes to exploring various terrains, I can test my electric bike trike on different surfaces such as pavement, gravel, and grass. This will help me understand how the bike handles in different conditions and adjust my riding technique accordingly.
Transition: Now that I have become familiar with exploring different speeds and terrains, it’s time to consider additional accessories for my electric bike conversion kit trike.
Consider Additional Accessories
To get the most out of your electric bike conversion kit trike, you should definitely consider adding some additional accessories. These accessories can enhance your riding experience and provide added convenience and safety. Here are some top-rated options to consider:
-
Lighting: Install powerful LED lights to improve visibility, especially when riding at night or in low-light conditions.
-
Storage: Attach a rear rack or panniers to carry your belongings securely. This is especially useful for commuting or running errands.
-
Waterproof bags: Opt for waterproof bags to protect your belongings from rain or splashes.
-
Locks: Invest in a sturdy lock to keep your trike secure when parked.
With these additional accessories, you can enjoy a safer and more convenient ride on your electric bike conversion kit trike.
Now, let’s move on to the next section where we’ll share our experience and tips for maximizing your trike’s performance.
Share Your Experience and Tips
When adding accessories to your electric bike conversion kit trike, consider sharing your experience and tips to help others enhance their riding experience.
One important tip for troubleshooting is to always double-check your connections. Make sure all the wires are securely connected and that there are no loose or frayed wires.
Another tip is to regularly inspect and maintain your battery for optimal performance. Recommended battery maintenance includes keeping it clean and dry, avoiding extreme temperatures, and charging it according to the manufacturer’s instructions.
It’s also a good idea to invest in a quality battery charger to ensure a proper charge.
Frequently Asked Questions
Are there any specific tools or equipment required for installing an electric bike conversion kit on a trike?
To install an electric bike conversion kit on a trike, specific tools and equipment are required. These include wrenches, pliers, a screwdriver, and a torque wrench. Additionally, you will need a battery, motor, controller, and wiring harness to complete the installation.
How long does the installation process usually take?
The installation process for an electric bike conversion kit on a trike typically takes around 2 to 4 hours. This time may vary depending on the complexity of the kit and the experience of the person performing the installation.
Can the electric bike conversion kit be easily removed or transferred to another trike if needed?
Removing or transferring the electric bike conversion kit to another trike is as easy as unscrewing a light bulb! With its universal compatibility, it seamlessly fits different trike models, making the process hassle-free and convenient.
What is the average range and top speed of an electric trike after the conversion?
After converting a trike with an electric bike conversion kit, the average range and top speed will depend on the specific kit used. However, electric trike battery life is generally around 20-50 miles, and top speeds can reach up to 20-30 mph. The benefits of electric trike conversion kits include increased speed and range, making transportation easier and more efficient.
Are there any legal requirements or restrictions regarding the use of electric trikes on public roads?
There are legal requirements and safety regulations for using electric trikes on public roads. These include age restrictions, speed limits, and equipment requirements such as lights, reflectors, and horns.
Conclusion
As I stand back and admire my newly transformed trike, I can’t help but feel a sense of accomplishment.
The journey of installing the electric bike conversion kit was like navigating through a winding road, filled with challenges and triumphs.
It was as if I held the key to unlocking a hidden power within my trike, propelling it forward with ease.
Just like a butterfly emerging from its cocoon, my trike has undergone a magnificent transformation.
Now, it is ready to soar through the streets, bringing joy and excitement to my everyday adventures.
