I’ve always loved biking, but recently I’ve been wanting to give my ride a little extra boost. That’s when I discovered the world of electric components for bikes.
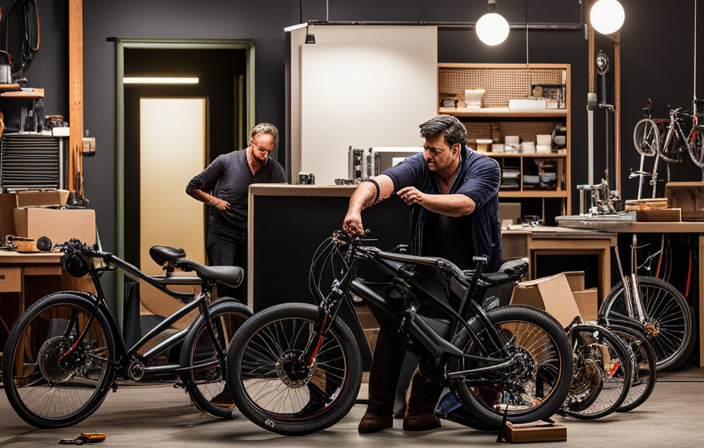
Installing an electric motor onto your bike can transform it into a powerful and efficient mode of transportation. In this article, I’ll guide you through the step-by-step process of installing electric components onto your bike, ensuring a seamless and enjoyable riding experience.
So, let’s dive in and get your bike electrified!
Key Takeaways
- Assess bike frame compatibility with electric component
- Gather necessary tools for the installation process
- Install the electric motor and mount the battery securely
- Connect electric components and secure wiring and cables
Assess Your Bike’s Compatibility
Before you start, make sure your bike’s frame is compatible with the electric component you want to install.
Assessing battery compatibility is crucial in determining whether your bike can support the power requirements of the electric component. Start by checking the voltage and capacity of your existing battery. Compare it with the voltage and capacity specifications of the electric component you plan to install. If they match, your bike is likely compatible.
Next, evaluate motor options based on your bike’s compatibility and your desired performance. Consider factors such as motor power, torque, and efficiency. Research different motor types, such as hub motors or mid-drive motors, and choose the one that best suits your needs.
With a compatible battery and a suitable motor, you can confidently proceed to the next step of researching and purchasing the right electric components for your bike.
Research and Purchase the Right Electric Components
To find and buy the correct electric parts for your bike, make sure to thoroughly research and compare different options. This is crucial to ensure compatibility and to get the best value for your money. Here are some steps to help you in your research and purchasing process:
-
Start by identifying the specific electric components you need for your bike, such as a motor, battery, or controller.
-
Research different brands and models of these components, considering factors like power output, efficiency, and durability.
-
Compare prices from various retailers or online platforms to find the best deals and discounts available.
Gather the Necessary Tools
Now that you’ve done your research and purchased the necessary electric components, it’s time to gather the tools you’ll need for the installation process. Assessing compatibility and ensuring safety are key factors when gathering tools. Here are the essential tools you’ll need:
| Tools | Quantity | Purpose |
|---|---|---|
| Wrench | 2 | To loosen and tighten nuts and bolts |
| Screwdriver | 2 | To remove and install screws |
| Pliers | 1 | To grip and hold components |
| Wire cutter | 1 | To cut and strip wires |
Having these tools on hand will make the installation process smoother and more efficient. With the right tools, you can proceed to the next section and prepare your bike for the electric component installation. It is important to ensure a seamless transition between sections to maintain a smooth flow of instructions.
Prepare Your Bike
Make sure you assess your bicycle’s condition, checking for any damages or adjustments that need to be made. This step is crucial for bike maintenance and ensuring safety precautions.
Start by examining the frame for any cracks or dents. Check the wheels, spokes, and tires for any signs of wear or damage. Inspect the brakes to ensure they are in good working condition and adjust them if necessary. Verify that the gears are shifting smoothly and the chain is properly lubricated. Additionally, check the handlebars, pedals, and saddle for any loose components that need tightening.
By thoroughly assessing your bike’s condition, you can address any issues before installing the electric motor, which will ensure a smooth and safe ride.
Now, let’s move on to the next section and learn how to install the electric motor onto your bike.
Install the Electric Motor
Start by checking the motor for any damages or signs of wear. Ensure that the motor is compatible with your bike’s frame and specifications. Take note of any specific mounting techniques recommended by the manufacturer.
Begin by locating the appropriate mounting points on the frame. Align the motor with these points, ensuring a secure fit. Use the necessary tools to attach the motor to the frame, following the manufacturer’s instructions. Double-check the tightness of all bolts and screws to prevent any potential issues during operation.
Once the motor is securely mounted, you can proceed to the next step of installing the battery. This will provide the necessary power for the motor to function efficiently.
Transitioning to the subsequent section, let’s now discuss how to mount the battery.
Mount the Battery
To mount the battery on the bike, I first need to determine the best location for it. This will depend on factors such as weight distribution and accessibility.
Once the location is determined, I will use brackets or straps to securely attach the battery to the bike frame, ensuring that it is stable and won’t move during rides.
Determine the best location for the battery
The first step in determining the best location for the battery is to consider the weight distribution of the bike. Choosing the optimal position for the battery is crucial to ensure proper weight distribution.
Begin by identifying the center of gravity of the bike, which is typically near the bottom bracket. This is where the majority of the weight is concentrated.
Next, evaluate the available space on the bike frame. Look for areas that are both secure and easily accessible. It is important to keep the battery positioned low on the bike to maintain stability and prevent any imbalance.
Once the ideal location is determined, use brackets or straps to securely attach the battery to the bike, ensuring it is tightly fastened and will not shift during rides. This will provide a stable and secure installation.
Use brackets or straps to securely attach the battery to the bike
Securely attach the battery to the bike frame using brackets or straps to ensure stability. This step is crucial in securing electric components and preventing any accidents or damage while riding. There are various battery attachment methods available, but using brackets or straps is the most common and reliable method.
To attach the battery using brackets, follow these steps:
- Position the battery on the bike frame in the desired location.
- Place the brackets on either side of the battery, aligning them with the mounting holes.
- Insert screws through the brackets and into the mounting holes on the battery.
- Tighten the screws securely to firmly attach the brackets to the battery and the bike frame.
Alternatively, you can use straps to attach the battery. Follow these steps:
- Loop the straps around the battery and the bike frame.
- Pull the straps tight and fasten them securely.
- Make sure the battery is snugly held in place.
By using these battery attachment methods, you can ensure the stability and safety of your electric components.
Now, let’s move on to connecting the battery to the motor and controller.
Connect the battery to the motor and controller
After securely attaching the battery to the bike using brackets or straps, the next step is to connect the battery to the motor and controller.
This connection is crucial for the proper functioning of the electric component on your bike. Start by locating the motor and controller, usually positioned near the rear wheel. Identify the positive and negative terminals on the battery and the corresponding terminals on the motor and controller.
Ensure that the connections are tight and secure, using the appropriate connectors or cables. This step is essential for maintaining battery efficiency and optimizing motor performance.
Once the battery is successfully connected to the motor and controller, you can proceed to install the controller, which controls the power flow and regulates the motor’s speed and performance.
Install the Controller
To install the controller for the electric bike, the first step is to find a suitable location on the bike frame. This should be a spot that is easily accessible, secure, and protected from the elements.
Once the location is determined, the next step is to attach the controller securely to the bike frame using mounting brackets or straps. It is important to ensure that the controller is tightly secured to prevent any movement or damage during the ride.
Find a suitable location for the controller
You’ll want to first identify a suitable location for the controller on your bike. This is an important step to ensure easy access and proper functioning of the electric component. To help you with this, I have prepared a table that outlines the factors to consider when finding the perfect spot for the controller:
| Factors to Consider | Possible Locations | Pros | Cons |
|---|---|---|---|
| Accessibility | Handlebars | Easy to reach | Limited space |
| Protection | Under the seat | Shielded from elements | Difficult to access |
| Stability | Frame | Secure and stable | Limited space |
Once you have chosen the ideal location, it’s time to secure the controller. This can be done using zip ties or mounting brackets. Attach the controller securely to the bike frame to ensure it stays in place during rides. Now, let’s move on to the next section and learn how to complete this installation process seamlessly.
Attach the controller securely to the bike frame
Now, it’s time for you to securely attach the controller to the frame of your bicycle. Follow these steps to ensure a stable and reliable bike frame attachment:
-
Begin by selecting a suitable location on the bike frame where the controller can be mounted securely. Look for a flat and accessible area that is away from moving parts and won’t interfere with your pedaling or steering.
-
Use zip ties or mounting brackets to fasten the controller to the frame. Make sure the controller is aligned properly and positioned in a way that allows for easy access to its buttons and ports.
-
Tighten the zip ties or screws firmly, but be careful not to overtighten and damage the controller or the frame. Check for any movement or play in the attachment and make adjustments as needed.
-
Once the controller is securely attached, give it a gentle tug to ensure it is stable and won’t come loose during rides.
Now that the controller is securely attached to the bike frame, we can move on to connecting it to the motor and battery without any further delay.
Connect the controller to the motor and battery
Once the controller is securely attached to the bike frame, it’s time to connect it to the motor and battery. Start by locating the motor wires and connecting them to the corresponding wires on the controller. Ensure that the connections are tight and secure.
Next, locate the battery wires and connect them to the designated terminals on the controller. It is crucial to install the battery correctly, ensuring that the positive and negative terminals match.
Once all the connections are made, double-check that everything is properly secured and insulated to avoid any short circuits.
In case you encounter any controller issues, such as the motor not responding or erratic behavior, make sure to troubleshoot by checking all the connections, ensuring they are tight and properly connected.
Now that the controller is connected to the motor and battery, let’s move on to connecting additional components for a complete electric bike setup.
Connect Additional Components
To continue with the installation process, the next step is to connect any additional components to the bike.
If desired, lights can be installed by carefully following the manufacturer’s instructions.
Next, make sure to connect any display panels or control interfaces that may be included with the components.
Install lights, if desired, following the manufacturer’s instructions
If you want lights on your bike, you can install them by following the manufacturer’s instructions. Here’s how to do it:
-
Installing Reflectors:
-
Choose the appropriate reflectors for your bike. Reflectors come in different shapes and sizes, so make sure to select the ones that fit your bike’s frame and wheels.
-
Clean the areas where you will attach the reflectors to ensure a secure bond.
-
Peel off the backing of the adhesive on the reflectors and press them firmly onto the designated spots on your bike.
-
Choosing the Right Type of Lights:
-
Determine the purpose of your lights. Are they for visibility or for illuminating the road?
-
Consider the power source. Battery-operated lights are convenient, but rechargeable lights are more eco-friendly and cost-effective in the long run.
-
Select the appropriate mounting option. Lights can be mounted on the handlebar, seat post, or helmet.
To connect any display panels or control interfaces, you need to follow a similar process.
Connect any display panels or control interfaces
When connecting any display panels or control interfaces, it is important to carefully follow the manufacturer’s instructions.
Start by identifying the connectivity options available on your specific device. Common options include USB, HDMI, VGA, and Ethernet.
Once you have determined the appropriate connection type, locate the corresponding port on your bike or handlebar.
Ensure that both the device and the bike are powered off before making any connections.
Insert the connector into the port firmly, making sure it is secure.
If the connection is loose or not working properly, try troubleshooting techniques such as checking for any dust or debris in the port, or trying a different cable.
Once all connections are made, you can proceed to test all connections to ensure proper functionality.
Test all connections to ensure proper functionality
After connecting the display panels and control interfaces, it is crucial to test all the connections to ensure proper functionality. This step is essential in order to identify any potential issues or malfunctions before proceeding further.
Begin by adjusting any loose or unstable connections, making sure they are securely fastened. Use a multimeter to measure the voltage and continuity across each connection. Check for any abnormal readings or fluctuations that could indicate a faulty connection.
Additionally, test the functionality of each component by activating the bike’s electrical system. Verify that the display panels are properly lit and responsive to input, and that the control interfaces are functioning as intended.
Adjust and Test the Electric Components
Before taking my newly installed electric components for a spin, it’s crucial to make any necessary adjustments to the motor, controller, or battery. This step ensures optimal performance and longevity of the system.
Once adjustments are complete, the next step is to thoroughly test the electric components to ensure they’re functioning correctly. This includes checking for any wiring issues, loose connections, or abnormal behavior.
Make any necessary adjustments to the motor, controller, or battery
You’ll need to make any necessary adjustments to the motor, controller, or battery before installing the electric component onto the bike.
To begin, adjust the motor settings to ensure optimal performance. This can be done by consulting the manufacturer’s instructions or referring to the motor’s user manual.
Next, focus on optimizing battery performance. Check the battery’s voltage and capacity to ensure they meet the requirements of the electric component. Adjust the battery’s output settings if necessary, taking into account factors such as the weight of the bike and desired speed. It is important to find the right balance to avoid draining the battery too quickly or sacrificing performance.
Once these adjustments are made, you can proceed to the next step of testing the electric components to ensure they are working correctly.
Test the electric components to ensure they are working correctly
After making any necessary adjustments to the motor, controller, or battery, it is crucial to test the electric components to ensure they are working correctly. This step is essential to identify any potential issues or malfunctions before taking the bike for a test ride.
To conduct the testing process, gather the necessary test equipment, such as a multimeter and diagnostic software specific to your electric components. Begin by connecting the multimeter to the appropriate wires and measuring the voltage and current readings. Compare these readings with the manufacturer’s specifications to determine if they fall within the acceptable range.
Additionally, use the diagnostic software to troubleshoot any issues and identify error codes, if applicable.
Take a short test ride to ensure proper function and performance
To ensure everything is working correctly, take a short test ride to check for proper function and performance. Here’s how to do it:
-
Start by mounting your bike and turning on the electric components, such as the motor and lights.
-
Begin riding at a slow pace, gradually increasing your speed. Pay attention to any unusual noises or vibrations.
-
Test the responsiveness of the electric components by engaging the throttle and brakes. Make sure they are working smoothly and effectively.
-
Perform a performance assessment by climbing hills or riding on different terrains to gauge how well the electric components handle different conditions.
By conducting a thorough test ride and assessing the performance of your electric components, you can identify any issues or areas that need improvement.
Once you are satisfied with the test ride results, it’s time to move on to securing and protecting the wiring without compromising the functionality of your bike.
Secure and Protect the Wiring
Make sure the wiring is properly secured and protected to prevent any potential damage. Wiring protection is crucial to ensure the longevity and functionality of your electric component.
Here are some step-by-step instructions on how to protect and waterproof your wiring.
-
Start by inspecting the wiring for any exposed or loose connections. Secure any loose connections using electrical tape or zip ties.
-
Use wire loom or conduit to cover the wiring. This will provide an extra layer of protection against abrasion and moisture.
-
Apply silicone sealant or electrical tape to seal any exposed connections or splices. This will prevent water from seeping into the wiring and causing damage.
-
Consider using heat shrink tubing on the ends of the wiring. This will create a watertight seal and further protect the connections.
By following these waterproofing techniques, you can ensure that your wiring is well-protected against moisture and potential damage.
Once you have secured and protected the wiring, you can proceed to fine-tune and customize your electric component for optimal performance.
Fine-tune and Customize
Once you’ve secured and protected the wiring, it’s time to fine-tune and customize your setup to meet your specific preferences and needs. Customizing your electric components not only allows you to personalize your bike, but also enhances its performance. There are various options you can consider for customization, including performance upgrades. To help you make informed decisions, here’s a table showcasing some popular customization options and their benefits:
| Customization Option | Benefits |
|---|---|
| Upgraded Battery | Longer range and increased power output |
| High-Performance Motor | Improved acceleration and top speed |
| Advanced Display | More detailed ride information and control |
| Custom Lighting | Enhanced visibility and stylish appearance |
| Ergonomic Grips | Improved comfort and reduced hand fatigue |
| Suspension Upgrades | Smoother ride and better handling |
Maintain and Care for Your Electric Components
Now that you’ve customized your setup, it’s important to properly maintain and care for your electric components to ensure their performance remains intact.
Here are some troubleshooting tips to help you keep your electric components in top shape.
First, regularly inspect all connections to make sure they are secure and free of any damage.
Next, keep your components clean by wiping them down with a soft, damp cloth and avoiding harsh chemicals.
Additionally, check for any signs of wear or frayed wires, and replace them if necessary.
It’s also crucial to keep your electric components protected from extreme temperatures and moisture.
Finally, always follow the manufacturer’s guidelines for maintenance and servicing.
By following these steps, you can ensure that your electric components will continue to function optimally for a long time.
Learn and Follow Local Regulations
To ensure compliance and safety, familiarize yourself with and abide by local regulations regarding the use and maintenance of your electric components. It is important to learn about the different types of electric bike regulations and understand the safety requirements for electric bikes. Here is a step-by-step guide to help you navigate these regulations:
| Electric Bike Regulations | Safety Requirements |
|---|---|
| Speed limits | Helmet usage |
| Age restrictions | Reflectors |
| Licensing | Lights |
| Road access | Brakes |
| Weight restrictions | Bell or horn |
Enjoy Your Electric Bike
Now that I’ve successfully installed the electric component onto my bike, it’s time to take it out for a ride.
I can’t wait to explore new routes and experience the added power and convenience that my electrified bike offers.
As I ride, I’ll make sure to take note of any tips or tricks that enhance my experience, so that I can share them with others who are interested in electrifying their bikes.
Take your newly electrified bike out for a ride
Once you’ve finished installing the electric component on your bike, you can take it out for a ride. But before you hit the road, there are a few things you need to do to ensure everything is running smoothly.
Here’s a step-by-step guide to fine-tuning the electric motor and adjusting the controller settings:
-
Start by checking the motor alignment. Make sure it is properly aligned with the bike’s drivetrain to avoid any unnecessary friction.
-
Next, adjust the controller settings. This will allow you to customize the level of assistance and speed limits according to your preferences.
-
Take a short test ride to evaluate the performance. Pay attention to any unusual noises or vibrations, and make adjustments if necessary.
-
Finally, make sure all the cables and connections are secure. Double-check that nothing is loose or dangling that could cause potential issues during your ride.
With everything fine-tuned and the controller settings adjusted, you’re ready to explore new routes and enjoy the added power and convenience of your electrified bike.
Explore new routes and enjoy the added power and convenience
With the electric motor installed and the controller settings adjusted, you’re ready to hit the road and experience the added power and convenience of your electrified bike. Now, it’s time to explore scenic routes and embrace eco-friendly transportation. To help you plan your rides, I’ve created a table with a few suggestions:
| Route Name | Distance (miles) | Difficulty Level |
|---|---|---|
| Coastal Cruise | 15 | Easy |
| Mountain Madness | 25 | Moderate |
| City Tour | 10 | Easy |
These routes offer a variety of landscapes and challenges, catering to different preferences. Whether you’re seeking a peaceful coastal ride or an adrenaline-pumping mountain adventure, these routes have got you covered. So, hop on your electrified bike and explore the beauty of nature while reducing your carbon footprint. Share your experience and tips with others, inspiring them to join in on the fun and embrace eco-friendly transportation.
Share your experience and tips with others
Share your electrified biking experience and offer tips to inspire others to embrace eco-friendly transportation.
As someone who has been riding an electric bike for several years now, I can say that it has truly transformed my daily commute. The added power and convenience make it a joy to ride, not to mention the positive impact on the environment.
One tip I would share is to plan your routes in advance, taking advantage of bike lanes and avoiding busy roads. Additionally, make sure to invest in a good quality lock to keep your bike secure.
Sharing success stories and tips like these can motivate others to give electric biking a try.
Troubleshooting and support are also important aspects of this journey, so let’s explore that next.
Troubleshooting and Support
If you’re experiencing any issues with the installation, don’t hesitate to ask for assistance or consult the troubleshooting guide.
Troubleshooting techniques can help identify and resolve any problems you may encounter during the installation process.
First, check all connections to ensure they are secure and properly aligned. If there are any loose or disconnected wires, reconnect them tightly.
Next, verify that all components are compatible with your bike and that they are installed correctly according to the provided instructions.
If the issue persists, it may be helpful to reach out to customer support options. They can provide further guidance, troubleshooting advice, or even arrange for a professional technician to assist you if needed.
Frequently Asked Questions
How much power does the electric motor provide?
The electric motor provides power to the bike based on its efficiency. The efficiency of the motor determines how much power it can generate. This power has an impact on the bike’s performance, such as its speed and acceleration.
Can I install the electric components on any type of bike?
Yes, electric components can be installed on most types of bikes. However, compatibility depends on the specific components and the bike’s frame, fork, and wheel size. Some bikes may require modifications for proper installation.
What safety precautions should I take when installing the electric components?
Before installing electric components, it’s crucial to prioritize safety. Start by wearing protective gear, such as gloves and goggles. Disconnect the bike’s battery and ensure all power sources are off. Carefully follow manufacturer instructions and double-check all connections for proper insulation.
How long does it take to install the electric components on a bike?
The installation time for electric components on a bike varies depending on experience and complexity. The installation process typically involves securing the battery, attaching the motor, connecting the wiring, and testing the system.
Are there any specific regulations I need to follow when using an electric bike?
When using an electric bike, there are specific regulations and legal requirements that need to be followed. These include limitations on speed, age restrictions, and the use of safety equipment such as helmets and lights.
Conclusion
In conclusion, transforming your bike into an electric wonderland is a journey worth taking. Just like a caterpillar transforming into a beautiful butterfly, your bike will undergo a magical metamorphosis.
By assessing compatibility, researching and purchasing the right components, gathering tools, and preparing your bike, you will be ready to start the transformation.
Installing the electric motor is the next step, followed by maintaining your components and following regulations to ensure a safe and legal ride.
In case of any issues, troubleshooting will be necessary, but don’t worry, there are resources available to help you along the way.
So hop on your newly electrified bike and let the wind carry you to new heights of joy and freedom. Happy riding!