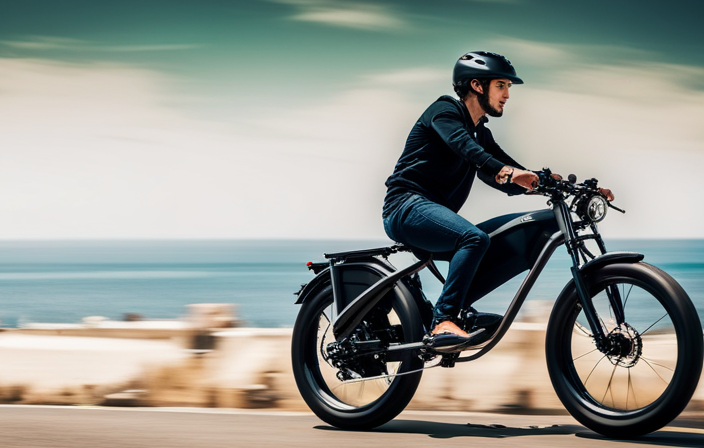

Are you tired of the hassle and effort it takes to kickstart your motorized bike every time you want to ride?
What if there was a way to make your bike start with just the push of a button?
In this article, I will guide you through the step-by-step process of installing an electric start on your motorized bike.
With the right tools and materials, you’ll be enjoying the convenience of electric start in no time.
Let’s get started!
Key Takeaways
- Check if the bike has a kickstart mechanism and modify it if necessary.
- Ensure the bike’s electrical system can handle the electric start load.
- Gather the necessary tools and materials for installation.
- Connect the starter motor to the battery and install the push-button ignition switch.
Assess Your Bike’s Compatibility for Electric Start
You’ll need to assess if your bike is compatible for electric start. Assessing compatibility is crucial to ensure that the installation process goes smoothly and that you won’t encounter any issues later on.
Start by checking if your bike has a kickstart mechanism already installed. If it does, it might require modifications to accommodate the electric start system. Troubleshooting issues may arise if your bike’s electrical system is not designed to handle the additional load of the electric start. Check the battery capacity and ensure it can provide enough power. Additionally, inspect the wiring and make sure it is in good condition.
Once you have assessed compatibility and resolved any potential issues, you can move on to the next step of gathering the necessary tools and materials.
Gather the Necessary Tools and Materials
To get started, make sure you have all the tools and materials needed for the installation. Here is a list of 4 items you will need:
-
Electric starter motor: Choose a motor that is compatible with your bike’s engine size and power requirements. Consult the manufacturer’s specifications for guidance.
-
Wiring and connectors: Ensure you have the appropriate gauge and length of wire for connecting the starter motor to the bike’s electrical system. Use high-quality connectors to ensure a secure and reliable connection.
-
Battery and battery box: You will need a suitable battery to power the electric starter motor. Make sure the battery box is sturdy and securely mounted to the bike.
-
Switch and control module: Install a switch and control module that allows you to easily engage and disengage the electric starter motor.
Proper wiring and connection of the starter motor is crucial for a successful installation. Ensure all connections are secure and follow the manufacturer’s instructions.
Once you have gathered all the necessary tools and materials, you can proceed to the next step of removing the kick start mechanism.
Remove the Kick Start Mechanism
After gathering the necessary tools and materials, it’s time to remove the kick start mechanism from your motorcycle.
This step is crucial in order to make way for the installation of the electric starter motor.
Start by locating the kick start lever and the associated mechanism, which is typically attached to the engine casing.
Using a wrench or socket set, carefully remove the bolts securing the kick start mechanism in place.
Once the bolts are removed, gently pull the kick start lever away from the engine casing, taking care not to damage any surrounding components.
With the kick start mechanism removed, you can now proceed to install the electric starter motor.
This alternative starting method will provide you with a convenient and reliable way to start your motorized bike.
Install the Electric Starter Motor
Once the kick start mechanism is removed, it’s time to attach the starter motor. Installing an electric start on your motorized bike offers several benefits. Here’s how you can do it:
-
Position the starter motor: Locate a suitable spot on the engine where the starter motor can be securely mounted. Ensure that it is aligned with the engine’s flywheel for optimal functionality.
-
Secure the starter motor: Use the provided mounting brackets and bolts to firmly attach the starter motor to the designated spot on the engine. Double-check for any loose connections or misalignments.
-
Connect the wiring: Connect the electrical wires from the starter motor to the battery. Follow the manufacturer’s instructions to ensure correct wiring and polarity.
By installing the electric start, you’ll enjoy the convenience of effortlessly starting your motorized bike. Now, let’s move on to the next step of connecting the starter motor to the battery.
Connect the Starter Motor to the Battery
Now, let’s proceed with connecting the starter motor to the battery. To do this, we will need to connect the wires from the starter motor to the battery terminals.
Start by identifying the positive and negative terminals on the battery. The positive terminal is usually marked with a ‘+’ symbol, while the negative terminal is marked with a ‘-‘ symbol.
Take the positive wire from the starter motor and connect it to the positive terminal of the battery. Similarly, connect the negative wire from the starter motor to the negative terminal of the battery. Make sure the connections are secure and tight to prevent any loose connections.
If you encounter any issues during the connection process, here are some troubleshooting tips. Double-check that the wires are connected to the correct terminals. Also, ensure that the battery is fully charged and in good working condition. If the starter motor still doesn’t work after following these steps, it may be necessary to consult a professional for further assistance.
With the starter motor successfully connected to the battery, we can now move on to installing the push-button ignition switch.
Install the Push-Button Ignition Switch
To begin installing the push-button ignition switch, you’ll need to gather the necessary tools and materials. Here’s what you’ll need:
- Push-button ignition switch
- Wire strippers
- Electrical tape
- Screwdriver
Now, let’s talk about the benefits of using a push-button ignition system. Firstly, it provides convenience by eliminating the need to use a key to start the motorized bike. With just a simple push of a button, the engine comes to life.
Additionally, push-button ignition systems are more reliable and durable compared to traditional ignition systems. They are less prone to wear and tear, ensuring a longer lifespan.
However, it’s important to be aware of common issues that may arise with push-button ignition systems. These include electrical shorts, faulty wiring connections, and battery drainage. Proper installation and regular maintenance can help prevent these issues.
Now that the push-button ignition switch is installed, let’s move on to testing the electric start system.
Test the Electric Start System
After the push-button ignition switch is in place, it’s time to evaluate the functionality of the electric start system. To begin the testing procedure, ensure that all connections are secure and wires are properly connected.
First, turn the key to the ‘on’ position and check if the lights and indicators are functioning correctly. Then, press the start button and listen for any clicking or buzzing sounds. If you hear these noises, it indicates that the starter motor is receiving power.
Next, check if the engine starts smoothly when the start button is pressed. If the engine fails to start, there may be an issue with the battery or the starter motor. Troubleshooting tips include checking the battery voltage and inspecting the starter motor for any damage or loose connections.
Once the testing is complete, make any necessary adjustments or troubleshoot issues to ensure the electric start system is functioning properly.
Make Any Necessary Adjustments or Troubleshoot Issues
You should check for any loose connections or damaged components and make the necessary adjustments or troubleshoot any issues that arise. It is important to ensure that all the wiring is properly connected and secured to prevent any electrical malfunctions. Additionally, you may need to adjust the carburetor to ensure proper fuel mixture for the electric start system. If you encounter any wiring issues, such as a faulty ignition switch or a broken wire, you will need to troubleshoot and repair them accordingly.
To help you with this process, refer to the table below for common troubleshooting steps:
| Issue | Possible Cause | Solution |
|---|---|---|
| No power to electric start | Loose connection | Check and tighten all wiring connections |
| Engine cranks but won’t start | Incorrect carburetor adjustment | Adjust carburetor according to manufacturer’s specifications |
| Starter motor doesn’t engage | Faulty starter motor or solenoid | Replace faulty components |
By making these necessary adjustments and troubleshooting any issues, you can ensure that your electric start system is functioning properly. Enjoy the convenience of electric start on your motorized bike!
Enjoy the Convenience of Electric Start on Your Motorized Bike
Experience the ease of using the electric start feature on your motorized bicycle. The advantages of electric start are numerous. No more struggling with a kickstart or worrying about a dead battery. With just the press of a button, your motorized bike will come to life effortlessly.
However, like any system, there may be some common issues that arise with electric start. One common problem is a faulty ignition switch. If you experience this, you may need to replace the switch. Another issue could be a weak battery, which may require charging or replacing.
By troubleshooting these common issues, you can enjoy the convenience of electric start on your motorized bike without any interruptions.
Moving forward, let’s explore how to maintain and care for your electric start system.
Maintain and Care for Your Electric Start System
To ensure optimal performance, it’s important to regularly maintain and care for your electric start system. Proper maintenance will not only extend the lifespan of your system but also prevent common issues that may arise. Here are some maintenance tips to keep your electric start system in top shape:
| Maintenance Tips | Troubleshooting Common Issues |
|---|---|
| Check battery voltage | Engine not cranking |
| Inspect wiring | Weak or no spark |
| Clean connections | Starter motor not engaging |
| Lubricate moving parts | Faulty ignition switch |
| Test starter relay | Intermittent starting issues |
Regularly check the battery voltage to ensure it is at the recommended level for starting. Inspect the wiring for any signs of damage or loose connections. Clean the connections to ensure a solid electrical connection. Lubricate any moving parts to prevent friction and wear. Test the starter relay to ensure it is functioning correctly. By following these maintenance tips and troubleshooting common issues, you can enjoy the convenience of your electric start system for a long time.
Frequently Asked Questions
Can I install an electric start on any motorized bike?
Installing an electric start on a motorized bike has pros and cons. Benefits include ease of use and convenience. However, it requires additional wiring, a battery, and regular maintenance. Consider these factors before deciding to install an electric start.
How long does it typically take to install an electric start on a motorized bike?
The installation time for an electric start on a motorized bike can vary depending on the specific bike model and the skill level of the installer. However, the benefits of electric start make the installation process worthwhile.
Are there any specific tools or materials that I need to gather for the installation?
To install an electric start on a motorized bike, I will need specific tools such as a wrench, screwdriver, and wire cutters. Additionally, materials required include an electric starter kit, wiring harness, and a battery.
What are the common issues or troubleshooting steps involved in installing an electric start?
Common troubleshooting issues when installing an electric start include faulty wiring connections, incorrect installation of the starter motor, or a dead battery. Troubleshooting steps involve checking the wiring, ensuring proper installation, and testing the battery for power.
Are there any maintenance or care requirements for the electric start system after installation?
After installing the electric start system, regular maintenance is crucial. Keep the system clean and free of debris. Check the battery regularly and replace if necessary. Troubleshoot any issues promptly to ensure optimal performance.
Conclusion
Well, folks, that’s how you install electric start on your motorized bike. It’s a piece of cake, really.
Just gather your tools, remove that pesky kick start mechanism, and pop in the electric starter motor.
Connect it to the battery and give it a test run. If you encounter any issues, don’t worry, just make some adjustments or troubleshoot as needed.
And voila! You’ll be enjoying the sheer convenience of electric start on your bike. Just remember to maintain and care for your electric start system, because let’s face it, we all know how temperamental technology can be.
Happy riding!