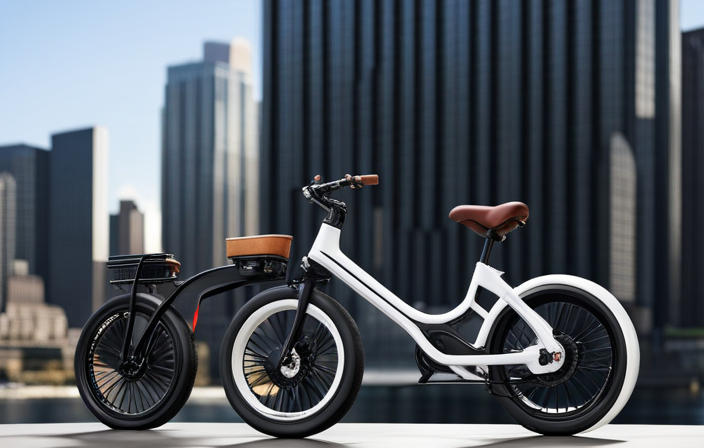
Do you find yourself exhausted from pedaling uphill or trying to keep up with traffic on your bike? Get ready to transform your ride with this electrifying guide on converting your bike to electric!
In just a few simple steps, you’ll transform your ordinary bicycle into a powerful and efficient mode of transportation. With the right conversion kit and a bit of DIY know-how, you’ll be cruising effortlessly and enjoying the thrill of an electric bike in no time. You’ll save money on transportation costs while also reducing your carbon footprint. Learning how to build an electric bike will give you a greater appreciation for its mechanics and allow you to customize it to fit your needs. Plus, the satisfaction of completing the project yourself makes the ride even more enjoyable.
So, let’s dive into the electrifying world of bike conversions and take your cycling experience to new heights!
Key Takeaways
- Prioritize wiring safety by wearing insulated gloves and goggles.
- Connect wires according to manufacturer’s instructions.
- Test and evaluate the bike’s performance for optimal results.
- Securely attach the battery mount and protect the wiring from moisture and dust.

Under Armour Squeeze Water Bottles, 32 oz Water Bottles, Sideline Sports Water Bottle with Quick-Shot Lid, Quick & Easy Hydration, Gym Water Bottles, Squeeze Bottle, 1 32oz Bottle
- Easy Hydration: Quick-shot lid and one-way valve
- On-the-Go Use: One-hand operation for active hydration
- Measurement Markings: Ounces and milliliters for tracking
As an affiliate, we earn on qualifying purchases.
Assess Your Bike’s Compatibility
Before you start converting your bike into an electric one, it’s crucial to assess whether your bike is compatible with the necessary modifications.
Assessing compatibility involves evaluating the frame, wheel size, and available space for the electric components. Ensure that the frame is sturdy enough to handle the extra weight of the electric system.
Verify if the wheel size matches the kit specifications, as different kits are designed for specific wheel sizes. Additionally, check if there is enough space to accommodate the battery, motor, and controller without interfering with other bike components.
Once you have assessed your bike’s compatibility, it’s time to choose the right electric bike conversion kit. This involves considering factors such as battery capacity, motor power, and ease of installation.
By selecting the appropriate kit, you can ensure a successful and efficient conversion process.
Choose the Right Electric Bike Conversion Kit
When selecting the right electric bike conversion kit, you’ll be amazed at the range of options available to transform your two-wheeled adventure into an electrifying experience. Here are four electric bike conversion kit brands that offer top-notch quality and performance:
-
Bafang: Known for their powerful motors and easy installation process, Bafang conversion kits are a popular choice among electric bike enthusiasts.
-
Tongsheng: With their lightweight and efficient design, Tongsheng kits provide a smooth and reliable ride, perfect for daily commuting.
-
Swytch: Offering a unique lightweight and portable design, Swytch kits allow you to easily convert your bike into an electric one and back again in just a few seconds.
-
Bosch: Renowned for their cutting-edge technology and superior performance, Bosch conversion kits deliver exceptional power and range.
By choosing the right electric bike conversion kit, you can enjoy benefits such as increased speed and range, effortless uphill rides, and reduced commuting time.
Once you’ve selected your kit, it’s time to gather the necessary tools and supplies for the installation process.
Gather the Necessary Tools and Supplies
To embark on your electrifying transformation, gather the tools and supplies needed to fuel your two-wheeled adventure and unleash the power within. When choosing the right conversion kit, it is essential to consider factors such as motor power, battery capacity, and compatibility with your bike.
Look for kits that offer a sufficient range and torque to meet your riding needs. Additionally, ensure that the kit is compatible with your bike’s frame and wheel size.
To ensure a successful conversion, gather the necessary tools, including wrenches, screwdrivers, and pliers, to remove the front wheel and install the conversion kit. It is crucial to have a clear understanding of your bike’s components and their functions.
With the right tools and knowledge, you will be ready to embark on the next step of your electric bike conversion journey.
Remove the Front Wheel
First things first, you gotta get that front wheel off to kickstart your electrifying transformation. Removing the wheel is a crucial step in converting your bike into an electric one. Before you begin, make sure to take proper safety precautions during removal.
Now, let’s delve into the process.
-
Start by loosening the bolts or quick release mechanism holding the wheel in place. Be cautious not to damage any surrounding components.
-
Once the bolts are loosened, carefully lift the front end of the bike off the ground. This will allow you to slide the wheel out from the front fork.
-
With a firm grip on the wheel, pull it straight out from the fork, ensuring that it clears any brake calipers or fenders.
Now that the front wheel is removed, you’re one step closer to installing the electric wheel and transforming your bike into an electrifying ride.
Install the Electric Wheel
Now that you’ve got the front wheel off, it’s time to amp up your ride by installing the electrifying electric wheel.
Electric wheel installation tips are crucial for a successful conversion. First, ensure that the electric wheel is compatible with your bike’s frame and fork. Measure the fork dropout spacing to ensure a proper fit.
Next, attach the electric wheel to the fork by inserting the axle through the dropouts and tightening the nuts or quick-release mechanism. Make sure the wheel is centered and aligned properly.
Connect the motor and battery to the designated ports, following the manufacturer’s instructions. This conversion offers numerous benefits, including increased speed, extended range, and reduced effort while riding.
With the electric wheel installed, it’s time to connect the motor and battery, taking your electric bike conversion to the next level.
Connect the Motor and Battery
After installing the electric wheel, are you ready to experience the power of the motor and battery in action?
Now it’s time to connect the motor and charge the battery. To begin, locate the motor wires and battery connectors. Connect the motor wires to the battery connectors, ensuring that the positive and negative terminals match. Once connected, double-check the connections to ensure they are secure.
Now, it’s time to charge the battery. Locate the charging port on the battery and plug in the charger. Make sure to follow the manufacturer’s instructions for charging time and safety precautions.
Once the battery is fully charged, you’re ready to mount the controller and throttle, which will allow you to control the speed and power of your electric bike.
Mount the Controller and Throttle
Get ready to experience the exhilarating control and responsiveness of your ride by securely mounting the controller and throttle.
Proper mounting techniques are crucial to ensure the safety and stability of your electric bike. Begin by selecting a suitable location for the controller, preferably near the battery for convenient wiring. Use sturdy mounting brackets and screws to secure the controller in place, ensuring it is well-protected from elements and vibrations.
Next, attach the throttle to the handlebars using a clamp or other appropriate mounting mechanism. Consider different throttle control options, such as thumb throttles or twist grips, and choose one that suits your preferences and riding style.
Once the controller and throttle are securely mounted, you can move on to the next step of installing the pedal assist sensor, which enhances the overall riding experience.
Install the Pedal Assist Sensor
To enhance your riding experience, securely install the pedal assist sensor. This will allow you to effortlessly glide through the streets, feeling the power of the electric motor seamlessly amplifying your pedal strokes.
Begin by locating the desired position for the sensor on the bike frame. Using the provided screws and a screwdriver, attach the sensor in a position where it will be able to detect your pedal movements accurately. Ensure that it is securely fastened to prevent any movement or damage while riding.
Once installed, double-check the alignment and make any necessary adjustments. If you encounter any issues with the pedal assist sensor not functioning correctly, troubleshoot by checking the wiring connections and ensuring they are properly connected.
Once the pedal assist sensor is securely in place, you can proceed to the next step of connecting the wiring, which will be discussed in the following section.
Connect the Wiring
Now it’s time for me to connect the wiring and unlock the full potential of my electric ride.
Before I begin, it’s important to prioritize wiring safety. Make sure to wear insulated gloves and goggles to protect yourself from any potential electrical hazards.
Start by carefully routing the wires along the frame, securing them with zip ties or electrical tape. Use a wire stripper to remove the insulation from the ends of the wires, and then connect them according to the manufacturer’s instructions.
Double-check all connections and ensure they are secure. If you encounter any issues during this process, here are a few troubleshooting tips: check for loose or damaged wires, confirm correct wire polarity, and inspect all connectors for proper alignment.
Once the wiring is complete, I can move on to the next step of testing the electric bike conversion to ensure everything is functioning properly.
Test the Electric Bike Conversion
Once I’ve completed the wiring, I’ll be able to test the electric bike conversion and see if it runs as smoothly as a well-oiled machine.
To conduct a comprehensive performance evaluation, I will focus on the following key areas:
-
Speed and Acceleration: I will measure the bike’s top speed and assess how quickly it reaches that speed. This will help me determine if the conversion has enhanced the bike’s performance.
-
Battery Life: I will closely monitor the battery’s capacity and how long it lasts during various riding conditions. This will provide valuable insights into the overall efficiency of the electric system.
-
Handling and Control: I will test the bike’s maneuverability and stability, paying special attention to any changes resulting from the conversion. This will ensure a safe and enjoyable riding experience.
After obtaining the test results, I will be able to adjust and fine-tune the settings accordingly to optimize the electric bike’s performance.
Adjust and Fine-Tune the Settings
Fine-tune the settings like an artist adding the final brushstrokes to a masterpiece, ensuring optimal performance and a seamless riding experience. When optimizing performance, it is crucial to pay attention to details and troubleshoot common issues that may arise. To assist you in this process, refer to the following table which highlights key settings and adjustments:
| Setting | Adjustment | Result |
|---|---|---|
| Motor power | Increase/decrease | Enhanced speed |
| Pedal assist level | Adjust higher/lower | Customized assistance |
| Regenerative braking | Enable/disable | Extended battery life |
| Throttle sensitivity | Fine-tune responsiveness | Smooth acceleration |
By fine-tuning these settings, you can achieve the desired performance and address any potential issues. Once the adjustments are complete, you can confidently proceed to the next section and install the battery mount for a seamless integration.
Install the Battery Mount
To seamlessly integrate the battery mount, begin by securely attaching it to the designated area on the bicycle frame. The battery placement is crucial for optimal weight distribution and stability. Ensure that the mount is compatible with the specific battery model you are using, as different batteries may require different mounting systems.
Carefully follow the manufacturer’s instructions to properly secure the mount, using the appropriate tools and hardware. Double-check that the mount is firmly attached and does not interfere with any other components or moving parts of the bike.
Once the battery mount is securely in place, the next step is to secure and protect the wiring. This ensures that the electrical connections remain intact and safeguarded from potential damage during rides.
Secure and Protect the Wiring
Safeguard and secure the wiring to ensure smooth and seamless electrical connections on your e-bike. Proper wire organization is crucial for the overall functionality and longevity of your electric bike. Start by neatly grouping wires together using zip ties or cable clips, keeping them away from moving parts to prevent any potential damage. Additionally, weatherproofing and insulation are essential to protect the wiring from moisture, dust, and other elements that could cause malfunction. Use heat shrink tubing or electrical tape to cover exposed sections and secure connectors. To emphasize the importance of wire organization, weatherproofing, and insulation, consider the following table:
| Wire Organization | Weatherproofing | Insulation |
|---|---|---|
| Neatly group wires | Protect from moisture | Cover exposed sections |
| Secure with zip ties or cable clips | Shield from dust | Use heat shrink tubing or electrical tape |
By following these steps, you can ensure the safety and efficiency of your electrical connections. Now, let’s move on to the next section and start enjoying your electric bike!
Enjoy Your Electric Bike!
Now it’s time to fully embrace the exhilarating freedom of riding your e-bike! After securing and protecting the wiring of your electric bike, you can now focus on customizing accessories and maximizing battery life to enhance your riding experience.
When it comes to accessories, you can choose from a wide range of options such as baskets, racks, and lights to suit your needs and style. Additionally, you can consider installing a larger capacity battery or using power-saving modes to extend your battery life and enjoy longer rides.
Remember to regularly charge your battery and follow manufacturer’s guidelines to ensure its longevity. By customizing accessories and maximizing battery life, you can truly make your e-bike your own.
Now, let’s move on to the next section where we will learn how to maintain and troubleshoot your electric bike.
Maintain and Troubleshoot Your Electric Bike
As you cherish the freedom of riding your e-bike, it’s crucial to maintain and troubleshoot to ensure a seamless experience. Proper maintenance techniques will not only prolong the lifespan of your electric bike but also enhance its performance. Here are some troubleshooting tips and maintenance techniques to keep your e-bike running smoothly:
-
Regularly inspect and clean your bike, paying special attention to the chain, brakes, and tires. This will prevent any issues caused by dirt or debris.
-
Check the battery regularly to ensure it is charged and functioning correctly. Keep it clean and avoid extreme temperatures to optimize its performance.
-
Monitor the tire pressure and adjust as needed. Proper inflation will improve traction and reduce the risk of flats.
By following these maintenance techniques and troubleshooting tips, you can enjoy a reliable and efficient electric bike for years to come. Remember to consult your bike’s manual for specific instructions and always prioritize safety while working on your e-bike.
Frequently Asked Questions
How long does it take to convert a bike to electric?
On average, it takes about 4-6 hours to convert a bike to electric. The necessary skills include basic knowledge of electronics, mechanical aptitude, and the ability to follow instructions carefully.
Can any bike be converted to electric?
Yes, any bike can be converted to electric, as long as the bike frame is compatible with the electric conversion kit. The benefits of electric bike conversion include increased speed, reduced effort, and a greener mode of transportation.
What is the average cost of an electric bike conversion kit?
The average cost of an electric bike conversion kit varies depending on the options you choose. There are pros and cons to converting a bike to electric, but it can be a cost-effective way to make your bike electric.
Do I need any specialized tools to convert my bike to electric?
I don’t need any specialized tools to convert my bike to electric. The converting process involves removing the bike’s existing components, installing the electric motor, battery, and controller, and reassembling the bike.
Can I still pedal my electric bike if the battery dies?
When the electric bike’s battery is depleted, I can still pedal using alternative propulsion methods. These methods allow me to continue riding, albeit with reduced speed and effort compared to when the battery is operational.
Conclusion
In conclusion, converting a regular bike into an electric one is an exciting and rewarding project. By carefully assessing compatibility, choosing the right conversion kit, and gathering the necessary tools and supplies, anyone can transform their bike into a powerful electric vehicle.
The installation process may require some patience and attention to detail, but the end result is well worth the effort. So, hop on your newly electrified bike and let the sparks of innovation ignite your ride into a whole new level of exhilaration and efficiency.
Remember, with proper maintenance and troubleshooting, your electric bike will continue to provide a smooth and enjoyable ride for years to come.