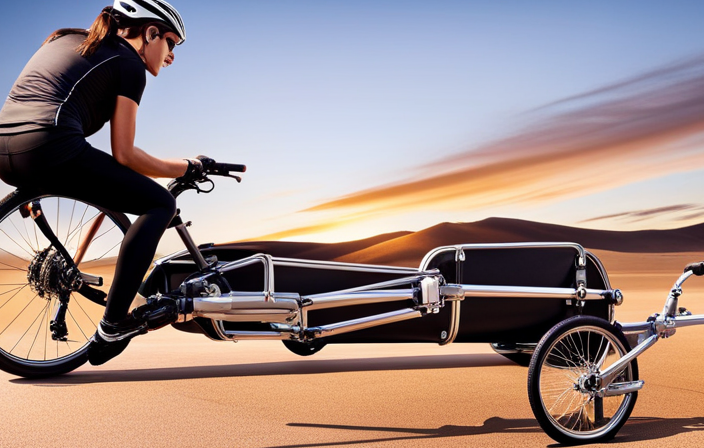
A bike trailer is like a solid base for my outdoor excursions, serving as a crucial asset that makes it easy for me to carry my gear.
In this guide, I will take you through the step-by-step process of creating your very own bike trailer.
From gathering the necessary materials and tools to maintaining and caring for your creation, I will provide you with precise and detailed instructions.
So let’s get started on this exciting journey of building your own bike trailer!
Key Takeaways
- Choose strong and lightweight materials for the frame, such as aluminum or steel.
- Take accurate measurements and cut frame pieces according to your design plan.
- Assemble the frame securely using bolts or screws.
- Attach wheels and axle properly, considering the addition of brakes and suspension for better control.

Under Armour Squeeze Water Bottles, 32 oz Water Bottles, Sideline Sports Water Bottle with Quick-Shot Lid, Quick & Easy Hydration, Gym Water Bottles, Squeeze Bottle, 1 32oz Bottle
- Easy Hydration: Quick-shot lid and one-way valve
- On-the-Go Use: One-hand operation for active hydration
- Measurement Markings: Ounces and milliliters for tracking
As an affiliate, we earn on qualifying purchases.
Gather the Necessary Materials and Tools
Now that you’ve decided to make a bike trailer, you’ll need to gather all the necessary materials and tools. Choosing the right materials is crucial for building a sturdy and functional trailer. Opt for strong and lightweight materials such as aluminum or steel for the frame, and durable fabric or plastic for the cover or enclosure. For the necessary tools, you’ll need a tape measure, a hacksaw or a pipe cutter for cutting the frame pieces, a drill with a variety of drill bits for attaching the wheels and axle securely, and a wrench or pliers for assembling the frame and installing the hitch.
When measuring and cutting the frame pieces, precision is key. Measure twice and cut once to ensure accurate dimensions. Use a miter box or a square to make precise 90-degree cuts. Assemble the frame following best practices, making sure all joints are securely fastened with bolts or screws. Attach the wheels and axle tightly to prevent any wobbling or instability during use.
Building a sturdy and functional base and sides is essential for carrying your gear safely. Use strong materials and ensure proper reinforcement at the corners and seams. Install a reliable hitch that securely connects the trailer to your bike, allowing for smooth and stable towing.
Creating a weather-resistant cover or enclosure will protect your gear from rain, dust, and other elements. Use waterproof fabric and ensure proper sealing to keep your cargo dry and secure. Don’t forget to add reflectors and lights to your trailer for increased visibility and safety, especially when riding in low light conditions.
After construction, it’s important to test and adjust the trailer for optimal performance. Make sure it attaches securely to your bike and rides smoothly. Adjust the wheel alignment and tire pressure as needed.
Next, let’s move on to the section about measuring and cutting the frame pieces. It’s crucial to ensure accurate dimensions for a well-built trailer.
Measure and Cut the Frame Pieces
First, you’ll need to measure and cut the frame pieces for your new bike trailer. To ensure accuracy and precision, it’s crucial to use the right cutting tools and take accurate frame measurements.
Here’s how to do it:
-
Gather the necessary cutting tools: You’ll need a hacksaw or a miter saw with a fine-toothed blade. These tools will allow you to make clean and precise cuts on the frame pieces.
-
Take accurate frame measurements: Use a tape measure or ruler to measure the length and width of the frame pieces. Make sure to double-check your measurements to avoid any errors.
Once you have gathered the cutting tools and taken accurate frame measurements, you can proceed to cut the frame pieces. Before making any cuts, mark the measurements on the frame pieces using a pencil or marker. This will serve as a guide and ensure that your cuts are aligned.
With the frame pieces measured and marked, you can now move on to the next step: assembling the frame. By following these precise measurements and using the appropriate cutting tools, you’ll be well on your way to creating a sturdy and reliable bike trailer.
Assemble the Frame
To assemble the frame, you’ll need to start by connecting the pre-cut pieces together using screws or bolts. Before you begin, make sure you have all the necessary tools and materials at hand.
First, take the measurements of each piece to ensure accurate assembly. Use measuring techniques such as a tape measure or ruler to determine the correct dimensions. Once you have confirmed the measurements, align the pieces according to your design plan. Carefully position the pieces together, ensuring that they fit snugly.
Then, using welding techniques or fasteners such as screws or bolts, secure the pieces in place. Welding provides a strong and permanent bond, while screws or bolts allow for easier disassembly if needed. Make sure to follow proper safety precautions when using welding equipment, such as wearing protective gear and working in a well-ventilated area.
Once the frame is securely assembled, it’s time to move on to the next step: attaching the wheels and axle. This will complete the foundation of your bike trailer and get it ready for use.
Attach the Wheels and Axle
Once you’ve securely assembled the frame, it’s time to attach the wheels and axle to complete the next step of your project. This is a crucial part of building a bike trailer as it will determine the stability and maneuverability of your trailer. To ensure a smooth ride, we will also discuss installing the brakes and adding suspension.
To attach the wheels and axle, follow these steps:
- Position the wheels on either side of the axle. Make sure the axle is centered and aligned with the frame.
- Insert the axle through the wheel hubs, ensuring it goes all the way through.
- Secure the wheels in place by tightening the axle nuts using a wrench. This will prevent them from wobbling or falling off.
Once the wheels are attached, it’s time to consider the braking system. Adding brakes to your bike trailer will provide better control and safety. Consult the manufacturer’s instructions for specific brake installation, as it may vary depending on the type of brakes you have.
Additionally, you may want to add suspension to your trailer for a smoother ride. This can be achieved by incorporating a suspension system between the frame and the axle. Consult a suspension expert or consider purchasing a suspension kit specifically designed for bike trailers.
Now that the wheels and axle are securely attached, and the brakes and suspension have been installed, it’s time to move on to the next section: building the base and sides of the trailer. This will give your trailer the structure it needs to carry your cargo safely and efficiently.
Build the Base and Sides of the Trailer
Now that you have securely attached the wheels and axle, it’s time to focus on building the base and sides of your trailer.
The base is the foundation of your trailer, providing stability and support for your cargo. Begin by measuring and cutting a piece of plywood to the desired size for your trailer’s base. Make sure the dimensions are accurate and the edges are smooth.
Next, attach the plywood to the frame by using screws or nails. Ensure that it is securely fastened and does not wobble.
Once the base is in place, it’s time to attach the sides of the trailer. Measure and cut the side panels from another piece of plywood. Again, precision is key.
Place the side panels vertically, parallel to the base, and attach them to the frame using screws or nails. Make sure the sides are level and straight, as this will determine the overall stability of your trailer.
With the base and sides securely attached, your trailer is starting to take shape. Now, let’s move on to the next step – installing the hitch.
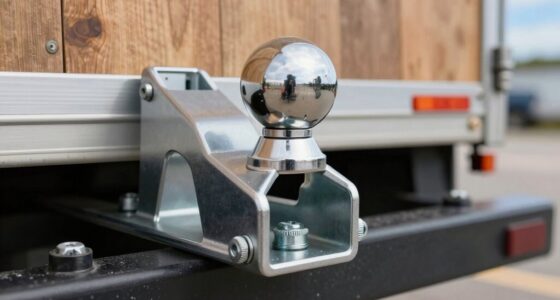
Install the Hitch
You’ll need to attach the hitch to the back of the trailer frame in order to connect it to your vehicle. When installing the hitch, it is important to ensure compatibility with different bike models. Start by positioning the hitch at the designated spot on the back of the trailer frame. Make sure it is aligned properly and that the bolt holes match up.
Next, insert the bolts through the holes in the hitch and frame. Use a wrench to tighten the bolts securely, ensuring that the hitch is firmly attached to the frame. It is crucial to double-check the tightness of the bolts to prevent any accidents or damage while on the road.
When selecting a hitch, consider the specific bike models you plan to use with the trailer. Different bikes may require different hitch styles or sizes. It is recommended to consult the manufacturer’s guidelines or seek professional advice to ensure proper compatibility.
Now that the hitch is securely installed, you can move on to creating the cover or enclosure for your bike trailer. This will protect your cargo from the elements and provide added security.
Create the Cover or Enclosure
To create the cover or enclosure for your trailer, start by measuring the dimensions of the frame and gathering the necessary materials. This step is crucial to ensure a proper fit and functionality of the enclosure.
Here is a detailed guide on how to design and build an enclosure for your bike trailer:
-
Determine the enclosure design: Consider the purpose of your trailer and the weather conditions it will be exposed to. Choose a design that provides adequate weather protection, such as a waterproof fabric or a hard shell.
-
Select the materials: Depending on the chosen design, gather the materials needed for the enclosure. This may include fabric, mesh, zippers, poles, and fasteners. Ensure that the materials are durable and capable of withstanding outdoor elements.
-
Mark and cut the fabric: Using the measurements of the trailer frame, mark and cut the fabric accordingly. Take into account any openings for ventilation or access.
-
Assemble and secure the enclosure: Follow the instructions provided with your chosen enclosure design to assemble and secure the cover onto the trailer frame. Pay attention to proper attachment points and ensure a tight fit.
By creating a well-designed enclosure, you can protect your cargo from inclement weather and keep it secure during transportation. Additionally, it provides a more organized and streamlined look to your bike trailer.
Now, let’s move on to the next section and enhance the safety of your trailer by adding reflectors and lights.
Add Reflectors and Lights for Safety
Adding reflectors and lights is essential for enhancing the safety of your trailer. They increase visibility and help other road users see you more easily.
When choosing reflectors, opt for ones made from high-quality, durable materials. They should withstand various weather conditions and remain highly reflective even in low light situations. Look for reflectors made from materials such as acrylic or glass, as these offer excellent reflectivity.
For lights, LED lights are the most popular choice due to their brightness and energy efficiency. Choose ones specifically designed for trailers. These lights are usually waterproof, shockproof, and have a long lifespan.
In addition to the materials, it is crucial to properly install the reflectors and lights on your trailer. Follow the manufacturer’s instructions carefully and ensure that the lights and reflectors are securely attached.
Test and Adjust the Trailer
Once the reflectors and lights are properly installed, it’s time to test and adjust the trailer to ensure optimal functionality. Here are some adjustment techniques and troubleshooting tips to help you get the most out of your bike trailer:
-
Check the hitch connection: Make sure the trailer is securely attached to your bike’s rear axle. Ensure that the hitch is properly aligned and tightened to prevent any wobbling or detachment during the ride.
-
Test the weight distribution: Load the trailer with some weight and observe how it affects the balance. Adjust the position of the cargo to achieve an even weight distribution, which will help maintain stability while riding.
-
Evaluate the wheel alignment: Spin the wheels and check for any wobbling or rubbing against the trailer frame. If needed, adjust the wheel alignment or tighten any loose spokes to ensure smooth rolling and prevent unnecessary friction.
Attach the Trailer to Your Bike
After thoroughly testing and making necessary adjustments to my bike trailer, it’s now time to attach it to my bike. Attaching the trailer correctly is crucial to ensure safe and efficient transportation of my gear.
There are a few different methods for attaching the trailer, depending on the specific model and design. First, I need to locate the attachment point on my bike. This is usually a small metal loop or bracket that is located near the rear axle or seat post. Once I have located the attachment point, I can use the appropriate method to secure the trailer.
Common methods include using a quick-release mechanism, a hitch arm, or a clamp that attaches directly to the bike frame. Regardless of the method used, it’s important to follow the manufacturer’s instructions carefully and ensure that the trailer is securely attached. I should also double-check that all bolts and connections are tightened properly before setting off on my ride. This will prevent any potential accidents or damage to the trailer or bike.
Now that the trailer is securely attached to my bike, it’s time to pack and load my gear.
Pack and Load Your Gear
Now you’re ready to pack and load your gear onto the securely attached trailer. Proper loading techniques and weight distribution are crucial to ensure a safe and stable journey. Here’s how to do it:
-
Organize your gear: Make a list of everything you need to bring and categorize them accordingly. This will help you determine the best way to load them onto the trailer.
-
Heavy items on the bottom: Start by placing the heaviest items at the bottom of the trailer. This will lower the center of gravity and provide better stability during your ride. Place them towards the front of the trailer to distribute the weight evenly.
-
Balance the load: Distribute the weight evenly from side to side. This will prevent the trailer from tipping over and ensure a smoother ride. Avoid having too much weight on one side, as it can affect your bike’s balance.
-
Secure loose items: Use bungee cords, straps, or cargo nets to secure any loose items. This will prevent them from shifting or falling off the trailer while you’re riding.
Secure Your Cargo
To ensure a safe journey, it’s important to securely fasten your cargo using bungee cords, straps, or cargo nets. Cargo organization is key to maximizing space and minimizing movement inside the trailer. By strategically arranging your items, you can prevent them from shifting during transit. This not only prevents damage to your cargo but also ensures stability while riding.
When securing delicate items, such as fragile cargo, extra precautions should be taken. Wrapping fragile items in bubble wrap or packing them in soft materials can provide an additional layer of protection. Placing them in sturdy boxes and securing them with straps or cargo nets will further minimize the risk of breakage.
To further illustrate the importance of cargo organization and securing delicate items, let’s take a look at the following table:
| Cargo Item | Placement |
|---|---|
| Glass bottles | Packed in boxes |
| Electronics | Wrapped in bubble wrap |
| Ceramic dishes | Placed in soft padding |
| Fragile decorations | Secured with cargo net |
| Fine artwork | Placed upright, secured with straps |
By following these guidelines, you can ensure that your cargo remains intact and undamaged during transportation.
Now, let’s transition into the next section about practicing riding and maneuvering with the trailer.
Practice Riding and Maneuvering with the Trailer
As you familiarize yourself with riding and maneuvering a trailer, it’s important to practice in an open area away from traffic. Before hitting the roads with your bike trailer, here are some practice tips and safety precautions to keep in mind.
Firstly, start by attaching the trailer securely to your bike. Make sure the hitch is properly fastened and the trailer is balanced before you begin.
Next, practice riding in a straight line, keeping a safe distance from obstacles. Get a feel for the added weight and how it affects your balance and maneuverability.
Once you are comfortable with straight-line riding, practice turning with the trailer. Approach turns slowly and gradually, making sure to give yourself enough space to complete the maneuver. Keep in mind that the trailer will track wider than your bike, so take this into account when navigating corners.
Another important aspect to practice is braking. Remember that with the added weight of the trailer, your stopping distance will be increased. Get a sense of how much longer it takes to come to a complete stop and adjust your braking accordingly.
By practicing these maneuvers in a controlled environment, you will gain confidence and become more familiar with handling your bike trailer. This will ensure a smoother and safer experience when you are ready to venture into traffic.
With your practice sessions complete, it’s now time to maintain and care for your bike trailer.
Maintain and Care for Your Bike Trailer
After completing your practice sessions, it’s essential to regularly maintain and take care of your bike trailer. Proper maintenance ensures that your trailer remains in optimal condition and extends its lifespan. In this section, I will provide you with troubleshooting tips for common issues and share some valuable advice on maintaining your trailer tires.
To help you better understand the importance of maintenance, here is a table summarizing the key areas to focus on:
| Area | Maintenance Tips |
|---|---|
| Tires | Regularly inspect for wear and tear. Keep them properly inflated. Replace if necessary. |
| Frame | Clean the frame regularly and check for any cracks or damage. Lubricate moving parts. |
| Hitch | Ensure the hitch is securely attached and functioning correctly. Lubricate if needed. |
| Storage | Store your trailer in a dry, protected area to prevent rust and damage. |
| Safety Equipment | Regularly check and replace reflectors, lights, and any other safety equipment as needed. |
Enjoy Your New Bike Trailer on Outdoor Adventures!
Now that you know how to maintain your trailer, let’s dive into the exciting world of outdoor adventures with your new bike trailer! With your trusty bike trailer in tow, you’ll be able to explore the great outdoors and embark on thrilling camping excursions.
But before you set off on your journey, let’s talk about some essential tips and tricks for outdoor cooking and camping hacks.
When it comes to outdoor cooking, preparation is key. Make sure you pack all the necessary cooking utensils, such as a portable stove, pots and pans, and a set of cutlery. Don’t forget to bring along some basic ingredients like salt, pepper, and oil. These simple items can turn a basic meal into a delicious feast.
Now, let’s move on to some camping hacks that will make your outdoor adventure even more enjoyable. One handy hack is to use a pool noodle to protect your bike trailer frame from scratches and dings. Simply cut a section of the noodle and wrap it around the frame. This will provide extra cushioning and protection during transportation.
Another useful hack is to use empty plastic bottles as makeshift lanterns. Fill the bottles with water and strap a headlamp around them. The light will reflect off the water, creating a soft and ambient glow that will illuminate your campsite.
With these outdoor cooking tips and camping hacks, you’re well-equipped to make the most of your new bike trailer on your outdoor adventures. So get out there, explore the wilderness, and enjoy the freedom of the open road!
Frequently Asked Questions
How long does it typically take to assemble a bike trailer?
Typically, it takes around 1 to 2 hours to assemble a bike trailer. Assembling a bike trailer involves following a series of steps to ensure proper installation.
Common challenges in bike trailer assembly include aligning the frame components, attaching the wheels securely, and adjusting the hitch mechanism. It is important to carefully read and follow the assembly instructions provided by the manufacturer to ensure a safe and successful assembly process.
What are the recommended materials for building the base and sides of the trailer?
To build a bike trailer, it’s important to choose the right materials for the base and sides. Recommended materials for the base include sturdy plywood or metal, which provide strength and durability.
For the sides, lightweight yet sturdy materials like aluminum or PVC can be used.
When selecting the size and weight capacity, consider the intended use and load requirements. This ensures the trailer can handle the weight and size of the items you plan to transport.
Is the hitch included with the bike trailer kit or does it need to be purchased separately?
The hitch compatibility depends on the specific bike trailer kit you purchase. Some kits include a hitch, while others require you to purchase it separately.
There are advantages to purchasing a separate hitch, as it allows you to choose a hitch that is compatible with your specific bike and provides a secure connection between the trailer and your bike. This ensures safer towing and better stability during your bike rides.
Are there any weight limitations for the trailer?
There are weight limitations for the bike trailer to ensure safety. It is important to adhere to these limitations to avoid any accidents or damage to the trailer.
The weight limitations vary depending on the specific trailer model and manufacturer. To determine the weight limitations, refer to the trailer’s user manual or contact the manufacturer directly.
It is crucial to follow these guidelines and take necessary safety measures when using the trailer.
Can the bike trailer be easily folded or disassembled for storage or transport?
Folding the bike trailer is a breeze, like magic! With a simple pull of a lever, the frame collapses effortlessly, allowing for easy storage.
The folding mechanism is designed to be user-friendly and requires no special tools or skills.
Additionally, the trailer is equipped with detachable wheels, making it even more portable.
These features ensure that the bike trailer can be quickly and conveniently disassembled for transport, fitting seamlessly into any adventure.
Conclusion
In conclusion, making a bike trailer is a rewarding project that can greatly enhance your outdoor adventures. By following the steps outlined in this article, you can create a sturdy and functional trailer to transport your cargo.
One interesting statistic to consider is that bike trailers can typically carry loads of up to 100 pounds, making them a reliable option for transporting groceries, camping gear, or even small furniture.
So why wait? Start building your own bike trailer and enjoy the convenience and freedom it brings to your biking experience.