
Bike
How To Make A Gas Powered Bicycle
Creating a gasoline-powered bike can serve as an excellent project for individuals looking to possess a distinctive and effective means of transport. While it may not be as complex as one might think, it nonetheless demands careful planning and meticulous attention to details.
In this article, I will guide you through the steps of how to make a gas-powered bicycle, from choosing the right engine to maintaining it for years to come.
The first step in making a gas-powered bicycle is to choose the right engine. There are many types of engines available, but you need to find one that is compatible with your bicycle frame and can provide the power you need.
Once you have the engine, you need to prepare your bicycle by removing any unnecessary parts and making sure it is in good condition. Then, you can install the engine and test and adjust it to make sure it’s running smoothly.
Finally, it’s important to maintain your gas-powered bicycle to ensure it continues to run efficiently and safely. By following these steps, you can have a gas-powered bicycle that is both fun and practical to ride.

Key Takeaways
- Choosing the right engine is crucial for fuel efficiency and personal preferences.
- Proper installation and positioning of the engine, along with correct attachment of cables and hardware, ensures stability and a smooth ride.
- Regular maintenance, including oil changes and lubrication, is essential for optimal performance and safety.
- Gas engines have higher fuel efficiency and power, but require more maintenance, while electric engines are better for the environment and have lower maintenance costs.
Choose the Right Engine
Picking the perfect engine is key to creating a gas-powered bike that’ll rev your heart and get you moving with ease! When it comes to choosing an engine for your bicycle, there are a few things to consider.
Fuel efficiency is one of the most important factors to look at. Gas engines tend to have a higher fuel efficiency compared to electric engines, which means you can go further on a single tank of gas. However, electric engines are better for the environment and have lower maintenance costs.
Another factor to consider when choosing an engine is the pros and cons of electric versus gas engines for bicycles. Electric engines are much quieter and produce zero emissions, making them a better choice for those who want to be environmentally conscious. On the other hand, gas engines tend to have more power and can go faster. They also have a longer lifespan and are easier to maintain.
Ultimately, the decision of which engine to choose will depend on your personal preferences and needs.
Now that you’ve chosen your engine, it’s time to prepare your bicycle for the conversion process.
Prepare Your Bicycle
First, I’ll remove the pedals and crankset from my bicycle to make room for the engine. This involves using a pedal wrench to loosen the bolts and then sliding them off the crank arms.
Next, I’ll install the engine mounting bracket onto the frame of my bike. This will require some drilling and attaching bolts to securely fasten it in place.
Finally, I’ll attach the throttle and clutch cables to the engine and handlebars, respectively, so that I can control the speed and power of my gas-powered bicycle.
Remove Pedals and Crankset
Before beginning, make sure to properly prepare and protect yourself before proceeding to pry off the pedals and crankset with a powerful prybar. If you’re not comfortable using a prybar, there are alternative tools such as a pedal wrench or crank puller that can make the job easier. Once you have the right tool, start by removing the pedals with a counterclockwise turn.
With the pedals off, it’s time to remove the crankset. Begin by loosening the bolts that hold the chainrings in place. Once the bolts are loose, use your prybar to gently pry the crankset off the bike. If you don’t plan on repurposing your old crankset, you can simply discard it.
However, if you do plan on reusing it, be sure to store it in a safe place until you need it again. With the pedals and crankset removed, you’re now ready to install the engine mounting bracket.
Install Engine Mounting Bracket
Now that the pedals and crankset have been removed, it’s time to attach the engine mounting bracket. This is a critical step in the process, as it will ensure that the motor is securely held in place and that there is no unwanted movement during operation.
Choosing the right materials for the bracket is important, as it needs to be strong enough to support the weight of the engine while also being lightweight enough to not add unnecessary bulk to the bike. Many people choose to use aluminum or steel for the bracket, as these materials are both durable and lightweight.
In addition to choosing the right materials, it may also be necessary to modify the bracket design to ensure a perfect fit for your specific bike and engine. This can involve measuring and cutting the bracket to fit the frame of your bike, as well as drilling holes to accommodate the mounting bolts.
Once the bracket is in place, it’s important to double-check that everything is securely fastened and that there is no movement or wobbling. With the engine mounting bracket securely in place, it’s time to move on to attaching the throttle and clutch cables.
As we move on to attaching the throttle and clutch cables, it’s important to keep in mind that these components play a critical role in controlling the motor and ensuring a smooth ride. With the engine mounting bracket firmly in place, we can now focus on the details of attaching these cables and making sure that they are properly adjusted for maximum performance.
Attach Throttle and Clutch Cables
With the engine mounting bracket securely in place, it’s time to smoothly connect the throttle and clutch cables. These cables are essential to control the engine’s speed and power, so it’s crucial to install them correctly.
First, I routed the cables through the designated holes and adjusted their tension according to the manufacturer’s specifications. I found that too much tension could cause the engine to rev too high, while too little could make it stall easily. Once I had found the right balance, I secured the cables to their respective connectors and tested their responsiveness.
Cable routing is also important when attaching the throttle and clutch cables. I made sure to avoid any sharp bends or kinks that could interfere with their movement. I also kept them away from the exhaust and other hot components to prevent damage or melting.
With the cables properly attached and routed, I was confident that my gas-powered bicycle would perform optimally. Next, I’ll proceed to install the engine to complete the build.
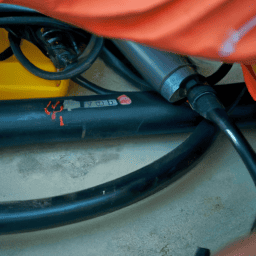
Install the Engine
Now that I’ve got all the necessary tools and materials, it’s time to install the engine onto my bicycle.
One of the most important steps is to position the engine correctly, ensuring that it’s centered and aligned with the chain.
Once in place, I need to secure the engine to the mounting bracket using the bolts and nuts provided.
Finally, I’ll need to connect the fuel lines and electrical wiring to the engine, making sure they’re properly attached and secure before testing the engine.
Position the Engine Correctly
To ensure optimal performance, it’s crucial to position the engine correctly on your gas-powered bicycle. The engine displacement and weight distribution are two factors you need to consider when positioning the engine.
The engine displacement should be compatible with the size and weight of the bicycle. A larger engine can provide more power, but it can also cause the bike to become unstable and harder to control. On the other hand, a smaller engine may not provide enough power to move the bike.
Weight distribution is also important to consider when positioning the engine. The engine should be placed in a position that will not cause the bike to become unbalanced. If the engine is too heavy and placed too far forward, the front wheel may lift off the ground, making it difficult to steer. On the other hand, if the engine is placed too far back, the bike may become difficult to control, especially when going uphill.
Once you have determined the correct position for your engine, you can move on to securing it to the mounting bracket.
Secure the Engine to the Mounting Bracket
Once you’ve determined the perfect position for your engine, you’ll feel confident securing it to the mounting bracket and hitting the road with ease.
Before you start, make sure you have all the necessary hardware for securing the engine. This will include bolts, washers, and nuts that are the correct size and length for your specific engine and mounting bracket.
When securing the engine, it’s important to ensure stability. This can be achieved by tightening the bolts to the recommended torque specification and double-checking that the engine is level and centered.
Once the engine is securely fastened to the mounting bracket, you can move on to connecting the fuel lines and electrical wiring.
Connect Fuel Lines and Electrical Wiring
After securing the engine to the mounting bracket, you’ll want to connect the fuel lines and electrical wiring to ensure your ride is both efficient and safe. Here are the steps to follow:
-
Connect the fuel tank to the carburetor using a fuel line. Make sure the connections are tight and secure to prevent fuel leaks.
-
Connect the spark plug wire from the engine to the spark plug. This will ensure the engine is able to ignite the fuel properly.
-
Connect any other necessary electrical wiring, such as for the headlight or horn. Refer to the manufacturer’s instructions for specific wiring diagrams.
-
Before starting the engine, double-check all connections to make sure they are secure. It’s also a good idea to check the fuel level and oil level, and to make sure the throttle and brakes are working properly.
Remember to take safety precautions when working with fuel and electrical wiring. Always wear protective gloves and eyewear, and work in a well-ventilated area. If you encounter any issues with your fuel or electrical connections, refer to troubleshooting tips in the manufacturer’s instructions.
Now that your fuel lines and electrical wiring are connected, it’s time to test and adjust the engine to make sure it’s running smoothly.
Test and Adjust
Now that we’ve installed the engine, it’s time to test and adjust it.
First, I’ll check for any leaks or loose connections by inspecting the fuel lines, carburetor, and exhaust system.
Once I’m confident there are no issues, I’ll start the engine and take it for a test ride. I’ll make note of any performance issues that need to be addressed.
From there, I’ll make necessary adjustments to improve the engine’s performance. This may include adjusting the carburetor or changing the spark plug.
Check for Any Leaks or Loose Connections
First, you’ll want to check for any leaks or loose connections on your gas-powered bicycle. Don’t forget to tighten any loose bolts or screws to ensure a safe ride. Common mistakes when assembling a gas-powered bicycle include improperly installed fuel lines, loose connections, and not tightening bolts and screws.
To troubleshoot any issues, check for fuel leaks or loose connections by inspecting the fuel tank, fuel lines, carburetor, and exhaust system. To ensure the safety of your ride, follow these four steps to check for leaks or loose connections:
-
Inspect the fuel tank and fuel lines for any visible cracks, holes, or leaks.
-
Check the carburetor for any loose connections and ensure it’s properly installed.
-
Examine the exhaust system for any leaks or loose connections.
-
Tighten any loose bolts or screws that may be causing the issue.
Once you have checked for any leaks or loose connections, it’s time to start the engine and test ride your gas-powered bicycle.
Start the Engine and Test Ride
Get ready to feel the rush of the wind in your hair as you ignite the engine and take your newly assembled ride for a spin around the block. Before you do, however, it’s essential to perform some engine troubleshooting and safety precautions to ensure that your ride is safe and efficient.
First, check the throttle and clutch to ensure they’re working correctly. Next, inspect the brakes to ensure they’re functioning correctly. Once you’ve completed these checks, start the engine and let it run for a few minutes to warm up. Take your time to listen for any unusual sounds or vibrations. If you detect any, turn off the engine and investigate further before proceeding.
Once you’re satisfied, put on your helmet and safety gear and take your bike for a test ride. Ensure that you have a clear path to ride on and that you’re within the speed limits. If you notice any issues during your test ride, immediately stop the bike, turn off the engine, and make necessary adjustments to improve performance.
Make Necessary Adjustments to Improve Performance
Once you’ve taken your test ride, you’ll want to fine-tune your ride to perfection, so you can experience the thrill of flying down the road like a bolt of lightning. Performance tuning your gas-powered bicycle can be a bit tricky, but with these troubleshooting tips, you’ll be able to make the necessary adjustments to improve your ride’s performance.
First, check your fuel mixture. The ideal fuel mixture for a gas-powered bicycle is 40:1, meaning 40 parts gasoline to 1 part oil. Adjust your fuel mixture accordingly based on your ride’s performance.
Second, adjust your spark plug gap. A gap that is too wide or too narrow can cause misfires and a decrease in performance.
Lastly, make sure your carburetor is clean and functioning properly. A dirty carburetor can cause a number of performance issues, including decreased acceleration and poor fuel economy.
By following these troubleshooting tips, you’ll be able to fine-tune your gas-powered bicycle to perfection.
Ensuring that your gas-powered bicycle is maintained properly is key to keeping it running smoothly. Now that you’ve made the necessary adjustments to improve performance, it’s important to regularly maintain your ride to prevent any issues from arising.
Maintain Your Gas-Powered Bicycle
As a gas-powered bicycle owner, I know that regular maintenance is crucial to keep it running smoothly and safely.
Three key areas to focus on are oil, moving parts, and worn out parts. I make sure to regularly check and change the oil, clean and lubricate the moving parts, and replace any worn out parts as needed.
By following these steps, I can extend the life of my gas-powered bicycle and ensure that it continues to perform at its best.
Regularly Check and Change Oil
Don’t neglect the engine’s health by failing to check and change the oil regularly, or you’ll risk your gas-powered bicycle breaking down on a deserted road. Proper oil maintenance is crucial in extending the life of your engine and ensuring it runs smoothly.
Choosing the right type of oil for your engine is also important, as using the wrong one can cause damage and reduce performance. Here are some reasons why you should regularly check and change your oil:
-
Prevent engine wear and tear: Regular oil changes keep your engine parts lubricated and minimize friction between them. This prevents wear and tear and extends the life of your engine.
-
Improve fuel efficiency: Dirty oil can increase friction in your engine, which can reduce fuel efficiency. Regular oil changes can help maintain your engine’s performance and improve fuel economy.
-
Avoid costly repairs: Neglecting oil changes can lead to serious engine problems, such as overheating or seizing. These repairs can be expensive and time-consuming, so it’s best to avoid them by regularly checking and changing your oil.
To keep your gas-powered bicycle running smoothly, you should also clean and lubricate moving parts. This helps prevent rust and corrosion and ensures that your bike operates efficiently.
Clean and Lubricate Moving Parts
Proper maintenance of your gas-powered bicycle’s moving parts is crucial to ensure that it operates smoothly and efficiently. The importance of regular maintenance can’t be overstated because it prevents unnecessary wear and tear on the bike and can extend its lifespan.
Keeping the moving parts clean and lubricated is a critical aspect of bike maintenance that should not be overlooked. Using high-quality lubricants is essential to maintain the integrity of your bike’s moving parts. Not only does this help reduce friction, but it also protects against corrosion and rust.
A well-lubricated bike will operate more smoothly and efficiently, leading to a more enjoyable ride. The benefits of using high-quality lubricants can’t be overstated because they help keep your bike in top condition for longer. With proper maintenance, you can extend the life of your bike and avoid costly repairs down the line.
In the next section, we will discuss the importance of replacing worn-out parts as needed.
Replace Worn Out Parts as Needed
After cleaning and lubricating the moving parts of my gas powered bicycle, I always inspect the components to see if any parts need replacing. This is an important step in ensuring that the bike runs smoothly and safely.
Over time, parts can wear out and become less effective, which can cause problems while riding. Therefore, it’s crucial to replace worn out parts as needed to maintain the bike’s functionality.
To do this, I follow a simple process which involves inspecting all the components of the bike, identifying any worn out parts, and replacing them with new ones. Here are the steps I take to replace worn out parts:
- Inspect all the components of the bike, including the engine, wheels, brakes, and chain.
- Look for signs of wear and tear, such as cracks, rust, or frayed cables.
- Identify any parts that need replacing, and make a list of the parts required.
- Replace the worn out parts with new ones, ensuring that they fit properly and are secured tightly.
By following these steps, I can ensure that my gas powered bicycle remains in good condition. This process is known as preventative maintenance, and it’s essential for keeping the bike running smoothly and safely.
Frequently Asked Questions
What is the maximum speed that a gas-powered bicycle can reach?
I’ve found that the top speed of a gas-powered bicycle varies depending on its specific make and model. However, with performance upgrades such as a larger engine or improved exhaust, it’s possible to reach speeds of up to 50 mph.
How much does it cost to convert a regular bicycle into a gas-powered one?
Coincidentally, I was just researching the cost of converting a regular bicycle into a gas-powered one. Conversion options range from DIY kits for around $200 to professional installations for over $1000.
Are there any legal requirements or restrictions for riding a gas-powered bicycle on public roads?
When riding a gas-powered bicycle on public roads, there are legal implications and safety concerns to consider. It is important to check local laws and regulations regarding motorized bicycles and to wear appropriate safety gear.
How long does the fuel last in a gas-powered bicycle and how often does it need to be refueled?
When I rode my gas-powered bicycle, I noticed the fuel lasted about 2 hours of continuous use. Fuel consumption depends on the engine size and power output. I refueled every 2-3 rides, or about every 50 miles.
Can the engine be easily removed or detached from the bicycle for maintenance or repair purposes?
Yes, the engine can be easily removed from the bicycle for maintenance or repair purposes. Its durability is dependent on proper maintenance and regular oil changes. Neglecting engine maintenance can cause premature wear and damage.
Conclusion
In conclusion, making a gas-powered bicycle may seem daunting, but it can be a rewarding experience with the right preparation and guidance.
As I installed the engine onto my bicycle, I felt a sense of accomplishment and excitement for the possibilities that lay ahead.
I encourage anyone interested in creating their own gas-powered bicycle to take the time to research and gather the necessary materials. With attention to detail and regular maintenance, this unique mode of transportation can provide a thrilling and efficient way to travel.
So, get ready to hit the road and enjoy the thrill of your powered-up bicycle! As the saying goes, "Life is a journey, enjoy the ride."

Ralf is a devoted husband and father who loves spending time with his family. He enjoys riding his bicycle as much as possible, and takes every opportunity he can to get out on the open road. Ralf is a kind and gentle person who wants only the best for those around him.


Have you ever experienced the annoyance of cycling on tires that aren’t fully inflated? It feels as though you’re pedaling in quicksand, doesn’t it?
Well, fear not! In this informative article, we will explore the crucial topic of tire pressure in bicycles. From the ideal psi for different types of bikes to the factors affecting tire pressure, we’ll cover it all.
So, saddle up and get ready to discover the secrets to a smoother and more efficient ride. Let’s dive in!
Key Takeaways
- Underinflated tires can lead to decreased stability, reduced responsiveness, increased rolling resistance, and compromised control.
- Overinflated tires can result in a harsh and uncomfortable ride, decreased traction and handling, and increased risk of punctures and blowouts.
- It is important to find the optimal tire pressure for specific conditions, balancing comfort and performance.
- Regularly checking and adjusting tire pressure using a reliable bicycle pump with a pressure gauge can improve bike handling, speed, and performance, and also prevent under or over-inflation.
The Importance of Properly Inflated Bicycle Tires
Properly inflated bicycle tires are crucial for a smooth and safe ride. Balancing safety and optimizing performance, maintaining the correct tire pressure is essential.
When the tires are inflated to the recommended psi (pounds per square inch), it ensures that the bike handles well on different surfaces and provides better traction. The right tire pressure also helps to prevent flats and reduces the risk of blowouts, which can be dangerous, especially when riding at higher speeds.
Additionally, properly inflated tires improve energy efficiency, making it easier to pedal and reducing the strain on your muscles. Neglecting tire pressure can lead to decreased control, poor handling, and even accidents.
Now, let’s delve into the factors affecting tire pressure and how to determine the optimal psi for your bicycle.
Factors Affecting Tire Pressure
Make sure you consider the factors that can impact your tire pressure.
Several factors can affect the tire pressure of your bicycle, including temperature, rider weight, and terrain.
Temperature changes can cause the air inside the tires to expand or contract, leading to fluctuations in tire pressure.
Additionally, rider weight plays a role in determining the optimal tire pressure. Heavier riders may require higher tire pressure to support their weight and prevent pinch flats, while lighter riders may need lower tire pressure for a smoother ride.
The terrain you ride on also affects tire pressure. For example, off-road trails with rough surfaces may require lower tire pressure to improve traction and absorb shocks. On the other hand, smooth road surfaces typically require higher tire pressure for better rolling resistance and efficiency.
When considering the recommended psi for road bikes, it is important to take these factors into account.
Recommended PSI for Road Bikes
To ensure optimal performance and safety while riding your road bike, it’s important to consider the recommended tire pressure. Balancing traction and minimizing rolling resistance are key factors in determining the ideal PSI for road bikes. The recommended tire pressure varies depending on factors such as rider weight, tire width, and road conditions. A higher PSI provides less rolling resistance, allowing for faster speeds on smooth pavement. However, it may sacrifice comfort and traction, especially on rough roads. On the other hand, a lower PSI improves traction and absorbs road vibrations better, but it may increase the risk of pinch flats. To find the right balance, you can refer to the table below, which illustrates the recommended PSI range based on tire width:
| Tire Width (mm) | Recommended PSI Range |
|---|---|
| 23 | 100-130 |
| 25 | 90-120 |
| 28 | 80-110 |
Considering tire width and its impact on tire pressure is crucial for optimizing performance and safety on the road. Now, let’s transition to the recommended PSI for mountain bikes.
Recommended PSI for Mountain Bikes
For a smooth and efficient ride on your mountain bike, you’ll want to find the recommended tire pressure. Maintaining the proper mountain bike tire pressure is crucial for optimal performance and control on rugged terrains. Here are some tire pressure recommendations to consider:
- Tire pressure should be adjusted based on the rider’s weight and preferences.
- Higher tire pressure can result in decreased rolling resistance and better efficiency on smooth trails.
- Lower tire pressure provides better traction and control on rough and technical terrains.
- It is important to find the right balance between grip and rolling resistance by experimenting with different pressures.
Now, let’s move on to discussing the recommended psi for hybrid bikes.
Recommended PSI for Hybrid Bikes
Finding the right tire pressure for hybrid bikes is essential for a comfortable and efficient ride. When it comes to hybrid bikes, the recommended PSI can vary depending on the type of terrain you will be riding on.
For gravel bikes, it is generally recommended to have a lower tire pressure. This allows for better traction and control on loose surfaces. However, it’s important to find a balance as too low of a tire pressure can increase the risk of pinch flats.
On the other hand, higher tire pressures are typically recommended for smoother surfaces to reduce rolling resistance and increase efficiency. It’s important to note that tire pressure has a significant impact on ride quality, affecting both comfort and performance.
Transitioning into the subsequent section about recommended PSI for commuter bikes, it’s important to consider the specific needs and conditions of your daily commute.
Recommended PSI for Commuter Bikes
When commuting on your hybrid bike, it’s important to adjust your tire pressure based on the specific needs and conditions of your daily route. Finding the right tire pressure is crucial for a smooth and safe ride. Here are three key factors to consider when determining the optimal tire pressure for your commuter bike:
-
Surface Conditions: If you encounter rough roads or uneven terrain during your commute, it’s advisable to increase your tire pressure slightly. This helps minimize the risk of pinch flats and provides better stability.
-
Load Capacity: Take into account the weight you’re carrying on your bike, including bags or panniers. Heavier loads require higher tire pressure to maintain optimal performance and prevent excessive rolling resistance.
-
Rider Preference: Your personal comfort and handling preferences also play a role in tire pressure selection. Experiment with different pressures to find the balance between a smooth ride and responsive handling.
Adjusting your tire pressure correctly can greatly impact your bike’s handling and overall performance. Now, let’s move on to discussing the recommended PSI for BMX bikes.
Recommended PSI for BMX Bikes
Determining the recommended tire pressure for BMX bikes can greatly enhance their performance and handling. The recommended psi for dirt bikes is typically higher than that of commuter bikes due to the different terrain and riding style.
BMX bikes are designed for jumps, tricks, and high impact riding, so having the correct tire pressure is crucial. Higher tire pressure provides better responsiveness and faster rolling speed on smooth surfaces, while lower tire pressure offers improved traction and shock absorption on rough terrains.
Finding the ideal psi for your BMX bike requires some experimentation, as it can vary depending on your weight, riding style, and personal preference. It is important to note that tire pressure directly affects the bike’s performance, so regular checks and adjustments are necessary to maintain optimal performance and safety levels.
How to Check and Adjust Tire Pressure
To ensure optimal performance and safety levels, it’s important to regularly check and adjust the tire pressure of your BMX bike. Proper tire pressure is crucial for maintaining control, improving traction, and preventing flats. Checking pressure is a simple process that involves using a tire gauge to measure the amount of air inside the tire. The recommended PSI for BMX bikes is typically between 35 and 60. Adjusting the pressure is done by adding or releasing air using a pump with a pressure gauge. It’s important to follow the manufacturer’s guidelines for the specific tire and bike model. Riding with underinflated tires can negatively affect handling and increase the risk of pinch flats. By regularly checking and adjusting tire pressure, you can ensure a smooth and safe ride. Transitioning into the next section, let’s explore the effects of underinflated tires.
The Effects of Underinflated Tires
Underinflated tires can negatively impact a BMX bike’s handling and increase the risk of pinch flats. Riding on underinflated tires poses dangers that riders should be aware of.
Here are three ways underinflated tires affect handling and control:
-
Decreased stability: With lower tire pressure, the bike becomes less stable, making it harder to maintain balance, especially during sharp turns or maneuvers.
-
Reduced responsiveness: Underinflated tires result in sluggish handling, making it difficult to quickly respond to obstacles or changes in terrain.
-
Increased rolling resistance: The tires’ surface area in contact with the ground increases when underinflated, causing more friction. This leads to a decrease in speed and efficiency, making pedaling more strenuous.
Riding on underinflated tires can significantly impact your biking experience, compromising your control and putting you at risk. Transitioning into the next section on the effects of overinflated tires, it is crucial to maintain the proper tire pressure for optimal performance.
The Effects of Overinflated Tires
Now that we have discussed the dangers of underinflated tires, let’s explore the effects of overinflated tires.
Overinflation can lead to a harsh and uncomfortable ride due to the decreased amount of contact between the tire and the road surface. This reduced contact area can result in a loss of traction and compromised handling. Additionally, overinflated tires are more prone to punctures and blowouts, as the increased pressure puts excessive stress on the tire’s structure.
To prevent overinflation, it is crucial to use a tire pressure gauge. This handy tool allows you to accurately measure the psi in your bicycle tires and ensure they are inflated to the recommended level. By using a tire pressure gauge, you can maintain optimal tire pressure, which improves both your safety and performance on the road.
Now, let’s delve into balancing comfort and performance when it comes to bicycle tires without compromising on either aspect.
Balancing Comfort and Performance
Finding the right balance between comfort and performance is essential for a smooth and enjoyable ride on your bike.
When it comes to tire pressure, it’s crucial to find the right amount for different terrains. Higher tire pressure provides less rolling resistance, making it ideal for smooth roads and maximizing speed. However, it also reduces comfort and decreases traction, especially on rough or wet surfaces.
On the other hand, lower tire pressure increases comfort and improves traction, but it can result in slower speeds. Understanding the impact of tire pressure on handling and traction is key to finding the optimal pressure for your specific riding conditions.
By adjusting tire pressure accordingly, you can enhance both comfort and performance on your bike.
Transitioning into the subsequent section about tips for maintaining proper tire pressure, it’s important to keep in mind the balance between these two factors.
Tips for Maintaining Proper Tire Pressure
One important tip for maintaining proper tire pressure is to regularly check and adjust it based on the specific riding conditions. This ensures optimal performance and safety while riding.
To start, it is essential to have the right equipment for checking tire pressure, such as a reliable bicycle pump with a pressure gauge. Before each ride, I recommend checking the tire pressure to ensure it falls within the manufacturer’s suggested range. This can prevent issues like flats or poor handling.
Additionally, it is important to regularly inspect the tires for any signs of wear or damage. If any issues are detected, the tire should be replaced promptly.
By staying on top of tire maintenance, riders can enjoy a smooth and efficient cycling experience.
Speaking of bicycle pumps with pressure gauges, let’s discuss the benefits they offer in the next section.
The Benefits of Using a Bicycle Pump with Pressure Gauge
Make sure you have a bicycle pump with a pressure gauge to enjoy the benefits it offers in maintaining optimal tire pressure. The accuracy of the pressure gauge is crucial in ensuring that your tires are inflated to the correct PSI. Having a pressure gauge allows you to monitor the pressure levels accurately, preventing under or over-inflation. This is important because improper tire pressure can lead to decreased performance, increased rolling resistance, and even tire damage.
Here is a visual representation of the benefits of using a bicycle pump with a pressure gauge:
| Benefits | |
|---|---|
| Accurate Inflation | Prevents under or over-inflation, ensuring optimal tire pressure. |
| Improved Performance | Proper tire pressure enhances bike handling, speed, and overall performance. |
| Longer Tire Life | Maintaining correct tire pressure reduces wear and tear, prolonging tire lifespan. |
By using a bicycle pump with a pressure gauge, you can reap these benefits and ensure that your tires are always at their best. In the next section, we will address common myths and misconceptions about tire pressure without skipping a beat.
Common Myths and Misconceptions about Tire Pressure
Contrary to popular belief, maintaining the correct tire pressure is not as complicated as it may seem. Many common misconceptions exist regarding tire pressure, but let’s debunk some of these myths.
Myth 1: ‘Higher tire pressure means faster rides.’ Actually, excessively high pressure can lead to a bumpy and uncomfortable ride, as well as reduced traction and control.
Myth 2: ‘Lower tire pressure provides better grip.’ While it may seem logical, too low pressure can cause pinch flats and increase rolling resistance, ultimately slowing you down.
Myth 3: ‘All tires should be inflated to the maximum PSI rating.’ Not true. Each tire has a recommended pressure range, and it’s essential to find the sweet spot within that range for optimal performance and comfort.
In conclusion, understanding the common misconceptions and debunking these myths is crucial to finding the ideal PSI for your bicycle tires.
Conclusion: Finding the Ideal PSI for Your Bicycle Tires
To find the perfect tire pressure for your bike, all you need to do is experiment within the recommended pressure range and see what feels most comfortable and efficient for you.
Finding the optimal tire pressure is crucial as it directly affects the handling and traction of your bicycle.
A higher tire pressure will reduce rolling resistance and make your bike faster on smooth surfaces, but it may also result in a harsher ride and decreased traction on rough terrain.
On the other hand, a lower tire pressure will provide a more comfortable ride and better traction on uneven surfaces, but it may increase rolling resistance and make your bike slower.
It’s important to strike a balance that suits your riding style and the conditions you typically encounter.
So, take the time to experiment and find the tire pressure that gives you the ideal combination of comfort, efficiency, handling, and traction.
Frequently Asked Questions
Can I use the same PSI for all types of bicycles?
No, you cannot use the same psi for all types of bicycles. Different types of bicycles have different psi requirements for their optimal tire pressure. It is important to adjust the psi according to the specific bicycle type.
What happens if I overinflate my bicycle tires?
Overinflating bicycle tires can have negative consequences. It increases the risk of a tire blowout, reduces traction and control, and makes the ride uncomfortable. Tire pressure directly impacts bike performance, so it’s important to maintain the correct psi.
How often should I check and adjust tire pressure?
I recommend checking and adjusting tire pressure regularly to ensure optimal performance. It is important to maintain the correct psi for your bicycle tires. Failure to do so may result in decreased efficiency and potential safety hazards.
Is it necessary to use a bicycle pump with a pressure gauge?
Using a bicycle pump with a pressure gauge is beneficial. Pros include accurate pressure readings and convenient inflation. Cons include the cost and potential for gauge malfunctions. Alternative methods for checking tire pressure include using a separate pressure gauge or a digital tire pressure monitor.
Are there any common myths or misconceptions about tire pressure that I should be aware of?
Common misconceptions about tire pressure include the belief that higher pressure always means better performance, but this can lead to decreased traction and a harsher ride. Factors like temperature and rider weight can also affect tire pressure.
Conclusion
In conclusion, finding the ideal PSI for your bicycle tires is crucial for optimal performance and safety. By properly inflating your tires, you can enhance your riding experience and prevent unnecessary wear and tear.
Remember, different types of bikes require different PSI levels, so it’s important to consult your bike’s manufacturer or a professional for specific recommendations. Don’t fall for common myths and misconceptions about tire pressure – rely on accurate information and invest in a quality bicycle pump with a pressure gauge.
Keep your tires in top shape and enjoy the ride!

Olivia’s writing is not only informative but also inspiring. She has a knack for telling stories that capture the essence of cycling and the joy it brings to people’s lives. Her writing has been praised by readers and industry experts alike for its clarity, depth, and authenticity.
In addition to her writing, Olivia is also an avid cyclist. She enjoys exploring new trails and routes and has participated in several cycling events and races. Her first-hand experience with cycling gives her a unique perspective on the sport, reflected in her writing.
Overall, Olivia is a talented writer passionate about cycling and dedicated to producing high-quality content for FlatironBike. Her contributions to the magazine have helped make it a go-to source for cycling enthusiasts worldwide.

Imagine this scenario: the breeze flowing through your hair, the sensation of liberation while you cycle along an expansive road. Regardless if you are an experienced bike rider or a novice eager to dive into a new pastime, one inquiry persists: what’s the price of a bicycle?
In this article, I will delve into the world of bicycles, exploring the different types available, the factors that affect their price, and how to research and compare prices.
Get ready to hit the road with confidence, knowing you’ve made the right investment.
Key Takeaways
- The price of a bicycle is influenced by factors such as brand reputation, materials used, and features like suspension systems and disc brakes.
- There are three different levels of bicycles available: entry-level, mid-range, and high-end, each offering different performance and technology.
- Custom-built bicycles offer a personalized fit, optimal comfort, and performance, with attention to detail and reasonable pricing.
- When buying a bicycle, consider options such as used bicycles, accessories, maintenance costs, and where to buy, and also explore cost-saving tips and financing options.
Types of Bicycles Available
You can find a variety of bicycles available at different price ranges. When it comes to mountain bikes, there are several types to choose from.
You have the hardtail, which has a suspension fork in the front and a rigid rear, providing better control and efficiency on rough terrains.
Then there’s the full suspension bike, which has both front and rear suspension, offering a smoother ride on more challenging trails.
Additionally, electric bikes have become increasingly popular due to their numerous benefits. They provide an extra boost of power when needed, making uphill climbs easier and reducing fatigue. Electric bikes also allow for longer rides and are environmentally friendly.
Now, let’s delve into the factors that affect the price of a bicycle, including brand reputation, materials used, and additional features.
Factors Affecting the Price of a Bicycle
Factors that affect the price of a bike include the brand, materials used, and features.
-
Brand: Well-known brands often have a higher price due to their reputation for quality and performance. Lesser-known brands may offer similar features at a lower cost.
-
Materials: The materials used in the bike’s construction can greatly impact its price. High-end bikes often have lightweight and durable materials like carbon fiber, while more affordable options may use aluminum or steel frames.
-
Features: Additional features like suspension systems, gears, and disc brakes can significantly affect the price of a bicycle. Higher-end models tend to have more advanced features, but it’s important to consider whether these features are necessary for your intended use.
Understanding these factors can help you make informed decisions when purchasing a bike, allowing you to find the right balance between cost and quality.
Now, let’s delve into the world of entry-level bicycles.
Entry-Level Bicycles
When looking for an entry-level bike, it’s important to consider your budget and intended use.
There are various types of frames to choose from, each offering its own benefits. Aluminum frames are lightweight and durable, making them a popular choice for beginners. Steel frames are known for their strength and affordability, while carbon frames provide a lightweight and responsive ride.
When it comes to beginner-friendly brands, some notable options include Giant, Trek, and Specialized. These brands offer a range of entry-level bicycles that are designed with the needs of beginners in mind, providing a comfortable and reliable ride.
As you transition into the subsequent section about mid-range bicycles, it’s important to explore the additional features and performance upgrades that come with a higher price point.
Mid-Range Bicycles
Looking for a mid-range bike? Consider the features and performance upgrades that come with a higher price point.
Mid-range bicycles often offer a wider range of gears compared to entry-level models, allowing for smoother shifting and better adaptability to various terrains. You’ll find options like a Shimano 105 or SRAM Rival groupset, which provide precise and reliable gear changes.
Another aspect to consider is the frame material. Mid-range bikes typically use materials like aluminum or carbon fiber, which offer a good balance between weight, stiffness, and durability. These materials contribute to a more responsive and comfortable ride.
When it comes to mid-range bicycles, you get a significant improvement in components and overall performance compared to entry-level options.
Now, let’s move on to high-end bicycles, where you’ll find even more advanced features and top-of-the-line components.
High-End Bicycles
When it comes to high-end bicycles, you can expect nothing less than top-of-the-line performance and technology. These bikes are designed to deliver exceptional speed, precision, and responsiveness, allowing cyclists to reach their maximum potential.
Additionally, high-end bicycles are built using premium materials and components, ensuring durability, lightweight construction, and enhanced performance.
Whether you’re a professional athlete or a passionate cyclist, investing in a high-end bicycle will undoubtedly elevate your riding experience to new heights.
Top-of-the-Line Performance and Technology
The top-of-the-line performance and technology of this bicycle are worth every penny. With a range of performance enhancements and advanced bike technologies, this bike is designed to elevate your riding experience to new heights. From its lightweight carbon frame to its aerodynamic design, every aspect of this bike is optimized for speed and efficiency. The cutting-edge electronic shifting system ensures smooth and precise gear changes, while the high-performance disc brakes provide exceptional stopping power. To give you a visual representation of its capabilities, take a look at the table below:
| Feature | Benefit |
|---|---|
| Lightweight carbon frame | Increased speed and agility |
| Aerodynamic design | Reduced wind resistance |
| Electronic shifting system | Smooth and precise gear changes |
| High-performance disc brakes | Exceptional stopping power |
| Advanced suspension system | Enhanced comfort and control |
Now, let’s delve into the next section about premium materials and components that make this bicycle truly exceptional.
Premium Materials and Components
Premium materials and components are what make this bike truly exceptional. The frame is constructed using high-quality carbon fiber, which provides a lightweight yet incredibly strong foundation for the bike. This ensures maximum efficiency and power transfer, allowing riders to reach their full potential.
The top-of-the-line components used in this bike are carefully selected to enhance performance and durability. From the precision-engineered drivetrain to the high-performance brakes, every aspect of this bike is designed for top-notch performance.
The premium materials and top-of-the-line components work together seamlessly to create a bike that is both reliable and high-performing.
As we transition to the next section about custom-built bicycles, it’s important to note that these premium materials and top-of-the-line components can also be customized to suit individual preferences and needs.
Custom-Built Bicycles
When it comes to custom-built bicycles, the possibilities are endless. These bikes are tailored to your specifications, allowing you to choose everything from the frame material to the components.
Not only will you have a bike that fits you perfectly, but you’ll also have a unique design and features that set your bike apart from the rest.
Tailored to Your Specifications
Tailored to your specifications, we can offer you a bicycle at a reasonable price. Here’s why you should consider getting a custom-built bicycle with personalized components:
-
Custom frame: Our expert craftsmen will design and build a frame that perfectly suits your body type and riding style. A custom frame ensures optimal comfort and performance.
-
Personalized components: From handlebars to pedals, every component can be tailored to your preferences. Choose the exact type, size, and material that will enhance your riding experience.
-
Attention to detail: Our team pays meticulous attention to every detail, ensuring that your bicycle is built to the highest standards. We take pride in our workmanship and strive to deliver a bike that exceeds your expectations.
With a custom-built bicycle, you’ll not only enjoy a bike that fits you like a glove but also benefit from unique design and features that set it apart from off-the-shelf options.
Unique Design and Features
You’ll love the distinctive design and innovative features of your custom-built bike. Our team of expert designers and engineers work closely with you to create a bicycle that perfectly matches your preferences and style.
From the frame to the handlebars, every aspect of your bike is carefully crafted to ensure a unique design that stands out from the crowd. Our innovative features are designed to enhance your riding experience. Whether it’s the advanced suspension system that provides a smooth and comfortable ride or the state-of-the-art gears that allow for seamless shifting, we’ve incorporated the latest technology into your bike.
As you ride, you’ll appreciate the attention to detail and the thought that went into creating a truly exceptional bike.
Now, let’s move on to the next section where we’ll discuss our selection of used bicycles.
Used Bicycles
The price of a used bicycle can vary depending on its condition. When looking for second-hand bike options, it’s important to consider factors such as the brand, model, age, and overall wear and tear. To give you an idea of the price range, here is a table showcasing used bicycle prices:
| Condition | Price Range ($) |
|---|---|
| Excellent | $200 – $500 |
| Good | $100 – $300 |
| Fair | $50 – $150 |
As you can see, the prices can differ significantly based on the condition of the bicycle. It’s advisable to thoroughly inspect the bike and test ride it before making a purchase. Now that we’ve discussed used bicycle prices, let’s move on to the next section about bicycle accessories and maintenance costs.
Bicycle Accessories and Maintenance Costs
To make sure your bike is in good condition and to enhance your riding experience, it’s important to invest in accessories and budget for maintenance costs.
Bicycle accessories are essential for safety and convenience. You’ll need lights, a helmet, and a lock to keep your bike secure. These accessories can range in price, but it’s worth investing in quality items that will last.
Additionally, regular maintenance is crucial to keep your bike running smoothly. Bicycle repair services can help with more complex repairs, but there are also essential bicycle tools you can purchase to do basic maintenance yourself. These tools include a tire pump, a multi-tool for adjusting components, and a chain cleaner.
By having these tools and budgeting for occasional repairs, you’ll ensure that your bike remains in top condition.
Now let’s explore where to buy a bicycle.
Where to Buy a Bicycle
When considering where to purchase a bike, it’s important to research different retailers and compare prices. There are two main options to consider: buying online or visiting local bike shops.
-
Buying Online
-
Convenience: Online retailers offer the convenience of browsing and purchasing from the comfort of your own home.
-
Wide Selection: Online platforms often have a larger variety of bikes to choose from, including different brands, styles, and sizes.
-
Local Bike Shops
-
Expert Advice: Visiting a local bike shop allows you to benefit from the knowledge and expertise of the staff who can help you find the perfect bike for your needs.
-
Test Rides: Trying out different models and sizes in person can give you a better idea of how the bike feels and performs.
Considering these options will help you make an informed decision on where to buy your bicycle.
Now, let’s explore some cost-saving tips for buying a bicycle without compromising on quality.
Cost-Saving Tips for Buying a Bicycle
When it comes to saving money on buying a bicycle, there are a few key strategies I always keep in mind.
First, I always look out for end-of-season sales and discounts, as this is when bike shops often offer great deals to clear out their inventory.
Additionally, I make sure to compare prices at different stores and online platforms to ensure I’m getting the best possible deal.
Lastly, I’m not afraid to negotiate with the seller, as sometimes they may be willing to lower the price to make the sale.
By utilizing these cost-saving tips, I’ve been able to find high-quality bicycles at affordable prices.
End-of-Season Sales and Discounts
I’m curious about the price of bicycles during end-of-season sales and discounts. It’s always a great idea to take advantage of these promotions as they can save you a significant amount of money.
During end-of-season promotions, bike shops often offer clearance sales to make room for new inventory. Here’s what you can expect during these sales:
-
Deep discounts: You’ll find bicycles at prices much lower than their original retail value.
-
Limited stock: As these sales are popular, the available stock may be limited, so it’s best to act quickly.
-
Accessories included: Some bike shops bundle accessories like helmets or locks with the purchase of a bicycle during these promotions.
-
Expert advice: Bike shop staff can provide valuable guidance on choosing the right bike for you.
Now that you know what to expect during end-of-season sales, let’s move on to comparing prices and negotiating for an even better deal.
Comparing Prices and Negotiating
To get the best deal on a bike, you should start by comparing prices at different bike shops. It’s important to visit multiple stores and see what each one has to offer. You can also check out price comparison websites to get an idea of the average cost for the type of bike you’re interested in.
Once you have a good understanding of the market price, you can use that information to negotiate with the bike shop. Don’t be afraid to haggle and ask for discounts or additional accessories to be included in the deal. Negotiation techniques such as being polite, firm, and knowledgeable can help you get a better price.
By comparing prices and using negotiation techniques, you can ensure that you’re getting the best possible deal on your new bike.
Now, let’s talk about financing options for your bicycle purchase.
Financing Options for Bicycle Purchase
You can explore various financing options for buying a bicycle. When it comes to financing options, there are several ways to make your purchase more affordable. Here are some cost-saving tips to consider:
-
Look for store financing: Many bicycle shops offer financing options with low or no interest rates. This can be a convenient way to spread out the cost of your purchase.
-
Consider a personal loan: If you can’t find suitable store financing, you may want to explore personal loan options from your bank or credit union. These loans often have competitive interest rates and flexible repayment terms.
-
Use a credit card: If you have a credit card with a low interest rate or a promotional offer, you could use it to finance your bicycle purchase. Just remember to pay off the balance as quickly as possible to avoid high interest charges.
-
Check for employer benefits: Some companies offer employee benefits that include discounts or financing options for bicycles. Check with your employer to see if you qualify.
-
Explore peer-to-peer lending: Peer-to-peer lending platforms connect borrowers with individual lenders. This can be a good option if you prefer a more personal lending experience.
By exploring these financing options and considering cost-saving tips, you can make buying a bicycle more affordable.
Now, let’s move on to the next section about researching and comparing bicycle prices.
Researching and Comparing Bicycle Prices
When researching and comparing prices for bicycles, it’s important to consider factors such as brand reputation and features. To help you make an informed decision, I have compiled a table comparing different types of bicycles and where you can buy them:
| Type of Bicycle | Where to Buy |
|---|---|
| Mountain Bike | Local bike shops, online retailers |
| Road Bike | Specialty bike stores, online marketplaces |
| Hybrid Bike | Department stores, local bike shops |
| Folding Bike | Online retailers, specialty bike stores |
| Electric Bike | Local bike shops, online retailers |
By comparing prices and availability across these channels, you can find the best deal for your desired type of bicycle. Additionally, considering the reputation of the brand and the specific features you’re looking for will ensure you make a well-rounded decision. Now that you have an idea of where to buy, let’s move on to budgeting for bicycle accessories and gear.
Budgeting for Bicycle Accessories and Gear
When budgeting for bicycle accessories and gear, it is important to consider items such as helmets, lights, and reflective gear.
Helmets are a crucial safety accessory that should never be overlooked.
Lights and reflective gear are essential for visibility, especially when riding at night or in low-light conditions.
Additionally, investing in proper cycling clothing and shoes can greatly enhance comfort and performance while riding.
Helmets, Lights, and Reflective Gear
Don’t forget to grab a helmet, lights, and reflective gear for your bicycle. These accessories are crucial for ensuring your safety while riding.
Helmets protect your head from potential injuries in case of a fall or collision. Lights are essential for visibility, especially when cycling at night or in dimly lit areas. Reflective gear, such as vests or stickers, make you more visible to others on the road.
When selecting your gear, consider the following safety tips. Choose a helmet that fits properly and meets safety standards. Look for lights that have a strong beam and are easy to install. Opt for reflective gear that is highly reflective and can be easily seen from a distance.
Now that we’ve covered the importance of helmets, lights, and reflective gear, let’s move on to the next section about cycling clothing and shoes.
Cycling Clothing and Shoes
Cycling clothing and shoes are essential for comfort and performance while riding. When it comes to cycling apparel, it’s important to choose items that are specifically designed for the sport. These garments are made from moisture-wicking materials that keep you dry and cool during intense rides. The right cycling jersey will have a snug fit to reduce drag and pockets to store small essentials. Additionally, padded cycling shorts provide comfort and prevent chafing during long rides. As for shoes, it’s crucial to select the right pair to ensure proper power transfer and stability. Cycling shoes often have stiff soles that maximize efficiency and clipless pedal compatibility for a secure connection. By investing in high-quality cycling clothing and shoes, you can enhance your riding experience and improve performance. Now let’s transition into the subsequent section about bicycle maintenance and repair costs.
Bicycle Maintenance and Repair Costs
You can expect to pay for maintenance and repairs for your bicycle. Bicycle maintenance costs can vary depending on the type of bike you have and the specific repairs needed.
For basic maintenance such as lubricating the chain, adjusting brakes and gears, you can expect to pay around $30 to $50. If your bike requires more extensive repairs, such as replacing a worn-out tire or fixing a broken chain, the cost can range from $50 to $100 or more.
Common bicycle repairs also include replacing brake pads, fixing a punctured tube, and truing the wheels. It’s important to regularly maintain your bike to ensure its longevity and safety. With proper care, your bike can last for many years.
Now, let’s move on to final thoughts and recommendations.
Final Thoughts and Recommendations
Now that we’ve discussed the costs associated with bicycle maintenance and repair, let’s move on to some final thoughts and recommendations.
As someone who has been passionate about cycling for years, I understand the importance of finding the right balance between quality, customization options, and value for money when purchasing a bicycle.
When it comes to customization options, it’s worth considering whether you want a bike that can be easily upgraded with different components or if you prefer a more straightforward, off-the-shelf option. Additionally, it’s essential to weigh the value for money. Sometimes, spending a little extra upfront can save you money in the long run by investing in a higher quality bike that requires less maintenance and repairs.
Ultimately, finding the perfect bicycle is a personal journey, but considering these factors will help ensure you make a well-informed decision.
Now, let’s dive into some key points to keep in mind:
- Look for a bike that offers a wide range of customization options to suit your specific needs and preferences.
- Consider the long-term value for money by investing in a higher quality bike that may require fewer repairs and maintenance.
- Think about whether you prefer an off-the-shelf option or a bike that can be easily upgraded with different components.
- Remember that finding the perfect bicycle is a personal journey, so take your time and do thorough research before making a decision.
Frequently Asked Questions
What are the different types of gear ratios available for bicycles?
There are several types of gear ratios available for bicycles, including single-speed, multi-speed, and internal hub gears. Single-speed bicycles have the advantage of simplicity and low maintenance, while multi-speed options allow for greater versatility and easier hill climbing.
Are there any specific safety features to consider when buying a bicycle?
Wearing a helmet is crucial for bicycle safety. When choosing a bicycle, consider the right size and fit for comfort and control. Make sure to measure your inseam and test ride to find the perfect match.
How often should a bicycle be serviced for maintenance?
A bicycle should be serviced for maintenance at least once a year. Regular maintenance ensures optimal performance and extends the lifespan of the bike. Signs of wear and tear such as squeaky brakes or loose parts should be addressed promptly.
Are there any legal requirements for bicycle ownership, such as registration or insurance?
Yes, there are legal requirements for bicycle ownership. Some areas may require registration, while others may not. Insurance coverage for bicycles is typically not mandatory, but it can provide valuable protection in case of accidents or theft.
What are some popular brands known for their durable bicycle frames?
Some popular bicycle brands known for their durable frames are Trek, Specialized, and Giant. These brands are highly regarded for their quality construction and materials, making them a great choice for anyone looking for the best bicycle frames.
Conclusion
After researching and comparing bicycle prices, I have learned that the cost of a bicycle can vary greatly depending on factors such as the type of bike and its components.
For example, entry-level bicycles are generally more affordable, while high-end bikes can be quite expensive.
However, it’s important to consider the long-term costs as well, such as maintenance and repair expenses. Just like a car, a bicycle requires regular upkeep to ensure optimal performance.
So, when budgeting for a bike, it’s crucial to also factor in the cost of accessories and gear.
Remember, investing in a quality bicycle is like investing in your own transportation freedom.
Olivia’s writing is not only informative but also inspiring. She has a knack for telling stories that capture the essence of cycling and the joy it brings to people’s lives. Her writing has been praised by readers and industry experts alike for its clarity, depth, and authenticity.
In addition to her writing, Olivia is also an avid cyclist. She enjoys exploring new trails and routes and has participated in several cycling events and races. Her first-hand experience with cycling gives her a unique perspective on the sport, reflected in her writing.
Overall, Olivia is a talented writer passionate about cycling and dedicated to producing high-quality content for FlatironBike. Her contributions to the magazine have helped make it a go-to source for cycling enthusiasts worldwide.
As I rode along the road, my bicycle seemed like a part of me. The design and careful craftsmanship of my bike’s length significantly contributed to this feeling of unity.
The dimensions of a bicycle are not arbitrary; they are meticulously calculated to ensure optimal performance, comfort, and safety. From the frame length to the handlebar width, every aspect is carefully considered.
In this article, we will explore the various dimensions of a bicycle, revealing the importance of getting the length just right.
Key Takeaways
- Bicycle dimensions, including frame length and handlebar width, are carefully calculated for optimal performance, comfort, and safety.
- Frame geometry, angles, and dimensions, as well as different frame materials, impact bike handling and rider comfort.
- Wheelbase, the distance between the front and rear wheels, affects stability and maneuverability.
- Handlebar width and stem length directly impact bike maneuverability, control, and overall fit.
Overview of Bicycle Dimensions
Understanding the dimensions of a bicycle is essential for finding the right fit and ensuring a comfortable ride. How long is your bike? It is important to consider the frame materials used. Different materials, such as aluminum, carbon fiber, or steel, can affect the overall length and weight of the bike.
The length of a bike is closely tied to its size and fit. A bike that is too long can be difficult to handle and may cause discomfort, while a bike that is too short can lead to a cramped riding position. Finding the right balance between frame length and size is crucial for optimal performance and riding experience.
With this understanding, let’s now delve into the specifics of frame length and size.
Frame Length and Size
When it comes to bicycles, understanding frame geometry is crucial for a comfortable and efficient ride. The frame length and size play a major role in determining the overall fit and feel of the bike.
By choosing the right frame size, riders can ensure optimal power transfer, handling, and comfort.
Understanding Frame Geometry
The length of a bicycle is influenced by its frame geometry. Understanding frame geometry is crucial in determining the handling and comfort of a bike. Here are five key points to consider:
-
Impact of frame geometry on bike handling: The angles and dimensions of the frame affect how a bike responds to steering inputs and maintains stability. A steeper head tube angle, for example, results in quicker and more responsive handling.
-
How frame geometry affects rider comfort: Frame geometry also plays a role in rider comfort. Factors such as the seat tube angle, top tube length, and stack and reach measurements determine the bike’s fit and how comfortable it feels during long rides.
-
Frame material and its impact on geometry: Different frame materials, such as carbon fiber or aluminum, can influence the geometry of a bike. Carbon frames, for instance, allow for more flexibility in shaping the geometry and optimizing performance.
-
Tube shapes and their effects: The shape and diameter of the tubes used in frame construction also impact the overall geometry. Aero-shaped tubes, for example, reduce drag and increase speed.
-
Wheelbase and stability: The wheelbase, the distance between the front and rear wheels, affects stability. A longer wheelbase provides more stability at higher speeds, while a shorter wheelbase offers quicker handling for tight turns.
Understanding frame geometry is just the first step in choosing the right bike. Now, let’s delve into the importance of selecting the appropriate frame size.
Choosing the Right Frame Size
To choose the right frame size, you should consider your height and inseam measurement.
The frame material is an important factor to consider when choosing a bike. Different materials, such as steel, aluminum, and carbon fiber, have different characteristics that affect the bike’s weight, stiffness, and durability.
Determining the ideal saddle height is crucial for comfort and efficient pedaling. It can be calculated based on your inseam measurement and the type of riding you plan to do.
Once you have chosen the right frame size and material, you can focus on other aspects of bike fit, such as handlebar reach and seat position. These factors, along with wheelbase and overall length, contribute to the bike’s handling and stability.
Wheelbase and Overall Length
The bicycle’s wheelbase and overall length play a crucial role in determining its stability and maneuverability.
The wheelbase refers to the distance between the front and rear axles, while the overall length is the measurement from the front of the bike to the back. These two factors have a significant impact on how the bike handles and its stability during rides.
A longer wheelbase generally provides better stability, especially at high speeds and on rough terrains. On the other hand, a shorter wheelbase offers increased maneuverability, making it easier to navigate tight turns and corners.
Finding the right balance between wheelbase and overall length is essential to ensure optimal bike handling and stability.
Speaking of handling, another important aspect to consider is handlebar width, which I will discuss in the next section.
Handlebar Width
Handlebar width greatly affects the bike’s maneuverability and control. The positioning of handlebar grips is crucial in achieving optimal bike handling and stability. Here are three key reasons why handlebar width is important:
-
Stability: A wider handlebar provides more stability, especially when riding at high speeds or traversing rough terrains. It allows for better control and minimizes the chances of losing balance.
-
Steering responsiveness: The width of the handlebar determines how quickly and efficiently the bike responds to steering inputs. A narrower handlebar offers quicker maneuverability, ideal for navigating tight corners or congested areas.
-
Comfort and leverage: The width of the handlebar affects the rider’s comfort and ability to apply leverage. A wider handlebar allows for a more natural and comfortable grip, reducing strain on the wrists and shoulders.
Considering the significance of handlebar width in bike handling, the next aspect to explore is the stem length, which plays a crucial role in determining the bike’s overall fit and handling characteristics.
Stem Length
Stem length directly impacts a bike’s fit and handling. The stem is the component that connects the handlebars to the fork steerer tube. It determines the distance between the rider and the handlebars, affecting the bike’s overall reach and riding position.
Finding the right stem length is crucial for achieving a comfortable and efficient riding experience. A shorter stem provides a more upright position, ideal for leisurely rides or riders who prefer a more relaxed posture. On the other hand, a longer stem promotes a more aggressive and aerodynamic position, suitable for racing or riders seeking maximum power output.
Therefore, choosing the appropriate stem length is essential for optimizing bike fit and overall performance.
Moving on to the next section, seat tube length also plays a significant role in determining bike fit.
Seat Tube Length
Now that we’ve discussed stem length, let’s move on to another important aspect of bicycle measurement: seat tube length.
The seat tube is the vertical tube that connects the seatpost to the bottom bracket. It plays a crucial role in determining the rider’s position on the bike. The seat tube angle, measured in degrees, affects the rider’s comfort and efficiency.
A steeper seat tube angle positions the rider more forward, making it easier to generate power. On the other hand, a more relaxed seat tube angle allows for a more upright and comfortable riding position.
Another important aspect of seat tube length is the diameter, which determines the size of the seatpost that can be used.
Now that we understand the role of seat tube length, let’s move on to the next section where we’ll discuss top tube length.
Top Tube Length
The top tube length affects the rider’s reach and overall bike fit. It plays a crucial role in determining the comfort and handling of a bicycle. The top tube length refers to the horizontal distance between the seat tube and the head tube.
A longer top tube length typically results in a more stretched-out riding position, suitable for riders with longer torsos or those seeking a more aerodynamic posture. On the other hand, a shorter top tube length allows for a more upright riding position, ideal for riders with shorter torsos or those prioritizing comfort over speed.
Finding the right top tube length is essential for achieving proper bike fit, as it ensures optimal balance, control, and power transfer.
Moving on to the next section about chainstay length, this measurement also plays a crucial role in bike geometry and overall performance.
Chainstay Length
To determine the right chainstay length for you, consider your desired bike handling and stability. The chainstay length plays a crucial role in how your bike handles and feels on the road or trail. Here are four key factors to consider when thinking about chainstay length:
-
Stability: A longer chainstay length provides more stability, making the bike feel steady and predictable, especially at high speeds.
-
Maneuverability: A shorter chainstay length allows for quicker and more nimble handling, making it easier to navigate tight corners and switchbacks.
-
Climbing efficiency: A shorter chainstay length places more weight on the rear wheel, improving traction and climbing efficiency.
-
Compatibility: When choosing a chainstay length, it’s important to consider the seatpost diameter as well. Some seatpost diameters may limit the range of chainstay lengths available.
With chainstay length covered, let’s move on to discussing fork length and its impact on bike performance.
Fork Length
Consider the impact of fork length on your bike’s performance and how it affects your riding experience.
Fork length is a crucial aspect of frame geometry that greatly influences the handling and stability of your bicycle. It refers to the distance from the bottom of the head tube to the axle of the front wheel.
A longer fork length generally results in a more stable ride, especially at high speeds and on rough terrain. It provides greater control and reduces the chances of the front wheel lifting off the ground during steep descents.
On the other hand, a shorter fork length offers quicker steering response and improved maneuverability, making it ideal for tight turns and technical trails.
The choice of fork length ultimately depends on your riding style and the type of terrain you frequent.
Now let’s delve into the next aspect of bike geometry: crankarm length.
Crankarm Length
Crankarm length greatly impacts your biking experience and affects how efficiently you pedal. It is a crucial component that connects the pedals to the bottom bracket. The length of the crankarm determines the amount of leverage you have while pedaling, which directly affects your power output and pedal stroke efficiency.
When it comes to crankarm materials, they are typically made from aluminum or carbon fiber. Aluminum crankarms are known for their durability and affordability, while carbon fiber crankarms offer a lighter weight and increased stiffness for better power transfer.
In terms of crankarm design, there are various options available, including standard, compact, and triple. Each design has its advantages and is suitable for different types of riding and terrain.
Considering the importance of crankarm length and design, it is crucial to choose the right one based on your riding style and preferences. This will ensure optimal pedaling efficiency and overall biking performance.
Speaking of pedaling efficiency, the next section will delve into the pedal-to-saddle distance and its impact on your biking experience.
Pedal-to-Saddle Distance
The pedal-to-saddle distance greatly affects your comfort and efficiency while biking. It refers to the distance between the pedals when they are at their lowest point in the pedal stroke. This distance is crucial because it determines how far you need to extend your legs when pedaling.
If the pedal-to-pedal distance is too short, you may experience knee pain and discomfort. On the other hand, if it is too long, you may not be able to fully extend your legs, resulting in decreased power and efficiency.
Additionally, the pedal-to-saddle distance affects your knee-to-handlebar distance, which determines your overall riding position and comfort. Finding the right balance between these two distances is essential for a comfortable and efficient biking experience.
Speaking of comfort, the next subtopic we will discuss is ‘standover height.’
Standover Height
In our previous discussion about pedal-to-saddle distance, we explored the importance of finding the right position for efficient pedaling.
Now, let’s delve into another crucial aspect of bicycle fit: standover height. Standover height refers to the distance between the top tube of the bicycle frame and the ground when you straddle the bike with your feet flat on the floor.
It is an important measurement to consider, especially for riders with shorter inseams or those who are concerned about stability when coming to a stop. Standover height is closely tied to frame size, as different frame sizes will offer varying standover heights.
By understanding and considering your standover height, you can ensure a comfortable and safe fit for your bicycle.
Now, let’s explore how we can adjust the bike length for even greater comfort.
Adjusting Bike Length for Comfort
Adjusting the bike length can greatly enhance the comfort of your ride. When it comes to adjusting the length of your bike, there are a few key factors to consider.
One important aspect is the bike angle. By adjusting the angle of the bike, you can fine-tune the length to suit your body and riding style. This can make a big difference in your overall comfort and performance.
Another factor to consider is the actual length of the bike. Depending on your height and preferred riding position, you may need to lengthen or shorten the bike to achieve the optimal fit. Making these adjustments can help prevent discomfort and even improve your speed and efficiency.
Considering these factors, let’s now delve into the considerations for different types of bicycles.
Considerations for Different Types of Bicycles
To achieve the optimal fit for your bike, it’s important to take into account the specific type of bike you are riding. Bike sizing varies depending on the type of bicycle, and there are several factors that affect bike fit.
One important consideration is the frame size. Different types of bikes have different frame geometries that can affect how the bike fits your body. For example, road bikes typically have a more aggressive riding position with a longer top tube, while mountain bikes have a more upright position with a shorter top tube.
Another factor to consider is the handlebar width. Narrower handlebars can give you a more aerodynamic position, while wider handlebars provide better stability and control. Pedal position, saddle height, and stem length are also important factors affecting bike fit.
By considering these factors, you can ensure that your bike is sized correctly for your comfort and riding style.
Transitioning into the next section, it is crucial to understand the importance of proper bike length for an enjoyable and safe riding experience.
Conclusion: The Importance of Proper Bike Length
Now that we have explored the various considerations for different types of bicycles, it is clear that the length of a bike plays a crucial role in its performance and overall ride quality. The importance of proper fit cannot be overstated, as it directly affects your comfort, control, and efficiency on the bike. A bike that is too long or too short can lead to discomfort, inefficient pedaling, and even injury.
Proper bike length impacts your performance in several ways. Firstly, it allows for optimal power transfer, ensuring that each pedal stroke propels you forward efficiently. Secondly, it enables you to maintain a comfortable and aerodynamic riding position, which can significantly improve your speed and endurance.
To further emphasize the significance of proper fit, let’s delve into two key subtopics: the impact of bike length on comfort and the effect it has on handling and control.
Frequently Asked Questions
What are the different factors to consider when adjusting the length of a bicycle for comfort?
When adjusting the length of a bicycle for comfort, factors to consider include the rider’s height, flexibility, riding style, and intended use. These factors will determine the optimal length that ensures a comfortable and efficient riding experience.
How does the length of a bicycle affect its maneuverability and stability?
The length of a bicycle affects its maneuverability and stability. For example, a shorter bike with a compact frame offers better maneuverability, making it easier to navigate tight corners. However, a longer bike with a stretched-out frame provides more stability, especially at high speeds. Finding the right balance between maneuverability and stability is crucial for both comfort and performance.
Are there any safety concerns related to having a bike that is too long or too short?
Having a bike that is too long or too short can pose safety concerns. A bike with a frame size that is too small can result in a cramped riding position, while a saddle height that is too high can compromise stability and control.
Can the length of a bicycle be adjusted after it has been purchased?
Adjusting the length of a bicycle frame is possible using bike fit techniques. One interesting statistic is that a proper bike fit can increase power output by 7-15%.
Are there any specific recommendations for adjusting the length of different types of bicycles, such as road bikes or mountain bikes?
For optimal handlebar width, road bikes typically have narrower bars for aerodynamics, while mountain bikes have wider bars for better control. Frame geometry plays a crucial role in adjusting the length of a bicycle to ensure proper fit and comfort.
Conclusion
In conclusion, it’s crucial to understand the importance of proper bike length for optimal comfort and performance. By considering factors such as frame length, wheelbase, handlebar width, and stem length, cyclists can ensure a bike that fits their body and riding style.
For example, let’s imagine a scenario where a professional mountain biker is preparing for a challenging downhill race. With a bike that is too long, their control and maneuverability would be compromised, increasing the risk of accidents.
Thus, adjusting bike length is essential for a safe and enjoyable ride.
Olivia’s writing is not only informative but also inspiring. She has a knack for telling stories that capture the essence of cycling and the joy it brings to people’s lives. Her writing has been praised by readers and industry experts alike for its clarity, depth, and authenticity.
In addition to her writing, Olivia is also an avid cyclist. She enjoys exploring new trails and routes and has participated in several cycling events and races. Her first-hand experience with cycling gives her a unique perspective on the sport, reflected in her writing.
Overall, Olivia is a talented writer passionate about cycling and dedicated to producing high-quality content for FlatironBike. Her contributions to the magazine have helped make it a go-to source for cycling enthusiasts worldwide.


Mastering Bicycle Gear Use on Flat Roads

7 Ways a Bicycle Is Useful to Us

What Are the Basics of How a Bicycle Freewheel Works?

How Bicycle Tires Lose Air: A Comprehensive Guide

What Bicycle Can Assist With Walking for Mobility Support?
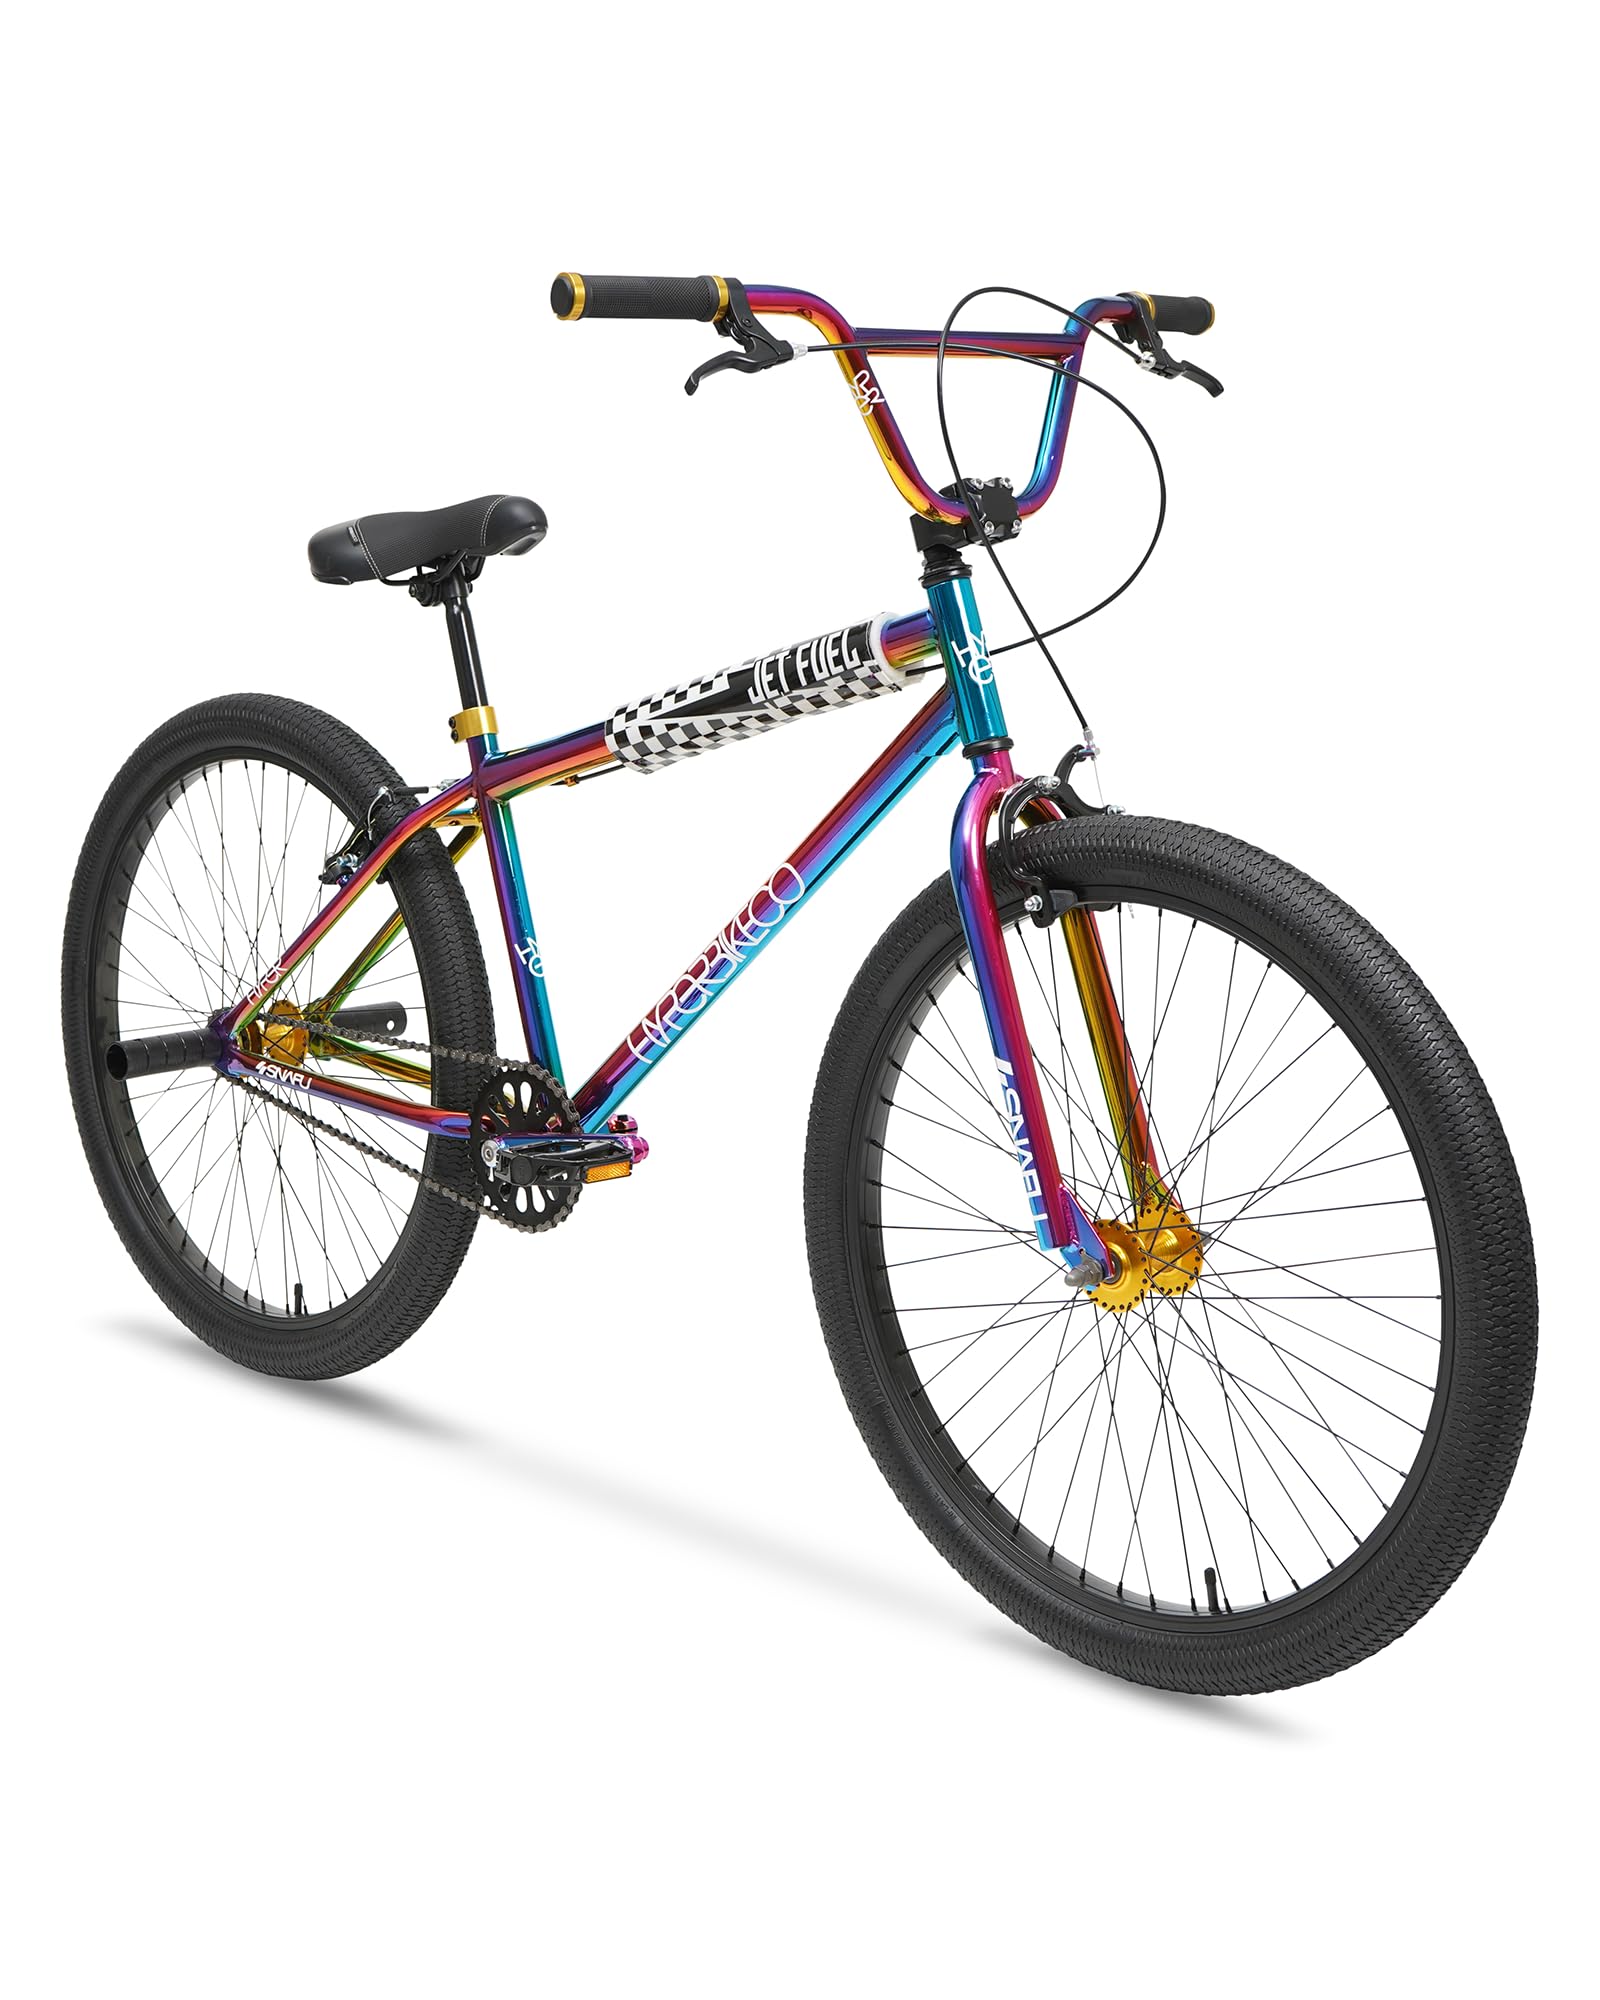
6 Best Adult BMX Bikes in 2023
How To Measure Bicycle Handlebars
How To Make A Gas Powered Bicycle
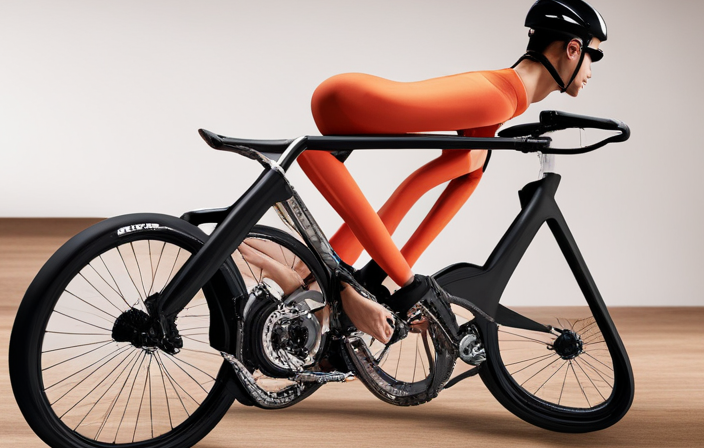
How To Use A Dropper Post On A Gravel Bike
Where Is The Serial Number On A Schwinn Bicycle

-
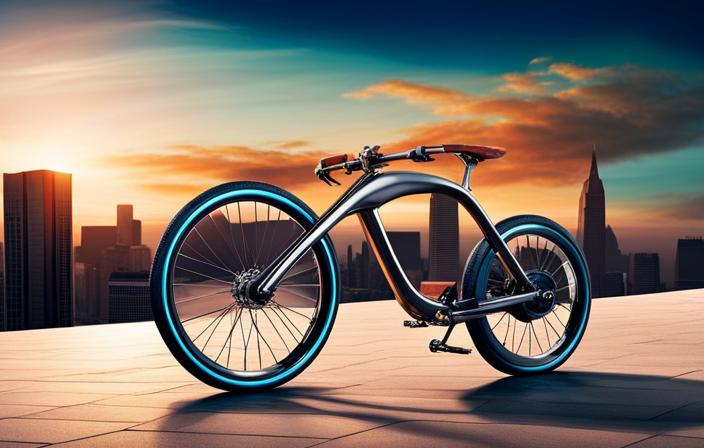 Electric Bike3 months ago
How To Turn Your Bike Into An Electric Generator
-
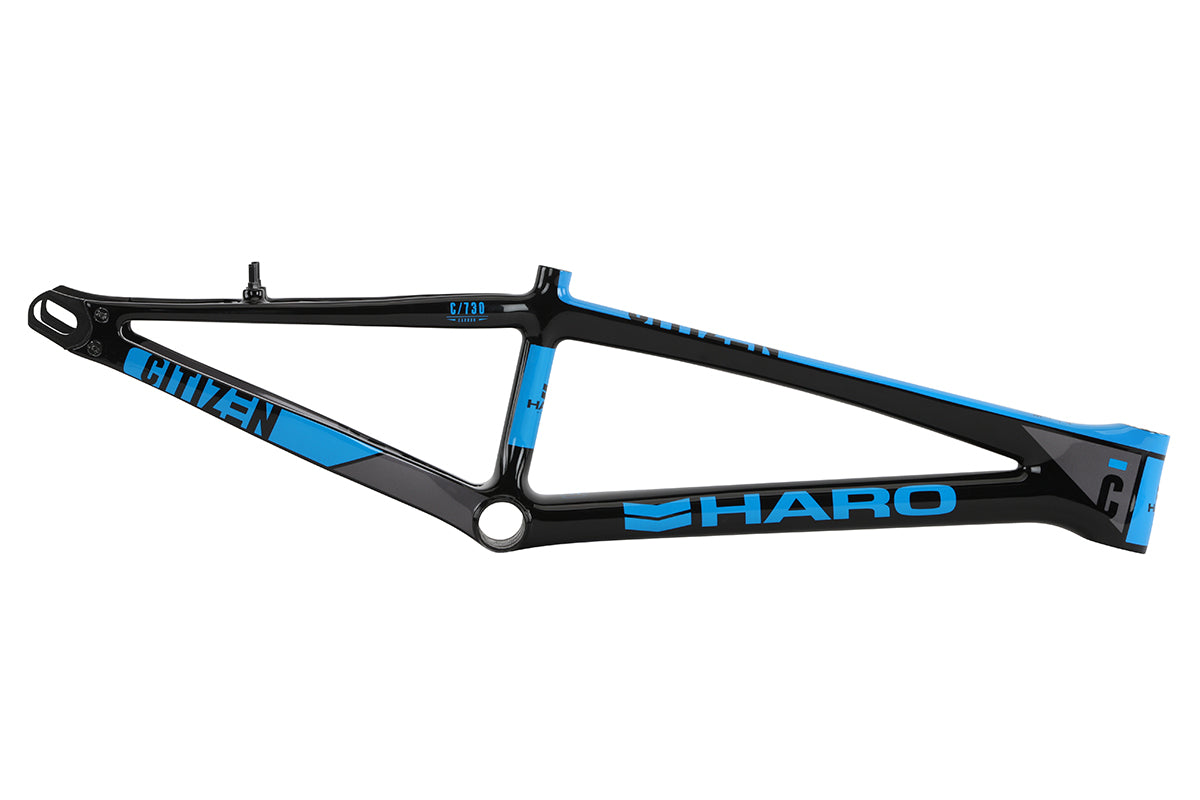 Bike2 months ago
Advantages and Disadvantages of a Carbon Fiber Bike Frame
-
 Beginners Guides2 months ago
A Guide to Right Hybrid Bike Posture: How to Sit on the Bike for Optimal Performance
-
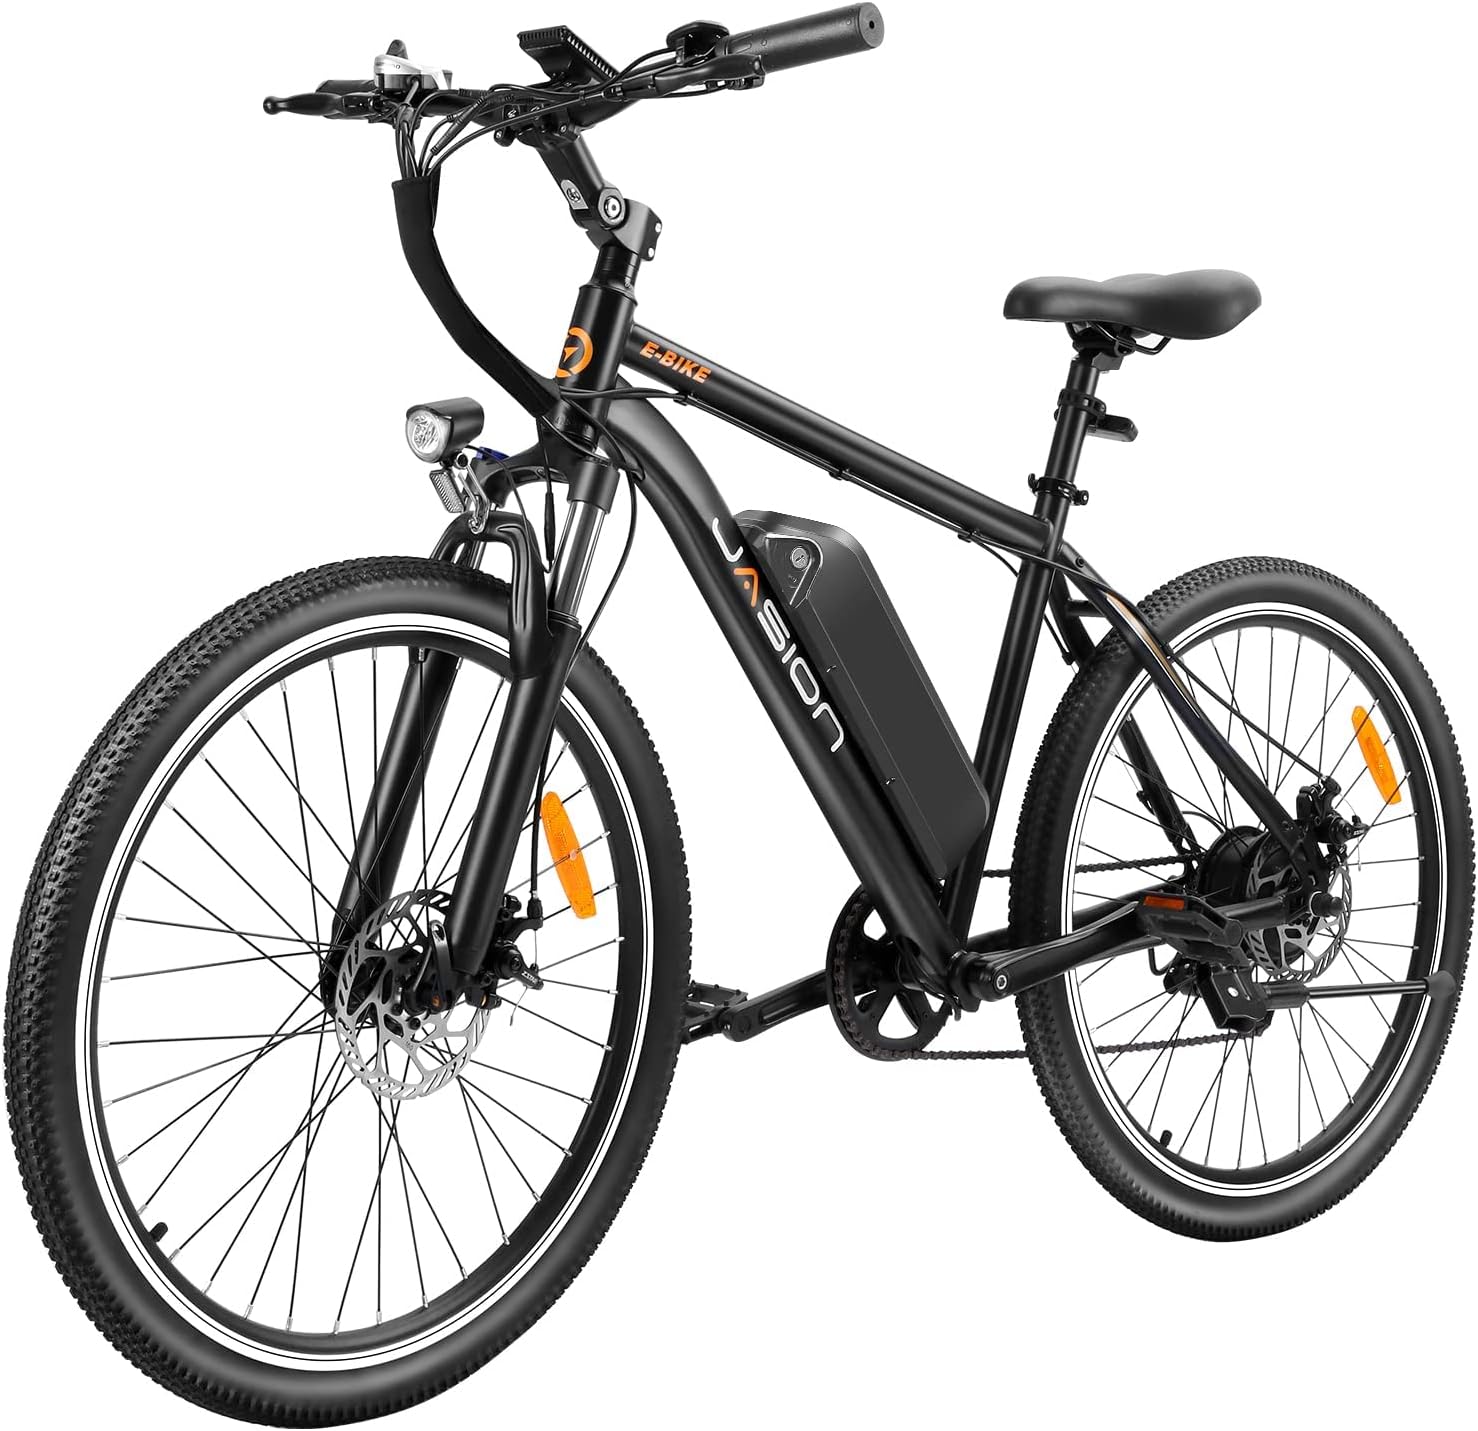 Vetted3 months ago
Jasion EB5 Electric Bike Review: Commute Mountain Bike for Adults
-
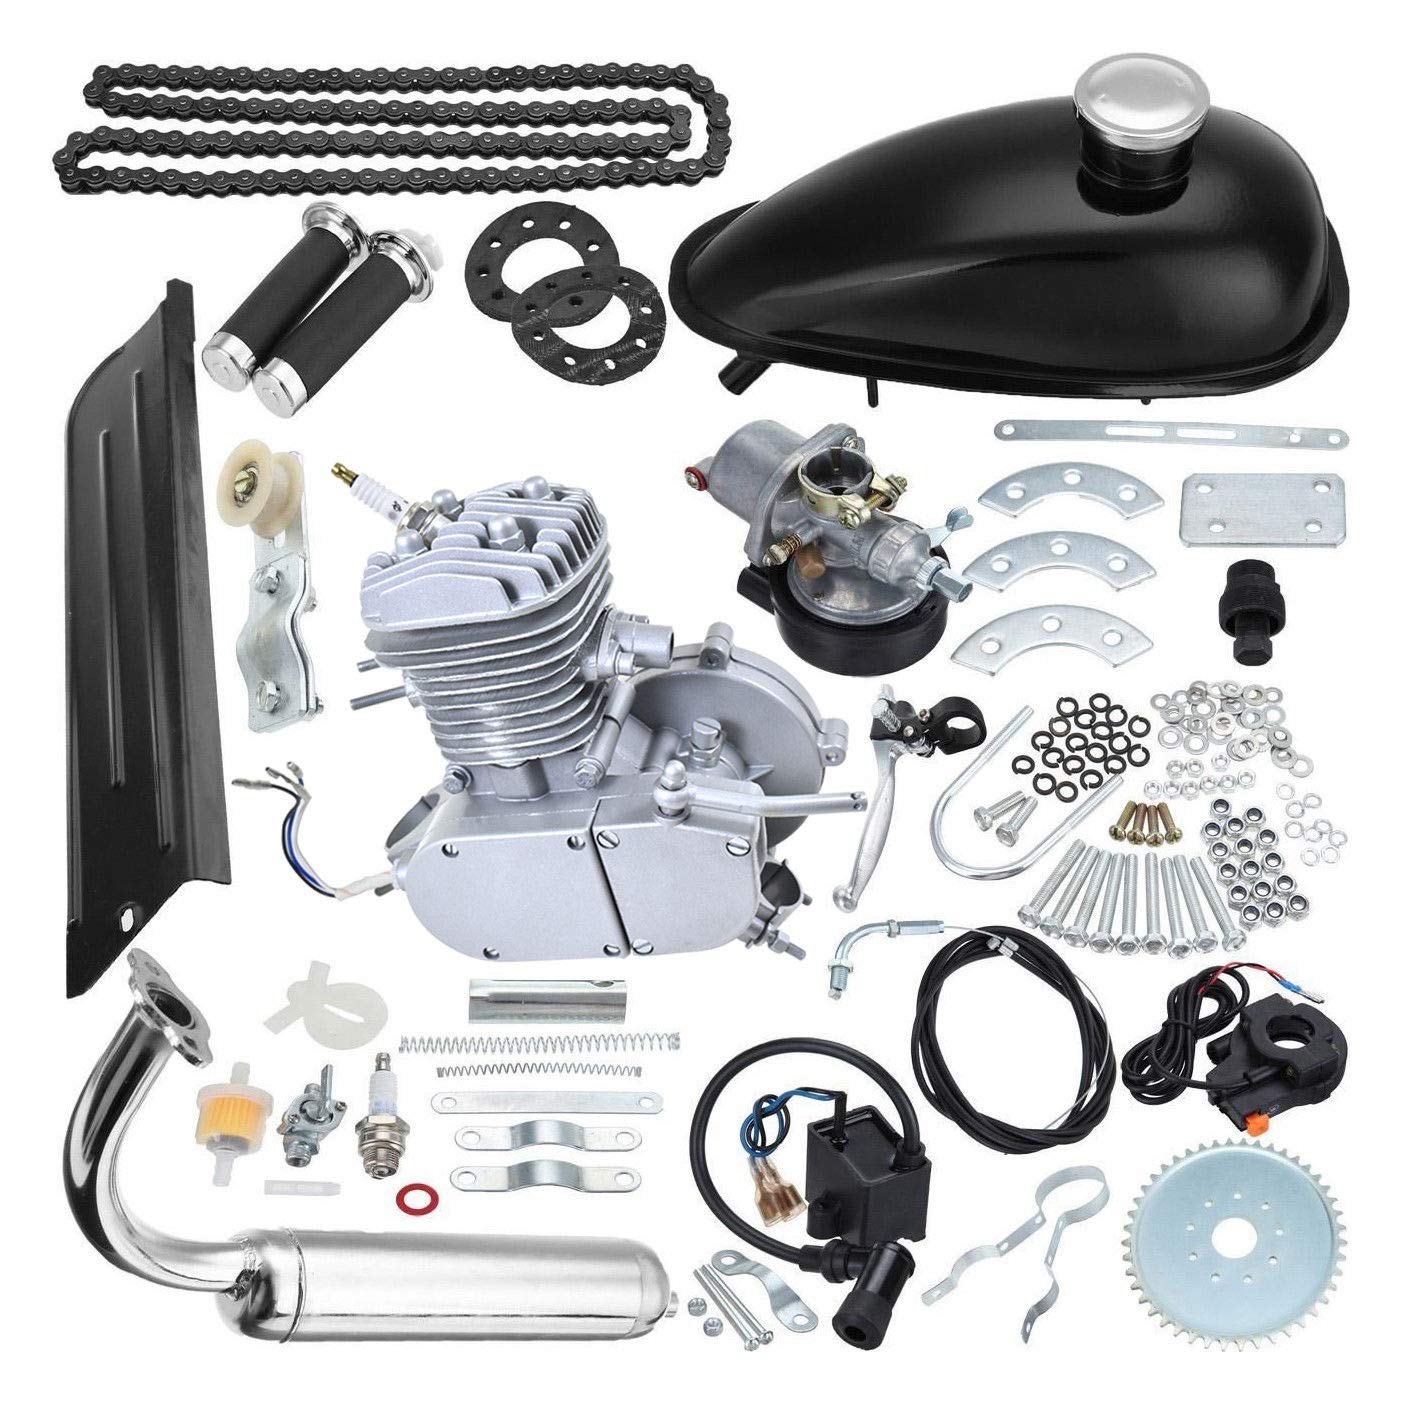 Vetted3 months ago
Review: 80CC Motorized Bicycle Gas Engine Kit with Performance Carburetor
-
 Beginners Guides2 months ago
Where Are KTM Motorcycles Made?
-
 Vetted3 months ago
FREESKY Electric Bike Review: 1000W Motor, 48V Battery, Full Suspension
-
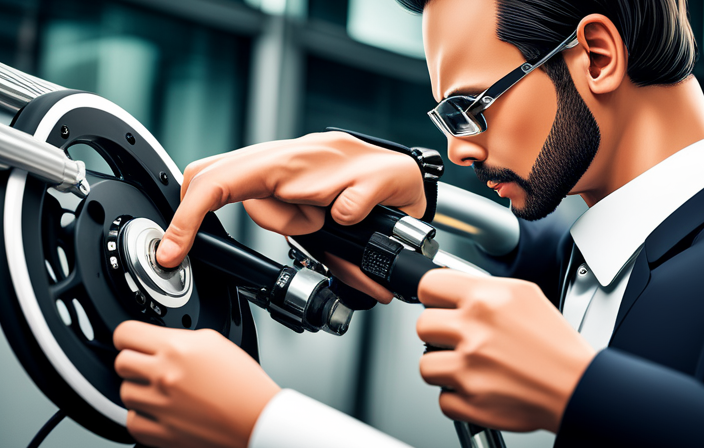 Electric Bike3 months ago
How To Program Electric Bike Controller For More Speed