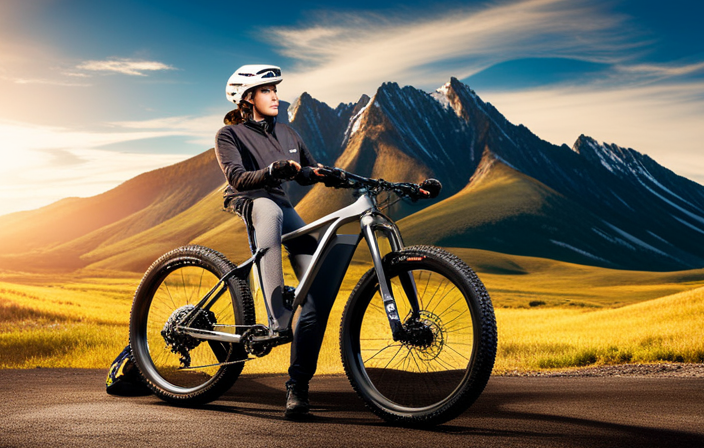
Have you ever wanted to experience the thrill of cruising on an electric bike, but without breaking the bank? Look no further!
In this article, I will guide you through the step-by-step process of making your very own homemade electric bike. Imagine the freedom of zooming down the streets, powered by your own creation.
With just a few tools and materials, along with some handy instructions, you’ll be well on your way to building your very own eco-friendly mode of transportation.
Let’s get started!
Key Takeaways
- The Throttle and Brake Sensors need to be installed during the installation and mounting process.
- The Battery and Other Components need to be properly mounted to ensure the electric bike functions correctly.
- Testing and Checking Functionality is crucial to ensure all connections and mountings are secure and the motor, throttle, and brake sensors are working properly.
- Adjustments and Fine-Tuning may be necessary to optimize the performance of the homemade electric bike.
Assess Your Bicycle and Gather the Necessary Tools and Materials
Before you start, make sure to assess your bicycle and gather all the necessary tools and materials.
When it comes to choosing the right battery for your electric bike, there are a few factors to consider. First, determine the voltage and capacity you need based on the distance you plan to ride. Also, consider the weight and size of the battery, as it will affect the overall balance and handling of your bike.
Next, assess the bicycle’s frame compatibility. Measure the width of the frame to ensure it can accommodate the motor and battery. Look for any obstructions or cables that may interfere with the installation.
Once you have chosen the appropriate battery and assessed the frame compatibility, you can move on to the next step of removing the pedals and rear wheel.
Remove the Pedals and Rear Wheel
First, you’ll need to detach the pedals and remove the rear wheel. To remove the pedals, start by using a pedal wrench to loosen the pedal axle. Turn the wrench counterclockwise for the left pedal and clockwise for the right pedal. Once loose, continue unscrewing the pedals by hand until they are completely off. Be sure to store the pedals in a safe place, as they will not be needed for the electric bike conversion.
Next, remove the rear wheel by releasing the quick-release skewer or loosening the nuts on the axle. If using a quick-release skewer, flip the lever to release tension and then pull the skewer out. If using nuts, use a wrench to loosen and remove them. Carefully slide the wheel out of the dropouts, being cautious not to damage the derailleur or the chain.
Properly storing and maintaining the removed pedals and rear wheel is important to ensure their longevity. Store them in a clean and dry place to prevent rust or damage. Consider lubricating the threads of the pedal axles and the wheel axle before storing to keep them in good condition.
With the pedals and rear wheel removed, we can now move on to the next step of installing the electric motor.
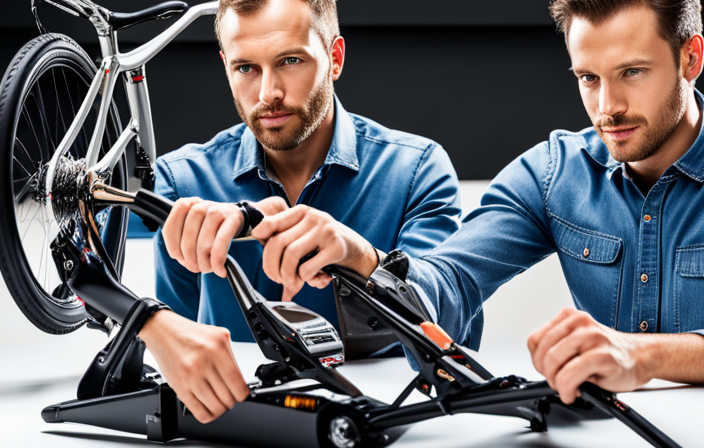
Install the Electric Motor
To install the electric motor on my homemade electric bike, I need to first choose the right electric motor for my needs. This involves considering factors such as power output, voltage, and efficiency.
Once I have selected the appropriate motor, I will then mount it securely to the bicycle frame, ensuring a stable and reliable connection.
Choose the Right Electric Motor for Your Needs
When selecting the right electric motor for your needs, you should consider factors such as power, voltage, and efficiency. Choosing the appropriate electric motor for your electric bike is crucial for achieving optimal performance. Factors to consider when selecting an electric motor for your homemade electric bike include the power output, which determines the speed and acceleration of the bike, and the voltage, which affects the overall power consumption and range. Additionally, you should look at the efficiency of the motor, as a more efficient motor will give you longer battery life.
To grab your attention, here are two sub-lists to consider:
-
Power:
-
Determine the power requirements based on your desired speed and acceleration.
-
Consider the weight of the bike and rider to ensure sufficient power for uphill climbs.
-
Voltage:
-
Check the voltage compatibility with your battery system.
-
Higher voltage motors generally offer higher power output.
Once you have chosen the right electric motor, the next step is to mount the motor to the bicycle frame.
Mount the Motor to the Bicycle Frame
To mount the motor to your bicycle frame, you can follow these simple steps. First, ensure that the motor you have chosen is compatible with your bike frame. Different mounting techniques may be required depending on the frame design. The table below provides an overview of common motor mounting techniques for various frame types:
| Frame Type | Mounting Technique |
|---|---|
| Step-through | Rear rack or mid-drive |
| Mountain | Mid-drive or hub motor |
| Road | Rear rack or mid-drive |
| Folding | Rear rack or front hub motor |
Once you have determined the appropriate mounting technique for your frame, gather the necessary tools and hardware. Carefully position the motor on the frame and mark the mounting holes. Use a drill to create pilot holes, then secure the motor using bolts or screws. Ensure that the motor is firmly attached to the frame to prevent any movement during operation.
Next, you can move on to connecting the motor to the battery and controller.
Connect the Motor to the Battery and Controller
In order to ensure optimal performance for my homemade electric bike, it is crucial to choose the right battery. The battery should have a high capacity and be compatible with the motor.
Once the battery is selected, I will connect the motor to it using the appropriate wiring and connectors.
Finally, I will install the controller to regulate the motor’s power output, ensuring a smooth and controlled ride.
Choose the Right Battery for Your Electric Bike
First, make sure you have chosen the right battery for your electric bike. This is crucial as it determines the overall performance and range of your bike. When choosing the right battery capacity, consider factors such as your desired range, weight capacity, and terrain. Here are three key considerations to keep in mind:
-
Battery Capacity: Determine how far you intend to ride on a single charge. Higher capacity batteries offer longer range but may increase the weight of your bike.
-
Understanding Battery Voltage Requirements: Check the voltage requirements of your motor and controller. Ensure that the battery you choose matches these requirements to ensure proper functionality.
-
Battery Type: Consider the different types of batteries available, such as lithium-ion or lead-acid. Lithium-ion batteries are lightweight, have a longer lifespan, and offer better performance.
Now that you have chosen the right battery, it’s time to connect the motor to the battery and controller, which will be discussed in the next section.
Connect the Motor to the Battery
After carefully selecting the right battery for your electric bike, it is time to move on to the crucial step of connecting the motor to the battery. This step requires attention to detail and precision to ensure a smooth and efficient operation of your homemade electric bike.
Motor connection troubleshooting is an essential aspect of this process. It involves checking the wiring connections, ensuring they are secure and properly aligned. Additionally, it is important to maximize battery efficiency by optimizing the power flow from the battery to the motor. This can be achieved by using appropriate gauge wires and minimizing resistance.
By following these steps, you can ensure that your electric bike’s motor is seamlessly connected to the battery, providing reliable and efficient power.
Now, let’s move on to the next section and learn how to install the controller to regulate the motor’s power.
Install the Controller to Regulate the Motor’s Power
To install the controller and regulate the power of your motor, you’ll need to follow these steps.
Proper wiring is crucial for a successful controller installation. Start by identifying the wires coming from the motor and battery. Connect the motor wires to the corresponding terminals on the controller. Then, connect the battery wires to the appropriate terminals on the controller as well. Make sure all connections are tight and secure. Once the wiring is complete, double-check the connections to ensure they are correct.
Properly regulating the motor’s power is essential for a smooth and controlled ride. If you encounter any issues with motor power regulation, start by checking the wiring connections. Loose or faulty connections can cause power irregularities. Additionally, consult the controller’s manual for troubleshooting tips and common issues. By addressing these problems, you can ensure optimal motor performance and a safer riding experience.
Now, let’s move on to the next step, which is installing the throttle and brake sensors.
Install the Throttle and Brake Sensors
Attach the throttle and brake sensors to the handlebars using zip ties. The throttle sensitivity is an important aspect to consider when installing the throttle sensor. It determines how the motor responds to the input from the rider. Adjusting the throttle sensitivity allows for a more customized riding experience. The brake sensor placement is crucial as it ensures the motor cuts off power when the brakes are engaged, enhancing safety. Make sure the brake sensors are securely fastened to the handlebars and aligned properly with the brake levers. It is recommended to refer to the manufacturer’s instructions for specific installation details.
| Throttle Sensitivity | Brake Sensor Placement |
|---|---|
| Allows customization | Enhances safety |
| of riding experience | when brakes are used |
Now that the throttle and brake sensors are installed, it’s time to move on to the next step: mounting the battery and other components.
Mount the Battery and Other Components
Now that the throttle and brake sensors are in place, it’s time to mount the battery and other components. The battery placement is crucial for the overall balance and stability of the electric bike. I recommend finding a secure location, such as the center of the frame or the rear rack, to mount the battery. Make sure to use sturdy mounting brackets or straps to ensure it stays in place during rides.
Next, it’s important to make proper wiring connections for the battery and other components. Connect the positive and negative terminals of the battery to the corresponding terminals on the controller. Double-check the connections to ensure they are secure and properly insulated.
Once the battery and other components are mounted and wired, it’s time to test the electric bike’s functionality. This will involve checking the throttle response, brake functionality, and overall performance of the bike. It’s important to ensure everything is working smoothly before taking it out for a ride.
Test the Electric Bike’s Functionality
Before taking your homemade electric bike out for a ride, it’s important to double-check all the connections and mountings to ensure they’re secure.
This will help prevent any unexpected issues while on the road.
Additionally, it’s crucial to test the motor, throttle, and brake sensors to ensure they’re functioning properly.
This will ensure a smooth and safe ride.
Double-Check All Connections and Mountings
Make sure you go over all the connections and mountings on your homemade electric bike to ensure everything is secure.
Checking connections is an important step in ensuring the functionality and safety of your electric bike. Start by inspecting all the electrical connections, making sure they are properly connected and tightly secured. Look for any loose or damaged wires and replace them if necessary. Pay close attention to the battery connections, as a loose connection can lead to power loss or even a potential safety hazard.
Additionally, check the mountings of all the components, such as the motor, battery, and controller. Ensure that they are firmly attached to the frame and there is no excessive movement or play.
Once you have double-checked all the connections and mountings, you can move on to testing the motor, throttle, and brake sensors to ensure smooth operation.
Test the Motor, Throttle, and Brake Sensors
To test the motor, throttle, and brake sensors, you should start by ensuring they are all functioning properly. Here are the steps to take:
-
Testing the motor’s performance:
-
Connect the motor to a power source and turn it on.
-
Observe if the motor spins smoothly and quietly.
-
Check if the motor responds correctly to throttle input.
-
Measure the motor’s speed and torque using a tachometer.
-
Verify that the motor doesn’t overheat during operation.
-
Troubleshooting common sensor issues:
-
Inspect the throttle and brake sensors for any physical damage or loose connections.
-
Test the throttle by gradually increasing the speed and making sure it responds accurately.
-
Check the brake sensors by applying the brakes and ensuring they disengage the motor.
Once you have tested and confirmed the functionality of these components, you can proceed to make adjustments and fine-tune the electric bike for optimal performance.
Make Adjustments and Fine-Tune the Electric Bike
Once you’ve assembled your electric bike, you’ll want to make adjustments and fine-tune it for optimal performance.
Fine-tuning your electric bike is crucial to ensure that it performs at its best and meets your specific needs. To fine-tune the performance, start by adjusting the motor settings. You can tweak the power output and acceleration to suit your preferences.
Additionally, optimizing the efficiency of your electric bike is essential for maximizing its battery life. Adjust the controller settings to ensure that the power is distributed efficiently and that you’re getting the most out of your battery.
Fine-tuning your electric bike will not only enhance its performance but also improve your overall riding experience. Before moving on to ensuring safety and legal compliance, it’s important to make these adjustments first.
Ensure Safety and Legal Compliance
For optimal safety and to comply with legal regulations, it’s important to thoroughly inspect and ensure that your electric bike meets all required safety standards.
Start by checking the frame for any cracks or damage, as a sturdy frame is crucial for stability.
Make sure the brakes are working properly and adjust them if necessary.
Check the tires for proper inflation and tread depth to ensure good traction.
Install reflectors and lights to enhance visibility, especially when riding at night.
Additionally, wear a helmet and other protective gear to reduce the risk of injury.
Keep in mind that different regions may have specific legal requirements, such as speed limits or age restrictions.
By following these safety guidelines and legal requirements, you can confidently enjoy your homemade electric bike and explore the open road.
Enjoy Your Homemade Electric Bike
Now that you have your DIY e-bike ready, it’s time to fully enjoy the ride. Homemade electric bikes offer numerous benefits that make them a great choice for transportation.
Firstly, they are cost-effective, as you have built it yourself using affordable components. Additionally, homemade electric bikes are environmentally friendly, emitting zero emissions and reducing your carbon footprint. Riding your homemade electric bike also provides health benefits, as it promotes physical activity and can be a fun way to stay fit.
To ensure that your homemade electric bike remains in good condition, regular maintenance is crucial. Here are some tips to keep it running smoothly.
Firstly, regularly check the tire pressure and ensure they are properly inflated. This will enhance the bike’s performance and increase its lifespan. Secondly, clean the bike regularly to prevent the accumulation of dirt and debris. Lastly, inspect the brake system regularly to ensure it is functioning properly and make any necessary adjustments or repairs.
By following these maintenance tips, you can enjoy your homemade electric bike for a long time to come.
Frequently Asked Questions
How much does it cost to convert a regular bicycle into an electric bike?
Converting a regular bicycle into an electric bike can cost anywhere from $300 to $1500. DIY conversion kits are cheaper but require technical skills and tools, while professional installation ensures a high-quality result with additional costs.
Can I use any type of bicycle for the conversion, or are there specific requirements?
Any type of bicycle can be used for an electric bike conversion, but there are specific requirements to consider. The electric bike conversion process has its advantages and disadvantages, which I will explain in detail.
How long does the battery of an electric bike usually last before needing to be recharged?
The battery life of an electric bike can vary depending on factors such as the battery capacity and the level of assistance used. Generally, a typical electric bike battery can last around 20-50 miles before needing to be recharged, with charging frequency typically ranging from once every 2-4 days.
Are there any weight restrictions for the rider when using an electric bike?
Weight restrictions for electric bikes vary depending on the model, but most can support riders up to 250 pounds. Safety precautions include wearing a helmet, following traffic laws, and maintaining a balanced weight distribution to ensure stability while riding.
Is it possible to switch back to a regular bicycle after converting it into an electric bike?
Switching back from an electric bike to a regular bicycle is possible by removing the electric components. Advantages include improved exercise and cost savings, but disadvantages include losing the convenience and speed of an electric bike.
Conclusion
In conclusion, creating a homemade electric bike has been a fulfilling and rewarding experience for me.
As I rode on my newly transformed bike, the exhilaration and sense of accomplishment surged through my veins.
The meticulous process of assessing, gathering, and installing the necessary components may seem daunting, but the end result is truly worth it.
So, if you’re looking to embark on an exciting project that combines innovation and adventure, I highly recommend building your own electric bike.
Let the thrill of the open road await you!