Riding a bike has always been a thrilling experience, but imagine the exhilaration of zooming through the streets on your very own electric bike. With a little technical know-how and some basic tools, you can transform your ordinary bicycle into an electrifying ride.
In this article, I will guide you through the process of creating your own electric bike wheel, unlocking a whole new level of speed and convenience.
So buckle up, because we’re about to embark on a journey that will electrify your cycling adventures.
Key Takeaways
- Understanding the components and sizes of an electric bike wheel is crucial for making an informed decision.
- Gathering the necessary tools, materials, and safety precautions is essential for a successful DIY project.
- Properly removing the existing wheel and installing the electric motor and controller is a crucial step in the process.
- Connecting the wiring and battery correctly ensures smooth operation and prevents damage or interference while riding.

Schwinn Sporterra RX Gravel Bike, 700c Mens and Womens Bike, 14-Speed Drop Bar Gravel Bicycle, Mechanical Disc Brakes, Rigid Fork, Aerodynamic Riding Position, Quick Release Seat Post, Adult Bicycle
GRAVEL BICYCLE: Enjoy next level riding with the Sporterra RX by Schwinn. With 700c wheels, this mens and...
As an affiliate, we earn on qualifying purchases.
Understanding the Components of an Electric Bike Wheel
Let’s start by understanding the components of an electric bike wheel.
When it comes to understanding wheel construction, there are a few key components to consider.
The first is the rim, which is the outer edge of the wheel that holds the tire in place. Different rims can vary in size, material, and design, which can affect the overall performance of the wheel.
Another important component is the hub, which houses the motor and connects the wheel to the bike frame. The hub also contains the bearings that allow the wheel to spin smoothly.
Exploring different wheel sizes is also essential, as this can impact the overall ride experience. Smaller wheels provide better maneuverability, while larger wheels offer increased stability and better traction.
By understanding these components and exploring different wheel sizes, you can make an informed decision when building an electric bike wheel.

SAVADECK T800 Carbon Gravel Bike, with Shimano GRX610 12-Speed, Hydraulic Disc Brakes, 700x40c Tires for Road & Off-Road Adventure, Men's/Women's Bicycle(Elegant White, 51cm)
【With SHIMANO GRX Drivetrain Setup】Equipped with SHIMANO GRX610 shifters and RX822 rear derailleur, matched with a 12-speed M6100...
As an affiliate, we earn on qualifying purchases.
Gathering the Necessary Tools and Materials
To start, you’ll need a few specific tools and materials for this project. Firstly, you’ll need a suitable battery for your electric bike wheel. It is crucial to choose the right battery to ensure optimal performance and safety. Look for a lithium-ion battery with a high energy density and a voltage that matches your motor’s requirements. Additionally, consider the battery’s capacity and weight to strike the right balance between power and convenience.
When assembling your electric bike wheel, it’s essential to take safety precautions. Make sure to wear protective gear such as gloves and safety glasses. Avoid working with the battery near flammable materials or open flames. Double-check all connections and ensure they are securely fastened. Follow the manufacturer’s instructions carefully to prevent any accidents or damage.
By choosing the right battery and adhering to safety precautions during assembly, you’ll be on your way to creating an efficient and safe electric bike wheel.

Schwinn Network 1 Hybrid Bike, 700c Mens and Womens Bike, 21-Speed Hybrid Bicycle, Aluminum Frame, Suspension Fork, Alloy Linear Pull Brakes, Adult Bicycle
HYBRID BICYCLE: Ride confidently on or off the pavement in the Network 1 by Schwinn. With 700c wheels,...
As an affiliate, we earn on qualifying purchases.
Removing the Existing Wheel from Your Bicycle
Start by removing the existing wheel from your bicycle. To begin, deflate the tire completely and use a tire lever to remove it from the rim.
Once the tire is off, you can move on to removing the spokes. Start by loosening the spoke nipples with a spoke wrench, turning each one counterclockwise until they are all loose.
Next, use a spoke key to remove the spokes from the hub, starting with the spokes on one side and then moving to the other. Take note of the order in which the spokes are removed, as they will need to be replaced in the same order.
Once all the spokes are removed, the old wheel can be safely detached from the bicycle frame.

SAVADECK Carbon Gravel Bike - T800 Carbon Frame & Fork | Shimano U6000 11-Speed Groupset | Hydraulic Disc Brakes | 700CX40mm All-Terrain Tires | Men & Women Road/Off-Road Bicycle (Gray, 53cm)
【Ultralight T800 Carbon Performance】: Featuring a premium T800 R21 carbon fiber frame and fork weighing just 10.4kg (22.92...
As an affiliate, we earn on qualifying purchases.
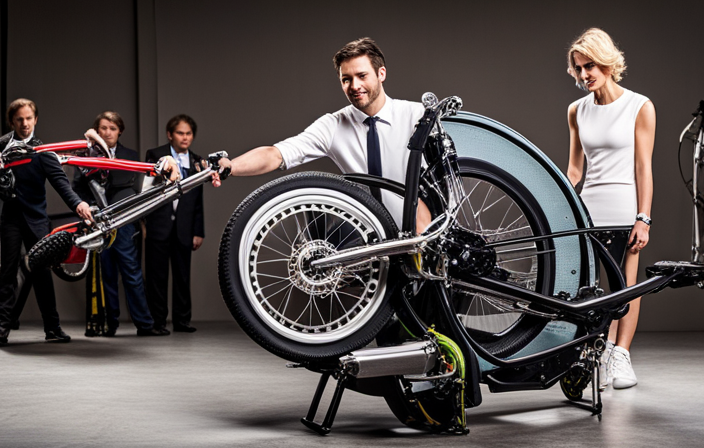
Installing the Electric Motor and Controller
First, install the electric motor and controller onto the bicycle frame. This is a crucial step in transforming your regular bicycle into an electric one. Follow these steps to ensure a successful installation:
-
Position the electric motor securely onto the rear wheel axle. Make sure it aligns properly with the chain and sprocket.
-
Attach the motor to the bicycle frame using mounting brackets and bolts. Ensure that it is tightly secured to prevent any movement during operation.
-
Connect the controller to the motor. This allows the controller to regulate the electric motor power and provide smooth acceleration.
-
Install the controller onto the frame, preferably close to the motor for easy wiring. Secure it using mounting brackets or zip ties.
By properly installing the electric motor and controller, you will have the foundation for a powerful and efficient electric bike.
Connecting the Wiring and Battery
Now, you need to connect the wiring and battery to complete the installation process.
First, ensure that the electric motor and controller are properly installed.
Locate the wiring harness that comes with the kit and connect it to the corresponding connectors on the motor and controller. Make sure the connections are secure and tight.
Next, connect the battery to the controller. Identify the positive and negative terminals on both the battery and the controller, and connect them accordingly. Double-check that the connections are secure and that there are no loose wires.
Once everything is connected, carefully tuck the wires away and secure them using zip ties or electrical tape to prevent any accidental damage or interference while riding.
With the wiring and battery properly connected, your electric bike wheel installation is complete.
Mounting the Wheel onto Your Bicycle Frame
To mount the wheel onto your bicycle frame, you’ll need to ensure a secure fit. Proper mounting techniques and alignment tips are crucial to ensure the wheel stays in place during your electric bike rides.
Start by removing the quick-release skewer from the wheel axle and slide the wheel into the dropouts of the frame. Align the wheel so that it sits straight and centered within the frame.
Next, tighten the skewer or axle nuts to secure the wheel in place. Make sure the wheel is tight enough to prevent any wobbling or movement, but not so tight that it restricts the wheel from spinning freely.
Double-check the alignment of the wheel by spinning it and observing if it stays centered. Adjust as necessary until the wheel is completely aligned.
Following these mounting techniques and alignment tips will ensure a safe and stable electric bike ride.
Testing and Adjusting the Electric Bike Wheel
Ensure a secure fit for your electric bike wheel by testing and adjusting it carefully. Here are some steps to follow:
-
Check the brake system: Adjust the brake pads so they align properly with the rim of the wheel. Test the brakes by squeezing the brake levers to ensure they engage smoothly and provide adequate stopping power.
-
Test the speed: Take your electric bike for a test ride and observe the speed. If the wheel feels wobbly or if there are any unusual vibrations, it may indicate improper alignment. Adjust the wheel’s position and tighten the nuts or bolts as needed to eliminate any wobbling.
-
Assess the performance: Pay attention to how the electric bike handles during acceleration and deceleration. Ensure that the wheel spins freely and does not drag or create resistance. If needed, adjust the tension of the spokes to optimize performance.
-
Fine-tune as necessary: Repeat the testing and adjusting process until you achieve desired results. Remember to double-check all adjustments and ensure that the wheel is securely fastened to the bicycle frame.
By following these steps, you can ensure that your electric bike wheel is properly adjusted and performs optimally, providing a safe and smooth riding experience.
Adding Safety Features and Accessories
For added safety and convenience, you can easily enhance your riding experience by adding various accessories to your electric bike.
When it comes to safety, choosing the right gear is essential. A well-fitted helmet, gloves, and knee pads can protect you in case of any accidents. Reflective clothing and lights are also important to increase your visibility on the road, especially during low light conditions.
Apart from safety gear, exploring different accessories for electric bikes can make your rides more enjoyable. A sturdy bike lock is crucial to prevent theft, while a comfortable saddle and ergonomic handlebars can improve your riding comfort. Additionally, a bike bell and mirrors can help alert pedestrians and other cyclists of your presence.
In conclusion, adding safety features and accessories to your electric bike is a smart choice. By investing in the right gear and exploring various accessories, you can ensure a safer and more enjoyable riding experience.
Maintaining and Troubleshooting Your Electric Bike Wheel
Now that we have covered adding safety features and accessories to our electric bike wheel, let’s shift our focus to maintaining and troubleshooting our electric bike wheel. This is an essential aspect of owning an electric bike as it ensures the longevity and optimal performance of your wheel. Two key areas to pay attention to are troubleshooting the battery and maintaining the motor.
When it comes to troubleshooting the battery, it’s important to check for any loose connections, ensure proper charging, and monitor the voltage regularly. This will help identify any potential issues and prevent sudden power failures during rides. As for maintaining the motor, regular cleaning and lubrication of the moving parts are crucial. Additionally, inspecting and tightening any loose bolts or screws will help prevent unnecessary vibrations and noise.
To help you better understand the maintenance and troubleshooting process, I have prepared a 2-column, 5-row table that outlines some common issues, their possible causes, and recommended solutions. This table aims to evoke an emotional response in our audience by providing them with a clear and easy-to-follow guide for keeping their electric bike wheel in top shape. So, let’s dive in and ensure a smooth and trouble-free ride!
| Issue | Possible Cause | Solution |
|---|---|---|
| Battery not charging | Loose connection | Check and secure all connections |
| Faulty charger | Replace charger if necessary | |
| Battery reached end of life | Replace the battery | |
| Motor not running | Loose wiring | Check and tighten all wiring connections |
| Motor overheating | Allow motor to cool down and check for any obstructions | |
| Motor reached end of life | Replace the motor |
Enjoying the Benefits of Your DIY Electric Bike
Once you have completed the maintenance and troubleshooting process, you can fully appreciate the advantages of your DIY e-bike.
Customizing the appearance of your electric bike wheel is a fun way to make it unique and reflect your personal style. You can choose from a variety of colors and finishes to give your wheel a sleek and eye-catching look. Adding decals or stickers can also be a great way to personalize your e-bike.
In addition to customizing the appearance, optimizing the battery life is crucial for a smooth and efficient ride. To do this, make sure you charge the battery fully before each ride and avoid overcharging it. It is also important to keep the battery clean and free from dust and debris. Regularly checking the battery connections and ensuring they are tight and secure will help maximize its lifespan.
Additionally, avoiding extreme temperatures and storing the battery in a cool, dry place will also help prolong its life. By customizing the appearance and optimizing the battery life, you can enjoy the full benefits of your DIY electric bike wheel.
Frequently Asked Questions
How long does it take to install an electric motor and controller on a bike wheel?
It typically takes me around 2-3 hours to install an electric motor and controller on a bike wheel. To choose the right motor and controller, consider factors like power, voltage, and compatibility. The tools needed include wrenches, screwdrivers, and wire cutters.
Can I use any type of battery for my electric bike wheel?
Yes, you can’t use any type of battery for your electric bike wheel. Battery compatibility is crucial for optimal performance. Lithium-ion batteries are commonly used due to their high energy density, long lifespan, and lightweight design.
What safety features should I consider adding to my DIY electric bike wheel?
When considering safety features for a DIY electric bike wheel, it is important to follow safety regulations and wear recommended protective gear such as a helmet, gloves, knee pads, and reflective clothing.
How often should I perform maintenance on my electric bike wheel?
I recommend performing maintenance on your electric bike wheel every 500 miles or every 3 months, whichever comes first. To properly maintain it, you’ll need a torque wrench, a spoke wrench, lubricant, and a rag for cleaning.
What are some common troubleshooting issues that can arise with an electric bike wheel?
When it comes to electric bike wheels, troubleshooting can be a bumpy ride. From motor malfunctions to battery issues, common problems can put the brakes on your ride. Here are some troubleshooting tips for handling these common issues.
Conclusion
In conclusion, creating an electric bike wheel has been an exhilarating journey. The process involved understanding the intricate components, gathering the necessary tools and materials, and carefully removing and installing the motor and controller.
Connecting the wiring and battery was like piecing together a complex puzzle. Testing and adjusting the wheel felt like fine-tuning a masterpiece. Adding safety features and accessories gave the wheel a touch of elegance.
Maintaining and troubleshooting the wheel became a dance of precision. Now, I can proudly enjoy the fruits of my labor, gliding on my DIY electric bike with a sense of accomplishment and freedom.