I recall the sense of liberation I experienced the moment I mastered cycling. The breeze flowing through my hair, the rush of moving swiftly, and the noise of the tires spinning underneath. It felt akin to soaring.
But as I grew older, I started to wonder how bikes were made. How could something so simple yet so intricate be put together? That’s when I decided to learn how to make a bicycle.
Making a bike is like building a puzzle. It requires attention to detail, patience, and a steady hand. It’s a process that involves gathering tools and materials, assembling the frame, installing the drivetrain and brakes, adding the wheels and tires, and fine-tuning the bike until it’s ready to ride.
But the satisfaction of creating something from scratch, something that can take you places, is worth the effort. So, let’s get started on building your very own bicycle.
Key Takeaways
- Building a bike requires attention to detail, patience, and a steady hand, with high-quality components chosen for durability and reliability.
- Assembling the frame involves attaching the fork and headset, installing the bottom bracket and crankset, and adding the seatpost and saddle, with regular maintenance of the headset and bottom bracket important for optimal performance.
- The drivetrain must be installed properly for efficient shifting, with the brakes adjusted properly for safety and regular maintenance of wheels and tires important for a smoother ride and to prevent accidents or damage.
- Small adjustments and upgrades can be made to enhance the riding experience, such as adjusting the saddle height, swapping out pedals, and upgrading the gear system, with periodic tune-ups by a professional recommended.
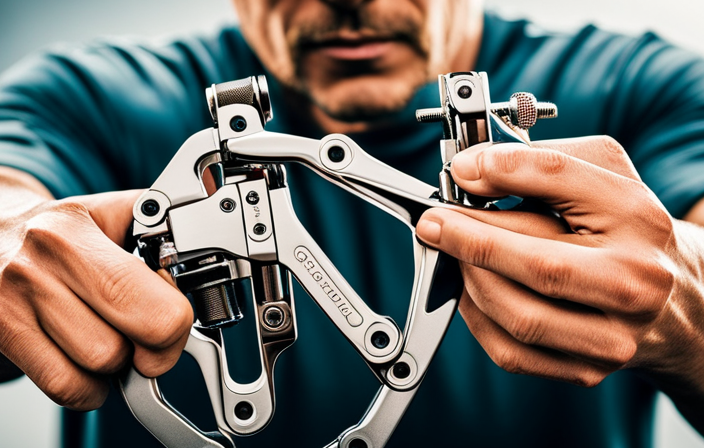
Gather Your Tools and Materials
Don’t forget to grab all of the necessary tools and materials before starting the project. For this project, you’ll need a hacksaw, a wrench, a drill, a screwdriver, pliers, a measuring tape, and a level.
You’ll also need a frame kit, which should include all of the necessary tubes, joints, and connectors for the frame. In addition, you’ll need a seat, handlebars, wheels, pedals, and a chain.
When selecting your materials, make sure to choose high-quality components that’ll be durable and reliable. Look for tubes and connectors made from lightweight and sturdy materials such as aluminum or carbon fiber. For the wheels, select rims that are strong and lightweight, with durable spokes and a reliable hub. Additionally, choose a comfortable and supportive seat and handlebars that fit your body type and riding style.
Now that you have all of the necessary tools and materials, it’s time to assemble the frame.
Assemble the Frame
Now that I’ve gathered all the necessary tools and materials, it’s time to start assembling the frame of my bicycle.
The first step is to attach the fork and headset, which will allow the handlebars to steer the front wheel.
Next, I’ll install the bottom bracket and crankset, which will be responsible for turning the rear wheel.
Finally, I’ll add the seatpost and saddle, which will provide a comfortable and stable seat for me to ride on.
Attach the Fork and Headset
To properly assemble your bicycle, it’s crucial to attach the fork and headset. The first step is to place the fork into the head tube of the frame and ensure proper alignment. Make sure the fork is centered and the steerer tube is vertical. Tighten the headset by using a headset wrench to adjust the upper and lower race cups until there is no play in the fork.
It’s important to note that maintaining the headset is crucial for optimal performance. Regularly check the headset for any looseness and adjust as necessary. Also, ensure that the bearings are properly greased and replace them if they are worn or damaged.
With the fork and headset properly attached, the next step is to install the bottom bracket and crankset, which will complete the foundation of the bicycle.
Install the Bottom Bracket and Crankset
You’ll feel the excitement building as you slide the bottom bracket into the frame and tighten it securely, ready to attach the sleek new crankset that’ll power you through your next adventure.
To ensure optimal performance, it’s important to consider factors such as bottom bracket maintenance and crank arm length selection.
When selecting a bottom bracket, it’s important to choose one that matches the frame’s specifications. Additionally, regular maintenance such as cleaning and lubrication will help prevent wear and tear on the bearings.
When it comes to selecting crank arm length, it’s important to consider factors such as riding style and body proportions. A shorter crank arm may be more suitable for riders with shorter legs or those who prefer a higher cadence, while a longer crank arm may be better for riders with longer legs or those who prefer a slower cadence.
Finally, make sure to properly torque the crank bolts and align the chainrings for optimal performance.
As you finish up installing the bottom bracket and crankset, it’s time to move on to the next step: adding the seatpost and saddle.
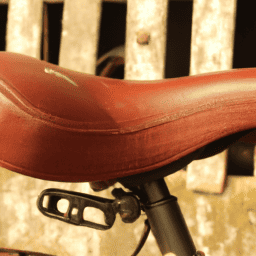
Add the Seatpost and Saddle
Adding the seatpost and saddle is a crucial step in ensuring a comfortable and efficient ride on your newly assembled bike. When it comes to choosing the right saddle, there are a few things to keep in mind. First, consider the type of riding you will be doing. If you plan on doing long distance rides, you may want a saddle with more padding and a wider seat. However, if you plan on doing more aggressive riding, a narrower seat with less padding may be more suitable.
Next, adjust the seatpost height to ensure that you are in a comfortable riding position. The right seatpost height is important for efficiency and comfort. To determine the correct height, sit on the saddle and place your heel on the pedal at its furthest point from the seat. Your leg should be almost fully extended, but not locked out. Adjust the seatpost accordingly and tighten the clamp bolt to secure it in place.
Now that the saddle and seatpost are in place, it’s time to move on to the next step – installing the drivetrain and brakes.
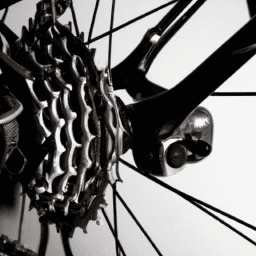
Install the Drivetrain and Brakes
Now it’s time to get your hands dirty and install the drivetrain and brakes onto your bicycle. The drivetrain consists of the chain, pedals, cranks, and chainrings, which work together to transfer power from your legs to the rear wheel.
Before installing the drivetrain, make sure to clean and lubricate the chain, and check for any damage or wear on the components. Regular drivetrain maintenance is key to ensuring smooth and efficient shifting.
To install the drivetrain, begin by attaching the cranks and pedals to the bottom bracket. Next, install the chainrings onto the cranks, making sure they are properly aligned and tightened. Finally, thread the chain through the derailleurs and cassette, and connect the ends using a chain tool. It’s important to adjust the derailleur limits and indexing to ensure the chain shifts smoothly through all the gears.
Once the drivetrain is installed, it’s time to fit the brakes. Proper brake adjustments are crucial for safety, so take your time and double-check your work.
Begin by attaching the brake calipers to the frame and wheel, making sure they are properly aligned. Next, adjust the brake pads so that they contact the rim evenly and with the correct amount of clearance. Finally, adjust the brake cable tension to ensure the brakes engage and release smoothly.
With the drivetrain and brakes installed, we’re ready to move on to the next step: adding the wheels and tires.
Add the Wheels and Tires
Once the wheels and tires are in place, you’ll be ready to take your bike for a spin and experience the thrill of riding on your own hand-built machine. But before you do, it’s important to make sure that your wheels are properly maintained and that your tire pressure is set correctly.
This will not only ensure a smoother ride, but it will also help prevent any accidents or damage to your bike. To keep your wheels in good condition, it’s recommended that you regularly check for any loose spokes or damaged rims. You can do this by spinning the wheels and listening for any unusual noises or wobbling. If you notice any issues, it’s best to take your bike to a professional for repairs.
Additionally, keeping your tires properly inflated is crucial for maintaining control and avoiding flats. Be sure to check your tire pressure regularly and adjust it according to the manufacturer’s recommendations. With these maintenance tips in mind, you’ll be ready to hit the road and enjoy your newly built bike.
As you fine-tune your bike, you can make small adjustments and upgrades to enhance your riding experience. This can include adjusting the saddle height, swapping out the pedals, or upgrading your gear system. With each tweak, you’ll be able to customize your bike to your specific needs and preferences, making it truly your own.
Fine-Tune Your Bike
After putting the finishing touches on your bike, you’ll be able to personalize it even further by tweaking the components to suit your riding style and preferences, allowing you to truly make it your own and enhance your overall cycling experience. Proper maintenance is crucial to ensuring that your bike functions optimally and lasts for as long as possible. This means regularly cleaning and lubricating your bike’s chain, checking tire pressure, tightening bolts, and inspecting brake pads. You should also periodically take your bike to a professional for a tune-up to address any issues that may arise over time.
In addition to basic maintenance, fine-tuning your bike can also help optimize its performance. This can involve adjusting the seat height and angle, handlebar position, and even swapping out certain components like the pedals or handlebar grips. Experimenting with different adjustments can help you find the perfect setup for your riding style, whether you’re a casual cyclist or a more serious rider. By taking the time to fine-tune your bike, you can ensure that it’s comfortable and efficient, allowing you to enjoy your rides to the fullest.
| Component | Adjustment | Benefits | ||||
|---|---|---|---|---|---|---|
| Seat | Height and angle | Improves comfort and pedaling efficiency | ||||
| Handlebars | Position | Improves comfort and handling | ||||
| Pedals | Type and grip | Increases efficiency and control | ||||
| Tires | Pressure | Improves traction and reduces rolling resistance | ||||
| Brakes | Alignment and tension | Improves stopping power and control | ||||
| Chain | Cleaning and lubrication | Prevents wear and tear and improves shifting | Handlebars | Adjustment and grip | Enhances steering and reduces hand fatigue |
Frequently Asked Questions
How do I choose the right size bicycle for me?
To choose the right size bicycle for me, I consider my inseam measurement, riding style, and terrain. Factors influencing bicycle size selection include frame size, wheel size, and handlebar height. To measure my inseam, I stand barefoot and measure from crotch to floor.
What is the proper way to adjust the saddle height and handlebar position?
Proper saddle height is crucial for injury prevention and efficient pedaling. To determine, stand next to your bike and adjust the saddle to hip height. Handlebar position affects comfort and performance – adjust to suit your riding style.
Can I use any type of brake pads on my bike or do I need specific ones?
Yes, specific brake pads are needed for different rim materials. Organic pads work on all rims, but metallic pads are better for wet conditions. Maintenance is important for optimal performance and troubleshooting issues such as squeaking.
How often should I lubricate my bike chain and what type of lubricant should I use?
Maintaining my bike chain is like caring for a pet. Regular cleaning and lubrication prevent wear and tear. Best practices include avoiding over-lubrication and using the right type for different weather conditions. I prefer a dry lubricant for dusty trails.
Is it necessary to wear a helmet while riding a bicycle and what are the safety guidelines to follow?
It is crucial to wear a helmet while riding a bicycle to prevent head injuries. Safety guidelines include proper fit, fastening, and replacement after an impact. Always follow traffic laws and stay aware of surroundings.
Conclusion
Well, there you have it. That was my experience building a bicycle. It was definitely a challenging project, but also very rewarding.
As I rode my newly-built bike for the first time, I felt a great sense of accomplishment and pride. However, I also couldn’t help but think about the importance of safety while riding a bike.
Building a bike is one thing, but riding it responsibly is another. It’s crucial to always wear a helmet, follow traffic laws, and be aware of your surroundings. So, while building a bike may be a fun and fulfilling project, let’s not forget about the importance of safety while riding it.