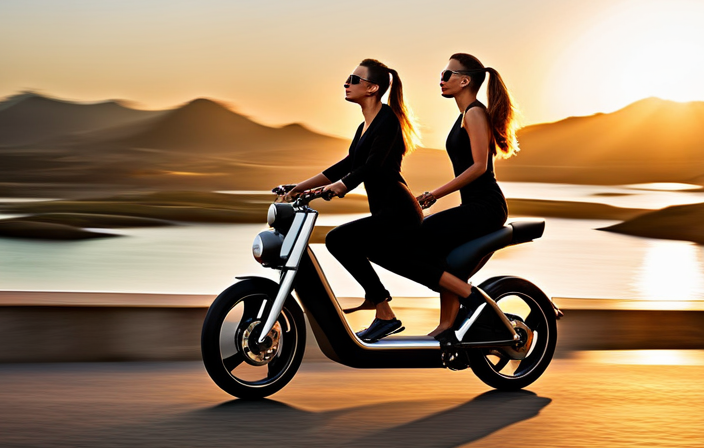
As an avid cyclist, I’ve always sought ways to enhance my biking experience. One day, it hit me like a bolt of lightning: why not transform my bike into an electric bike?
With the right conversion kit and a bit of know-how, I could effortlessly conquer hills and breeze through long rides.
In this article, I’ll guide you through the step-by-step process of turning your ordinary bike into an electrifying ride.
Get ready to embrace a new level of biking exhilaration!
Key Takeaways
- Installing the Electric Bike Display
- Reinstalling the Rear Wheel and Testing the Motor
- Adjusting and Fine-tuning the Electric Bike System
- Installing the Electric Bike Brakes and Lights
Assess Your Bike’s Suitability for Conversion
You’ll need to determine if your bike is suitable for conversion to an electric bike. The first step is to assess your bike’s condition. Inspect the frame for any cracks or structural damage. Check the wheels and tires for wear and tear. Ensure that the brakes are in good working condition. Evaluate the drivetrain, including the chain, gears, and derailleurs. It’s important to have a solid foundation before proceeding with the conversion.
Once you’ve assessed your bike’s condition, the next step is choosing a suitable conversion kit. Consider factors such as the motor power, battery capacity, and range. Look for a kit that is compatible with your bike’s frame and components. Take into account your riding style and terrain.
Choose the Right Electric Bike Conversion Kit
Before diving into the process of choosing the right electric bike conversion kit, it’s important to understand the various options available. When evaluating conversion options, consider factors such as battery range, motor power, and compatibility with your bike’s frame.
There are three main types of conversion kits: front wheel, rear wheel, and mid-drive. Front wheel kits are the easiest to install, but they may affect the bike’s balance. Rear wheel kits provide better traction, while mid-drive kits offer a more integrated and balanced riding experience.
When comparing conversion kit prices, keep in mind that higher-priced kits often come with better quality components and longer warranties. It’s crucial to strike a balance between your budget and the features you desire.
Now that you have evaluated the options and compared prices, it’s time to gather the necessary tools and equipment for the conversion process.
Gather the Necessary Tools and Equipment
To gather the necessary tools and equipment for the conversion process, start by checking your local hardware store for items such as wrenches, screwdrivers, and wire cutters. These tools will help you assess the compatibility of your bike and choose the right conversion kit options.
Here are four essential items you’ll need:
-
Socket set: A socket set with various sizes will come in handy for removing and installing bolts on your bike.
-
Multimeter: This tool allows you to measure voltage, resistance, and continuity, helping you troubleshoot any electrical issues during the conversion.
-
Crank puller: A crank puller is necessary for removing the bike’s crankset, which is required to access the bottom bracket and install the motor.
-
Torque wrench: A torque wrench ensures that you tighten bolts to the correct specifications, preventing damage to your bike and ensuring a secure conversion.
Now that you have gathered your tools, it’s time to remove the bike’s rear wheel.
Remove the Bike’s Rear Wheel
Once you’ve gathered the necessary tools, it’s time to remove the rear wheel of your bike.
Before proceeding, it’s essential to assess the compatibility of your bike with the electric motor and battery mount. Ensure that your bike frame has the necessary clearance and mounting points.
To begin, shift the bike into the smallest rear gear. This will loosen the tension on the chain and make the removal process easier.
Next, use a wrench to loosen the quick release skewer or axle nuts. Once the axle is loose, slide the wheel out of the frame carefully.
Don’t forget to remove the cassette from the rear wheel before proceeding to the next step of installing the electric motor and battery mount.
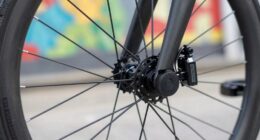
Install the Electric Motor and Battery Mount
Now that you’ve removed the rear wheel, it’s time to install the electric motor and battery mount. This step is crucial in converting your regular bike into an electric one. Follow these instructions to ensure a successful installation:
- Begin by attaching the electric motor to the bike frame using the provided brackets and screws.
- Align the motor with the chain for optimal performance.
Next, secure the battery mount onto the frame, ensuring it is stable and well-positioned. Use strong bolts or straps to firmly attach the mount, as it will hold the battery securely during rides.
By properly installing the electric motor and battery mount, you are setting the foundation for an efficient and reliable electric bike.
Now, let’s move on to the next step: connecting the motor to the battery for power.
Connect the Motor to the Battery
After securing the battery mount, it’s essential to connect the motor to the battery for power. To do this, you will need to locate the motor wires and the corresponding battery wiring.
Start by identifying the positive and negative terminals on both the motor and the battery. Connect the positive motor wire to the positive battery terminal and the negative motor wire to the negative battery terminal.
It’s crucial to ensure a secure and tight connection by using appropriate connectors or soldering the wires together. Double-check the wiring to avoid any potential short circuits or loose connections.
Once the motor is successfully connected to the battery, you are ready to move on to the next step and attach the throttle and controller, which will control the speed and power of your electric bike.
Attach the Throttle and Controller
To continue, you’ll need to attach the throttle and controller to control the speed and power of the motor. This step is crucial for converting your regular bike into an electric one. Here are some important points to keep in mind when installing the throttle and controller:
-
Position the throttle: Find a comfortable and accessible location on the handlebars to mount the throttle. Ensure it is within reach of your thumb or finger for easy operation.
-
Connect the wires: Follow the manufacturer’s instructions to connect the wires from the throttle to the controller. Double-check the connections to ensure a secure and proper fit.
-
Test and troubleshoot: Once everything is connected, test the throttle and controller to ensure they are functioning correctly. Troubleshoot any issues such as unresponsive throttle or erratic behavior.
Now that the throttle and controller are in place, let’s move on to installing the electric bike display, which will provide vital information about your electric bike’s performance.
Install the Electric Bike Display
Once you’ve completed installing the throttle and controller, it’s time to move on to installing the electric bike display. The electric bike display is an essential component that provides valuable information about your electric bike’s performance. It allows you to monitor your speed, battery level, distance traveled, and other important metrics. To install the display, follow these steps:
- First, locate the display mount on your handlebars and attach it securely using the provided screws.
- Connect the display cable to the controller, ensuring a tight connection.
- Power on the electric bike and test the display to ensure it is functioning correctly.
Here is a table outlining the various features of the electric bike display:
| Feature | Description |
|---|---|
| Speedometer | Displays your current speed |
| Battery Indicator | Shows the remaining battery level |
| Trip Distance | Tracks the distance traveled on each trip |
| Odometer | Records the total distance traveled |
If you encounter any issues with the electric bike display, refer to the troubleshooting section in the user manual. It provides solutions for common problems such as display not turning on or inaccurate readings. Once the display is installed and functioning properly, we can proceed to the next step: reinstalling the rear wheel and testing the motor.
Reinstall the Rear Wheel and Test the Motor
Make sure you securely reinstall the rear wheel and test the motor to ensure proper functionality.
After completing the installation of the electric bike display, it is crucial to conduct a thorough testing procedure to identify any potential issues or malfunctions.
To begin, carefully align the rear wheel with the dropouts and slide it into place. Make sure the axle is fully seated in the slots and tighten the nuts or quick-release lever to secure the wheel.
Once the wheel is properly installed, turn on the electric bike system and engage the motor. Observe the motor’s operation, listening for any unusual noises or vibrations. Pay attention to the responsiveness of the motor when applying throttle or pedal assist.
If any issues arise, refer to the troubleshooting tips provided by the manufacturer.
Now that the rear wheel is securely reinstalled and the motor has been tested for proper functionality, it is time to proceed to the next section and adjust and fine-tune the electric bike system, ensuring optimal performance.
Adjust and Fine-tune the Electric Bike System
Now that the rear wheel is securely reinstalled, it’s time to adjust and fine-tune the electric bike system for optimal performance. Here are some adjustment techniques and troubleshooting tips to ensure everything runs smoothly:
-
Brake adjustment: Check the brake pads for proper alignment and adjust them if necessary. Ensure that the brakes engage smoothly and provide sufficient stopping power.
-
Gear indexing: Make sure the gears shift smoothly and accurately. Use the barrel adjuster to fine-tune the indexing and eliminate any skipping or chain slippage.
-
Motor calibration: Follow the manufacturer’s instructions to calibrate the motor system. This will optimize the power delivery and ensure accurate speed and distance readings.
By properly adjusting the brakes, gears, and calibrating the motor, you’ll have an electric bike that performs at its best.
Now, let’s move on to the next section where we’ll install the electric bike brakes and lights.
Install the Electric Bike Brakes and Lights
After adjusting and fine-tuning the electric bike system, it’s time to install the brakes and lights.
Proper installation of the electric bike brakes is crucial for safe and effective operation. Begin by locating the brake mounting points on the frame and align the brake calipers with them. Securely tighten the mounting bolts to ensure stability.
Next, attach the brake levers to the handlebars and connect them to the brake calipers with the brake cables. Adjust the cable tension using the barrel adjuster to achieve the desired braking response.
Moving on to the bike lights, select a suitable location for the front and rear lights. Use the provided brackets or clips to attach them securely, ensuring visibility from all angles.
Now, with the brakes and lights installed, we can move on to the next step of securely fastening the battery and wiring.
Securely Fasten the Battery and Wiring
To securely fasten the battery and wiring, you’ll need to locate the designated mounting points and ensure a tight and stable attachment.
Mounting the battery securely is crucial to prevent any movement or damage during rides. Start by identifying the appropriate location on your bike frame where the battery can be safely installed. Once you’ve found the mounting points, use the provided hardware to secure the battery firmly in place.
Next, ensure proper wiring connections by carefully following the manufacturer’s instructions. Connect the battery to the motor and controller, making sure all connections are secure and insulated. Double-check that the wiring is free from any obstructions or potential hazards.
Test Ride and Make Any Necessary Adjustments
Once you’ve completed the necessary adjustments, take your electric bike for a test ride to ensure everything is functioning properly. Testing your electric bike after making adjustments is crucial to its performance and your safety. Here are the benefits of a test ride and some key components to check and adjust:
-
Brakes: Test the braking system to ensure it responds effectively. Adjust the brake pads if needed to achieve optimal stopping power.
-
Gears: Shift through all the gears to make sure they engage smoothly. Adjust the derailleur if necessary to prevent gear skipping or chain slippage.
-
Suspension: Test the suspension by riding over different terrains. Adjust the suspension settings to provide a comfortable and controlled ride.
-
Battery and Motor: Monitor the battery life and motor performance during the test ride. Adjust the power settings to suit your riding preferences.
By conducting a thorough test ride and adjusting the bike components as needed, you can ensure your electric bike operates at its best.
Now, let’s move on to how to maintain and care for your electric bike without compromising its performance.
Maintain and Care for Your Electric Bike
Now, let’s talk about how you can properly maintain and care for your e-bike to ensure its longevity and optimal performance.
Electric bike maintenance is crucial in order to keep your bike running smoothly. One important aspect of maintenance is regularly cleaning your e-bike. Use a soft cloth or sponge to wipe down the frame, battery, and other components, making sure to remove any dirt or debris.
Additionally, it’s essential to keep the chain lubricated to prevent rust and ensure smooth shifting.
Troubleshooting common electric bike issues is also part of maintenance. If you experience any power or battery problems, check the connections and make sure they are secure.
Regularly inspect the tires for any signs of wear and tear, and inflate them to the recommended pressure.
Enjoy Your New Electric Bike and Explore with Ease!
Get ready to experience the thrill of riding your new e-bike and effortlessly explore new places! With its electric motor, you can venture into remote areas and enjoy the beauty of nature without breaking a sweat.
Here are some key features that make your e-bike the perfect companion for exploring:
-
Long Battery Life: The advanced lithium-ion battery ensures you can travel long distances without worrying about running out of power.
-
Multiple Riding Modes: Switch between different riding modes, such as pedal-assist or full electric, to suit your preference and terrain.
-
Eco-friendly Transportation: By choosing an e-bike, you’re not only enjoying the freedom of exploration but also contributing to a greener environment. E-bikes produce zero emissions, making them a sustainable and eco-friendly transportation option.
Frequently Asked Questions
How much does it cost to convert a regular bike into an electric bike?
Converting a regular bike into an electric bike can cost anywhere from $500 to $2000, depending on the quality of the components used. The benefits of converting include increased speed, longer range, and reduced effort while riding.
What is the average range of an electric bike after conversion?
The average range of an electric bike after conversion depends on various factors such as battery capacity, terrain, and rider weight. Electric bike batteries offer a range of 20-80 miles, with the pros of eco-friendliness and cost savings, and the cons of limited range and added weight.
Can I still pedal my electric bike?
Yes, you can still pedal an electric bike with pedal assist. Pedal assist provides a boost to your pedaling effort, making it easier to ride uphill or travel longer distances. It enhances the riding experience and increases the efficiency of the bike.
How long does it take to install an electric bike conversion kit?
Installing an electric bike conversion kit typically takes a few hours, depending on your mechanical skills. It involves attaching a motor, battery, and controller to your bike. The benefits of converting a bike include increased speed and range, making your rides more enjoyable and convenient.
Are there any legal requirements or regulations for riding an electric bike?
When riding an electric bike, it is important to adhere to electric bike safety regulations. These regulations vary by country but typically include maximum speed limits, age restrictions, and requirements for lights and reflectors. Electric bike conversions offer benefits such as increased speed and range.
Conclusion
So there you have it, my friends! With a little bit of time, effort, and the right tools, you can transform your regular bike into an amazing electric bike.
I know some of you might be thinking, ‘But it seems like a lot of work!’ Trust me, I understand. It may seem overwhelming at first, but once you get the hang of it, the process becomes much easier.
Plus, think about all the benefits you’ll reap from having an electric bike – the convenience, the speed, and the freedom to explore new places with ease.
So go ahead, give it a try. You won’t regret it!