
Get ready to take your biking experience to the next level with the ultimate bike transformation: turning your normal bike into an electric one. Imagine the freedom of effortlessly cruising up hills and effortlessly gliding through your daily commute.
In this article, I will guide you through the step-by-step process of converting your beloved bike into an electric powerhouse. From assessing compatibility to installing the electric wheel, I’ll provide you with all the technical know-how and insider tips to make your dream of an electric bike a reality.
Let’s get started!
Key Takeaways
- Personalize your ride through customization
- Enjoy the benefits of an electric bike
- Combine benefits of electric bike with customization options
- Enhancements make riding more enjoyable
Assessing Your Bike’s Compatibility
You’ll want to assess if your bike is compatible for the conversion to electric. Before diving into the process of making your normal bike electric, it’s important to ensure that your bike can handle the upgrades necessary for the conversion.
One key area to consider is the braking system. Upgrading brakes is crucial because electric bikes tend to be heavier and require better stopping power. Make sure your bike’s brakes are in good condition and can handle the increased weight and speed.
Additionally, take a look at your bike’s suspension. Upgrading suspension can improve the overall ride quality and stability, especially when dealing with the added weight of the electric components. Evaluate your bike’s suspension system and consider making any necessary adjustments or upgrades to ensure a smooth and comfortable ride.
Choosing the Right Electric Bike Conversion Kit
When selecting an electric bike conversion kit, it’s important to choose the right one for your needs. There are several factors to consider when comparing different electric bike conversion kit brands:
- Motor Power: Look for a kit with a motor that has sufficient power to meet your cycling needs.
- Battery Capacity: Consider the range you require and choose a kit with a battery that can provide adequate distance.
- Installation Difficulty: Assess your mechanical skills and opt for a kit that matches your level of expertise.
- Price: Compare prices of different brands, keeping in mind that higher quality kits may come with a higher price tag.
Understanding the benefits of electric bike conversion kits over buying a new electric bike is crucial. Conversion kits allow you to transform your existing bike into an electric one, saving you money and allowing you to keep the bike you already love. Additionally, conversion kits offer flexibility as you can choose the specific components you desire, such as motor power or battery capacity.
Overall, selecting the right electric bike conversion kit ensures a successful and enjoyable electric biking experience.
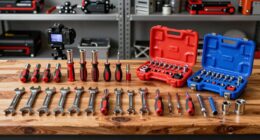
Gathering the Necessary Tools
To gather the necessary tools for the conversion, you’ll need to have a set of basic hand tools on hand. These tools include a wrench set, screwdrivers, pliers, and wire cutters. Additionally, you’ll need a few specialized tools specific to electric bike conversions, such as a torque wrench and a spoke wrench.
Once you have the tools, the next step is choosing the right battery for your electric bike. It’s important to consider factors such as battery capacity, voltage, and weight. Finding a reliable supplier is crucial, as you want to ensure that you are getting a high-quality battery that will last. Look for suppliers that have positive reviews and offer warranties on their products.
Doing thorough research and comparing different options will help you make an informed decision.
Removing the Bike’s Rear Wheel
After gathering the necessary tools, the next step is removing the bike’s rear wheel. This is an essential part of the process when transforming a regular bike into an electric one. To paint a clearer picture for you, here are the steps involved:
- Begin by shifting the gears to the smallest chainring and the smallest rear cog.
- If your bike has rim brakes, release them by squeezing the brake lever and opening the quick-release mechanism.
- For bikes with disc brakes, loosen the bolts on the brake caliper and carefully remove it from the frame.
- Next, use a wrench to loosen the nuts or quick-release skewer holding the rear wheel in place.
- Once the nuts or skewer are loose, gently lift the bike and slide the rear wheel out of the dropouts.
Now that the rear wheel is removed, you can move on to installing a new tire and reattaching the rear wheel to complete the transformation process.
Installing the Electric Wheel
Installing the electric wheel involves attaching it securely to the bike’s frame. To begin, it is crucial to choose the right electric wheel size for your bike. This ensures a proper fit and optimal performance. Measure the diameter of your bike’s rear wheel and select an electric wheel that matches it.
Once you have the correct size, the installation process can commence. Start by removing the nuts or quick-release skewer from the bike’s rear axle. Slide the electric wheel onto the axle, making sure it sits flush against the frame. Align the chain with the electric wheel’s sprocket, ensuring a smooth engagement.
Finally, secure the wheel in place by tightening the nuts or fastening the quick-release skewer. Remember to double-check the wheel’s alignment and test the brakes before taking your newly electrified bike for a spin.
Connecting the Motor and Battery
Once the motor and battery are connected, the electric wheel can be fully operational.
The first step in connecting the motor and battery is to ensure proper wiring connections. This involves connecting the positive and negative terminals of the motor to the corresponding terminals on the battery. It is important to double-check the connections to avoid any potential short circuits.
Next, carefully place the battery in a secure location on the bike. This can be done by using mounting brackets or straps to attach the battery to the frame or bike rack. It is crucial to position the battery in a way that ensures stability and does not interfere with the bike’s functionality.
By following these steps, the motor and battery can be successfully connected, allowing for a smooth and efficient electric bike conversion.
Mounting the Controller
To mount the controller, I secure it to the bike frame using mounting brackets or straps. This ensures that the controller is securely attached and won’t move during rides.
There are various mounting techniques you can use depending on the type of bike frame you have. Some controllers come with specific mounting brackets that can be attached to the frame easily. If your controller doesn’t have these brackets, you can use straps or zip ties to secure it in place.
When mounting the controller, it’s important to follow safety precautions. Make sure the controller is positioned in a way that it won’t interfere with your pedaling or any other bike components. Additionally, ensure that all wiring is properly secured and protected to prevent any accidents or damage to the controller.
Testing and Troubleshooting
Testing and troubleshooting can help identify any issues or malfunctions with the controller.
When it comes to common troubleshooting issues, there are a few things to keep in mind.
First, make sure all connections are secure and properly plugged in. Loose connections can cause intermittent problems.
Second, check the voltage of the battery to ensure it is fully charged. Low voltage can lead to reduced performance.
Third, inspect the wiring for any signs of damage or wear. Frayed wires can cause shorts and other electrical issues.
Lastly, try resetting the controller by turning off the power and then turning it back on. This can sometimes resolve minor glitches.
By following these troubleshooting tips and tricks, you can ensure a smooth and reliable electric bike conversion.
Adding Accessories and Enhancements
When adding accessories and enhancements, you can customize your electric bike conversion to suit your specific needs and preferences. Bike customization is an exciting aspect of converting a normal bike into an electric one.
There are numerous accessories and enhancements available in the market that can enhance your riding experience. One popular accessory is the bike rack, which allows you to carry extra gear or even a child seat. Another useful addition is a bike computer, which provides valuable information like speed, distance, and battery life.
Additionally, you can install lights for better visibility and safety, or a horn to alert pedestrians and other cyclists. These accessories not only make your electric bike more functional but also improve its overall aesthetic appeal.
The benefits of electric bike conversion, combined with the ability to personalize your ride through customization, make for an exciting and rewarding experience.
Enjoying Your Electric Bike
Now that you have added all the necessary accessories and enhancements to convert your regular bike into an electric one, it’s time to fully enjoy the benefits of your new ride.
However, it’s important to remember that maintaining your electric bike is crucial for its longevity and performance. Regularly check the battery and motor to ensure they are functioning optimally, and keep an eye on the tires and brakes for any signs of wear and tear.
Additionally, don’t forget to follow some safety tips for riding an electric bike. Always wear a helmet, obey traffic laws, and be mindful of your surroundings. It’s also wise to ride defensively, anticipate potential hazards, and use hand signals to communicate your intentions.
With proper maintenance and safety precautions, you can fully enjoy the exhilarating experience of riding your electric bike.
Frequently Asked Questions
How do I maintain and clean my electric bike after the conversion?
To maintain electric bike batteries, it’s important to regularly check their charge level and keep them clean. Use a soft cloth or sponge to clean the components, avoiding direct water contact. Proper cleaning techniques ensure optimal performance and longevity of your electric bike.
Can I still use my bike’s gears and brakes after the conversion?
Yes, the bike gear compatibility and brake system compatibility are maintained after the conversion. The electric motor is designed to work with the existing gear system, and the brake system remains unchanged.
Is it possible to convert any type of bike into an electric bike?
Yes, it is possible to convert any type of bike into an electric bike. The benefits of an electric bike include increased speed and ease of commuting. However, the cost of electric bike conversion can vary depending on the components and quality desired.
How long does it take to install the electric bike conversion kit?
Installing an electric bike conversion kit typically takes a few hours, depending on your familiarity with bike mechanics. The cost varies, but the benefits of electric bike conversion include increased speed, reduced effort, and eco-friendly transportation.
Are there any legal requirements or regulations I should be aware of before using my electric bike on public roads?
Before riding an electric bike on public roads, it’s important to consider safety. Wear a helmet, follow traffic laws, and be aware of pedestrians. Additionally, some areas may require insurance for electric bike conversion kits.
Conclusion
In conclusion, transforming my regular bike into an electric one has been an exhilarating journey. The process was not without its challenges, but the satisfaction of riding my newly electrified bike is incomparable.
It feels like I’ve unlocked a hidden power within myself, effortlessly gliding through the streets with a newfound sense of freedom. Just like the mythical Icarus, who soared through the skies with wings of wax, I too have transcended the limitations of the ordinary, embracing the extraordinary.
So, grab your tools and embark on this electrifying adventure, for the world of electric biking awaits you.