As someone who bikes, I understand how crucial it is to have a bicycle stem that fits correctly and is the right size, as it can significantly influence my comfort and performance while riding. Therefore, it’s essential to learn the correct method to measure a bicycle stem.
In this article, I will guide you through the steps to measure your current stem and determine your ideal stem size, as well as provide tips on choosing the right replacement stem and installing it correctly.
First, you’ll need to gather some necessary tools, including a ruler or tape measure, a caliper, and a wrench. Once you have these tools, you can identify the dimensions of your current stem, such as the length, angle, and diameter.
From there, you can determine your ideal stem size based on your riding style and body measurements. By following these steps, you can ensure that your bicycle stem fits you properly and provides the support and comfort you need for a successful ride.
Key Takeaways
- Proper fit and size of a bicycle stem is crucial for optimal performance and comfort while riding.
- Measuring and installing a bicycle stem requires tools such as a ruler, caliper, wrench, level, torque wrench, and hex wrenches.
- Important dimensions to identify in a current stem include length, angle, and diameter.
- Stem angle determines handlebar position and affects riding position and comfort level, and the ideal stem size is based on body measurements and riding style.
Gather Necessary Tools
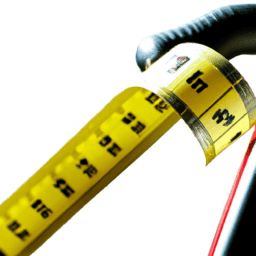
Let’s grab the tools we need to measure our bike stem! To measure a bike stem accurately, we need a few basic tools, such as a metric ruler, a caliper, and a level.
A metric ruler is a measuring tool that has markings in millimeters and centimeters, making it ideal for measuring the length and width of the stem. A caliper is a tool that measures the diameter of the stem, which is essential for determining the right size of the stem. It is also important to use a level to ensure that the stem is correctly aligned, as misalignment can affect the accuracy of the measurement.
When measuring a bike stem, it is important to avoid common mistakes such as measuring from the wrong point or using the wrong tool. For example, measuring the stem from the top of the stem cap instead of the center of the handlebar clamp can lead to inaccurate measurements. Using a ruler instead of a caliper to measure the diameter can also lead to incorrect measurements.
To ensure measuring accuracy, it is essential to use the correct tools and follow the right procedure. Now that we have our tools ready, let’s focus on identifying the stem dimensions to ensure that we get the right size for our bike stem.
Identify Stem Dimensions
To determine the dimensions of this component, it’s important to first identify the specific type of stem utilized on the bicycle.
Measuring stem angle is crucial as it determines how high or low the handlebars are positioned relative to the fork steerer tube. The most common stem angles are 0 degrees, +/- 6 degrees, and +/- 17 degrees. The angle can be measured using a protractor or an angle finder tool.
It’s essential to ensure that the stem angle matches the rider’s preferred riding position to prevent discomfort and potential injury.
Understanding stem materials is also important in identifying stem dimensions. The most common stem materials are aluminum and carbon fiber. Carbon fiber stems are lighter but more expensive than aluminum stems.
The stem length can be determined by measuring the distance from the center of the fork steerer tube to the center of the handlebar clamp. Once the stem angle and length are identified, the rider can then determine their ideal stem size based on their riding style and comfort level.
Determine Your Ideal Stem Size
Finding the perfect fit for your stem size can make all the difference in your riding experience, so it’s important to consider your preferred riding style and comfort level. Factors affecting stem size include your body geometry, riding style, and the type of bike you have.
For example, if you have a longer torso, you may need a longer stem to help you maintain a comfortable riding position. Similarly, if you prefer a more aggressive riding style, a shorter and more upright stem may be more suitable.
Another factor to consider is the stem angle. Adjusting the stem angle can also affect the riding position and comfort level. A stem with a positive angle will raise the handlebars and provide a more upright riding position, while a stem with a negative angle will lower the handlebars and provide a more aggressive riding position.
It’s important to find the right balance between comfort and performance when adjusting the stem angle. When choosing the right replacement stem, consider the factors mentioned above and make sure to measure your current stem accurately.
A well-fitted stem can improve your riding experience and prevent discomfort and injury, so take the time to find the right fit for you.
Choose the Right Replacement Stem
Picking out a new stem that perfectly fits your body geometry, riding style, and bike type can drastically enhance your cycling experience. When choosing a replacement stem, it is important to consider the different types of bicycle stems and the factors that affect stem choice. The three most common types of stems are quill, threadless, and adjustable, each with their own advantages and disadvantages. Quill stems are found on older bikes and have a threaded shaft that inserts into the headset. Threadless stems are commonly found on modern bikes and require a separate headset that clamps onto the steerer tube. Adjustable stems allow for easy adjustment of the stem angle and length, but can be heavier and less rigid than non-adjustable stems.
Factors affecting stem choice include stem length, angle, and rise. Stem length affects the reach to the handlebars, while stem angle and rise affect the height of the handlebars. These factors should be considered based on your body geometry and riding style. A professional bike fitting can help determine the ideal stem size and shape for you. Once you have chosen the right replacement stem, it’s time to install it onto your bike.
In order to install the new stem, you will need to follow a few steps to ensure that it is properly secured and aligned with your bike.
Install the New Stem
Now that you’ve got the perfect replacement stem, it’s time to attach it to your bike and enhance your cycling experience. Before proceeding with the installation, make sure you have the necessary tools on hand, including a torque wrench, hex wrenches, and a ruler.
Here’s a step-by-step guide to installing the new stem:
-
Remove the old stem by loosening the bolts on the stem cap and the handlebar clamp.
-
Clean the area where the new stem will be installed, removing any dirt or debris.
-
Place the new stem on the fork tube and align it with the front wheel.
-
Tighten the bolts on the stem cap and the handlebar clamp using proper tightening technique. Be sure to consult the manufacturer’s instructions for the recommended torque settings.
-
Adjust the handlebar height by loosening the bolts on the stem and sliding the handlebars up or down as desired.
-
Once you’ve achieved the desired height, retighten the bolts on the stem using proper tightening technique.
By following these steps, you can ensure a secure and comfortable fit for your new stem. Remember to always use proper tightening technique to avoid damaging your bike or compromising your safety.
With your new stem in place, you can enjoy a more customized and comfortable riding experience.
Frequently Asked Questions
How do I know if my stem is too long or too short for me?
Well, if you’re anything like me, you probably have no idea if your stem is too long or too short. But fear not! Proper stem sizing and adjusting stem height are key. Let’s dive into the technicalities, shall we?
Can I use a stem with a different angle than my current one?
Yes, I can use a stem with a different angle than my current one, but I must choose an appropriate angle based on my riding posture. A stem with a steeper angle will give me a more aggressive posture, while a shallower angle is more relaxed.
What materials are bicycle stems made of and how does it affect their performance?
When it comes to bike stems, the material used affects its performance. Alloy and carbon are commonly used, but carbon is more expensive. Stem length also affects bike handling, with shorter stems creating a more responsive ride.
How often should I replace my bicycle stem?
I replace my bicycle stem every 2-3 years or when I notice signs of wear, such as cracks or looseness. Proper stem alignment is crucial for safe and efficient riding, so I also regularly check and adjust it as needed.
Are there any specific maintenance tips for keeping my stem in good condition?
To maintain my stem, I suggest stem clamping to ensure proper fit and rust prevention by regularly cleaning and applying a protective coating. These techniques will prolong the life of the stem and prevent any potential safety hazards.
Conclusion
Well, after all that measuring and calculating, I’ve finally found the perfect stem size for my bike. It’s funny how something as seemingly small as a stem can make all the difference in the world when it comes to riding comfort and performance.
But that’s the beauty of cycling – every little adjustment can have a big impact. Now, I just need to install my new stem and hit the road.
It’s amazing how much more confident I feel on my bike when everything is dialed in just right. Who knows, maybe I’ll even set a new personal best on my next ride. Thanks to this guide, I know that I have the tools and knowledge to make the necessary adjustments to my bike and take my riding to the next level.


