Have you ever experienced the Goldilocks syndrome while searching for the ideal bicycle fit? Whether it’s too large or too small, the challenge can be aggravating when your bike doesn’t feel perfectly suited to you. However, akin to Goldilocks, through careful measurement and adjustment, we can discover the exact right fit.
Knowing how to measure a bicycle is essential for any cyclist, whether you’re buying a new bike or fine-tuning your current ride. In this article, I will guide you through the steps to measure your bicycle and find the right fit for your body.
Bicycles come in different sizes, just like shoes. And just like shoes, the right size matters. Riding a bike that’s too big or too small can lead to discomfort, pain, and even injury. But how do we know what size bike is right for us? That’s where measuring comes in.
By measuring our bike, we can determine its size and make adjustments to ensure a comfortable and efficient ride. So, let’s gather our tools and get started.
Key Takeaways
- Measuring a bike is crucial to ensure a comfortable and efficient ride, and different brands may have varying sizing standards.
- Adjusting the seat height and handlebar position is necessary for achieving a comfortable riding position that suits your body type and allows for efficient pedaling.
- Regularly checking and adjusting your bike’s fit can improve your experience and reduce the risk of discomfort or injury, and paying attention to how your bike feels is important.
- Professional bike fitting services can provide a personalized and comprehensive fitting experience, but can also be costly depending on the level of customization and complexity.

PZT Upgraded Bike Tent with Rain Cover, Portable Outdoor Storage Shed for 2 Bikes, 210D Oxford Fabric PU4000 Waterproof, Bike Shed/Bike Cover for Motorcycles, Garden Tools, Lawn Mower
Innovative Upgrade: A rain cover is added on the top of this bike tent/bike shed to enhance wind...
As an affiliate, we earn on qualifying purchases.
Understanding Bike Size and its Importance
You’ll want to make sure you’re choosing the right bike size for you, as it can greatly impact your comfort and performance while riding. The importance of bike size for performance cannot be overstated. Riding a bike that is too small or too big can lead to discomfort, poor posture, and even injury.
Common misconceptions about bike sizing include assuming that the size is based solely on height or that all brands have the same sizing standards. However, bike size is determined by a combination of factors such as inseam length, torso length, and arm length, among others. It’s important to note that different brands may have different sizing standards, so it’s essential to consult the manufacturer’s sizing chart for each bike you’re considering.
Before measuring your bike, gather the necessary tools.
Bike Storage Shed Tent, Waterproof Outdoor Storage Shed for Bicycle, Easy Setup, Portable Storage Tent for Motorcycle,Garden Tools,Lawn Mower
【High Quality Bike Storage Tent】This versatile storage tent protects your bicycles and outdoor gear from the elements. Made...
As an affiliate, we earn on qualifying purchases.
Gather the Necessary Tools
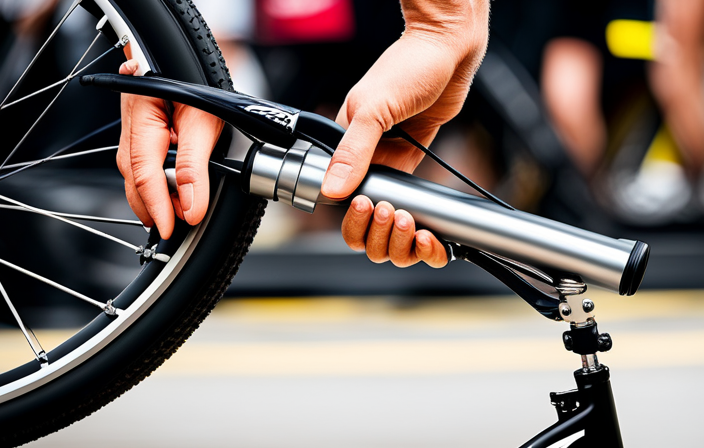
First, grab all the essential tools needed to determine the dimensions of your bike. Bike measurement techniques require a set of tools that can accurately measure the different parts of the bike.
Some of the essential tools that you need include a measuring tape, a ruler, a torque wrench, and a spirit level. Most importantly, you need to choose the right measuring tape for the job. A standard measuring tape may not be enough to measure the bike’s length and width accurately. Therefore, consider purchasing a measuring tape that’s at least six feet long and has a locking mechanism to hold the tape in place.
Apart from the measuring tape, a ruler comes in handy when measuring small parts of the bike, such as the stem length or the handlebar width. A torque wrench is necessary for tightening bolts to the recommended torque, which ensures that the bike’s parts are securely attached and reduces the risk of accidents.
Finally, a spirit level is useful in determining the bike’s levelness, which is essential for a comfortable ride. With all the necessary tools in place, you can move on to measuring your bike to ensure a perfect fit.

Housolution Bike Storage Tent Shed for 5 Bikes, Outdoor Portable 210D Oxford Thick PU4000 Waterproof Bike Cover with Ventilated Window, Bike Tent Fit for Bicycle, Lawn Mower, Garden Tools
Superior Waterproofing: The bike tent is made of 3-layer tear-resistant fabric and 210D silver-coated Oxford cloth with a...
As an affiliate, we earn on qualifying purchases.
Measuring Your Bike
To determine the dimensions of your bike, grab the necessary tools and get ready to gauge the geometry of your two-wheeled transportation. One of the most important things to keep in mind when measuring your bike is to take accurate measurements. This means that you need to make sure that your tools are calibrated correctly and that you’re taking your measurements from the right points on the bike.
Common mistakes include measuring from the wrong spot on the frame or using a tape measure that isn’t marked correctly. When measuring your bike, start by taking the measurements of the frame. This’ll give you an idea of the overall size of your bike and’ll help you determine the right size of components for your bike.
Once you have the frame measurements, you can move on to measuring the wheels, handlebars, and other components. Taking accurate measurements is key to finding the right fit for your bike, which we’ll discuss in the next section.

Happy Travel Bike Storage Shed Tent, Waterproof Portable Bicycle Cover with 30% More Top Storage Space for 2/3/4/5 Bikes,Clips Easy Setup Outdoor Sheds Shelter for Motorcycle, Garden Tools, Lawn Mower
【Large Capacity Bike Shed】:The outdoor bike storage tent size has been increased to 86.5in×31.5in×73in, and we have adopted...
As an affiliate, we earn on qualifying purchases.
Finding the Right Fit
Achieving the perfect fit for your bike involves finding a comfortable riding position that suits your body type and allows you to pedal efficiently. This means taking proper posture into consideration and making necessary adjustments to ensure that your body is aligned correctly with the bike.
To find the right fit, start by adjusting the seat height so that your leg is fully extended when the pedal is at the bottom of its stroke. Next, adjust the handlebar height and position to suit your comfort and riding style. Finally, adjust the reach of the bike to ensure that you can comfortably reach the handlebars without overstretching. By finding the right fit, you’ll be able to ride longer and more comfortably, and you’ll also be able to pedal more efficiently, which can improve your overall performance on the bike.
As you begin to ride your bike, it’s important to pay attention to how it feels and make any necessary adjustments as you go. In the next section, we’ll cover some tips for maintaining proper bike fit to help you get the most out of your ride.
Tips for Maintaining Proper Bike Fit
As a cyclist, I know that maintaining proper bike fit is crucial for a comfortable and efficient ride.
To ensure that my bike fits me perfectly, I always check and adjust the seat height regularly. Additionally, I adjust the handlebar position to maintain a comfortable riding posture.
If I need a more comprehensive bike fitting, I consider seeking professional help to ensure that I’m getting the most out of my ride.
Regularly Check and Adjust Seat Height
Checking and adjusting your bike’s seat height regularly can make a significant difference in your comfort and performance on the road. As someone who enjoys cycling, I know the importance of comfort and preventing injuries while riding. By ensuring that your seat is at the correct height, you can avoid unnecessary strain on your knees, hips, and lower back.
To determine the appropriate seat height, you can use the table below as a guide. The first column lists your inseam measurement, and the second column provides the corresponding seat height. It’s important to note that these measurements are just a starting point and may need to be adjusted based on your personal preferences and riding style. By taking the time to check and adjust your seat height, you can improve your riding experience and reduce the risk of discomfort or injury.
Now that we’ve covered the importance of regularly checking and adjusting your seat height, let’s move on to the next step: adjusting the handlebar position.
Adjust Handlebar Position
To adjust the handlebar position, start by sitting on your bike and taking note of how your arms feel. Are they comfortably stretched out or too cramped? The handlebar grip should be within easy reach, without having to lean forward or strain to reach it.
Adjust the handlebar stem accordingly, either by loosening the bolts and sliding the stem up or down, or by changing the stem entirely. It’s important to maintain proper posture while cycling, which means keeping your back straight and your shoulders relaxed.
If your handlebars are too low, you may find yourself hunching over and putting unnecessary strain on your back and neck. On the other hand, if your handlebars are too high, you may feel like you’re sitting too upright and not getting enough power out of your pedal strokes.
Finding the right handlebar position takes some trial and error, so don’t be afraid to make adjustments until you find the perfect fit. Consider professional bike fitting services if you’re having trouble finding the right handlebar position or if you’re experiencing discomfort while cycling.
A professional bike fitter can help you determine the best handlebar height and reach for your body type and riding style, as well as make other adjustments to your bike to ensure a comfortable and efficient ride.
Consider Professional Bike Fitting Services
Consider getting a professional bike fitting to ensure a comfortable and efficient ride. While it may seem unnecessary, a proper fitting can prevent injuries and improve performance.
The benefits of a bike fitting include finding the correct bike size, adjusting the saddle height and position, and determining the optimal handlebar position. It can also identify any pre-existing conditions or injuries that may require special adjustments to your bike.
The cost of professional fitting services may vary, but it’s often worth the investment. A good bike fitting can range from $100 to $300, depending on the level of customization and complexity of the fitting. Compared to buying a new bike or paying for medical expenses due to injuries caused by an ill-fitting bike, the cost of a bike fitting is relatively small.
By investing in a professional bike fitting, you can ride with confidence, knowing that your bike is tailored to your unique needs and body measurements.
Frequently Asked Questions
How often should I measure my bike to ensure it still fits me properly?
To ensure my bike still fits me properly, I measure the bike frame periodically. Proper bike fit is crucial for injury prevention and optimal performance. Incorrect fit can cause discomfort, pain, and decreased efficiency.
Can I use a measuring tape instead of a ruler to measure my bike?
I prefer using a ruler instead of a measuring tape for measuring my bike. While a measuring tape is flexible and easier to handle, it can be less accurate than a rigid ruler. A ruler provides more precise measurements, especially for small increments.
Is it necessary to adjust the saddle height when measuring my bike?
I adjust the saddle height when measuring my bike to ensure proper bike fit. The correct saddle height is important for efficient pedaling and prevents injury. It’s an essential step for accurate bike measurements.
How do I determine the appropriate handlebar width for my body size?
Did you know that handlebar width affects shoulder width and breathing efficiency? To improve performance, consider handlebar grip options and the importance of bike fit. Measure your shoulder width and choose a handlebar width that matches.
Can I measure my bike on my own or do I need someone else’s help?
I can measure my bike solo with a tape measure and a few basic tools. However, a professional bike fitting offers benefits such as optimizing comfort and performance. It’s a worthwhile investment for serious riders.
Conclusion
In conclusion, measuring your bicycle is important for ensuring a comfortable and safe ride. Just like a tailor measures a suit to fit their client perfectly, measuring your bike will help you find the right fit for you.
As a cyclist, you want to make sure that your bike isn’t too big or too small and that it suits your riding style. Think of measuring your bike like taking your car for a tune-up. It may take a little extra time and effort, but it’s worth it in the long run.
By following the steps outlined in this article and regularly maintaining your bike’s fit, you’ll be able to enjoy a smooth and comfortable ride every time you hit the road. So go ahead and grab your measuring tape, level, and calculator, and get ready to find the perfect fit for your bicycle.
Happy cycling!