
As a passionate cyclist, I’ve accumulated plenty of experience in preparing my bike for flights. It can initially seem like a daunting task, yet with correct preparation and the right gear, it’s manageable. In this piece, I will divulge my personal advice and techniques for efficiently packing a bicycle for air transportation.
First and foremost, it’s important to familiarize yourself with your airline’s policies and fees for transporting bikes. Some airlines require that bikes be packed in a specific way or require additional fees for oversized baggage. Be sure to do your research ahead of time so you can avoid any surprises at the airport.
Once you have that information, it’s time to start disassembling certain components of your bike to make it easier to pack and transport.
Key Takeaways
- Familiarize yourself with airline policies and fees before packing your bike for air travel.
- Use specialized bike bags or boxes designed for bicycles to ensure maximum protection during transport.
- Disassemble certain components of your bike to make it easier to pack and transport.
- Use high-quality bike packaging materials such as bubble wrap, foam sheets, zip ties, cardboard boxes, and packing tape to protect your bike.

SCICON Sports Aerocomfort 3.0 TSA Road Bike Travel Bag
Weight: 9,5 Kg
As an affiliate, we earn on qualifying purchases.
Familiarize Yourself with Airline Policies and Fees
Before you start packing your bike, make sure to check out your airline’s policies and fees so you don’t get hit with any unexpected charges at the airport.
Baggage weight and oversized fees can add up quickly, so understanding airline policies for bike travel is crucial. Some airlines may require you to book your bike as a separate piece of luggage, while others may allow it as part of your checked baggage allowance. Some airlines may also have restrictions on the size and weight of your bike, so it’s important to check the dimensions and weight before packing.
Tips for avoiding additional fees and charges when flying with a bicycle include packing your bike as compactly as possible and disassembling certain components of your bike. This will not only save you money but also ensure that your bike is protected during transport.
Now that you have a good understanding of airline policies and fees, it’s time to start packing your bike for air travel.

SCICON Sports Aerocomfort 3.0 TSA Triathlon Bike Travel Bag
Weight: 11 Kg
As an affiliate, we earn on qualifying purchases.
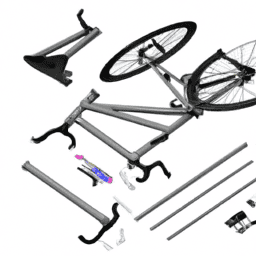
Disassemble Certain Components of Your Bike
When preparing my bike for air travel, I always make sure to disassemble certain components to ensure its safety.
First, I remove the pedals to prevent any damage to the crank arms or chainring.
Next, I loosen the stem bolts and remove the handlebars, securing them to the frame with zip ties or velcro straps.
Finally, I take off the wheels and secure any loose parts, such as the derailleur or brake calipers, with bubble wrap or foam padding.
By taking these steps, I can confidently pack my bike and know that it’ll arrive at my destination in good condition.
Remove Pedals, Handlebars, and Wheels
Once you’ve got your tools ready, it’s time to start taking off the pedals, handlebars, and wheels, just like a mechanic preparing for a race.
Start by removing the pedals. Most bikes have pedals that are threaded in opposite directions, so you’ll need to turn the left pedal counterclockwise and the right pedal clockwise to loosen them. However, some pedals may have alternative removal methods, such as using an Allen key or a pedal wrench.
Once the pedals are off, wrap them in bubble wrap or a cloth to prevent any scratches or damage.
Next, remove the handlebars. Loosen the stem bolts with an Allen key or a wrench and slide the handlebars out. Be careful not to damage any cables or wires attached to the handlebars. If the cables are too tight, release them by loosening any cable clamps or bolts.
Wrap the handlebars in bubble wrap or a cloth and secure them to the frame with zip ties.
Lastly, remove the wheels by loosening the quick-release skewers or bolts. Wrap the wheels in bubble wrap or a cloth and store them in a separate bag.
With these components removed, it’s time to secure any loose parts before packing the bike for travel.
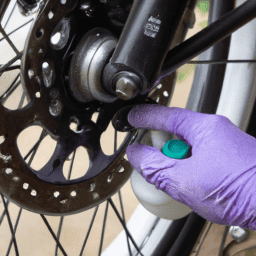
Secure Loose Parts
To make sure everything stays in place during transport, it’s important to secure any loose parts left on the bike. This includes the saddle, seat post, and any accessories such as water bottle holders or bike computers. Before tightening bolts, it’s important to pad the areas where the parts will be secured to prevent scratches or damage to the bike frame. A simple way to pad these areas is to use bubble wrap or foam tubing.
Once the padding is in place, tighten bolts using a torque wrench to ensure that the parts are secure but not over-tightened. Over-tightening can damage the bike frame or strip the bolts, making it difficult to remove them later on. Double-check that all parts are snugly secured before moving on to the next step of packing the bike.
As you finish securing loose parts, you can now move on to the next step of packing your bike for air travel. It’s important to use specialized bike bags or boxes to protect your bike during its journey.

LOOMA MOTION Bike Travel Bag Airplane – Box for Air Travel | Durable Bike Cases with Full Protection | Fits Road & TT Bikes with Wheels, Safe Case for Flying
All protections included – Unlike other bike case for flying, the Looma Motion comes with complete protection for...
As an affiliate, we earn on qualifying purchases.
Use Specialized Bike Bags or Boxes
Using specialized bike bags or boxes is essential for ensuring the safe and secure transport of your bicycle during air travel. There are many bike bag options available on the market, each with their own unique features and benefits.
The most popular bike bags include soft-shell bike bags, hard-shell bike boxes, and hybrid bike bags that combine the best of both worlds. The bag vs box debate is a common one among cyclists, with some preferring the added protection and durability of a hard-shell box, while others prefer the convenience and portability of a soft-shell bag. Ultimately, the decision comes down to personal preference and budget.
Regardless of which option you choose, make sure to select a bag or box that is specifically designed for bicycles, as this will ensure a proper fit and maximum protection for your bike during transport.
Now, let’s move on to the next step, which is to protect your bike during transport.

VEVOR Bike Travel Bag, Transport Universal Bicycle Storage Case Bag with TSA Lock, Support Plates, Protection and Fork Mount Stabilisation, Bicycle Case Max. Wheelbase 51 in for Airplane, Outdoor Use
Road Bike Fit: This bike travel bag fits wheelbases up to 51 in (130 cm). You remove wheels,...
As an affiliate, we earn on qualifying purchases.
Protect Your Bike During Transport
Make sure you wrap your handlebars with foam or bubble wrap to prevent any scratches or damage during transit. For example, imagine arriving at your destination only to find that your handlebars are dented and scratched, ruining your entire biking trip. When packing your bike, it is important to use high-quality bike packaging materials to ensure that your bike is protected during transit. While specialized bike bags or boxes are the best options, there are also DIY bike packing tips you can use to protect your bike.
One way to protect your bike is to use pipe insulation foam to wrap around your bike frame and fork. This foam is lightweight and easy to use, and it provides added protection against shocks and impacts during handling. Another tip is to use zip ties to secure your wheels to the frame of your bike. This will prevent the wheels from shifting during transit, which can cause damage to the spokes or derailleur. To give you an idea of what materials you will need to pack your bike, here is a table of some commonly used bike packaging materials:
| Material | Description | Use |
|---|---|---|
| Bubble wrap | Lightweight plastic wrap with air pockets | Protects against scratches and minor impacts |
| Foam sheets | Soft, cushioned foam that can be cut to size | Provides added protection against impacts and scratches |
| Zip ties | Plastic ties that can be secured around bike frame and parts | Secures parts and prevents shifting during transit |
| Cardboard boxes | Durable boxes that can be cut to size | Provides a sturdy outer layer of protection for your bike |
| Packing tape | Strong adhesive tape used to secure wrapping and boxes | Keeps wrapping and boxes in place during transit |
Now that you know how to protect your bike during transport, the next step is to learn how to reassemble your bike upon arrival.
Reassemble Your Bike Upon Arrival
Once you arrive at your destination, you’ll need to put your bike back together to get ready for your ride. This process may seem daunting, but with the right tools and knowledge, it can be done quickly and efficiently.
First, make sure you have all the necessary tools, including a torque wrench, Allen keys, and a pedal wrench. Check that all the small parts, such as bolts and washers, are accounted for and not lost during transport.
One common issue during reassembly is the alignment of the derailleur. It’s important to make sure the derailleur hanger is not bent and that the derailleur is properly aligned with the cassette.
Another issue is the tightness of the headset. Make sure it’s not too loose or too tight, as either can cause issues while riding.
By taking your time and checking all the components thoroughly, you can ensure a safe and successful ride after reassembling your bike.
Frequently Asked Questions
Can I use a regular suitcase to transport my bike on a plane?
I wouldn’t recommend using a regular suitcase as an alternative to a bike bag or box for air travel. Most suitcases won’t meet weight limits and lack the necessary padding to protect your bike.
Do I need to remove the pedals from my bike before packing it?
Before packing my bike, I consider removing the pedals. Pros include reducing the risk of damage and saving space. Cons include added time and potential for lost parts. Alternatively, I may use a pedal wrench and leave them on for packing.
What should I do if my bike is too large to fit in a standard bike bag or box?
If my bike is too large for a standard bike bag or box, I should consider alternative solutions, such as using an oversized baggage service offered by the airline or renting a hard-sided bike case.
Is it necessary to purchase additional insurance for my bike during air travel?
Yes, purchasing additional insurance coverage for your bike during air travel is highly recommended. Despite packing tips and precautions, there is always a risk of damage or loss during transit. Protect your investment and avoid potential financial loss.
Are there any restrictions on the type of bike I can bring on a plane?
When it comes to air travel with a bike, airlines typically have restrictions on the size and weight of the bike you can bring. Custom bike options may also come with additional fees.
Conclusion
In conclusion, packing a bicycle for air travel requires patience, knowledge, and the right tools. As a seasoned traveler and cyclist, I know the importance of adhering to airline policies and fees, as well as disassembling certain components of the bike for safe transport.
Once the bike is disassembled, it’s essential to use specialized bike bags or boxes that can protect the bike from damage during transport. The process of reassembling the bike upon arrival can be challenging, but with the right knowledge and tools, it can be done easily.
The key is to take your time and ensure that each component is reassembled correctly. As I’ve learned from experience, the satisfaction of being able to explore new destinations on my own bike far outweighs the challenges of packing and transporting it.
With these tips in mind, cyclists can confidently travel with their bikes and enjoy the ride of a lifetime.