Bike
How To Repaint A Bicycle

Repainting a bicycle is a transformative process that can make an old, worn-out bike look brand new again. It’s like giving your trusty steed a facelift that will not only improve its appearance but also extend its lifespan. This may sound like an intimidating task, but with the right tools and techniques, it’s a project that can be tackled by anyone.
Before you begin, gather all the necessary materials and tools, including sandpaper, primer, paint, and clear coat. You’ll also need some basic bike tools to disassemble and reassemble your bicycle, such as wrenches, screwdrivers, and pliers.
With these in hand, you’ll be ready to give your bike the makeover it deserves. So, let’s dive into the process of repainting your bicycle and see how easy it can be with a little bit of elbow grease and some patience.
Key Takeaways
- Repainting a bike can make it look brand new and extend its lifespan.
- Materials and tools needed include sandpaper, primer, paint, clear coat, and basic bike tools.
- Steps for repainting a bike include choosing metal-specific paint, sanding away old paint and rust, disassembling the bike, cleaning the frame, applying primer, reassembling the bike, and experimenting with custom paint designs.
- Maintenance tips include keeping the bike clean and dry, lubricating the chain, checking brakes, and inspecting tires.
Gather Your Materials and Tools
Now it’s time to gather all the materials and tools you’ll need to give your bicycle a fresh coat of paint.
To start, you’ll need to choose the right type of paint for your bicycle. There are many types of paint to choose from, but you should look for one that’s specifically designed for metal surfaces. You can choose from a variety of finishes, including gloss, semi-gloss, and matte.
In addition to paint, you’ll also need sandpaper to prepare the surface of your bicycle for painting. You’ll want to remove any old paint or rust before applying the new coat. Sanding techniques can vary depending on the type of surface you’re working with, so be sure to do your research before getting started.
With these materials and tools in hand, you’re ready to move on to the next step: disassembling your bicycle.
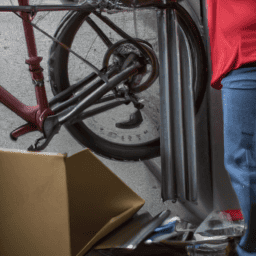
Disassemble Your Bicycle
First, you’ll want to loosen the bolts and screws holding the different components of your bike together. This will allow you to disassemble the bike and prepare it for repainting. Before starting, make sure you have the necessary tools on hand, such as Allen wrenches, screwdrivers, pliers, and a wrench set. It’s also important to take safety precautions, such as wearing gloves to protect your hands and goggles to shield your eyes from any debris that may fly up during disassembly.
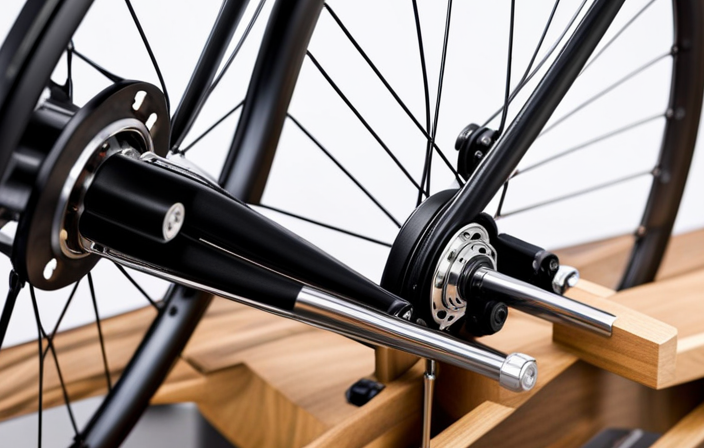
Next, begin disassembling the bike by removing the wheels, pedals, saddle, and handlebars. Store the disassembled parts in a safe place to avoid losing any pieces. Use zip ties or small bags to keep the hardware organized and labeled so you can easily put the bike back together when it’s time.
Storing the parts in a logical order will also help you avoid confusion and save time in the long run. With the bike fully disassembled, you can now move on to prepping the frame for painting.
Prep Your Frame
To get your frame ready for a fresh coat of paint, you’ll want to make sure you thoroughly clean it with a degreaser and sand away any rust or rough patches that may interfere with the new finish. This may seem time-consuming, but it will ensure a smoother and longer-lasting paint job.
Start by removing any components or accessories that may still be attached to your bike frame, so that you can focus on the frame itself. Use a degreaser to remove any dirt, oil, or grime that may be present on the frame. Rinse the frame with water and let it dry completely before moving on to the next step.
Next, use sandpaper grit to remove any rust or rough patches on the frame. Start with a coarse grit sandpaper and then move on to a finer grit sandpaper to smooth out the surface. Be sure to pay extra attention to any areas where the paint has chipped or peeled off.
Once you have sanded the entire frame, wipe it down with a clean cloth to remove any dust or debris. You can now apply a primer to the frame to ensure that the new paint adheres properly. There are many primer options available, so choose one that is appropriate for your frame material and the type of paint you will be using.
By now, you should have a clean, smooth, and primed bike frame, ready for its new coat of paint. With the prep work out of the way, it’s time to reassemble your bicycle and get it back on the road.
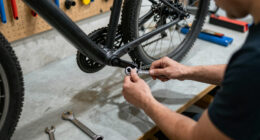
Reassemble Your Bicycle
After completing the prep work, it’s time to put everything back together and enjoy your sleek, new ride. But before you start reassembling your bicycle, make sure that all the parts are clean and free from dirt and debris. This will ensure that everything fits together properly and that you won’t have any issues with misaligned parts.
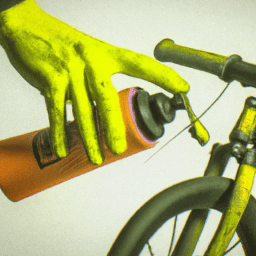
When reassembling your bicycle, it’s important to pay attention to the torque specifications for each bolt and screw. Using a torque wrench will help you ensure that everything is tightened to the correct level, preventing any potential issues down the road. Additionally, be sure to lubricate all moving parts, such as the chain, derailleur, and brake calipers.
This will not only help to prevent rust and corrosion, but it will also help your bike to shift and brake smoothly. With proper lubrication and torque, your bike will feel like new again.
Now that your bicycle is reassembled and in working order, it’s time to move on to the finishing touches.
Finishing Touches
Now that I’ve finished painting my bicycle, it’s time to move on to the finishing touches.
First, I need to remove the masking tape and newspaper from the areas I covered earlier.
Next, I’ll carefully inspect the bike for any smudges or mistakes, and clean them up with a damp cloth or sandpaper if necessary.
Finally, I can step back and admire my handiwork, enjoying the satisfaction of a job well done.
Remove masking tape and newspaper
Congratulations! You can finally peel off the masking tape and newspaper from your freshly painted bicycle, revealing its stunning new look. But before you throw away those scraps of paper and tape, make sure to follow these steps to avoid any damage to your new paint job:
-
Use a sharp blade or a pair of scissors to carefully cut the tape along the edges of your paint job. This will prevent any peeling or chipping of the new paint.
-
Once the tape is removed, inspect your bicycle for any smudges or mistakes that may have occurred during the painting process. If necessary, use sandpaper to smooth out any rough areas.
-
Clean up any excess paint or debris using a damp cloth or sponge. Be careful not to rub too hard, as this could damage the new paint job.
-
Finally, take a step back and admire your newly painted bicycle!
Now that you’ve removed all the tape and paper, it’s time to move on to the next step: cleaning up any smudges or mistakes.
Clean up any smudges or mistakes
To clean up any smudges or mistakes, you’ll need to grab a damp cloth or sponge and gently wipe away any imperfections. This is an important step in the process because even the smallest smudge can ruin the overall look of your newly painted bicycle.
Don’t be afraid to take your time and go over the entire surface, making sure that everything looks perfect. If you notice any scratches or imperfections that can’t be wiped away with a damp cloth, don’t worry.
You can easily fix these issues by sanding down the affected area and applying a touch-up coat of paint. This is also a good time to choose any additional paint colors you may want to add to your bicycle, such as stripes or accents.
Once you’re happy with the overall look of your bike, it’s time to move on to the final step and enjoy your newly painted bicycle!
Enjoy your newly painted bicycle!
Get ready to ride your freshly painted bike and show it off to all your friends! But before you hit the road, it’s important to keep your newly painted bicycle in top condition.
Maintenance tips include keeping it clean and dry, lubricating the chain, checking the brakes, and inspecting the tires for wear and tear. By taking care of your bike, you’ll ensure it stays looking great for years to come.
If you’re feeling creative, you can also experiment with custom paint designs to make your bike truly unique. From simple stripes and patterns to more intricate designs, the possibilities are endless.
Just remember to use high-quality paint and take your time to achieve the desired results. With a little patience and practice, you can turn your bicycle into a work of art that reflects your personal style. So go ahead and let your imagination run wild – the end result will be worth it!
Frequently Asked Questions
How long does the repainting process usually take?
The duration of the repainting process can vary based on the size of the bicycle and complexity of the design. However, proper preparation is crucial for a successful paint job. Common mistakes to avoid include not cleaning the bike thoroughly and rushing the drying process.
Can I use any type of paint for my bicycle?
I wouldn’t want to paint a bullseye on my back, so I always choose suitable paint for my bike. When preparing the surface, I suggest using sandpaper and cleaning agents. Be mindful of the weather, as it can affect the paint’s drying time.
Is it necessary to remove all the parts from the bicycle before painting it?
It is not necessary to remove all parts before repainting a bicycle, but it is recommended. Pros of leaving parts on include saving time and avoiding potential damage from removing and reassembling. However, tips for protecting parts during repainting include covering them with tape or plastic wrap.
How do I ensure that the paint job will last a long time?
To ensure a long-lasting paint job, proper paint preparation is key. Start by thoroughly cleaning and sanding the surface. Apply a primer and let it dry before adding the final coat. Regular maintenance tips include storing the bike indoors and cleaning it regularly.
Can I paint over rusted areas on my bicycle or do I need to remove the rust first?
To prevent rust from spreading, it’s best to remove the rusted areas before painting. Rust prevention techniques like primers and rust converters can also help. Alternative paint options like powder coating can provide added protection against rust.
Conclusion
Well folks, I hope you’ve enjoyed my detailed and technical guide on how to repaint your bicycle. I know you’re all dying to get out there and show off your new color scheme, but before you do, let me give you a few final tips.
First off, don’t forget to wear gloves and a mask while painting. You don’t want to end up with a new shade of paint on your skin or in your lungs.
And speaking of paint, don’t skimp on quality. Trust me, you don’t want your beautiful new paint job to start chipping away after just a few rides.
Lastly, if all else fails and your paint job turns out to be a disaster, don’t worry. Just tell everyone it’s a new avant-garde style and that you’re a trendsetter. Who knows, maybe you’ll start a new fashion craze.
Keep on pedaling, my friends!
Bike
How Much Can A 100cc Bicycle Go

Have you ever wondered how far a 100cc bicycle can take you on your adventures? Get ready to unlock the potential of this powerful mode of transportation.
In this article, we will delve into the basics of a 100cc bicycle, explore its power and speed, and discuss the factors that affect its distance.
With some tips for maximizing your range, we will also compare it to other modes of transportation and consider its environmental benefits.
Get ready to embark on a thrilling journey with your 100cc bicycle.
Key Takeaways
- A 100cc bicycle can travel up to 100 kilometers on a single tank of fuel, making it suitable for various adventures.
- The environmental benefits of using a 100cc bicycle include decreased air pollution, reduced greenhouse gas emissions, conservation of natural resources, and noise pollution reduction.
- Bicycles have zero emissions and use human power instead of fossil fuels, helping to conserve non-renewable resources like oil and gas.
- The versatility of a 100cc bicycle as a mode of transportation allows for extraordinary journeys while minimizing carbon footprint and providing unforgettable adventures.
Understanding the Basics of a 100cc Bicycle
A 100cc bicycle can go a maximum speed of around 50 miles per hour. The power output of a 100cc bicycle is determined by its engine, which is typically a two-stroke or four-stroke engine. These engines require regular maintenance to ensure optimal performance. This includes checking and changing the oil, cleaning the air filter, and inspecting the spark plug.
Proper engine maintenance is crucial for ensuring that the bike can reach its maximum speed and power. Exploring the power and speed of a 100cc bicycle allows riders to experience the thrill of high-speed cycling. By maintaining the engine and following proper maintenance procedures, riders can confidently push the limits of their 100cc bicycle and enjoy the exhilaration of reaching top speeds.
Exploring the Power and Speed of a 100cc Bicycle
You might be surprised by the power and speed that a 100cc bike can achieve. Here are four key points to help you appreciate the capabilities of a 100cc bicycle:
-
Power and Acceleration: Despite its small engine size, a 100cc bike can deliver impressive power and acceleration. Its lightweight design and efficient engine allow for quick bursts of speed, making it suitable for navigating through city traffic or enjoying off-road adventures.
-
Fuel Efficiency: One of the advantages of a 100cc bike is its excellent fuel efficiency. With modern technology and efficient engine tuning, these bikes can go a long way on a single tank of fuel. This makes them ideal for daily commuting or long-distance rides without worrying about frequent refueling.
-
Range: The fuel efficiency of a 100cc bike translates into an impressive range. Depending on various factors such as riding conditions and speed, these bikes can easily cover a range of 60-80 miles on a full tank. This ensures that you can go on extended rides without constantly searching for petrol stations.
-
Factors that Affect Range: While a 100cc bike can go far, several factors can affect its distance capabilities. These factors include riding style, terrain, weight, and maintenance. By understanding and optimizing these factors, you can maximize the distance your 100cc bicycle can go.
Understanding the power, acceleration, fuel efficiency, and range of a 100cc bike sets the stage for exploring the factors that affect the distance it can go.
Factors That Affect the Distance a 100cc Bicycle Can Go
Understanding the power, acceleration, fuel efficiency, and range of a 100cc bike sets the stage for exploring the factors that impact its distance capabilities.
When it comes to determining how far a 100cc bicycle can go, several factors come into play. Firstly, the terrain plays a significant role. Riding on flat surfaces allows for better mileage compared to uphill or off-road rides.
Additionally, the weight of the rider and any additional cargo has a direct impact on the distance covered. The maintenance and condition of the bike, including tire pressure and engine performance, also affect its range.
Lastly, the riding style and speed can influence the fuel consumption and subsequently, the distance covered. Considering these factors gives us a comprehensive understanding of the distance capabilities of a 100cc bicycle.
Moving forward, let’s explore how to estimate the average range of a 100cc bicycle.
Estimating the Average Range of a 100cc Bicycle
To estimate the average range of your 100cc bike, consider factors such as terrain, rider weight, bike maintenance, and riding style. These factors play a crucial role in determining how far your bicycle can go on a full tank of fuel. Maximizing fuel efficiency is key to maximizing the distance covered. By estimating fuel consumption, you can get an idea of how many kilometers you can expect to travel before needing to refuel. To help you visualize the impact of these factors, here is a table outlining the estimated range for a 100cc bicycle under different conditions:
Terrain | Rider Weight | Bike Maintenance | Riding Style | Estimated Range |
---|---|---|---|---|
Flat | Light | Well-maintained | Smooth | 100 km |
Hilly | Heavy | Poorly-maintained | Aggressive | 70 km |
Mixed | Average | Regularly-maintained | Moderate | 85 km |
Rough | Light | Well-maintained | Smooth | 90 km |
Urban | Heavy | Regularly-maintained | Aggressive | 75 km |
By understanding these factors and estimating fuel consumption, you can make informed decisions to maximize the distance covered on your 100cc bicycle. Now, let’s explore some tips for achieving this goal.
Tips for Maximizing the Distance Covered on a 100cc Bicycle
To maximize the distance covered on your 100cc bike, there are several tips you can follow.
-
Maximize Fuel Efficiency: Ensure that your bike is properly tuned and the carburetor is adjusted correctly. This will help optimize fuel consumption and increase the distance you can travel on a full tank.
-
Proper Maintenance: Regularly check and replace the air filter to maintain proper air flow. Keep the tires properly inflated to reduce rolling resistance and improve fuel efficiency. Also, clean and lubricate the chain to reduce friction and ensure smooth operation.
-
Ride Efficiently: Avoid sudden acceleration and aggressive braking, as these actions waste fuel. Maintain a steady speed and use the bike’s momentum to your advantage. Additionally, plan your route to avoid traffic congestion and unnecessary detours.
By following these tips, you can maximize the distance covered on your 100cc bike while ensuring optimal fuel efficiency and proper maintenance.
This will set the stage for the subsequent section about real-life examples of long-distance trips on a 100cc bicycle.
Real-Life Examples of Long-Distance Trips on a 100cc Bicycle
For real-life examples of long-distance trips on a 100cc bike, you can look at the experiences of other riders who have successfully traveled far distances.
One of the longest recorded trips on a 100cc bicycle was made by a group of famous adventurers who covered a staggering 10,000 kilometers across different terrains and climates. Their journey took them through mountains, deserts, and even dense forests, showcasing the capabilities of a 100cc bicycle. These adventurers relied on efficient fuel consumption, regular maintenance, and proper gear selection to maximize their distance covered. Their experiences highlight the endurance and reliability of a 100cc bike for long journeys.
Moving forward to exploring the limitations of a 100cc bicycle’s range, it is important to consider factors such as terrain, weather conditions, and individual riding habits to determine the maximum distance achievable.
Exploring the Limitations of a 100cc Bicycle’s Range
After exploring real-life examples of long-distance trips on a 100cc bicycle, it is important to understand the limitations of its range.
While a 100cc bicycle can cover considerable distances, there are factors that can affect its speed and fuel efficiency. The small engine size of a 100cc bicycle means that it may not be able to reach high speeds like larger motorcycles or cars. Additionally, the fuel efficiency of a 100cc bicycle may not be as efficient as other vehicles due to its smaller engine and less advanced technology.
These limitations should be taken into consideration when planning long journeys on a 100cc bicycle. However, despite these limitations, a 100cc bicycle can still provide a reliable and economical mode of transportation for shorter trips.
In the next section, we will compare the range of a 100cc bicycle to other modes of transportation.
Comparing the Range of a 100cc Bicycle to Other Modes of Transportation
When comparing the range of a 100cc bicycle to other modes of transportation, it is important to consider factors such as speed and fuel efficiency. Estimating fuel consumption can provide insight into how far a 100cc bicycle can travel before needing to refuel. Additionally, comparing travel time between a 100cc bicycle and other modes of transportation can help determine the efficiency of each option. To illustrate this, consider the following table:
Mode of Transportation | Average Speed (mph) | Estimated Fuel Consumption (gallon/hour) |
---|---|---|
100cc Bicycle | 15 | 0.1 |
Motorcycle | 60 | 0.5 |
Car | 60 | 1.5 |
Train | 80 | N/A |
Plane | 500 | N/A |
As shown in the table, a 100cc bicycle has a lower average speed and fuel consumption compared to motorcycles and cars. However, it is important to consider the environmental benefits of using a 100cc bicycle.
Considering the Environmental Benefits of Using a 100cc Bicycle
Considering the environmental benefits, using a 100cc bicycle can be a sustainable transportation option. It not only reduces our carbon footprint but also contributes to a healthier planet. Here are five reasons why a 100cc bicycle is an eco-friendly choice:
- Decreased air pollution: Unlike cars and motorcycles, bicycles don’t emit harmful pollutants into the air, helping to improve air quality.
- Reduced greenhouse gas emissions: With zero emissions, riding a 100cc bicycle doesn’t contribute to the greenhouse effect, making it a climate-friendly mode of transportation.
- Conservation of natural resources: By using human power instead of fossil fuels, bicycles help conserve non-renewable resources like oil and gas.
- Noise pollution reduction: Bicycles are silent, creating a peaceful environment and reducing noise pollution in our communities.
- Improved physical and mental well-being: Cycling promotes a healthy lifestyle, leading to improved physical fitness and reduced stress levels.
Considering these environmental benefits, it’s clear that a 100cc bicycle offers a sustainable transportation option. Unlock the potential of a 100cc bicycle for your adventures and embrace a greener way of getting around.
Conclusion: Unlocking the Potential of a 100cc Bicycle for Your Adventures
By embracing a 100cc bicycle, you can unlock its potential for exciting adventures and contribute to a greener way of transportation. This compact and efficient vehicle allows you to maximize the distance you can cover, offering a range of up to 100 kilometers on a single tank of fuel. Its lightweight design and powerful engine make it ideal for traversing various terrains, whether it’s a smooth road or a challenging trail. Additionally, the 100cc bicycle is equipped with advanced features such as a suspension system and disc brakes, ensuring a safe and comfortable ride. To demonstrate the capabilities of this remarkable vehicle, consider the following table:
Terrain Type | Maximum Distance (km) |
---|---|
City Streets | 80 |
Mountain Trails | 60 |
Coastal Roads | 90 |
Forest Paths | 70 |
Rural Highways | 100 |
As you can see, a 100cc bicycle is a versatile mode of transportation that can take you on extraordinary journeys while minimizing your carbon footprint. So, unlock its potential and embark on unforgettable adventures.
Frequently Asked Questions
Can a 100cc bicycle be used for daily commuting?
Yes, a 100cc bicycle can be used for daily commuting. It offers the advantages of cost-effectiveness and maneuverability. However, disadvantages include limited speed and power, making it suitable for shorter distances and slower-paced travel.
What is the fuel efficiency of a 100cc bicycle?
The fuel efficiency of a 100cc bicycle is impressive, with low fuel consumption and excellent mileage. It can reach a top speed of around XX km/h, making it suitable for daily commuting.
Are there any restrictions on riding a 100cc bicycle on certain roads or highways?
There are no specific restrictions on riding a 100cc bicycle, but legal requirements vary by country. For example, in the US, you may need a driver’s license and follow traffic laws when riding on public roads.
How long does it take to charge the battery of a 100cc electric bicycle?
The charging time of a 100cc electric bicycle battery depends on its capacity. Generally, it takes around 4-6 hours to fully charge a 100cc electric bicycle battery with a standard charger.
Can a 100cc bicycle be modified to increase its speed and range?
Yes, a 100cc bicycle can be modified to increase its speed and range. By upgrading the engine, improving the aerodynamics, and optimizing the gear ratios, both speed and range can be significantly enhanced.
Conclusion
After conducting thorough research and analysis, it’s clear that a 100cc bicycle has immense potential for adventure. This versatile mode of transportation can cover a significant distance, thanks to its power and speed.
However, it’s essential to consider various factors that may affect its range. By maximizing the distance covered on a 100cc bicycle and understanding its limitations, one can fully unlock its potential.
Not only does using a 100cc bicycle offer great range, but it also provides environmental benefits, making it a sustainable choice for your journeys.
Bike
How To Change From Bicycle To Car On Uber Eats

Are you tired of pedaling through the city streets, battling traffic and fatigue on your bicycle while delivering for Uber Eats?
Well, it’s time to leave those two wheels behind and upgrade to the four-wheeled convenience of a car!
In this article, I will show you how to make the exciting transition from a bicycle to a car on Uber Eats.
Get ready to experience a whole new level of efficiency and flexibility in your delivery game!
Key Takeaways
- Changing from a bicycle to a car on Uber Eats can improve delivery efficiency and prevent fines and delays.
- Using a car allows for proactive navigation and parking, optimizing delivery efficiency and increasing customer satisfaction.
- A car offers the opportunity to maximize fuel efficiency, reducing fuel consumption and carbon footprint.
- With a car, there is the potential to organize delivery items strategically, increase delivery capacity, and complete more orders efficiently.
Assess Your Delivery Needs
Before switching from a bicycle to a car on Uber Eats, it’s important to assess your delivery needs. Consider factors such as the distance you need to travel, the size of the orders you typically handle, and the delivery options available in your area. Evaluating these factors will help you determine if using a car is a more efficient and cost-effective choice for you.
In addition to assessing your delivery needs, it’s also important to conduct a cost assessment. Compare the expenses associated with using a car versus a bicycle. Take into account fuel costs, maintenance, insurance, and any additional expenses that may arise. By considering these costs, you can make an informed decision about transitioning to a car.
Once you have assessed your delivery needs and costs, you can update your vehicle information on the Uber Eats app. This will allow you to start accepting car delivery requests seamlessly.
Update Your Vehicle Information on the Uber Eats App
To update your vehicle information on the Uber Eats app, simply go to the settings section. Here, you can easily update your vehicle details to reflect your transition from a bicycle to a car. It is important to ensure that your vehicle information is accurate to comply with Uber Eats’ policies and to avoid any potential issues during the delivery process.
To help you understand the necessary updates, refer to the table below:
Vehicle Information | Details |
---|---|
Vehicle Type | Car |
Make | [Your car’s make] |
Model | [Your car’s model] |
Year | [Your car’s year] |
License Plate Number | [Your license plate] |
After updating your vehicle information, it is essential to undergo the vehicle inspection process to ensure that your car meets the safety standards set by Uber Eats. Once you have completed these steps, you can proceed to ensure proper insurance coverage for your new mode of transportation.
Ensure Proper Insurance Coverage
Make sure you have the right insurance coverage for your new mode of transportation. Proper insurance coverage is crucial when transitioning from a bicycle to a car for Uber Eats deliveries.
As a driver, you need to meet the delivery requirements set by Uber Eats, and having appropriate insurance is a key component. Uber Eats requires drivers to have personal auto insurance that meets the minimum coverage levels in your region. Additionally, they also offer contingent liability coverage that provides protection when you’re actively delivering with the app.
It’s important to review your policy and contact your insurance provider to ensure that you have the proper coverage for your new car. Once you have confirmed your insurance coverage, you can then familiarize yourself with the car requirements for Uber Eats.
Familiarize Yourself with Car Requirements
Get acquainted with the vehicle specifications that need to be met for Uber Eats deliveries. Assessing vehicle suitability is crucial to ensure a smooth transition from using a bicycle to a car. Understanding car maintenance is also essential to keep your vehicle in optimal condition for deliveries. Here is a table that outlines the basic requirements for a car to be eligible for Uber Eats:
Requirement | Details |
---|---|
Vehicle Age | Typically, must be 20 years old or newer |
Vehicle Type | Cars, vans, or trucks are accepted |
Vehicle Insurance | Must have valid and up-to-date insurance |
Vehicle Registration | Must be registered in your name |
Vehicle Inspection | May be required in certain regions |
By familiarizing yourself with these requirements, you can determine if your car meets the necessary criteria. Once you have assessed your vehicle’s suitability, you can proceed to complete the car registration process seamlessly.
Complete the Car Registration Process
After familiarizing yourself with the vehicle requirements, you can now proceed to complete the car registration process.
Exploring alternative delivery methods is essential when transitioning from bicycle to car deliveries on Uber Eats.
Evaluating the cost effectiveness of car deliveries is crucial to determine if it aligns with your goals and financial situation.
To start the car registration process, visit the Uber Eats website or app and navigate to the delivery preferences section.
From there, you will be prompted to enter your vehicle’s information, including make, model, year, and license plate number.
Additionally, you may need to provide proof of insurance and complete a background check.
Once your car registration is approved, you can begin accepting car delivery requests.
Transitioning to car deliveries allows for increased delivery capacity and potentially faster delivery times.
Transition from Bicycle to Car Deliveries
Transitioning from delivering on a bicycle to using a car allows for increased capacity and potentially faster delivery times. However, this transition comes with its own set of challenges. One of the first steps is selecting the right vehicle for your needs. Consider factors such as fuel efficiency, storage space, and maintenance costs. To help you make an informed decision, here is a comparison table of three popular car models:
Car Model | Fuel Efficiency (mpg) | Storage Space (cubic feet) | Maintenance Costs ($) |
---|---|---|---|
Model A | 30 | 20 | 500 |
Model B | 35 | 25 | 600 |
Model C | 40 | 30 | 700 |
As you can see, Model C offers the best fuel efficiency and storage space, but it also has slightly higher maintenance costs. Consider your budget and delivery needs when making your choice. Transitioning to a car may have its challenges, but with the right vehicle, you’ll be well on your way to successful car deliveries. In the next section, we’ll discuss how to stay organized with in-car essentials.
Stay Organized with In-Car Essentials
After successfully transitioning from bicycle to car deliveries, I realized the importance of staying organized with in-car essentials. Car organization is key to maintaining an efficient delivery setup.
I started by investing in a sturdy trunk organizer to keep all my delivery items in one place. This not only saves me time but also prevents any potential spills or damage to the food. Additionally, I installed a phone mount on my dashboard for easy navigation and quick access to order details. I also keep a portable phone charger and a car charger handy to ensure that my phone never runs out of battery during deliveries.
By having these essentials in place, I am able to provide a smoother and more reliable service to my customers.
Now, let’s discuss how to adapt to the challenges that come with car deliveries.
Adapt to Car Delivery Challenges
To adapt to the challenges of delivering with a car, you need to be prepared for various obstacles that may arise.
Overcoming traffic obstacles is a crucial aspect of car delivery. Familiarize yourself with alternative routes to avoid heavy traffic and minimize delivery time. Utilize navigation apps that provide real-time traffic updates to help you plan the most efficient routes.
Managing parking challenges is another hurdle to overcome. Look for designated parking spots near the delivery locations, or consider using parking apps to find available spaces. Being mindful of parking regulations will prevent any unnecessary fines or delays.
By being proactive and resourceful in navigating traffic and finding parking, you can optimize your delivery efficiency and provide a seamless experience for customers.
Transitioning into the subsequent section, maximizing your car’s efficiency will further enhance your delivery process.
Maximize Your Car’s Efficiency
To maximize my car’s efficiency for food delivery, I practice fuel-efficient driving techniques. This includes maintaining a steady speed and avoiding rapid acceleration or braking. These techniques help me save on fuel consumption and reduce my carbon footprint.
Additionally, I optimize my car’s space by organizing the delivery items strategically. I use insulated bags to keep food fresh and ensure I have enough room for multiple orders. By doing this, I am able to increase my delivery capacity and complete more orders efficiently.
Practice fuel-efficient driving techniques
Practicing fuel-efficient driving techniques will help you save on gas while delivering for Uber Eats. To maximize fuel savings and reduce your environmental impact, here are some eco-friendly driving techniques:
- Maintain a steady speed: Avoid unnecessary acceleration and braking as it can waste fuel.
- Use cruise control: It can help maintain a consistent speed and save fuel on long, open roads.
- Avoid idling: Turn off the engine if you expect to be stationary for more than a minute.
- Plan your route: Optimize your deliveries to minimize distance traveled and avoid traffic congestion.
- Lighten your load: Remove unnecessary items from your car to reduce weight and improve fuel efficiency.
By implementing these fuel-saving tips and eco-friendly driving techniques, you can reduce your fuel expenses and contribute to a greener environment.
Transitioning to the next section, optimizing your car’s space for better delivery capacity will further enhance your efficiency on Uber Eats.
Optimize your car’s space for better delivery capacity
To improve your delivery capacity, consider maximizing the space in your vehicle for efficient transportation. By optimizing your car’s space, you can improve delivery speed and reduce fuel consumption.
Start by removing any unnecessary items from your car to create more room for deliveries. Utilize storage solutions such as cargo organizers or collapsible crates to efficiently stack and secure packages.
Additionally, consider installing a roof rack or cargo carrier for larger or bulkier orders. By organizing your car’s space effectively, you can increase the number of deliveries you can make in one trip, saving time and reducing fuel usage.
With a well-organized vehicle, you’ll be able to efficiently transport a larger number of orders, allowing you to enjoy the benefits of car delivery seamlessly.
Enjoy the Benefits of Car Delivery
You’ll love the perks of car delivery on Uber Eats. Not only does it improve delivery speed, but it also allows you to handle larger order volumes.
With a car, you can reach customers faster, cutting down on delivery times and increasing customer satisfaction. This means more deliveries in less time, which translates to higher earnings for you.
Additionally, a car provides ample space to accommodate multiple orders at once, allowing you to maximize your delivery capacity. This means fewer trips back and forth, saving you time and fuel costs.
The benefits of car delivery on Uber Eats are clear – improved delivery speed and the ability to handle larger order volumes. Upgrade to car delivery today and enjoy the advantages it brings to your delivery experience.
Frequently Asked Questions
Can I use a motorcycle instead of a car for Uber Eats deliveries?
No, motorcycles cannot be used for Uber Eats deliveries. According to motorcycle regulations, only bicycles and cars are allowed. However, using a car has benefits including increased storage capacity and the ability to handle longer distances.
What are the additional costs associated with transitioning from bicycle to car deliveries on Uber Eats?
Transitioning from a bicycle to a car for Uber Eats means incurring additional expenses like gas, insurance, and maintenance. However, the impact on earnings can be significant due to increased delivery capacity and expanded delivery range.
Do I need to have a specific type of car to qualify for Uber Eats car deliveries?
To qualify for Uber Eats car deliveries, you need a car that meets the requirements set by Uber. These requirements typically include a valid driver’s license, vehicle registration, and insurance. Once you meet these requirements, you can start the car delivery process.
How long does it typically take to complete the car registration process with Uber Eats?
Typically, the car registration process with Uber Eats takes a few days. Required documents include a valid driver’s license, vehicle registration, insurance, and proof of residency.
Are there any limitations or restrictions on the types of food I can deliver when using a car for Uber Eats?
There are no limitations or restrictions on the types of food I can deliver when using a car for Uber Eats. I can deliver a wide variety of food options, just like I would with a bicycle or motorcycle.
Conclusion
Well, who would’ve thought that switching from the simplicity of a bicycle to the convenience of a car on Uber Eats would bring so much joy?
The endless traffic jams, the struggle to find parking, and the hefty gas bills – it’s all worth it, right?
Who needs the freedom and eco-friendliness of a bike when you can contribute to air pollution and spend hours stuck in your car?
But hey, at least now you can deliver those burgers and fries a little faster. Enjoy!
Bike
How Long Do Bicycle Tires Last In Storage

Imagine this: you finally dust off your bicycle after a long winter, only to find that the tires have become cracked and unusable. It’s a frustrating situation that many cyclists have encountered. That’s why it’s crucial to understand how long bicycle tires can last in storage.
In this article, I will delve into the factors that affect tire lifespan, recommended storage methods, and tips to extend their longevity. So, let’s dive in and ensure your bike is always ready for the road ahead.
Key Takeaways
- Proper storage of bicycle tires is crucial for prolonging their lifespan.
- Keeping tires away from direct sunlight, extreme temperatures, chemicals, and sharp objects is important.
- Using tire covers or bags can help protect tires from dust and debris during storage.
- Recycling and proper disposal of old or damaged tires is important for reducing landfill waste, conserving natural resources, saving energy, and reducing pollution and soil contamination.
Factors That Affect the Lifespan of Bicycle Tires in Storage
You might be wondering how long your bicycle tires can last in storage and what factors can affect their lifespan. Well, one important factor is the recommended storage temperature. Extreme temperatures can cause the rubber to deteriorate faster, so it is best to store your tires in a cool and dry environment.
Additionally, UV exposure can also have a negative impact on tire lifespan. The sun’s rays can break down the rubber compounds over time, leading to cracking and dryness. To protect your tires from UV damage, it is recommended to store them in a dark place or use tire covers.
Now that you know the factors that affect tire lifespan in storage, let’s move on to the recommended storage methods for bicycle tires.
Recommended Storage Methods for Bicycle Tires
Before storing bicycle tires, it’s important to clean and dry them thoroughly. This will prevent any moisture or dirt from causing damage during storage.
Using tire bags or covers is also recommended to protect the tires from dust and debris, which can lead to deterioration over time.
Lastly, it’s crucial to store the tires in a cool, dry, and dark place to maintain their quality and extend their lifespan.
Clean and Dry the Tires Before Storage
After cleaning and drying the tires, make sure to store them in a cool and dry place. Proper storage is crucial to ensure the longevity of your bicycle tires. Here are some cleaning methods and storage containers you can use:
- Use a mild soap and water solution to clean the tires. Avoid using harsh chemicals as they can damage the rubber.
- Gently scrub the tires with a soft brush or cloth to remove dirt and grime.
- Rinse the tires thoroughly and allow them to air dry completely before storage.
- Store the tires in airtight plastic bags or containers to prevent moisture buildup.
- Place the containers in a cool and dry area, away from direct sunlight and extreme temperatures.
By following these cleaning methods and using appropriate storage containers, you can protect your tires from unnecessary wear and tear.
Next, I will discuss the importance of using tire bags or covers to protect the tires from dust and debris.
Use Tire Bags or Covers to Protect from Dust and Debris
To protect your tires from dust and debris, it’s recommended to use tire bags or covers. Tire maintenance is crucial to ensure the longevity of your bicycle tires. One important aspect of tire maintenance is tire rotation. Regularly rotating your tires helps distribute the wear evenly, increasing their lifespan.
By using tire bags or covers, you provide an additional layer of protection against dust and debris that can accumulate during storage. These bags or covers act as a barrier, preventing any unwanted particles from settling on the tires and causing damage. However, it’s important to note that tire bags or covers should not be used as a substitute for proper tire storage.
It’s essential to store your tires in a cool, dry, and dark place to avoid any deterioration caused by extreme temperature or exposure to sunlight.
Store Tires in a Cool, Dry, and Dark Place
Make sure you store your tires in a cool, dry, and dark place to protect them from any potential damage. The storage temperature plays a crucial role in preserving the quality of your bicycle tires. Extreme heat or cold can cause the rubber to deteriorate, leading to cracks and reduced performance.
It is recommended to store your tires at a temperature between 50°F and 75°F (10°C to 24°C) to ensure optimal conditions. Additionally, humidity can also have a negative impact on tire longevity. High humidity levels can promote the growth of mold and mildew, which can weaken the tire structure. Therefore, it is essential to store your tires in a dry environment, preferably with a humidity level below 60%.
By following these guidelines, you can prolong the lifespan of your stored bicycle tires and ensure they are ready for use when needed.
Now, let’s delve into how long bicycle tires can last in storage.
How Long Can Bicycle Tires Last in Storage?
Bicycle tires can last for a long time in storage if properly stored. It is recommended to store tires in a cool, dry, and dark place to prevent damage and degradation. The recommended storage temperature for bicycle tires is between 40°F and 100°F (4°C and 38°C). Extreme temperatures can cause the rubber to deteriorate quickly, leading to cracks and reduced performance.
Additionally, it is important to store tires either vertically or horizontally to prevent deformation. Storing them in an upright position can help maintain their shape and prevent flat spots from forming.
To extend the lifespan of bicycle tires in storage, it is crucial to follow these guidelines and regularly inspect and rotate the tires. By taking these precautions, you can ensure that your stored bicycle tires remain in good condition and ready for use when needed.
Tips to Extend the Lifespan of Bicycle Tires in Storage
If you want to ensure your stored bicycle tires remain in good condition and ready for use, there are a few tips you can follow.
First, consider storing your tires in a cool and dry place to minimize the impact of temperature on their lifespan. Extreme heat or cold can cause the rubber to degrade faster, leading to premature wear and tear.
Second, if you have limited space, try to store your tires in a vertical position rather than stacking them horizontally. This will help prevent any unnecessary pressure or distortion on the tires.
Lastly, it’s a good idea to periodically check on your stored tires and rotate them to prevent flat spots from forming. Taking these precautions will help extend the lifespan of your bicycle tires in storage.
Now, let’s move on to the next section and talk about proper handling and care when taking tires out of storage.
Proper Handling and Care When Taking Tires Out of Storage
When taking tires out of storage, it’s important to check for signs of damage or deterioration. This includes looking for any cracks, cuts, or bulges in the tire.
Additionally, it’s crucial to inflate the tires to the recommended pressure to ensure proper performance and prevent any potential issues.
Lastly, inspect the tread wear and replace the tires if necessary, as worn-out tread can affect traction and safety while riding.
Check for Signs of Damage or Deterioration
Before storing your bicycle tires, always check for any signs of damage or deterioration. Several factors can affect the durability of tires, such as exposure to extreme temperatures, moisture, and improper storage techniques. Inspect the tires thoroughly for signs of age and degradation, including cracks, bulges, or dry rot.
Pay close attention to the sidewalls and tread area, as these are common areas for damage. Additionally, check the tire pressure to ensure it is within the recommended range. Properly inflated tires will help prevent damage during storage and ensure optimal performance when you are ready to use them again.
Remember, maintaining the condition of your tires is crucial for safe and enjoyable rides.
Now, let’s move on to the next section, where I will explain how to properly inflate your tires to the recommended pressure.
Inflate Tires to the Recommended Pressure
To properly inflate your tires, make sure you check the recommended pressure and use a tire pump with a pressure gauge. Proper inflation techniques are crucial for the longevity and performance of your bicycle tires. When tires are not inflated to the correct pressure, they can become prone to damage and wear more quickly.
Regularly checking tire pressure has numerous benefits. Firstly, it ensures optimal traction and control, especially when riding on different surfaces or in varying weather conditions. Secondly, it helps prevent punctures by reducing the risk of pinch flats. Additionally, properly inflated tires improve energy efficiency, making your rides smoother and more enjoyable.
By incorporating this simple maintenance routine into your cycling routine, you can extend the lifespan of your tires and enhance your overall riding experience.
Now, let’s move on to inspecting tread wear and replacing if necessary.
Inspect Tread Wear and Replace if Necessary
Check the tread wear on your bicycle tires regularly and replace them if necessary to ensure optimal performance and safety.
Inspecting tread wear is an essential part of maintaining your bicycle tires. Look for signs of uneven wear, such as bald spots or excessive wear on one side of the tire. If you notice any of these signs, it is time to replace your tires.
By replacing worn tires, you can prevent potential accidents and maintain better control while riding. Additionally, maintaining proper tire pressure is crucial for optimal performance. Ensure that your tires are inflated to the recommended pressure, as underinflated tires can affect your bike’s handling and increase the risk of flats.
When storing your bicycle tires, it is important to keep them in proper conditions, away from direct sunlight and extreme temperatures. This will help prolong their lifespan.
Now, let’s discuss recycling and disposal options for old or damaged bicycle tires.
Recycling and Disposal Options for Old or Damaged Bicycle Tires
There are various options for recycling and disposing of old or damaged bicycle tires.
When it comes to recycling options, one of the best choices is to take the tires to a local recycling facility that accepts rubber materials. These facilities have the capability to properly process the tires and turn them into new products or materials.
Another option is to check with your local bike shop or municipality to see if they have a tire recycling program in place. They may be able to collect and recycle the tires for you.
If recycling is not an option, proper disposal methods should be followed. This includes contacting your local waste management facility to inquire about their procedures for disposing of tires. They may require you to drop off the tires at a designated location or schedule a pick-up.
It is important to ensure that old or damaged bicycle tires are disposed of correctly to minimize their impact on the environment.
Frequently Asked Questions
Can I store my bicycle tires outside in extreme weather conditions?
Extreme weather can significantly reduce the lifespan of bicycle tires in storage. To protect them, store tires in a dry, temperature-controlled environment. If storing outside is necessary, use tire covers and ensure they are elevated to avoid direct contact with the ground.
What is the recommended storage temperature for bicycle tires?
The recommended storage temperature for bicycle tires is between 40-70°F. To properly clean tires before storage, use soap and water to remove debris and let them dry thoroughly.
Are there any specific storage containers or bags that are best for storing bicycle tires?
The best way to store bicycle tires is to use airtight containers or bags to prevent moisture and dust. Before storage, clean the tires thoroughly with mild soap and water. To prevent mold and mildew, ensure the tires are completely dry before storing.
Can bicycle tires be stored vertically or should they always be stored horizontally?
Bicycle tires can be stored vertically or horizontally, but vertical storage may lead to tire degradation. When stored vertically, the weight of the tire can cause deformation and stress on the sidewalls, potentially reducing their lifespan.
Is it necessary to inflate bicycle tires before storing them?
It’s best to inflate bicycle tires before storing them to prevent dry rot. Using tire sealant for long term storage has advantages, such as maintaining tire pressure and preventing air leaks.
Conclusion
Well folks, it turns out that bicycle tires in storage are quite the delicate creatures. With factors like temperature, humidity, and even the tire’s age playing a role in their lifespan, it’s no wonder they can’t handle the pressure.
But fear not, fellow cyclists, for there are recommended storage methods and tips to keep those tires in top shape. And just how long can they last? Well, that depends on a variety of factors, but with proper care and handling, you can certainly squeeze some extra miles out of them.
So remember, treat your tires right and they’ll keep you rolling for years to come. And if all else fails, there’s always recycling and disposal options for those worn-out wheels.
Happy cycling, everyone!
-
Electric Bike4 months ago
How To Turn Your Bike Into An Electric Generator
-
Beginners Guides1 year ago
A Guide to Right Hybrid Bike Posture: How to Sit on the Bike for Optimal Performance
-
Electric Bike4 months ago
Where To Get Free Electric Hybrid Bike
-
Beginners Guides1 year ago
Where Are KTM Motorcycles Made?
-
Gravel Bike4 months ago
Where To Ride Gravel Bike San Diego
-
Electric Bike4 months ago
How To Send A Electric Bike To Hawaii
-
Electric Bike3 months ago
How Do I Fix Error 30 On My Electric Bike
-
Bike1 year ago
Advantages and Disadvantages of a Carbon Fiber Bike Frame