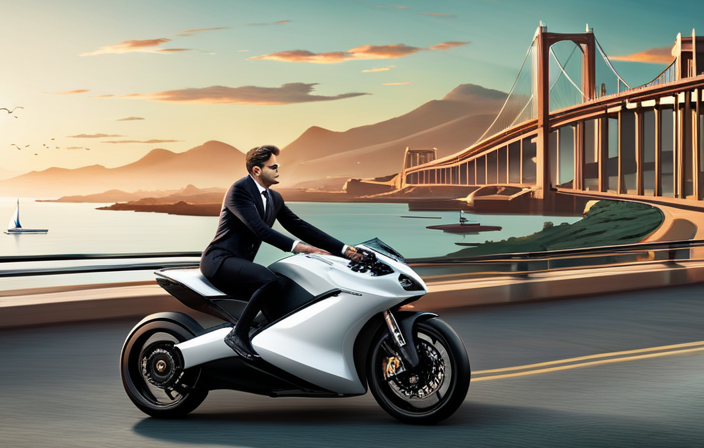
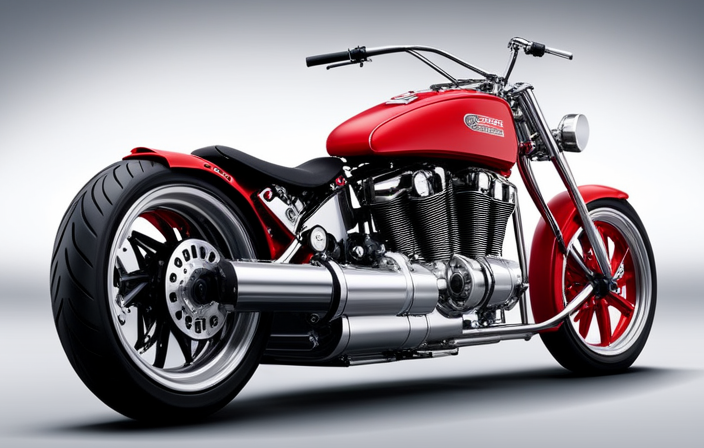
I know assembling an electric bike with rear tire drive might sound daunting, but trust me, it’s easier than it seems.
In this step-by-step guide, I will show you how to put together an electric bike using clear instructions and detailed explanations.
From gathering the necessary tools to testing the bike for optimal performance, I’ll cover every aspect to ensure a successful build.
So, let’s get started and create your own electric bike with rear tire drive!
Key Takeaways
- YouTube tutorials provide step-by-step instructions for assembling an electric bike with rear tire drive.
- Troubleshooting techniques for rear tire drive electric bikes can be found on YouTube.
- Comparing different electric bike models through videos can help in making informed decisions.
- Watching videos can provide insights on the features and specifications of electric bikes with rear tire drive.
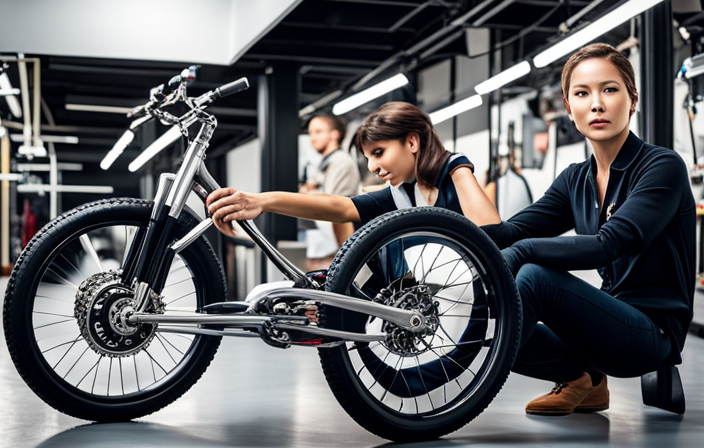
Gather all the necessary tools and materials
You’ll need to gather all the necessary tools and materials before you start putting your electric bike together. Here’s a step-by-step guide on what you’ll need and how to proceed.
-
Tools needed:
- Wrench set
- Screwdriver set
- Allen wrench set
- Pliers
- Wire cutters
- Multimeter
- Lubricant
-
Step by step instructions:
- Lay out all the components of your electric bike and organize them.
- Ensure you have all the necessary bolts, screws, and cables.
- Use the wrench set to tighten any loose parts.
- Use the screwdriver set to fasten the handlebars securely.
- Use the Allen wrench set to attach the pedals and adjust the seat height.
- Use the wire cutters to trim any excess wires.
- Use the multimeter to check the battery voltage.
- Apply lubricant to the chain and gears for smooth operation.
Now that you have gathered your tools and materials, it’s time to familiarize yourself with the components of an electric bike.
Familiarize yourself with the components of an electric bike
Once you’ve familiarized yourself with the various components, it’s time to start assembling your e-bike. Here’s a step-by-step guide on how to put an electric bike together:
-
Understanding the different types of electric bike motors:
- Direct Drive: These motors provide a smooth and quiet ride but can be heavier.
- Geared Hub: Lighter and more efficient, these motors are great for hilly terrains.
- Mid-Drive: Known for their power and torque, these motors are ideal for off-road adventures.
- Friction Drive: These motors are easy to install and maintain but may provide less power.
-
How to maintain and troubleshoot your electric bike:
- Regularly clean and lubricate the chain to prevent rust and ensure smooth operation.
- Check the tire pressure and brakes for optimal performance.
- Keep the battery charged and store it in a cool, dry place.
- If you encounter any issues, consult the manufacturer’s manual or seek professional help.
Now that you have a good understanding of electric bike motors and maintenance, let’s move on to the next step: assembling the frame and attaching the rear tire.
Start by assembling the frame and attaching the rear tire
To begin, assemble the frame and attach the back tire of the e-bike. First, gather the necessary tools: a wrench, Allen key set, and a Phillips head screwdriver.
Lay out all the frame components and identify the main frame, seat post, and rear tire. Align the holes on the main frame and seat post, then insert the bolts and tighten them using the wrench.
Next, attach the back tire to the frame by sliding the axle into the dropouts and securing it with the nuts and washers. Use the wrench to tighten the nuts, ensuring the tire is straight and centered.
With the frame and rear tire securely attached, you can now move on to the next section and install the rear tire drive system.
Install the rear tire drive system
Now that the frame and rear tire are securely attached, it’s time to install the rear tire drive system. This system is responsible for transferring power from the motor to the rear tire, allowing the bike to move forward.
To install the rear tire drive system, follow these steps:
-
Begin by locating the rear wheel axle slot on the frame. This is where the rear tire drive system will be attached.
-
Take the rear tire drive system and align it with the axle slot. Make sure it is centered and properly aligned.
-
Once aligned, slide the rear tire drive system into the axle slot until it is fully inserted.
-
Secure the rear tire drive system in place using the provided bolts or screws. Tighten them to ensure a sturdy connection.
By following these steps, you will successfully install the rear tire drive system. However, if you encounter any issues such as misalignment or difficulty inserting the drive system, refer to the troubleshooting section in the user manual for guidance.
With the rear tire drive system installed, the next step is to connect the motor and battery to complete the setup process.
Connect the motor and battery to the rear tire drive system
After securing the rear tire drive system in place, it’s time to connect the motor and battery to complete the setup process.
Begin by locating the motor and battery connectors. The motor connector is typically found near the rear wheel hub, while the battery connector is usually located on the frame near the seat tube. Match the connectors by their shape and size, ensuring they fit together securely. Once connected, double-check the connection to ensure it is tight and secure.
Now, it’s time to troubleshoot the rear tire drive system. Test the motor by turning on the power and gently applying pressure to the pedals. If the motor does not engage or there is a grinding noise, check the connections and consult the manufacturer’s instructions for troubleshooting tips.
With the motor and battery connected, we can now move on to attaching the handlebars, pedals, and other accessories.
Attach the handlebars, pedals, and other accessories
Once you’ve connected the motor and battery, it’s time to attach the handlebars, pedals, and other accessories to complete the assembly of your electric bike. Here’s a step-by-step guide to help you with this process:
-
Start by attaching the handlebars to the stem. Align the handlebars with the stem and tighten the bolts securely using a wrench.
-
Next, install the pedals. Each pedal is labeled ‘R’ for the right side and ‘L’ for the left side. Attach the pedal with the corresponding label to the correct side of the bike. Use a pedal wrench to tighten them firmly.
-
After the handlebars and pedals are in place, you can proceed to attach other accessories such as the bell, fenders, and lights. Follow the manufacturer’s instructions for each accessory to ensure proper installation.
Test the electric bike to ensure everything is functioning correctly
To make sure everything is working properly, you should take your electric bike for a test ride. Here are some tips for troubleshooting electric bike components and common issues that may arise during testing:
-
Check the battery: Ensure the battery is fully charged and securely connected. If the bike doesn’t power on or the battery drains quickly, it could indicate a problem with the battery or its connections.
-
Test the motor: Listen for any unusual noises or vibrations while riding. If the motor feels weak or doesn’t engage, there may be an issue with the motor or its wiring.
-
Examine the brakes: Test the brakes to ensure they engage smoothly and bring the bike to a complete stop. If the brakes feel spongy or don’t provide enough stopping power, they may need adjustment or replacement.
After completing the test ride and addressing any issues, it’s time to adjust and fine-tune the bike for optimal performance.
Adjust and fine-tune the bike for optimal performance
Now that you’ve completed the test ride and taken care of any issues, it’s time to adjust and fine-tune your bike for optimal performance.
To ensure your electric bike is operating at its best, there are several adjustment techniques and performance optimization strategies you can implement.
First, check the tire pressure and make sure it is within the recommended range. This will ensure proper traction and handling.
Next, adjust the brakes by tightening or loosening the brake cables to achieve the desired level of responsiveness.
Additionally, lubricate the chain and gears to reduce friction and improve overall efficiency.
Finally, make sure the seat height and handlebar position are adjusted to your comfort and riding style.
By following these adjustment techniques and performance optimization strategies, you can achieve the best performance from your electric bike.
Now, it’s important to transition into the next section about following safety guidelines and regulations for electric bikes.
Follow safety guidelines and regulations for electric bikes
Make sure you familiarize yourself with the safety guidelines and regulations for electric bikes to ensure a safe and legal riding experience. Here are some important points to keep in mind:
- Always wear a helmet and other protective gear while riding an electric bike.
- Observe traffic laws and signals, just like you would when riding a regular bicycle.
- Be mindful of your surroundings and use caution when riding in crowded areas or on busy roads.
Proper maintenance is crucial for the longevity and performance of your electric bike. Regularly check and maintain the following:
- Tire pressure: Ensure your tires are properly inflated for a smooth and safe ride.
- Brakes: Regularly inspect and adjust your brakes to ensure they are functioning correctly.
- Battery: Follow the manufacturer’s guidelines for charging and storing your electric bike’s battery.
By adhering to safety regulations and properly maintaining your electric bike, you can enjoy a safe and reliable riding experience.
To learn more, explore YouTube tutorials for additional guidance and troubleshooting tips.
Explore YouTube tutorials for additional guidance and troubleshooting tips
If you’re looking for more guidance and troubleshooting tips, YouTube tutorials can be a great resource.
When it comes to electric bikes, there are a plethora of videos available that can help you explore troubleshooting techniques and compare different electric bike models.
To get started, simply search for ‘electric bike tutorials’ or ‘electric bike troubleshooting’ on YouTube. You will find a variety of videos from experienced riders and bike enthusiasts who are eager to share their knowledge and expertise.
These tutorials often provide step-by-step instructions on how to assemble, maintain, and troubleshoot your electric bike. Additionally, they may offer insights on the different features and specifications of various electric bike models, helping you make an informed decision when purchasing your own.
Frequently Asked Questions
What are the necessary tools and materials needed to put together an electric bike with rear tire drive?
To assemble an electric bike with rear tire drive, the necessary tools include a wrench, screwdriver, pliers, and a bike stand. Materials needed are the bike frame, motor, battery, and wiring. Assembly time varies, and it’s crucial to follow safety guidelines. Common mistakes include improper wiring and incorrect installation. Recommended tutorials can be found online.
How long does it typically take to assemble an electric bike with rear tire drive?
Assembly time for an electric bike with rear tire drive typically ranges from 2-4 hours. To ensure a smooth process, follow these troubleshooting tips: double-check all connections, test the battery and motor, and consult the user manual for any specific instructions.
Are there any specific safety guidelines or regulations that need to be followed when putting together an electric bike?
When assembling an electric bike, it’s crucial to follow safety regulations. For instance, wearing protective gear, like a helmet, is essential. Assembly time can vary, but it’s important to take your time and follow the manufacturer’s instructions carefully.
Are there any common mistakes or challenges that people face when assembling an electric bike with rear tire drive?
When assembling an electric bike with rear tire drive, common challenges may include incorrect alignment, loose connections, or difficulty installing the motor. To troubleshoot, ensure proper alignment, tighten all connections, and follow the manufacturer’s instructions carefully.
Are there any specific YouTube tutorials that you would recommend for additional guidance and troubleshooting tips?
I recommend checking out specific YouTube tutorials for additional guidance and troubleshooting tips. These tutorials provide step-by-step instructions and technical details to help you overcome any challenges you may face while assembling an electric bike with rear tire drive.
Conclusion
In conclusion, putting together an electric bike with a rear tire drive is an exhilarating experience that can be easily accomplished with the right tools and guidance.
By following the step-by-step instructions and utilizing resources like YouTube tutorials, you can become a master bike builder in no time.
Remember to adhere to safety guidelines and regulations to ensure a smooth and enjoyable ride.
So why wait? Grab your tools and unleash your inner bike enthusiast today! You’ll be flying down the streets like a lightning bolt in no time.