
As a keen bicyclist, I understand how crucial it is to have a grip on my handlebars that is both comfortable and firm. Not long ago, I acquired a fresh set of grips for my mountain bicycle and found myself having to undertake the installation on my own.
It can seem like a daunting task, but with the right tools and a little patience, anyone can successfully install new bicycle grips.
In this article, I will guide you through the step-by-step process of putting on bicycle grips. From choosing the right grips for your bike to testing and adjusting for comfort and stability, I will provide all the necessary information to ensure a smooth and successful installation.
Whether you are a seasoned cyclist or a beginner, this guide will help you achieve the perfect grip for your ride.
Key Takeaways
- Choosing the right grips that match personal style and provide optimal grip, cushion, and durability is crucial for comfortable and stable riding.
- Proper installation of new grips requires cleaning the handlebars thoroughly, applying a small amount of rubbing alcohol or grip glue, and testing and adjusting grips for comfort and stability before riding.
- Regular maintenance of bicycle grips can help prolong their lifespan and prevent wear and tear.
- Experimenting with different grip materials may be necessary to find the right grips for your riding style and preferences.
Choose the Right Grips for Your Bike
You’ll want to make sure you choose the perfect grips for your bike to ensure maximum comfort and control during your rides. One important factor to consider is matching grip colors. Not only does this add a touch of personal style to your bike, but it also ensures that your grips match the overall aesthetic of your ride.
Additionally, choosing grips with an ergonomic grip design can greatly improve your riding experience. These types of grips are designed to fit comfortably in your hand and reduce the amount of strain on your wrists and fingers, which can prevent fatigue and discomfort during long rides.
Now that you’ve chosen the perfect grips for your bike, it’s time to gather the necessary tools to install them.
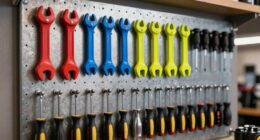
Gather Necessary Tools
First, grab the tools needed for the job and prepare yourself for a smooth installation process.
The tools required for putting on bicycle grips are fairly simple and can be easily found in your toolbox or at a bike shop. You’ll need a pair of scissors, a utility knife, rubbing alcohol, and a rag.
It’s important to choose the right type of bicycle grips for your bike before proceeding with the installation process. There are different types of bicycle grips available in the market, such as foam, rubber, gel, and cork grips. Choose the one that suits your riding style and comfort level.
Once you have gathered all the necessary tools, it’s time to prepare the bicycle handlebars and the new grips for installation.
Before putting on the new grips, clean the handlebars with rubbing alcohol and a rag to remove any dirt or debris. This will ensure a firm grip and prevent slipping.
Additionally, remember to maintain your bicycle grips regularly by cleaning them with a mild soap and water solution. This will help prolong their lifespan and prevent wear and tear.
With these tips in mind, you’re now ready to move on to the next step of removing the old grips.
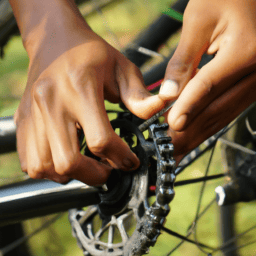
Remove Old Grips
To start the process, grab the utility knife and carefully slice through the old grips to loosen them from the handlebars, allowing you to peel them off by hand. This technique works well for grips that are not too stubborn or sticky.
However, if the grips are particularly difficult to remove, there are several other techniques you can try:
- Use an air compressor to blow air between the grip and handlebar, creating a gap that will make it easier to slide the grip off.
- Apply rubbing alcohol or water and soap solution to the grip to make it slippery, and then try to twist and pull it off.
- Use a wire or coat hanger to create a hook that can be inserted between the grip and handlebar, and then pull the grip off by twisting and pulling.
- Cut the grip off using a sharp pair of scissors or a box cutter, but be careful not to damage the handlebar underneath.
Before installing new grips, it’s important to clean the handlebars thoroughly to ensure a good grip and prevent any slipping or sliding. Use a clean cloth and rubbing alcohol to remove any dirt, oil or residue from the handlebars. You can also sand the handlebars lightly to remove any bumps or rough spots, and help the new grips adhere better.
Now that the old grips are removed and the handlebars are clean and ready, let’s move on to installing the new grips.
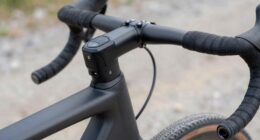
Install New Grips
Now that the handlebars are prepped and ready, it’s time to get those new grips on and take your ride to the next level.
First, choose your materials wisely. Grips come in a variety of materials such as rubber, silicone, foam, and cork. Each material provides different levels of grip, comfort, and durability. Consider your riding style and preferences when choosing the perfect material for your grips.
Next, proper sizing is crucial for comfortable and stable riding. Measure the length of your handlebars and compare it to the length of the grips you want to install. If the grips are too long, it can cause discomfort and interfere with your brake and shift levers. If the grips are too short, it can cause instability and discomfort.
Once you have the perfect size, apply a small amount of rubbing alcohol or grip glue to the inside of the grip and slide it onto the handlebar.
Finally, test and adjust your grips for comfort and stability before hitting the road.
Test and Adjust Grips for Comfort and Stability
Make sure you’re fully comfortable and stable on your ride by testing and adjusting your new grips. One way to do this is by adjusting the grip angle. The angle of your grips can greatly affect your riding posture, wrist and hand comfort, and overall control of your bike.
To adjust the grip angle, loosen the bolts that hold the grips in place. Then, rotate the grips until you find the angle that feels most comfortable and provides the most stability. Tighten the bolts back up once you’ve found the right angle.
Another way to improve the comfort and stability of your grips is by experimenting with different grip materials. There are a variety of materials available, such as rubber, foam, and cork. Each material has its own unique properties, so it’s important to find the one that works best for you.
Try out different materials until you find one that provides the right amount of grip, cushion, and durability for your riding style and preferences. Remember, finding the right grips may take some trial and error, but it’s worth it for a more comfortable and stable ride.
Frequently Asked Questions
How long do bicycle grips typically last?
Bicycle grips typically last between 6 months to a year, depending on the frequency of use and the quality of the grip. Proper bicycle grip maintenance is crucial, and signs of worn out grips include cracks, tears, and a loss of grip.
Can I reuse old grips or should I always purchase new ones?
I suggest against reusing old grips as they lose their grip and cushioning over time. However, you can upcycle grips by cleaning them with soap and water, then using spray adhesive to reattach them.
Are there any special techniques for removing stubborn old grips?
When removing stubborn old grips, applying lubricant can help loosen the adhesive. Use compressed air to slide a flat tool, like a screwdriver, between the grip and handlebar. Work slowly and carefully to avoid damaging the handlebar.
What are some common mistakes to avoid when installing new grips?
Avoiding mishaps when installing new bicycle grips is crucial. Proper grip placement is key to ensuring a comfortable and safe ride. Common mistakes to avoid include not cleaning the handlebars, using too much lubricant, and not tightening the screws enough.
Can I use different types of grips on different parts of my handlebars?
Mixing grips on different parts of the handlebars is possible, but compatibility with accessories must be considered. Some grips may interfere with brake or shifter placement. Consult with a bike mechanic for optimal grip and accessory placement.
Conclusion
In conclusion, putting on bicycle grips can seem like a daunting task, but it can be a straightforward process with the right tools and steps. Just like choosing the right gear for a ride, selecting the right grips is crucial for comfort and control.
Once you have the proper grips, gather the necessary tools, including scissors, screwdrivers, and rubbing alcohol, to ensure a smooth installation process.
Removing old grips may be challenging, but with a little elbow grease, it can be done. Then, it’s time to install the new grips, making sure to align them correctly and secure them tightly.
Finally, test and adjust the grips for comfort and stability, making sure they provide a firm grip and don’t slip during rides. Remember to take your time and follow each step carefully, and soon enough, you’ll be ready to hit the road with your newly installed bicycle grips!