
I have a special surprise for all the electric bike fans out there.
Today, I’m going to show you how to remove the back tire on your electric bike.
It’s a simple process that anyone can master with the right tools and a little know-how.
So, let’s get into gear and dive right in.
Get ready to roll up your sleeves and get your hands dirty as we take a closer look at this technical task.
Key Takeaways
- Inspect the tire for punctures, cuts, bulges, and abnormalities in the tread.
- Check the sidewalls for cracking and replace or repair if significant damage or wear is found.
- Clean the wheel and hub using a brush and degreaser to remove debris, grime, and grease.
- When placing the back tire back into the frame, ensure a snug fit, slide the axle through the hub and frame, and tighten the axle nuts evenly on both sides.

Under Armour Squeeze Water Bottles, 32 oz Water Bottles, Sideline Sports Water Bottle with Quick-Shot Lid, Quick & Easy Hydration, Gym Water Bottles, Squeeze Bottle, 1 32oz Bottle
- Easy Hydration: Quick-shot lid and one-way valve
- On-the-Go Use: One-hand operation for active hydration
- Measurement Markings: Ounces and milliliters for tracking
As an affiliate, we earn on qualifying purchases.
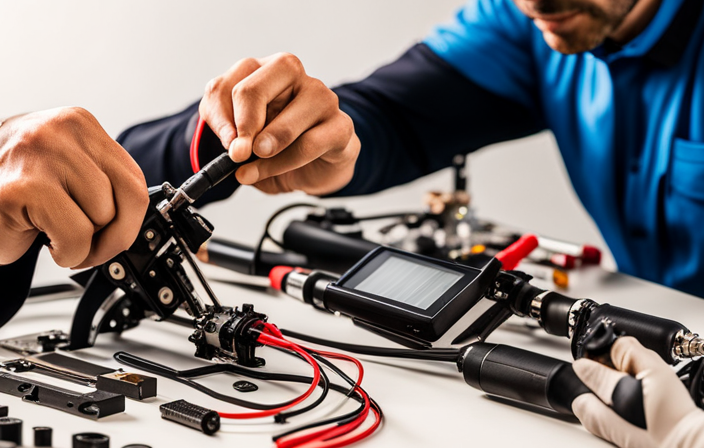
Gather the necessary tools and equipment
Before you begin, make sure you have all the necessary tools and equipment to remove the back tire on your electric bike. Back tire maintenance is essential for the smooth operation and longevity of your electric bike.
When it comes to choosing the right tire, it is important to consider factors such as terrain, weather conditions, and your riding style. A tire with good traction and durability will provide a safer and more enjoyable riding experience.
To remove the back tire, you will need a wrench, a tire lever, and a bike stand or something to prop up the bike. These tools will allow you to easily remove the wheel and replace the tire if necessary.
Now that you have gathered the necessary tools, let’s move on to the next step: turning off the electric bike and disconnecting the battery.
Turn off the electric bike and disconnect the battery
After you’ve turned off the e-bike and disconnected the battery, you can proceed to the next step.
To remove the back tire on an electric bike, it is crucial to disconnect the battery for safety reasons. Start by locating the battery compartment, usually located near the back wheel or within the frame of the bike. Carefully remove the battery by following the manufacturer’s instructions, which may involve unlocking or unscrewing it.
Once the battery is disconnected, you can move on to removing the back tire. Begin by releasing the tension on the chain or belt, which can usually be done by loosening the tensioner or adjusting the derailleur. This step is essential to ensure the tire can be removed without any resistance.
Now, let’s move on to releasing the tension on the chain or belt.
Release the tension on the chain or belt
To release the tension on the chain or belt, you’ll need to loosen the tensioner or adjust the derailleur. Here’s how you can do it:
-
Locate the tensioner or derailleur: The tensioner is usually a small pulley or an adjustable arm, while the derailleur is a mechanism that moves the chain between gears.
-
Use a wrench or Allen key: Depending on the type of tensioner or derailleur, you’ll need to use the appropriate tool to loosen the bolts or screws holding it in place.
-
Adjust the tension: Turn the tensioner or adjust the derailleur to either increase or decrease the tension on the chain or belt. Make sure to follow the manufacturer’s guidelines for the correct tension.
By adjusting the tension, you ensure that the chain or belt is properly maintained and functions smoothly.
Now, let’s move on to loosening the axle nuts or quick release lever to continue removing the back tire.
Loosen the axle nuts or quick release lever
Loosening the axle nuts or quick release lever is essential for removing the rear wheel on an electric bike. Proper maintenance of electric bike tires is crucial to ensure optimal performance and safety.
Regularly inspect the tire pressure and tread wear, and adjust accordingly. In addition, check for any punctures or damage that may affect the tire’s integrity.
To fix common issues with electric bike axles, such as loose or misaligned axles, start by loosening the axle nuts or quick release lever. Use a wrench to turn the nuts counterclockwise until they are loose enough to remove. Make sure to support the bike while doing this to prevent it from falling over.
Once the axle nuts are loosened, you can proceed to remove the chain or belt from the sprocket. This will allow for the easy removal of the rear wheel.
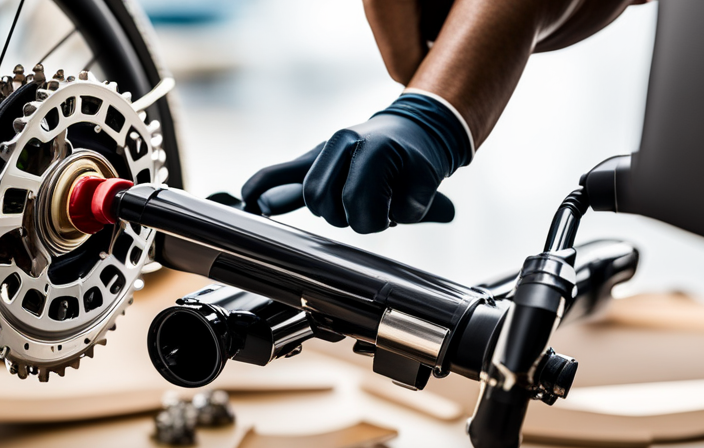
Remove the chain or belt from the sprocket
Once the axle nuts or quick release lever are loosened, you can easily detach the chain or belt from the sprocket.
To remove the chain, start by locating the chain tensioner. Use a wrench or tool to loosen the bolts securing the tensioner to the frame. Once loose, the tensioner can be removed, allowing the chain to be easily slipped off the sprocket.
If you have a belt drive system, you may need to remove the belt tensioner instead.
After removing the chain or belt, it is important to take the opportunity to lubricate the sprocket. Apply a small amount of lubricant to the teeth of the sprocket to ensure smooth operation.
With the chain or belt removed and the sprocket lubricated, you can now move on to the next step: removing the brake caliper or disconnecting the brake cable.
Remove the brake caliper or disconnect the brake cable
Now that the chain or belt has been removed from the sprocket, it is time to focus on the brake caliper or the brake cable. This step is crucial in ensuring a smooth operation of the brake system.
One important aspect to consider is lubricating the brake caliper to minimize friction and promote optimal braking performance. Using a suitable lubricant, apply a thin layer to the moving parts of the caliper, such as the sliding pins.
Additionally, it is essential to adjust the brake cable tension for optimal braking performance. This can be done by loosening the cable anchor bolt and making small adjustments until the desired tension is achieved.
Once the brake caliper has been lubricated and the cable tension adjusted, it is time to transition into the next section on how to loosen the axle and slide it out of the dropouts.
Loosen the axle and slide it out of the dropouts
To start, you’ll need to make sure the axle is loose and slide it out of the dropouts. The axle is what holds the back tire in place, so loosening it is crucial for removal. Once you’ve ensured the axle is loose, gently slide it out of the dropouts on either side of the frame. This will release the tire from the bike. To help visualize the process, refer to the following table:
| Dropout | Dropout | |
Each dropout is located at the end of the frame’s rear triangle and is where the axle slots in. By loosening the axle and sliding it out of the dropouts, the back tire can be easily removed. Now, let’s move on to the next section where we will gently remove the back tire from the frame.
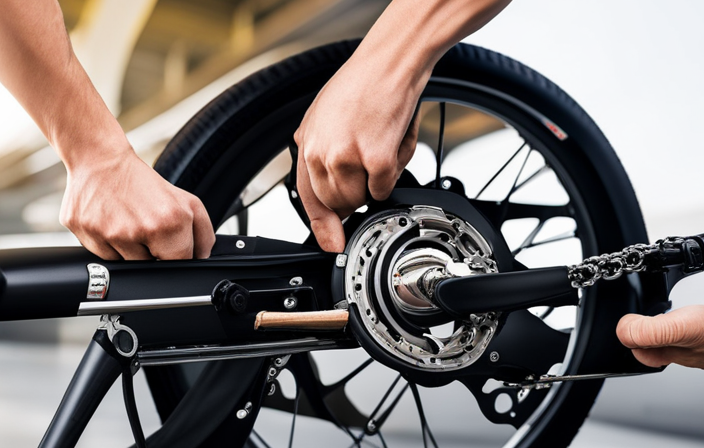
Gently remove the back tire from the frame
First, you’ll need to carefully detach the rear wheel from the frame. To remove the back tire on an electric bike, follow these steps:
- Begin by shifting the bike into the lowest gear to relieve tension on the chain.
- Use a wrench to loosen the axle nuts on both sides of the wheel.
- Once the nuts are loose, slide the wheel back in the dropout to create slack in the chain.
- Lift the bike slightly off the ground and pull the wheel towards you to remove it from the frame.
With the back tire successfully removed, you can now proceed to inspect the tire for any damage or wear. It’s important to check for punctures, wear on the tread, or any signs of damage that may require repair or replacement.
Inspect the tire for any damage or wear
Once the back tire is off, carefully examine it for any signs of damage or wear. Start by checking the tire pressure using a pressure gauge. The recommended pressure range can usually be found on the tire sidewall. If the pressure is too low, inflate it to the appropriate level.
Next, visually inspect the tire for any punctures or cuts. Run your fingers along the tread to feel for any abnormalities or bulges. Pay close attention to the sidewalls as well, as they can be prone to cracking. If you notice any significant damage or excessive wear, it may be necessary to replace or repair the tire.
Moving forward, addressing the issue promptly will ensure a safe and smooth ride.
Replace or repair the tire if necessary
Check for any significant damage or excessive wear on the tire, and if necessary, replace or repair it to ensure a safe and smooth ride. As part of regular electric bike maintenance, it is crucial to inspect the tire regularly.
Look for signs of punctures, cuts, or bulges that may compromise the tire’s integrity. If you notice any of these issues, it’s time to take action.
First, remove the damaged tire from the wheel by loosening the bolts or quick-release mechanism securing it in place. Once the tire is off, carefully examine the inner tube for any leaks or damage as well. If the tire or tube is beyond repair, it’s best to replace them with new ones.
Now that the tire is taken care of, let’s move on to the next step: cleaning the wheel and hub before reinstallation.
Clean the wheel and hub before reinstallation
To ensure a smooth reinstallation, make sure you clean the wheel and hub thoroughly. Here are the steps to clean the wheel and hub properly:
- Gather the necessary cleaning tools such as a brush, degreaser, and clean rag.
- Start by removing any debris or dirt from the wheel and hub using the brush.
- Apply the degreaser to the wheel and hub, making sure to cover all areas.
- Use the brush to scrub away any grime or grease from the surfaces.
- Wipe down the wheel and hub with a clean rag to remove any remaining residue.
By following these steps and using the appropriate cleaning tools, you will ensure that the wheel and hub are free from dirt and debris, which is essential for the proper reinstallation of the back tire.
Now, let’s move on to placing the back tire back into the frame.
Place the back tire back into the frame
Now that you’ve finished cleaning the wheel and hub, it’s time to carefully position the back tire back into the frame. Before doing so, it’s important to ensure that the chain tension is properly realigned and the tire pressure is checked for optimal performance. To assist you in visualizing this process, refer to the table below:
| Steps for Placing Back Tire into Frame |
|---|
| 1. Lift the tire and align it with the frame |
| 2. Slowly lower the tire into the frame, making sure it fits snugly |
| 3. Slide the axle through the hub and frame |
| 4. Tighten the axle nuts evenly on both sides |
| 5. Check the chain tension and adjust if necessary |
Realign the chain or belt onto the sprocket
Once the back tire is securely in place, it’s important to realign the chain or belt onto the sprocket for optimal performance. To ensure proper alignment, start by checking if the chain or belt is properly seated on the rear sprocket teeth. Look for any signs of misalignment, such as the chain or belt hanging off the sprocket or rubbing against other components.
If misalignment is detected, gently push or pull the chain or belt back into place, making sure it sits squarely on the sprocket teeth. This will prevent any unnecessary wear and ensure smooth and efficient power transfer. Proper chain maintenance is crucial to extend its lifespan and maintain overall bike performance.
Now, let’s move on to tightening the axle nuts or quick release lever for a secure fit.
Tighten the axle nuts or quick release lever
After aligning the chain or belt onto the sprocket, it’s crucial to tighten the axle nuts or quick release lever for a secure fit. This step ensures that the tire stays in place and prevents any potential issues during your ride.
Here are some important points to consider:
- Proper maintenance of electric bike tires is essential for optimal performance and safety.
- Neglecting to tighten the axle nuts or quick release lever can result in the tire becoming loose, leading to instability and potential accidents.
- Common issues with axle nuts or quick release levers on electric bikes include improper installation, insufficient tightening, and wear and tear over time.
Now that the axle nuts or quick release lever are securely tightened, it’s time to reconnect the brake caliper or brake cable and test the tire for proper function.
Reconnect the brake caliper or brake cable and test the tire for proper function
Make sure to reconnect the brake caliper or brake cable and give the tire a thorough test to ensure that everything is functioning properly. When it comes to brake caliper installation, it is crucial to follow the manufacturer’s guidelines.
First, locate the brake caliper mounting bracket on the frame of the bike. Align the brake caliper with the mounting bracket and insert the bolts. Tighten the bolts using a torque wrench to the specified torque.
Next, reattach the brake cable to the brake caliper. Make sure the cable is properly seated and secure.
Once the brake caliper and cable are reconnected, it’s time to test the tire for proper function. Start by checking the tire pressure with a gauge. Inflate or deflate the tire as needed to reach the recommended pressure.
Then, spin the tire and squeeze the brake lever to ensure that the brake caliper engages and stops the tire smoothly and effectively.
Frequently Asked Questions
What tools and equipment do I need to remove the back tire on an electric bike?
To remove the back tire on an electric bike, I’ll need a few tools: a wrench, a socket set, and tire levers. Here’s a step-by-step guide on how to do it.
How do I disconnect the battery and turn off the electric bike before removing the back tire?
To safely lift an electric bike during tire removal, use a sturdy bike stand or a bike lift. Properly store the disconnected battery in a cool, dry place away from any flammable materials.
How do I release the tension on the chain or belt before removing the back tire?
To release tension on the chain or belt, loosen the rear wheel nuts and slide the wheel back until the chain or belt is slack. After reassembling the back tire, align the chain or belt properly. Maintain tension by regularly checking and adjusting the alignment and tension. Tips for maintaining proper tension include ensuring the wheel is straight, using a tension gauge, and following the manufacturer’s recommendations.
How do I remove the brake caliper or disconnect the brake cable?
To properly adjust the brake caliper on an electric bike, first, loosen the brake cable tension by turning the barrel adjuster. Then, use a 5mm Allen wrench to loosen the caliper mounting bolts. Finally, remove the old brake pads and replace them with new ones.
How do I clean the wheel and hub before reinstalling the back tire?
To clean the wheel and hub, I recommend using a mild detergent and water. Avoid harsh chemicals that could damage the components. It is best to clean the wheel and hub regularly, especially after riding in wet or muddy conditions.
Conclusion
In conclusion, removing the back tire on an electric bike can be a straightforward process with the right tools and steps. By following the outlined procedure, you can ensure a smooth and efficient removal without any hiccups.
Remember to pay attention to the details and be precise in your actions to avoid any complications. Just like unwinding a tightly wound spring, taking off the back tire unveils the potential for exploration and adventure on your electric bike.
So go ahead, take the leap, and embrace the freedom that awaits you!