
Are you ready to unlock the power of your Nakto electric bike? To truly optimize your riding experience, it’s important to know how to remove the battery. Just like a skilled technician or engineer, you’ll need to master the art of battery removal.
In this article, we’ll guide you through the step-by-step process of safely and efficiently removing the battery from your Nakto electric bike. Get ready to dive into the technicalities and unleash your problem-solving skills as we explore this essential aspect of electric bike maintenance.
Key Takeaways
- Gather the necessary tools: Allen wrenches, small flathead screwdriver, clean and well-lit workspace, spare battery (optional)
- Turn off the electric bike to ensure safety and prevent electrical shock or damage
- Locate and remove the battery cover by finding the rectangular-shaped compartment, checking for release mechanisms, and removing the screws holding the cover in place
- Disconnect the battery cables by cutting zip ties or tape, loosening bolts or screws, and pulling the cables away from the battery terminals

Magicshine HORI1300S Bike Headlight, Compatible with Garmin/Wahoo, 1300 Lumens High & Low Beam Front Light, USB-C Rechargeable, IPX6 Waterproof for Night Riding and Urban Cycling-Black
DUAL OPTICS, HIGH & LOW BEAM: Max 1300LM high beam conquers the darkest trails. The anti-glare low beam...
As an affiliate, we earn on qualifying purchases.
Gather the Necessary Tools
To remove the battery from a Nakto electric bike, you’ll need to gather the necessary tools. Start by locating a set of Allen wrenches, as they will be essential for the battery removal process. These wrenches are typically included with the bike’s original packaging or can be purchased at a local hardware store.
Once you have the Allen wrenches, you’ll also need a small flathead screwdriver to disconnect any wiring connections. Make sure to have a clean and well-lit workspace, as this will make the process easier and safer. Having a spare battery on hand is also a good idea if you’re planning on replacing the old one.
With these tools and equipment ready, you can confidently proceed with removing the battery. Now, let’s move on to the next step: turning off the electric bike.

2026 Upgrade 9800Lumen Bike Light for Night Riding,Super Bright 6 LED Headlight,Aluminum 10 Mode Rechargeable Bicycle Light Front and Rear,360°Rotatable Brackt,Waterproof,Runtime 72 hr,Road Shockproof
【700DAYS Support] 】:If your bike light have any problem, please to pass us on through Amazon for the...
As an affiliate, we earn on qualifying purchases.
Turn Off the Electric Bike
First, make sure you switch off the e-bike. Proper battery maintenance is crucial for the longevity and performance of your electric bike. To begin troubleshooting any issues or to simply remove the battery, it is important to turn off the electric bike. This ensures that there is no power running through the system, reducing the risk of electrical shock or damage.
Start by locating the power switch or key, typically found near the handlebars or on the battery itself, and turn it off. Once the e-bike is powered down, you can safely proceed with removing the battery.
In the next section, we will discuss how to locate the battery compartment and access the battery for removal.

COOSPO Color Touchscreen GPS Bike Computer CS600, Wireless IPX7 Waterproof Cycling GPS Speedometer with Bluetooth/ANT+, Backlight Route Navigation, Support Bike Radar & 36H Battery Life
2.4" HIGH-RESOLUTION COLOR TOUCHSCREEN: Features auto-backlight technology that intelligently adjusts to ambient light, ensuring optimal visibility and effortless...
As an affiliate, we earn on qualifying purchases.
Locate the Battery Compartment
Once you have turned off the e-bike, the next step is to locate the compartment where the battery is located. The battery compartment is typically located near the center or rear of the electric bike frame. To help you locate it, here are five key points to consider:
- Look for a rectangular-shaped compartment on the frame of the bike.
- Check for any release mechanisms, such as latches or screws, that secure the battery compartment.
- Consult the user manual or manufacturer’s instructions for specific guidance on the battery compartment location.
- Some electric bikes have removable covers or panels that need to be opened to access the battery compartment.
- If you are still having trouble finding the battery compartment, consult a professional electric bike technician for further assistance.
With the battery compartment located, the next step is to remove the battery cover.
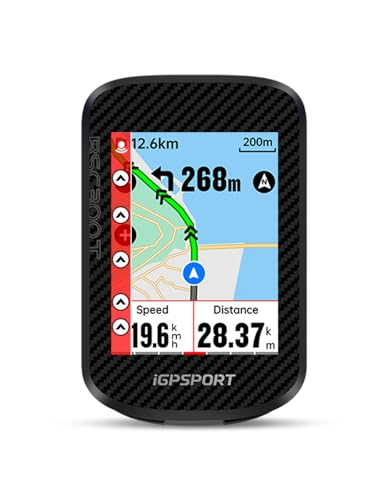
iGPSPORT BSC300T Wireless Bike Computer GPS, Touchscreen Offline MAP Navigation Off Course Warning Compatible with Insta360, for Ebike Road Bike MTB (Touch Screen&Button)
【Large Screen】The BSC300T wireless bike computer equipped with a 2.4'' touch screen and 6 buttons, allowing you to...
As an affiliate, we earn on qualifying purchases.
Remove the Battery Cover
Now, you can easily take off the cover for the battery. To remove the battery cover on your Nakto electric bike, follow the steps below:
| Step 1 | Step 2 | Step 3 | Step 4 |
| Locate | Remove | Lift | Store |
| battery | screws | the cover | the cover |
| compartment | holding | off the | in a safe |
| the | battery | place | |
| cover | cover |
Start by locating the battery compartment on your electric bike. Once you have identified it, remove the screws holding the battery cover in place. Use a screwdriver to carefully unscrew them. After the screws have been removed, lift the cover off the compartment. Make sure to store the cover in a safe place. This will allow you to access the battery and proceed with disconnecting the battery cables in the next section.
Transition: Now that you have successfully removed the battery cover, let’s move on to the next step of disconnecting the battery cables.
Disconnect the Battery Cables
To proceed with the disconnection of the battery cables, you need to follow these steps:
-
Locate the battery cables on your Nakto electric bike. They are typically attached to the battery terminals and are covered with a protective casing.
-
Use a pair of wire cutters or pliers to carefully cut the zip ties or tape that secure the battery cables to the frame of the bike. Be cautious not to damage the cables or any other components.
-
Once the cables are free, use a wrench or a pair of pliers to loosen the bolts or screws that connect the cables to the battery terminals. Turn them counterclockwise to loosen them.
-
Gently pull the cables away from the battery terminals, ensuring that they are fully disconnected before proceeding.
Now that the battery cables are safely disconnected, you can move on to the next step, which is to securely hold the battery.
Securely Hold the Battery
To securely hold the battery, you can use straps or a battery holder. These holding mechanisms ensure that the battery remains stable and doesn’t move during the removal process.
When using straps, make sure they are tight and secure, preventing any unnecessary shifting of the battery.
If you choose a battery holder, ensure it is compatible with your Nakto electric bike model and securely fastened to the frame.
It’s important to take battery removal precautions to avoid any damage or accidents. Before attempting to remove the battery, make sure the bike is powered off and the battery cables are disconnected.
Additionally, be mindful of the weight of the battery and use proper lifting techniques to prevent strain or injury.
With the battery securely held in place, you are now ready to slide it out of the compartment.
Slide the Battery Out of the Compartment
Gently slide out the battery from its compartment once it is securely held in place. To ensure the battery remains secure, it is important to follow specific procedures. First, make sure the bike is turned off and the key is removed. Then, firmly grasp the battery with both hands, placing one hand on each side. Apply even pressure and slowly pull the battery towards you, keeping it level and avoiding any sudden movements. It may require a bit of effort to fully remove the battery, as it is designed to fit snugly in the compartment. Remember to take necessary precautions, such as wearing gloves, to protect yourself from any potential hazards. Once the battery is safely removed, proceed to the next step of storing it in a safe location.
Store the Battery in a Safe Location
Make sure you find a secure and appropriate place to store the battery for your Nakto electric bike. Here are some battery storage tips to help you keep it safe and in good condition:
- Store the battery in a cool and dry location to prevent damage from extreme temperatures or moisture.
- Avoid storing the battery near flammable materials or in direct sunlight.
- Keep the battery away from children and pets to ensure their safety.
- If you won’t be using the bike for an extended period, consider removing the battery and storing it separately to prolong its lifespan.
By following these battery storage tips, you can ensure that your Nakto electric bike’s battery remains in optimal condition and ready for use when needed.
Now, let’s move on to reinstalling the battery cover.
Reinstalling the Battery Cover
Once you have found a secure location for storage, you can now proceed to reinstall the cover for the battery. The battery cover plays a crucial role in protecting the battery from external elements and ensuring its proper functioning. To reinstall the battery cover, follow these step-by-step instructions:
| Step | Action |
|---|---|
| 1 | Align the cover with the designated slots on the electric bike frame. |
| 2 | Push the cover firmly until you hear a click, indicating that it is securely in place. |
| 3 | Double-check that the cover is evenly aligned and there are no gaps. |
| 4 | Give the cover a gentle tug to ensure it is firmly attached. |
By properly securing the battery cover, you guarantee the safety and integrity of the electric bike’s battery. With the cover securely in place, you can now move on to reconnecting the battery cables.
Remember, the battery cover must be installed correctly to prevent any potential issues or damage to the battery.
Reconnecting the Battery Cables
To reconnect the battery cables, align the connectors and firmly push them together until you hear a click. Make sure the positive and negative terminals match up correctly to avoid any electrical issues.
Here are some troubleshooting tips for the battery connections:
- Check for any loose or damaged wires that may be preventing a secure connection.
- Clean the connectors with a soft cloth or brush to remove any dirt or corrosion.
- If the connectors are difficult to align, try gently wiggling them while applying pressure to help them fit together.
- Use a multimeter to test the voltage of the battery before reconnecting the cables to ensure it is fully charged.
Once you have successfully reconnected the battery cables, you are ready to move on to the next step: turning on the electric bike.
Turning On the Electric Bike
To turn on your e-bike, simply press the power button located on the handlebars. Before doing this, ensure that the battery is properly connected and charged.
The charging process is crucial for maintaining the battery’s lifespan and overall performance. It is recommended to charge the battery fully before each ride to ensure maximum power and range. A fully charged battery can provide a longer ride time and better overall performance.
It is also important to regularly check the battery’s charge level and recharge it when necessary. If you encounter any difficulties during the charging process or notice a decrease in battery life, it is advisable to consult a professional electric bike technician or engineer for troubleshooting.
Now, let’s move on to testing the battery connection and ensuring a secure fit.
Testing the Battery Connection
Now that you have successfully turned on your electric bike, it’s important to test the battery connection to ensure optimal performance.
Testing the battery life is crucial in determining if it needs to be charged or replaced. Start by locating the battery compartment, usually located near the rear wheel or under the seat.
Carefully remove the battery cover to gain access to the battery. Inspect the battery for any visible damage such as leaks, cracks, or corrosion. If you notice any signs of damage, it is recommended to replace the battery.
To test the battery life, connect a voltmeter to the battery terminals and check the voltage level. A fully charged battery should have a voltage between 36 to 42 volts. If the voltage is significantly lower, it may need to be charged or replaced.
Now that you have tested the battery connection and ensured its functionality, let’s move on to the next step: properly dispose of the old battery.
Properly Dispose of the Old Battery
After successfully testing the battery connection, it is important to properly dispose of the old battery. To dispose of the battery safely, follow these steps.
First, make sure the electric bike is turned off and the battery is disconnected from the bike. Next, check with your local waste management facility or recycling center to find out the proper method of disposal for your old battery. They may have specific guidelines or collection programs in place for recycling batteries.
It is crucial to recycle the old battery as it contains hazardous materials that can harm the environment if not disposed of correctly. Remember, never throw the battery in the trash or attempt to incinerate it. Proper disposal is essential for environmental protection.
Now, let’s move on to some tips for battery maintenance.
Tips for Battery Maintenance
One important aspect of maintaining your electric bike is regularly checking and charging the battery. Proper battery maintenance is crucial for extending its lifespan and ensuring optimal performance. Here are some tips to help you with battery charging and extending battery life:
- Charge the battery fully before each ride to maximize its capacity and range.
- Avoid overcharging the battery as it can lead to decreased performance and potential damage. Use a timer or charger with an automatic shut-off feature.
- Store the battery in a cool and dry place when not in use to prevent degradation.
By following these battery maintenance tips, you can ensure that your electric bike’s battery performs at its best and lasts longer.
Now let’s move on to troubleshooting common battery issues and how to resolve them.
Troubleshooting Common Battery Issues
To troubleshoot common issues with your electric bike’s battery, start by checking for any loose connections or faulty wiring. Ensure that all connections are secure and that there are no visible signs of damage.
If the battery is not charging properly, try different charging methods such as using a different charger or charging it overnight. If the battery still does not charge, it may be a sign of a faulty battery.
Common signs of a faulty battery include a sudden decrease in battery life, difficulty in holding a charge, or the battery not powering the bike at all. In these cases, it is recommended to contact a professional electric bike technician to diagnose and replace the battery if necessary.
Remember to always follow the manufacturer’s instructions when removing the battery to avoid any damage or injury.
Frequently Asked Questions
How long does it typically take to remove the battery from a Nakto electric bike?
To safely remove the battery from a Nakto electric bike, follow these tips.
First, ensure that the bike is turned off and the key is removed.
Locate the battery compartment, usually located near the rear wheel.
Use the appropriate tools, such as a screwdriver or Allen wrench, to loosen and remove any fasteners securing the battery.
Carefully disconnect the battery cables, being mindful of their polarity.
When not in use, store the battery in a cool, dry place away from extreme temperatures and moisture.
Can I remove the battery while the electric bike is still turned on?
No, you shouldn’t remove the battery while the electric bike is still turned on. Doing so can have serious consequences.
Removing the battery during a bike ride can cause a sudden loss of power, leading to a potentially dangerous situation. It’s important to always turn off the bike before attempting to remove the battery.
This ensures the safety of both the rider and the bike.
Is it possible to remove the battery without disconnecting the battery cables?
To remove the battery without disconnecting the battery cables, follow these steps:
First, locate the battery on your Nakto electric bike.
Next, ensure that the bike is turned off and the power switch is in the off position.
Then, carefully remove the battery cover to access the battery.
Finally, gently unplug the battery cable connectors from the battery terminals, making sure not to force or damage any of the connections.
What are some recommended locations to safely store the battery when it is removed?
When it comes to storing your electric bike battery, safety is key. There are several recommended storage locations that can ensure your battery remains in top condition.
One option is to store it in a cool, dry place away from direct sunlight and extreme temperatures. Another alternative is to use a battery storage bag or case specifically designed for electric bike batteries. These options provide added protection and help prevent any potential damage.
Remember, proper storage is essential to maintain the longevity and performance of your battery.
Are there any specific safety precautions to be aware of when removing the battery from a Nakto electric bike?
When removing the battery from a nakto electric bike, there are several safety precautions that you should be aware of.
First, ensure that the bike is turned off and the power switch is in the off position. This will prevent any accidental power surges.
Secondly, wear protective gloves to avoid any contact with electrical components.
Lastly, make sure to disconnect the battery carefully, following the manufacturer’s instructions, to avoid any damage or injury.
Taking these safety precautions will ensure a smooth and safe battery removal process.
Conclusion
Congratulations on successfully removing the battery from your Nakto electric bike!
You have followed the steps carefully and ensured the safety of yourself and your bike.
Just like a skilled electric bike technician or engineer, you approached this task with technical expertise, clarity, and precision.
Your problem-solving approach allowed you to troubleshoot any potential issues and provided solutions along the way.
Now, you can confidently dispose of the old battery and maintain your new one for optimal performance.
Keep up the great work!