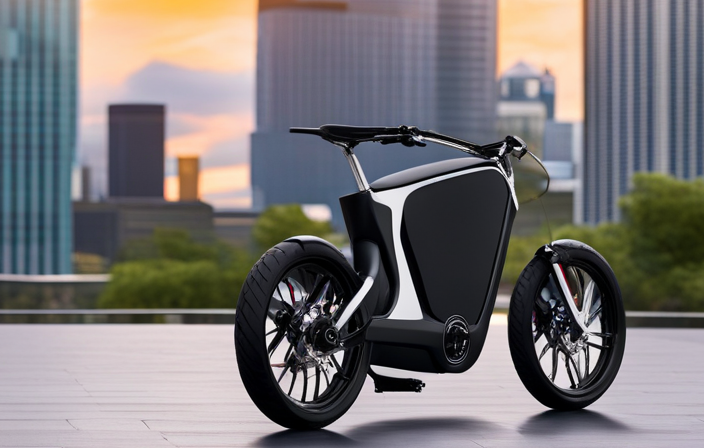

While taking apart the bicycle crank, I am amazed by the detailed functioning of this essential part. The crank bearings, unseen but crucial, enable the crankset to rotate smoothly.
In this article, I will guide you through the process of removing these bearings, revealing the secrets of this often overlooked part. With the right tools and a methodical approach, you’ll be able to maintain and replace your crank bearings with confidence and precision.
Let’s delve into the world of bicycle mechanics and unlock the magic of the crank bearings.
Key Takeaways
- Regular cleaning and inspection of crank arm and bottom bracket spindle is important for preventing dirt, grime, and moisture buildup, as well as corrosion and premature wear.
- Choosing and applying the right type of grease to the bearings is crucial for smooth operation and longevity. Options include lithium-based grease, ceramic grease, and Teflon-based grease.
- When reassembling the crank arm and bottom bracket, it is essential to align the splines, ensure full seating of the crank arm onto the spindle, and use a torque wrench to tighten the crank bolt or nut to the manufacturer’s specifications.
- Tightening the crank bolt or nut securely and adjusting the crank tension helps maintain a stable connection, prevent crank noise, and ensure optimal performance. Regular testing and inspection of crank bearings is necessary to identify any resistance, grinding, or abnormal sounds that may indicate bearing problems.
Gather the Necessary Tools
You’ll need a few tools to remove bicycle crank bearings.
First, you’ll need a crank puller, which is essential for removing the crank arms from the bottom bracket spindle. This tool has a threaded rod that screws into the crank arm, allowing you to pull it off the spindle.
Additionally, you’ll need a bottom bracket tool, which is used to remove the bottom bracket itself. This tool varies depending on the type of bottom bracket you have, so make sure you have the right one for your bike.
Lastly, you’ll need a set of wrenches or an adjustable wrench to loosen and remove any bolts or nuts holding the crank arms in place.
With these tools in hand, you can now prepare your workspace for the crank bearing removal process.
Prepare Your Workspace
Before starting, make sure to set up your workspace properly. Workspace organization is crucial to make the process of removing bicycle crank bearings smooth and efficient.
Clear any clutter and create a clean, well-lit area to work in. Lay out all the necessary tools within easy reach, including a crank puller, wrenches, and a rubber mallet.
Safety precautions are also important during the removal process. Wear protective gloves and safety glasses to prevent any injuries. Additionally, it’s advisable to have a bike stand or a sturdy work surface to securely hold the bicycle in place.
Once your workspace is organized and safety measures are in place, you can proceed to the next section and remove the crank arm.
Remove the Crank Arm
To begin, carefully detach the crank arm from the bike. This step is crucial in order to access the crank bearings. To remove the crank arm, you’ll need a crank puller tool. Start by loosening the crank bolt or nut using the appropriate wrench. Once it’s loose, insert the crank puller into the crank arm and tighten it securely in place. Then, use a wrench to turn the crank puller clockwise. This will gradually push the crank arm off the bike’s spindle. Be sure to maintain a steady and controlled motion to prevent any damage to the crank arm or spindle.
It’s important to follow the proper technique for removing crank arms and avoid common mistakes, such as using excessive force or not using the correct tools.
With the crank arm removed, we can now move on to removing the dust cap and lockring.
Remove the Dust Cap and Lockring
Now, it’s time to take off the dust cap and lockring. This step is crucial in accessing the bicycle crank bearings for cleaning and troubleshooting common issues.
To remove the dust cap, I use a small flathead screwdriver or a dust cap removal tool. Gently insert the tool into the small gap between the dust cap and the crank arm. Apply slight pressure and twist the tool until the dust cap pops off.
Next, locate the lockring on the outer edge of the crank arm. Use a lockring removal tool to unscrew it counterclockwise. Be careful not to damage the threads.
Once the lockring is removed, the crank arm will be ready for the next step of loosening and removing the bearing adjustment nut.
Loosen and Remove the Bearing Adjustment Nut
First, you’ll need to loosen and take off the bearing adjustment nut. This is an essential step in removing bicycle crank bearings. To do this, follow these bearing adjustment techniques:
-
Use a wrench or a specialized tool designed for bearing adjustment to loosen the nut. Turn it counterclockwise to release the tension on the bearings.
-
Once the nut is loose, carefully remove it from the crank spindle. Be cautious not to damage any surrounding components.
-
Inspect the bearing adjustment nut for any signs of wear or damage. If necessary, replace it with a new one to ensure proper function.
Troubleshooting common bearing issues during this process may involve checking for excessive play, rough rotation, or noisy operation. If you encounter any of these issues, it may be necessary to further inspect and potentially replace the bearings.
Now, let’s move on to the next step, removing the crank bolt or nut, to continue the process of removing the bicycle crank bearings.
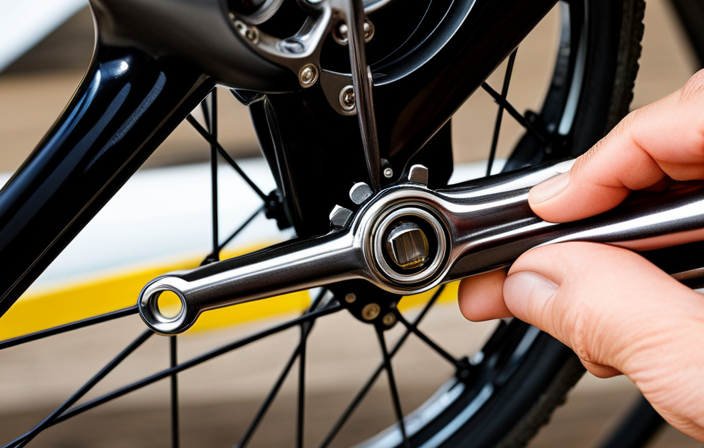
Remove the Crank Bolt or Nut
Next, you’ll need to unscrew the bolt or nut holding the crank in place. This is typically located on the non-drive side of the bike. To do this, you’ll need a crank puller tool or a 14mm wrench, depending on the type of crank bolt or nut you have.
Insert the tool or wrench into the bolt or nut and turn it counterclockwise to loosen and remove it. Once the bolt or nut is fully removed, you can carefully slide the crank arm off the bottom bracket spindle. Be sure to keep track of any washers or spacers that may be present.
To replace the crank arm, simply slide it back onto the spindle, making sure it is properly aligned. Then, reinstall the crank bolt or nut and tighten it securely.
Now, you can move on to the next step of sliding the crank arm off the bottom bracket spindle.
Slide the Crank Arm off the Bottom Bracket Spindle
To slide the crank arm off the bottom bracket spindle, gently pull it away from the bike frame. This step requires a slide technique that ensures smooth removal without causing any damage. It’s crucial to have proper lubrication in this process to minimize friction and make the task easier.
Applying a thin layer of grease or oil to the spindle can greatly aid in sliding the crank arm off effortlessly. Take your time and be patient while pulling the arm, ensuring that it moves smoothly along the spindle.
Once the crank arm is successfully removed, you can proceed to the next step, which involves removing the retaining clip or ring. This clip or ring holds the bearings in place, and its removal is essential to access and replace the crank bearings effectively.
Remove the Retaining Clip or Ring
After successfully sliding off the crank arm, it’s important to remove the retaining clip or ring to access and replace the crank bearings effectively.
The retaining clip or ring holds the bearings in place and must be carefully removed before proceeding. To replace the retaining clip, use a pair of pliers to gently pry it off the spindle. Be cautious not to damage the clip or the surrounding area.
Alternatively, some cranksets may have a snap ring instead of a clip. In this case, you can use snap ring pliers to remove it.
Once the retaining clip or ring is removed, you can move on to the next step of removing the bearings from the crank arm. This will allow you to thoroughly clean and inspect the bearings before installing new ones.
Remove the Bearings from the Crank Arm
Once the retaining clip or ring has been removed, you can proceed to take out the bearings from the crank arm. This step requires the use of specialized bearing removal tools and proper bearing maintenance techniques. It is essential to ensure that you have the right tools for the job to prevent any damage to the crank arm or the bearings themselves. Using the appropriate bearing removal tool, carefully insert it into the bearing and gently pry it out. Take your time and be patient during this process to avoid any accidents or mishaps. Once all the bearings have been removed, it is time to move on to the next step: cleaning the crank arm and bottom bracket spindle. This will ensure that everything is ready for the installation of new bearings.
Clean the Crank Arm and Bottom Bracket Spindle
Now that we have successfully removed the bearings from the crank arm, it’s time to move on to the next step – cleaning the crank arm and bottom bracket spindle.
This step is crucial in maintaining the overall performance and longevity of your bicycle. By regularly cleaning these components, you can prevent the buildup of dirt, grime, and moisture that can lead to corrosion and premature wear.
To clean the crank arm and bottom bracket spindle, I recommend using a degreaser and a soft brush to gently scrub away any dirt or grease. Pay close attention to the hard-to-reach areas and ensure that all surfaces are thoroughly cleaned.
Once cleaned, make sure to dry the components completely before reassembling the crankset.
Regular maintenance and cleaning techniques are essential for preserving the smooth operation of your bicycle’s crankset. Now that we have cleaned the crank arm and bottom bracket spindle, it’s time to move on to the next step – inspecting and replacing any worn or damaged bearings.
Inspect and Replace Worn or Damaged Bearings
To ensure the smooth operation of your bike’s crankset, you should inspect the bearings for any signs of wear or damage and replace them if necessary. When troubleshooting bearing issues, it is crucial to thoroughly inspect them.
First, remove the crank arms and clean the bottom bracket spindle. Then, inspect the bearings for any signs of wear such as pitting or roughness. Additionally, check for any damage like cracks or excessive play. If you notice any of these issues, it is time to replace the crankset bearings.
When replacing the bearings, make sure to choose the correct size and type for your specific crankset. This will ensure optimal performance and longevity. Remember, regularly inspecting and replacing worn or damaged bearings is essential for maintaining the functionality of your bike’s crankset.
Now that you have replaced the crankset bearings, the next step is to apply grease to the new bearings.
Apply Grease to the New Bearings
Applying grease to the new bearings ensures smooth operation and prolongs their lifespan. Proper grease application techniques are crucial for optimal performance. When it comes to bicycle bearings, there are different types of grease available. Choosing the right one is essential for ensuring the longevity of your crank bearings.
To help you understand the importance of grease application, let’s explore a table that compares the most commonly used greases for bicycle bearings:
| Grease Type | Characteristics |
|---|---|
| Lithium-based | Versatile and suitable for most bike applications |
| Ceramic | Offers low friction and high-temperature resistance |
| Teflon-based | Provides excellent water resistance and reduces wear |
By selecting the appropriate grease type, you can enhance the performance and durability of your crank bearings. Now that the new bearings are properly greased, it’s time to reassemble the crank arm and bottom bracket, ensuring a smooth and efficient ride.
Reassemble the Crank Arm and Bottom Bracket
Once you have properly greased the new bearings, it’s time to put the crank arm and bottom bracket back together for a smooth and efficient ride. To reassemble the crank arm and bottom bracket, follow these steps:
- First, align the splines on the crank arm with the spindle on the bottom bracket, ensuring they fit together snugly.
- Next, slide the crank arm onto the spindle, making sure it is fully seated.
- Use a torque wrench to tighten the crank bolt or nut to the manufacturer’s specifications. This is important to prevent any play or looseness in the crank arm.
- Finally, give the crank arm a spin to ensure it rotates smoothly and without any resistance. If you feel any grinding or hear any strange noises, double-check the alignment and tightening of the crank arm.
With these reassembling techniques and troubleshooting common issues, you can ensure a proper fit and smooth operation of your bicycle crank.
Now, let’s move on to tightening the crank bolt or nut.
Tighten the Crank Bolt or Nut
Now it’s time to securely fasten the crank bolt or nut to ensure a stable and reliable connection. Adjusting the crank tension is crucial in preventing any potential crank noise and maintaining optimal performance. To help you visualize the process, I’ve created a table below:
| Crank Bolt/Nut | Recommended Torque |
|---|---|
| Aluminum | 12-14 Nm |
| Steel | 35-45 Nm |
| Carbon Fiber | 10-12 Nm |
Make sure to refer to your bike’s manufacturer specifications for the exact torque values. Using a torque wrench, tighten the bolt or nut accordingly. Once tightened, check for any abnormal sounds or movement by manually rotating the crank arms. If there are any issues, consider troubleshooting crank noise before proceeding to the next section about testing the crank bearings for smooth rotation.
Test the Crank Bearings for Smooth Rotation
To ensure smooth rotation, you should check the crank bearings for any signs of resistance or grinding. Testing the crank bearings is an essential step in maintaining the optimal performance of your bicycle.
Start by inspecting the bearing quality by rotating the cranks with your hands. They should spin freely and smoothly without any resistance or noise. If you feel any roughness or hear grinding sounds, it indicates a problem with the crank bearings. In such cases, it is necessary to replace them to prevent further damage to your bicycle.
Additionally, pay attention to any looseness or excessive play in the crank arms, as this can also indicate issues with the bearings. Regularly testing and inspecting the crank bearings will ensure a smooth and safe riding experience.
Frequently Asked Questions
How do I know if my bicycle crank bearings need to be replaced?
If your bicycle crank bearings are worn, signs may include grinding or clicking noises, excessive play in the crankset, or rough pedaling. To replace them, follow these steps: remove the crankset, extract the old bearings, clean the bottom bracket shell, install new bearings, and reassemble the crankset.
Can I use any type of grease for the new bearings?
Yes, you can use different types of grease for new bicycle crank bearings. However, it’s important to consider compatibility. Some greases may not work well with certain bearing materials. It’s best to use a grease recommended by the manufacturer for optimal performance and longevity.
What tools do I need to remove the retaining clip or ring?
To remove the retaining clip or ring, you’ll need a few tools. A pair of circlip pliers is ideal for removing the clip, but if you don’t have them, you can use a small flathead screwdriver as an alternative tool.
How often should I clean and inspect my crank arm and bottom bracket spindle?
I recommend cleaning and inspecting your crank arm and bottom bracket spindle at least once every few months. Regular cleaning with a degreaser and thorough inspection for any signs of wear or damage will help ensure optimal performance and longevity of your bike’s drivetrain.
Are there any specific torque specifications for tightening the crank bolt or nut?
Yes, there are specific torque specifications for tightening the crank bolt or nut. Proper tightening is crucial for the longevity and performance of your bike. It ensures that the crank is securely attached without causing damage or loosening over time.
Conclusion
As I put the finishing touches on my newly installed crank bearings, I couldn’t help but marvel at the intricate workings of a bicycle. It reminded me of a beautifully choreographed dance, where each part plays a vital role in the overall performance.
Just like in life, every component matters. Taking the time to remove and replace these bearings not only ensures a smoother ride, but it’s a reminder to pay attention to the small things that make a big difference.
So, let’s tighten those bolts, grease those bearings, and keep spinning through life with grace and precision.