Taking off the pedal cranks from a bicycle might seem challenging for individuals unfamiliar with the procedure. Yet, equipped with the appropriate tools and a bit of knowledge, it turns into a fairly straightforward task.
In this article, I’ll walk you through the steps to remove your bike’s pedal arms safely and efficiently.
Before we dive into the process, it’s important to note that removing pedal arms requires some mechanical skill and knowledge. If you’re not confident in your abilities, it’s best to take your bike to a professional bike mechanic.
However, if you’re up for the challenge, follow along with me as I guide you through the process of removing bicycle pedal arms. With a little bit of patience and attention to detail, you’ll have your bike’s pedal arms off in no time.
Key Takeaways
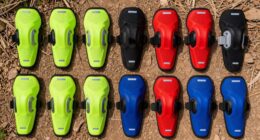
- Different types of pedals require different tools for removal.
- Use lubricant and secure the bike in a stand or clamp to make it easier to remove pedal arms.
- Refer to the manufacturer’s instructions or consult with a bike mechanic if unsure about the process.
- Proper care and maintenance of the bike’s bottom bracket ensure a smooth and safe riding experience.
Gather the Necessary Tools
You’ll need a couple of tools before you can start removing those bicycle pedal arms, so let’s grab ’em!
First, determine the type of bicycle pedals you have as different types require different tools. For example, if you have a pedal with a hexagonal socket, you’ll need an Allen wrench. If you have a pedal with a flat surface, you’ll need a pedal wrench.
Proper maintenance for bicycle pedals is also essential to ensure that the removal process goes smoothly. Before removing the pedal arms, ensure that the pedals are clean and free of any debris. This will help prevent any damage to the pedal threads or the crank arm.
Additionally, it’s important to lubricate the threads to make it easier to remove the pedal arms. Once you have gathered the necessary tools and ensured that your pedals are clean and lubricated, it’s time to prepare your bike for the pedal arm removal process.
Prepare Your Bike
Before removing the pedal arms, it’s important to prepare your bike properly.
First, I secure my bike in a bike stand or clamp to prevent it from moving around during the process.
Then, I use a pedal wrench to loosen the pedal arm, making sure to turn it counterclockwise.
This step is crucial to ensure a smooth and safe removal of the pedal arm.
Secure Your Bike
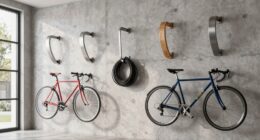
To keep your precious bike safe and secure, make sure to always lock it up properly. There are various locking mechanisms and anti-theft devices available in the market that can help you secure your bike. Some popular options include U-locks, cable locks, chain locks, and wheel locks. It’s recommended to use a combination of these devices to ensure maximum security.
When locking your bike, make sure to choose a sturdy object to lock it to, such as a bike rack or a metal pole. Avoid locking it to trees or flimsy objects that can be easily cut or broken. Once you have secured your bike, double-check to make sure that it’s locked properly and that the locking mechanism isn’t loose or easily accessible.
With your bike safely locked up, you can now move on to the next step of removing the pedal arm.
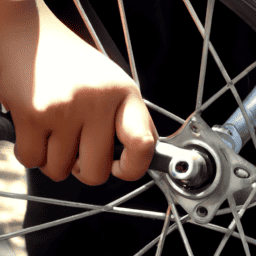
Loosen the Pedal Arm
As I turn the wrench towards the ground, the metal creaks and groans in protest, giving way to the force and allowing the pedal to slowly loosen from its attachment.
Loosening the pedal arm may seem like a simple task, but there are certain considerations to ensure a successful removal. Here are some tips to help you loosen the pedal arm with ease:
- Use lubricants: Applying lubricants to the pedal arm threads will make it easier for you to remove them. It reduces friction and helps loosen the threads.
- Avoid tightening the pedal arm: Over-tightening the pedal arm can make it difficult to remove. Always ensure that you don’t tighten it too much in the first place.
- Don’t force it: If the pedal arm is not coming off easily, don’t use excessive force. This can strip the threads and make it impossible to remove.
- Use a pedal wrench: Using a pedal wrench is important for proper leverage, and it ensures that you don’t damage the crank arm thread.
- Check the direction: Remember that the left pedal arm is reverse threaded. Turn it counterclockwise to loosen it.
Taking note of these tips will help you avoid common mistakes that people make when loosening pedal arms.
Now that the pedal arm is loose, it’s time to remove it completely.
Remove the Pedal Arm
First, loosen the bolts on the pedal arm using a wrench until they’re completely removed. Make sure to use the proper technique when using the wrench to avoid stripping the bolts. Common mistakes include using the wrong size wrench, using too much force, or loosening the wrong bolts. Always refer to the manufacturer’s instructions or consult with a bike mechanic if you’re unsure.
Once the bolts are removed, gently pull the pedal arm away from the bike frame. If it doesn’t come off easily, use a rubber mallet to tap it loose. Be careful not to damage the bottom bracket or other parts of the bike.
With the pedal arm removed, you can now move on to cleaning and inspecting the bottom bracket.
Clean and Inspect the Bottom Bracket
Now it’s time to take a closer look at the heart of your bike – the bottom bracket. Proper maintenance of this crucial component is essential to ensure the smooth functioning of your bike.
Start by removing the pedal arms and the chainring, and then clean the bottom bracket thoroughly with a degreaser and a brush. Pay close attention to any potential wear or damage, such as cracks or rust, and replace any worn-out parts.
Next, inspect the bottom bracket for any signs of damage or wear. Check for any looseness or play in the bearings, and make sure that the spindle is straight and not bent. If you notice any issues, it’s best to replace the entire bottom bracket to prevent any further damage or potential safety hazards.
Once the inspection is complete, you can reinstall or replace the pedal arm to complete the maintenance process. With proper care and maintenance of your bike’s bottom bracket, you can enjoy a smooth and safe riding experience.
Reinstall or Replace the Pedal Arm
You’re ready to give your bike a new lease of life by putting back the pedal arm. Before you do, it’s important to perform some pedal arm maintenance. This will ensure that the pedal arm functions properly and lasts longer.
Here are some steps to follow:
-
Clean the threads of the crank arm and the pedal spindle. Use a clean cloth to remove any dirt or debris that may have accumulated.
-
Apply a small amount of lubricant to the threads. This will make it easier to install the pedal arm and prevent it from seizing up.
-
Tighten the pedal arm to the recommended torque setting. Over-tightening can damage the threads, while under-tightening can cause the pedal to come loose while riding.
Upgrading pedal arms is also a great way to improve your cycling experience. You can choose from a variety of materials, such as aluminum, carbon fiber, or titanium, to enhance the strength, stiffness, and weight of your pedal arms.
Some pedal arms also come with different shapes, sizes, and colors, to match your riding style and personal preference. Just make sure that the new pedal arm is compatible with your bike’s bottom bracket and pedal spindle, and that you follow the manufacturer’s instructions for installation.
With the right pedal arm maintenance and upgrade, you can pedal with confidence and enjoy your ride to the fullest.
Frequently Asked Questions
How do I know if my bike pedal arms need to be removed?
I can inspect my bike pedal arms for signs of wear and ensure proper maintenance to prevent damage. Common mistakes include over-tightening and using the wrong tools. Professional help may be necessary for removal.
Can I remove the pedal arms without a specialized tool?
Yes, there are alternative removal methods for pedal arms without a specialized tool. However, it may require more effort and patience. To maintain pedal arms, regularly check for looseness and tighten as needed. Clean and lubricate threads to prevent corrosion.
How do I determine the correct size for a replacement pedal arm?
To determine the correct size for a replacement pedal arm, I use measuring techniques like a ruler or caliper. It’s important to consider the material options, such as aluminum or carbon fiber, to ensure a proper fit and avoid damage.
Should I lubricate the bottom bracket before reinstallation?
Yes, it is recommended to lubricate the bottom bracket before reinstallation. Applying chain lubricant can provide protection against rust and corrosion, and following best practices for bottom bracket maintenance can extend the lifespan of the component.
What should I do if the pedal arm is stuck and won’t come off?
When the pedal arm is stuck, it’s like trying to move a boulder. Common causes include rust or corrosion. To free it, use penetrating oil or heat. To prevent future issues, keep the threads clean and lubricated.
Conclusion
In conclusion, removing bicycle pedal arms isn’t as hard as it may seem. With the right tools and preparation, it can be done quickly and easily.
However, it’s important to take the time to clean and inspect the bottom bracket to ensure that it’s in good condition. As the saying goes, "a stitch in time saves nine."By regularly maintaining and checking your bike, you can prevent more serious issues from occurring down the road.
Don’t hesitate to take apart your bike and inspect it thoroughly. Your bike will thank you for it in the long run. Remember, safety always comes first when working on your bike, so don’t be afraid to ask for help if you need it.