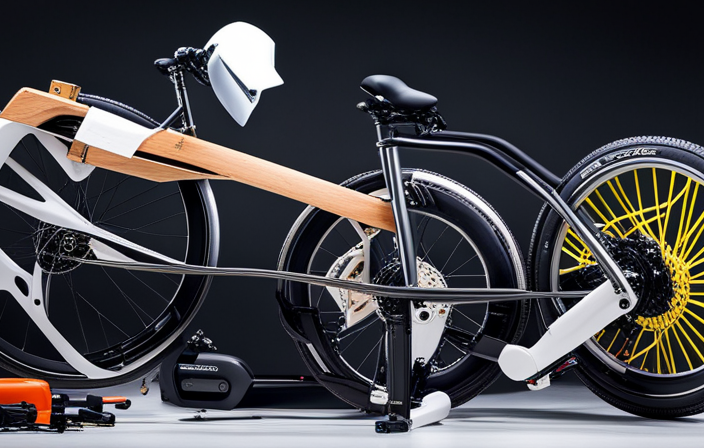

I understand that taking off the back wheel of a Mermax electric bike may seem intimidating, but with the appropriate tools and some direction, it is actually a simple process.
In this article, I will walk you through the step-by-step process of removing the rear wheel, ensuring you have all the necessary tools and equipment, releasing brake tension, and removing the chain from the rear sprocket.
By the end, you’ll be equipped with the knowledge to confidently tackle this maintenance task on your own.
Key Takeaways
- Proper axle alignment is crucial for reinstalling the rear wheel of a Mermax electric bike.
- It is important to ensure the chain is properly seated on the gears during the reinstallation process.
- Checking for proper alignment and functionality of the rear wheel is essential after reinstallation.
- Regular maintenance of electric bike wheels, including testing functionality and checking for alignment issues, is important for optimal performance.

Best Bright Bike Light for Night Riding, USB-C Rechargeable Bicycle Light, Bicycle Headlight Set, Daytime Running Light, Waterproof Bike Headlight Taillight for Adult Kid Mountain MTB Off-Road Cycling
【Great for Safe Night Riding】The bike lights are designed for safe night riding, featuring 6pcs TG3 LED beads...
As an affiliate, we earn on qualifying purchases.
Gather the Necessary Tools and Equipment
Before you begin, make sure you have all the necessary tools and equipment. To successfully remove the rear wheel of a Mermax electric bike, you will need a few specific tools.
First, make sure you have a set of Allen wrenches or a multi-tool that includes Allen wrenches in various sizes. These will be used to loosen and remove the bolts holding the wheel in place.
Additionally, you will need a small adjustable wrench or a 15mm wrench to loosen the axle nuts.
It’s also helpful to have a bike stand or something to prop the bike up on while you work.
Now that you have all the tools needed, let’s move on to the step by step instructions on how to prepare the bike for wheel removal.

Varstrom 48V 1000W 1500W Rear & Front Hub Motor Kit - Ebike Conversion Kit for 26"/27.5"/28"/29"/700C Front Rear Wheel,Electric Bike Conversion Set with Display & Ebike Battery (Optional)
【POWERFUL 48V 1000W Front Hub Motor Kit】: 48V 1000W front wheel motor kit is designed for a variety...
As an affiliate, we earn on qualifying purchases.
Prepare the Bike for Wheel Removal
To get started, make sure you’ve properly prepped your bike for wheel removal. Here are the steps you need to follow:
-
Begin by cleaning the bike thoroughly, paying special attention to the rear wheel area. Remove any dirt, debris, or grease that might interfere with the wheel removal process.
-
Inspect the rear wheel alignment to ensure it is straight and properly aligned with the frame. Use a ruler or straight edge to check for any deviations or misalignments.
-
Check the tire pressure and adjust if necessary. A properly inflated tire will make the wheel removal process easier and smoother.
-
Examine the brake system and make sure it is functioning correctly. This will help prevent any issues when it comes time to remove the wheel.
Now that the bike is prepped, we can move on to releasing the brake tension in the next section.

2026 Upgrade 9800Lumen Bike Light for Night Riding,Super Bright 6 LED Headlight,Aluminum 10 Mode Rechargeable Bicycle Light Front and Rear,360°Rotatable Brackt,Waterproof,Runtime 72 hr,Road Shockproof
【700DAYS Support] 】:If your bike light have any problem, please to pass us on through Amazon for the...
As an affiliate, we earn on qualifying purchases.
Release the Brake Tension
Now that the brake tension has been released, we can proceed to the next step. When it comes to removing the rear wheel of a Mermax electric bike, it’s crucial to properly adjust the brake tension to avoid any issues. Adjusting brake tension is essential for smooth and safe bike operation. If you’re experiencing any brake issues, troubleshooting the brake system should be your first step. To help you understand the importance of adjusting brake tension, here’s a table outlining the potential problems that can arise from incorrect brake tension:
| Brake Issue | Possible Cause | Solution |
|---|---|---|
| Spongy Brakes | Loose Brake Cable | Tighten Brake Cable |
| Brake Rubbing | Misaligned Brake Pads | Align Brake Pads |
| Brake Dragging | Sticking Brake Caliper | Lubricate Brake Caliper |
Now, to continue the process of removing the rear wheel, we need to loosen the axle nuts or quick release lever.

Magicshine HORI1300S Bike Headlight, Compatible with Garmin/Wahoo, 1300 Lumens High & Low Beam Front Light, USB-C Rechargeable, IPX6 Waterproof for Night Riding and Urban Cycling-Black
DUAL OPTICS, HIGH & LOW BEAM: Max 1300LM high beam conquers the darkest trails. The anti-glare low beam...
As an affiliate, we earn on qualifying purchases.
Loosen the Axle Nuts or Quick Release Lever
Make sure you’re careful when loosening the axle nuts or quick release lever to avoid any damage. When it comes to removing the rear wheel of your Mermax electric bike, the proper loosening technique is crucial.
One common mistake is using too much force when trying to loosen the nuts or lever. This can lead to stripping the threads or damaging the axle. Instead, apply steady and even pressure, making sure to turn the nuts or lever counterclockwise. If you encounter resistance, don’t force it. Instead, stop and assess the situation. It may be helpful to use a wrench or pliers for added leverage.
By following the correct loosening technique, you can ensure a smooth removal process.
Now, let’s move on to removing the chain from the rear sprocket.
Remove the Chain from the Rear Sprocket
When removing the chain from the rear sprocket, it’s important to release tension by shifting to the smallest chainring and smallest rear cog. This ensures that the chain is loose and easier to remove.
Here’s a step-by-step guide to removing the chain from the rear sprocket:
- Shift to the smallest chainring and smallest rear cog to release tension on the chain.
- Use a chain tool to carefully push out one of the chain pins. This will separate the chain and allow you to remove it from the sprocket.
- Once the chain is disconnected, carefully lift and remove it from the rear sprocket.
Chain maintenance is crucial for the longevity and smooth operation of your bike. Regularly lubricating the chain with a high-quality bike chain lubricant helps reduce friction and prevent rust.
Now that the chain is removed, we can move on to the next step of carefully lifting and removing the rear wheel without causing any damage.
Carefully Lift and Remove the Rear Wheel
To safely detach the back tire, carefully lift it while avoiding any potential damage.
When lifting the rear wheel of a Mermax electric bike, it is crucial to employ the correct lifting technique to prevent any harm to yourself or the bike.
Begin by ensuring that the bike is stable and secure, either by using a bike stand or propping it against a wall.
Next, position yourself behind the bike and firmly grasp the bike frame near the rear dropouts.
Slowly and steadily lift the bike, using your legs for power and maintaining a straight back.
Be cautious of any potential risks, such as sharp edges or loose parts.
By lifting the rear wheel carefully and attentively, you can safely remove it from the bike.
Now, let’s move on to inspecting the wheel and tire for any signs of damage.
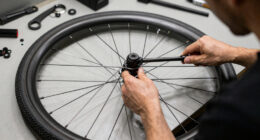
Inspect the Wheel and Tire for Damage
Take a close look at the wheel and tire to check for any signs of damage. Inspecting the wheel and tire is crucial to determine if there are any issues that need to be addressed.
Start by examining the tire for any punctures or cuts. If you find a punctured tire, you can repair it using a tire repair kit. This involves locating the puncture, cleaning the area, and applying a patch or plug.
On the other hand, if the wheel itself is damaged, it will need to be replaced. Look for any cracks, bends, or dents in the wheel. If you notice any of these signs, it is best to replace the wheel to ensure your safety on the road.
Once you have completed this assessment, you can then proceed to perform any necessary repairs or maintenance.
Perform any Necessary Repairs or Maintenance
Now that you’ve assessed any potential damage, you should start by checking the tire pressure and adjusting it if necessary. Proper tire pressure is essential for optimal performance and safety. Use a pressure gauge to measure the air pressure in the tires. Refer to the manufacturer’s specifications for the recommended tire pressure.
If the pressure is too low, use a hand pump or an air compressor to inflate the tires to the correct pressure.
Additionally, performing regular maintenance on your electric bike is crucial to ensure its longevity. This includes lubricating the chain, checking the brakes for wear and tear, and tightening any loose bolts or screws. By troubleshooting common issues and performing necessary repairs, you can keep your electric bike in top shape.
Now, let’s move on to reinstalling the rear wheel.
Reinstall the Rear Wheel
Make sure you align the axle with the dropouts before tightening the quick release skewer. This is a crucial step in the reinstalling process of the rear wheel on your Mermax electric bike. Failure to properly align the axle can lead to issues such as misalignment of the chain or improper functioning of the brakes. To help you understand the process better, refer to the table below which outlines the steps involved in reinstalling the rear wheel.
| Step | Action |
|---|---|
| 1 | Ensure the derailleur is properly positioned |
| 2 | Insert the axle into the dropouts |
| 3 | Align the axle with the dropouts |
| 4 | Tighten the quick release skewer |
| 5 | Check for proper alignment and functionality |
Troubleshooting common issues during the reinstalling process can save you time and frustration. Some common issues include difficulty aligning the axle, the chain not properly seated on the gears, or the brakes not engaging correctly. By following the steps and ensuring everything is aligned and tightened properly, you can avoid these issues and ensure the proper functionality of your rear wheel.
Next, we will test the wheel and ensure its proper functionality.
Test the Wheel and Ensure Proper Functionality
To ensure everything is working correctly, it’s important to test the functionality of the wheel after reinstalling it.
Regular maintenance for electric bike wheels is crucial to keep them in optimal condition.
When testing the wheel, there are common issues to watch out for.
First, check the wheel alignment by spinning it and observing any wobbling or rubbing against the brake pads.
Next, test the brakes to confirm they engage smoothly and effectively.
Ensure that the wheel spins freely without any unnecessary resistance.
Pay attention to any unusual noises or vibrations, as they may indicate issues with the bearings or spokes.
Finally, check the tire pressure to ensure it is at the recommended level.
Frequently Asked Questions
Can I remove the rear wheel of my Mermax electric bike without any tools?
No, tools are required to remove the rear wheel of a Mermax electric bike. Without the appropriate tools, it would be difficult to safely and effectively remove the rear wheel.
How do I know if the brake tension has been properly released?
Releasing brake tension on a mermax electric bike is crucial for proper maintenance. To adjust brake tension, locate the brake adjustment barrel and rotate it clockwise or counterclockwise. Regularly check the rear wheel for any signs of wear and tear and ensure proper alignment for optimal performance.
Can I remove the chain from the rear sprocket without damaging it?
Yes, the chain can be safely removed from the rear sprocket without causing damage. To do so, ensure proper chain tension is maintained throughout the process of removing the rear sprocket.
What are some common damages to look out for when inspecting the wheel and tire?
When inspecting the wheel and tire, I look for common tire issues such as punctures, cracks, or excessive wear. I also check for signs of wheel misalignment, such as wobbling or uneven tire wear.
Are there any specific tests I should perform to ensure the rear wheel is functioning properly after reinstallation?
To ensure the proper functioning of the rear wheel on a Mermax electric bike after reinstallation, it is important to perform specific tests. Common signs of a malfunctioning rear wheel include wobbling, noise, and difficulty in pedaling. Steps to properly reassemble and align the rear wheel include aligning the wheel with the frame, tightening the axle nuts, and checking the chain tension.
Conclusion
In conclusion, removing the rear wheel of a Mermax electric bike is a straightforward process that can be done with the right tools and a little know-how. By following the steps outlined in this article, you can successfully remove and inspect the wheel for any damage or necessary repairs.
Just like a skilled mechanic removing a wheel from a race car with precision, you too can remove the rear wheel of your Mermax electric bike with ease.
Safe riding!