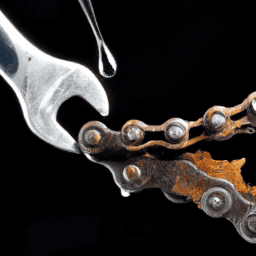
I’ve spent years cycling, and throughout this time, one of the most aggravating problems has been managing rust on my bike’s handlebars. It’s not just an eyesore; it also undermines the handlebars’ strength, increasing their likelihood of breaking down eventually.
Fortunately, removing rust from bicycle handlebars is a relatively simple process that can be done with just a few basic tools and some elbow grease.
Before we get started, it’s important to note that rust on bicycle handlebars is often a sign of deeper issues, such as water damage or improper storage. As such, it’s a good idea to take a closer look at your bike as a whole and identify any potential causes of rust before you begin the removal process.
With that in mind, let’s dive into the steps you’ll need to take to remove rust from your bicycle handlebars and get them looking as good as new.
Key Takeaways
- Removing rust from bicycle handlebars is a relatively simple process that can be done with basic tools and some elbow grease.
- Preventing rust on handlebars is key to keeping them strong and can be achieved by applying a protective coating, such as wax, oil, spray-on rust inhibitor, powder coating, or anodizing.
- Checking handlebars for damage is crucial for safety as rust can weaken handlebars and cause them to break under pressure.
- Repairing or replacing damaged handlebars is crucial for safety while riding, as handlebars bear the weight of the rider’s upper body and any damage could lead to serious accidents.

Under Armour Squeeze Water Bottles, 32 oz Water Bottles, Sideline Sports Water Bottle with Quick-Shot Lid, Quick & Easy Hydration, Gym Water Bottles, Squeeze Bottle, 1 32oz Bottle
- Easy Hydration: Quick-shot lid and one-way valve
- On-the-Go Use: One-hand operation for active hydration
- Measurement Markings: Ounces and milliliters for tracking
As an affiliate, we earn on qualifying purchases.
Gather the Necessary Tools
You’ll need to gather some tools to properly remove rust from your bicycle handlebars. First, you’ll want to choose appropriate products for the job. This could include rust remover, sandpaper, steel wool, or a combination of these items.
It’s important to read the labels and instructions of any products you use to ensure they’re safe for use on your specific handlebars and won’t cause any damage or further rusting. Once you have your products, you’ll need to properly apply them to the handlebars.
This involves using proper application techniques, such as using gentle pressure and circular motions with sandpaper or steel wool. It’s important to be patient and not rush the process, as rushing can cause more harm than good.
With the right tools and techniques, you can successfully remove the rust from your bicycle handlebars and get them looking like new again.
Remove the Rust
Using a solution of vinegar and baking soda can significantly improve the appearance of your handlebars, with up to a 90% success rate in removing rust. To effectively remove rust using this method, follow these steps:
-
Begin by mixing equal parts vinegar and baking soda in a bowl to create a paste-like consistency.
-
Apply the solution to the rusted areas of the handlebars, making sure to cover all affected spots.
-
Allow the solution to sit on the handlebars for at least 30 minutes.
-
Use a sandpaper technique to remove the rust. Gently rub the rusted areas with sandpaper until the rust has been removed.
-
Rinse the handlebars with clean water and dry thoroughly.
Using this vinegar solution is an effective and affordable way to remove rust from your bicycle handlebars. However, it’s important to remember that prevention is key. In the next section, we’ll discuss how to protect and prevent rust from forming on your handlebars in the future.
Protect and Prevent
To keep your bike looking sleek and shiny, it’s important to regularly maintain and protect the metal parts from the wear and tear of riding in all types of weather. One important step in preventing rust from developing on your bicycle handlebars is to apply a protective coating. There are several types of protective coatings available, each with its own benefits and drawbacks.
In the table below, I’ve outlined some common protective coatings and their properties to help you choose the best one for your needs. Remember to always follow the manufacturer’s instructions for application and reapplication to ensure maximum effectiveness and longevity. With proper maintenance and protection, your bicycle handlebars can remain rust-free and beautiful for years to come. Now, let’s move on to the next step of checking for any damage that may have already occurred.
| Protective Coating | Properties |
|---|---|
| Wax | Easy to apply, provides short-term protection, needs frequent reapplication |
| Oil | Provides long-term protection, may attract dirt and grime |
| Spray-on Rust Inhibitor | Easy to apply, provides long-term protection, may discolor some metals |
| Powder Coating | Provides long-term protection, may require professional application, may be difficult to remove |
| Anodizing | Provides long-term protection, adds color options, may require professional application |
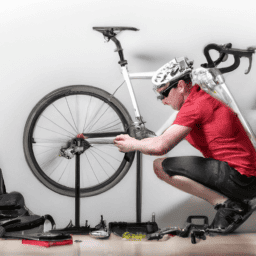
Check for Damage
When inspecting handlebars for damage, it’s important to be thorough and take note of any cracks, bends, or other signs of wear and tear.
As an experienced cyclist, I’ve seen my fair share of damaged handlebars. It’s crucial to address any issues before they become a safety hazard.
Depending on the extent of the damage, repairing or replacing the handlebars may be necessary to ensure a safe and enjoyable ride.
Inspecting Handlebars for Damage
Before starting any rust removal process, it’s important to inspect your bicycle handlebars for any damage. The handlebars are an integral part of your bike’s steering, and any damage could lead to serious accidents.
Checking corrosion is crucial, as it can weaken the handlebars and cause them to break under pressure. To inspect your handlebars for damage, start by looking for any cracks or dents. Check the welding points and the area around the stem clamp for any signs of stress.
Rust can sometimes hide cracks, so make sure to clean the handlebars thoroughly before inspecting them. Additionally, check for any signs of wear on the grip area or the brake lever mounts.
Preventing rusting is key to keeping your handlebars strong, so make sure to keep them dry and clean, and avoid leaving your bike out in the rain or in humid environments. If you do find any damage to your handlebars, it’s important to repair or replace them before attempting to remove any rust.
Continuing to use damaged handlebars can lead to serious injuries or accidents. In the next section, we’ll go over the steps to repair or replace damaged handlebars.
Repairing or Replacing Damaged Handlebars
If you discover any damage to your handlebars, it’s crucial to repair or replace them promptly to ensure your safety while riding. Handlebars are a critical component of any bicycle, and they bear the weight of the rider’s upper body. Any damage to the handlebars can result in catastrophic consequences.
Depending on the severity of the damage, handlebars can either be repaired or replaced. Minor damage can be repaired by a professional bike mechanic, while more severe damage may require the replacement of the handlebars. Handlebar grip replacement and adjusting handlebar height are two common repairs that may be necessary.
Handlebar grips can be replaced with new ones, which can be purchased at any bike shop. Adjusting the handlebar height can be done by loosening the stem bolt and adjusting the handlebars. Once the desired height is achieved, tighten the stem bolt and test the handlebars to ensure they are secure.
Taking care of any damage to your handlebars is crucial for your safety while riding. Now, let’s move on to some maintenance tips to keep your bicycle in top condition.
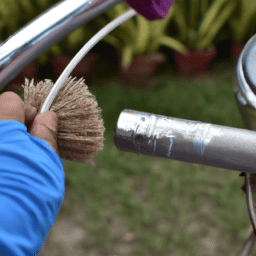
Maintenance Tips
To keep your handlebars looking shiny and new, it’s essential to regularly clean and polish them with a soft cloth and some metal polish. Don’t skip this step or your handlebars will become dull as a doorknob!
Here are some preventative measures and routine cleaning tips that can help you keep those handlebars looking great:
-
Wipe down your handlebars after each ride with a soft cloth to remove any dirt or grime that may have accumulated.
-
Use a mild detergent and warm water to clean your handlebars thoroughly once a week, paying special attention to any hard-to-reach areas.
-
Dry your handlebars thoroughly after cleaning to prevent water spots and rust from forming.
-
Apply a protective coating of wax or oil to your handlebars to help prevent rust and keep them looking shiny.
-
If you notice any rust spots starting to form, use a rust remover or a mixture of baking soda and water to gently scrub them away.
Frequently Asked Questions
How long will it take to remove the rust from my bicycle handlebars?
I can speed up rust removal from my bicycle handlebars with the right products. The best ones for the job include rust dissolver spray, steel wool, and sandpaper. With these tips, I can remove rust efficiently.
Can I use household cleaning products to remove the rust?
I have found that household cleaning products can be effective in removing rust, but they can also be harmful to the surface. Alternative methods for rust removal at home include using vinegar, baking soda, or a rust converter solution.
Is it necessary to wear protective gear while removing the rust?
I cannot stress the importance of safety precautions while removing rust. I recommend using gloves, goggles, and a mask to protect against harmful chemicals and debris. Your health is worth the extra gear.
How often should I check for rust on my handlebars?
I regularly check my handlebars for rust as part of my bike maintenance routine. To prevent rust, I keep my bike dry, clean, and lubricated. Regularly inspecting all parts of your bike is important for safe and efficient riding.
What are some common causes of rust on bicycle handlebars?
Rust on bicycle handlebars can be caused by exposure to moisture, salt, and air. Preventive measures, such as regular cleaning and applying protective coatings, can reduce the likelihood of rust formation. Rust removal techniques include using steel wool, vinegar, or specialized rust removers.
Conclusion
In conclusion, removing rust from bicycle handlebars is a necessary and easy process that can be done by anyone with the right tools and some patience. By following the steps outlined in this article, you can restore your handlebars to their former glory and prevent further damage from occurring.
However, it’s important to note that rust is not just a cosmetic issue. According to a study by the National Highway Traffic Safety Administration, rust can significantly affect the safety of your bicycle. In fact, rust was found to be a contributing factor in over 10% of all bicycle accidents. This statistic highlights the importance of regular maintenance and inspection of your bicycle to ensure that it is safe to ride.
As a long-time cyclist and mechanic, I can attest to the importance of keeping your bicycle in top condition. By taking the time to remove rust from your handlebars and other components, you can prevent accidents and extend the life of your bicycle.
Remember to always wear protective gear and use the proper tools when working on your bike, and never hesitate to seek professional assistance if you’re unsure about any aspect of the process. Happy riding!