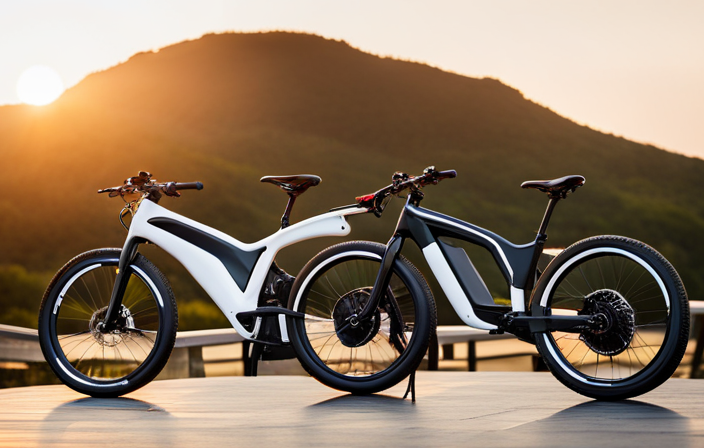

Imagine you’re cruising down the open road on your electric bike, feeling the wind in your hair and the thrill of the ride. But suddenly, disaster strikes – your bike breaks down. Don’t fret!
In this step-by-step guide, I will walk you through the process of repairing your electric bike. From identifying the problem to troubleshooting common issues, I’ll provide you with the knowledge and tools you need to get your bike back on the road in no time.
So, let’s dive in and get your electric bike running smoothly again!
Key Takeaways
- Regular maintenance is essential for prolonging the lifespan of electric bike components.
- Follow manufacturer’s guidelines for battery maintenance to maximize its lifespan and performance.
- Troubleshoot motor issues promptly and seek professional repair if necessary.
- Ensure safety by wearing appropriate gear, following safety precautions, and seeking professional help for complex issues.

CXWXC Bike Repair Stand 88lbs- E Bike Stand for Maintenance Workstand - Ebike Repair Stand Shop Home Mechanics for Mountain Bike and Road Bike (Max. 88lbs)
【Easy-Breezy Bicycle Maintenance】: A bike repair stand is an essential item when you’re working on your bike or...
As an affiliate, we earn on qualifying purchases.
Identify the Problem
You’ll need to figure out what’s wrong with your electric bike before you can start repairing it. To identify the problem, you can use various troubleshooting techniques.
One common issue could be a dead battery, which can be checked by ensuring it is properly connected and charged. Another problem might be a faulty motor, which can be diagnosed by listening for strange noises or feeling resistance when pedaling. Additionally, problems with the controller, throttle, or wiring can also arise.
By inspecting these components and looking for any visible damage or loose connections, you can determine the cause of the malfunction. Once you have identified the problem, you can move on to the next step of gathering the necessary tools for the repair process.

GOEHNER's Upgrade 2.0 Bike Repair Stand (Max 110 lbs) – Portable Aluminum Bicycle Workstand for Electric, Mountain, and Road Bikes
【Max Load 110lbs】 Crafted from durable #6070 aluminum, this lightweight yet heavy-duty bike repair stand can support bikes...
As an affiliate, we earn on qualifying purchases.
Gather the Necessary Tools
First, gather all the necessary tools needed for the task. To repair an electric bike, you’ll need a set of Allen wrenches, a multimeter, a soldering iron, wire cutters, and electrical tape.
These tools will help you diagnose and fix any issues with your electric bike.
Before you begin, make sure to review some troubleshooting tips to help you identify the problem. It’s important to follow safety guidelines to prevent any accidents or injuries.
Once you have all the tools and knowledge, you can move on to the next step of disconnecting the power source. This will ensure that you can work on the bike safely without any electrical hazards.

BALINGE Foldable Bike Repair Stand - Portable Bicycle Stand for Road & Mountain Bikes, Max 132 lbs
Please Watch our video to see how to properly use and adjust the repair stand.By watching the vedio...
As an affiliate, we earn on qualifying purchases.
Disconnect the Power Source
To safely work on your electric bike, start by disconnecting the power source. This is an essential step to avoid any potential accidents or injuries. Here is a step-by-step guide to disconnecting the power source:
- Locate the power switch or button on your electric bike.
- Turn off the power switch to cut off the electrical supply to the bike.
- If your bike has a removable battery, carefully remove it from its compartment.
- If the battery is not removable, locate the main power cable and unplug it from the bike’s electrical system.
- Ensure that there are no other power sources connected to the bike.
By disconnecting the power source, you can troubleshoot power issues and safely work on your electric bike.
Now, let’s move on to the next step and inspect and test the battery.

VEVOR Bike Repair Stand, 4-Leg Steel Bicycle Repair Stand, 42.5"-74.8" Adjustable Height Bike Maintenance Work Stand with Magnetic Tool Tray, Foldable Bike Service Stand for Home, Shop (Max 80 Pounds)
80 lbs High Load Capacity: Crafted from heavy-duty non-rust steel with a thick column diameter, the bike repair...
As an affiliate, we earn on qualifying purchases.
Inspect and Test the Battery
Next, take a moment to inspect and test the battery to ensure its functionality. Battery maintenance is crucial for the optimal performance of your electric bike. To begin, visually inspect the battery for any signs of damage such as leaks or corrosion. Check the battery connections to make sure they are secure and free of dirt or debris. Now, let’s move on to testing the battery. Connect the battery to a charger and monitor the charging process. Ensure that the charging indicator light is on and the battery is receiving a steady charge. Once fully charged, disconnect the battery from the charger and measure its voltage using a multimeter. Compare the reading to the manufacturer’s specifications to determine if the battery is still in good condition. With the battery inspected and tested, we can now proceed to the next step of checking the motor and wiring connections.
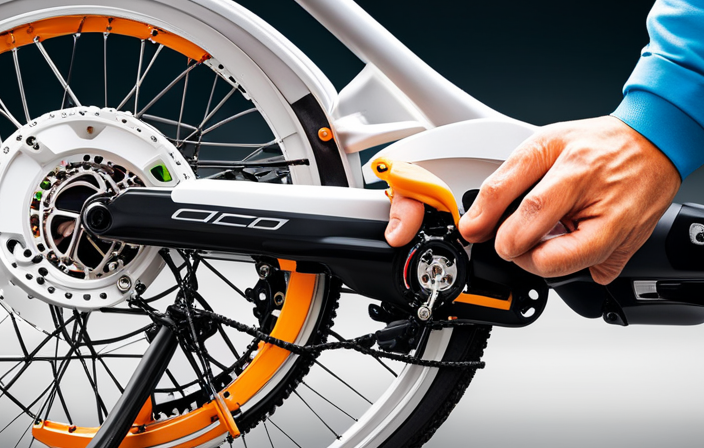
Check the Motor and Wiring Connections
Now, take a moment to check the motor and wiring connections on your electric bike. This step is crucial for motor troubleshooting and ensuring that your bike is operating at its optimal performance. Follow these steps to inspect and repair the motor and wiring connections:
-
Begin by visually inspecting the motor for any signs of physical damage or loose connections. Look for frayed wires or loose connectors that may be causing issues.
-
Carefully examine the wiring connections, ensuring that they are securely fastened. Tighten any loose connections or replace damaged wires as needed.
-
Use a multimeter to test the continuity of the wires and connections. This will help identify any faulty or broken components that may be affecting the motor’s performance.
By thoroughly inspecting and repairing the motor and wiring connections, you can address any issues and ensure that your electric bike is running smoothly.
In the next section, we will discuss how to replace faulty components to further improve your bike’s performance.
Replace Faulty Components
Start by replacing any faulty components to improve your bike’s performance. When troubleshooting electrical issues, it’s crucial to identify and replace damaged components. Here’s a step-by-step guide to help you with this process:
- Disconnect the battery and remove any covers or panels to access the components.
- Inspect the wiring connections and connectors for any signs of damage or corrosion.
- Use a multimeter to test the continuity of wires and check for any shorts or open circuits.
- Refer to the bike’s manual or consult a professional to identify the specific components that need replacement.
- Purchase the replacement parts from a reputable supplier.
- Carefully remove the faulty components and install the new ones following the manufacturer’s instructions.
By replacing damaged components, you ensure a more reliable and efficient electric bike. After completing this step, it’s time to move on to the next section where we will discuss repairing or replacing the display.
Repair or Replace the Display
To improve your biking experience, consider fixing or swapping out the display. The display on an electric bike is crucial as it provides important information such as speed, battery level, and distance traveled. If you’re experiencing display issues, here are three steps to troubleshoot and potentially replace the display:
-
Check the connections: Ensure all the cables connecting the display to the controller and battery are securely plugged in. Loose connections can lead to display malfunctions.
-
Test the display on another bike: If possible, connect the display to another electric bike to determine whether the issue lies with the display or the bike’s electronics.
-
Replace the display: If troubleshooting doesn’t resolve the issue, it may be necessary to replace the display altogether. Consult your bike’s manual or contact the manufacturer for guidance on finding and installing a compatible replacement.
Now, let’s move on to the next section about adjusting the brakes and gears.
Adjust the Brakes and Gears
To continue with the maintenance of your electric bike, now let’s move on to the crucial task of adjusting the brakes and gears. This step is essential to ensure smooth and safe riding experience. Firstly, check the brake pads for wear and tear. If they are worn out, it’s time to replace them to maintain optimal braking performance. Secondly, let’s focus on the gears. To ensure smooth shifting, we need to adjust the gear indexing. This involves fine-tuning the cable tension and alignment of the derailleur. By following the manufacturer’s instructions and using the right tools, you can easily make these adjustments. Remember, properly functioning brakes and gears are essential for your safety and comfort while riding. Now, let’s move on to the next section where we will learn how to lubricate the moving parts for better performance.
Lubricate Moving Parts
Now, let’s move on to lubricating the moving parts for better performance.
Lubrication is essential for reducing friction and preventing wear and tear on your electric bike. Start by applying a small amount of lubricant to the chain, ensuring that it is evenly distributed.
Next, lubricate the derailleur pivots, jockey wheels, and any other moving parts that come into contact with each other. Be sure to use a lubricant that is specifically designed for bicycles to ensure optimal performance.
After applying the lubricant, wipe off any excess to prevent dirt and debris from accumulating. This will help to prolong the lifespan of your bike’s components.
Now, we can transition to the next step of the maintenance process, which is to check and inflate the tires.
Check and Inflate the Tires
After ensuring that all the moving parts of my electric bike are properly lubricated, the next step in the repair process is to check and inflate the tires. This is an essential maintenance task that should be done regularly to ensure optimal performance and safety. To begin, I use a tire pressure gauge to check the current pressure of the tires. If the pressure is low, I carefully attach a pump to the valve and inflate the tires to the recommended pressure level. It’s important to be cautious and not overinflate the tires, as this can lead to a bumpy and uncomfortable ride. Additionally, I inspect the tires for any visible punctures and address them accordingly. Once the tires are properly inflated and any punctures are fixed, I am ready for the next step: test ride and fine-tune the electric bike.
Test Ride and Fine-Tune
Once you’ve checked and inflated the tires, it’s time to take your electric bike for a test ride and make any necessary adjustments.
Start by finding a safe and open space to ride, away from traffic and obstacles. Begin riding slowly and gradually increase your speed to get a feel for the bike’s performance. Pay attention to any unusual noises, vibrations, or handling issues that may arise.
If you notice any problems, such as a misaligned brake or a loose chain, make the necessary adjustments using the appropriate tools. Fine-tuning techniques include adjusting the brakes, gears, and suspension to ensure optimal performance and comfort.
Once you’ve made all the necessary adjustments, take another test ride to confirm that everything is running smoothly.
Now that you’ve tested and fine-tuned your electric bike, let’s move on to some regular maintenance tips to keep it in top shape.
Regular Maintenance Tips
To ensure the longevity and optimal performance of your electric bike, regular maintenance is key. In this section, we will discuss two important aspects of regular maintenance: battery maintenance and motor troubleshooting.
Firstly, battery maintenance is essential for maximizing the lifespan of your electric bike. It involves regularly checking the battery’s charge level, cleaning the battery terminals, and ensuring proper storage when not in use. Additionally, it is important to follow the manufacturer’s guidelines for charging and discharging the battery to prevent any potential damage.
Secondly, motor troubleshooting is crucial for identifying and resolving any issues that may arise with the motor. This includes checking for loose connections, inspecting the motor for any signs of damage or wear, and ensuring that the motor is properly lubricated.
By properly maintaining the battery and troubleshooting the motor, you can ensure that your electric bike continues to perform optimally. In the next section, we will delve into troubleshooting common issues that may occur during the operation of your electric bike.
Troubleshooting Common Issues
If you experience any issues with your electric bike, troubleshooting common problems can help you identify and resolve them. Here are three troubleshooting techniques to help you get your electric bike back on track:
-
Check the battery: Start by ensuring that the battery is fully charged. If it is, but your bike still won’t turn on, check the battery connections for any loose or corroded wires. Clean and tighten them if necessary.
-
Inspect the motor: If your electric bike is not providing sufficient power or making strange noises, it could be a motor issue. Check the motor connections and look for any signs of damage or overheating. If you find any, it may require professional repair.
-
Examine the electrical system: Faulty wiring or connections can cause various issues. Inspect the wiring harness, connectors, and switches for any damage or loose connections. Make sure to fix any issues you find.
These troubleshooting techniques can help you identify and resolve common maintenance mistakes. By addressing these problems, you can ensure the safe operation of your electric bike.
Moving on to the next section, let’s discuss some important safety precautions to keep in mind while repairing your electric bike.
Safety Precautions
When working on your electric bike, it’s important to prioritize safety precautions. Electric bike accidents can be dangerous, so it’s crucial to take the necessary steps to protect yourself.
First and foremost, always wear the appropriate safety gear. I recommend wearing a helmet, gloves, and protective eyewear to safeguard yourself from potential injuries.
Additionally, ensure that you are working in a well-ventilated area to avoid inhaling any harmful fumes. When handling electrical components, make sure to disconnect the battery and wear insulated gloves to prevent electric shocks.
It’s also important to follow the manufacturer’s instructions for maintenance and repairs.
Lastly, if you encounter any issues that you are unsure how to handle, it’s best to seek professional help.
Transitioning into the subsequent section, remember that seeking professional assistance is crucial when dealing with complex problems.
Seek Professional Help if Needed
Seeking professional help is crucial when dealing with complex issues related to your electric bike. While some repairs can be done at home, there are times when it’s best to consult a professional. Here are two key situations when you should consider seeking professional assistance:
-
When to consult a professional:
- When you are unsure about the root cause of the issue and need expert advice.
- When the repair involves intricate electrical components that require specialized knowledge and tools.
-
Common mistakes to avoid:
- Attempting complex repairs without proper training can lead to further damage or personal injury.
- Disregarding safety protocols and handling high-voltage electrical parts without expertise can be dangerous.
Remember, electric bike repairs can be complicated, and it’s better to be safe than sorry. By seeking professional help, you can ensure that your electric bike is repaired correctly and avoid any unnecessary risks.
Frequently Asked Questions
What are some common issues that may occur with an electric bike?
Some common issues with electric bikes include battery problems, motor malfunctions, and electrical wiring failures. To prevent these issues, regular maintenance, proper charging, and avoiding extreme weather conditions are essential.
How can I troubleshoot problems with the battery or power source?
To troubleshoot problems with the battery or power source, start by checking the battery connections and ensuring they are secure. Then, use a multimeter to test the voltage output and verify if the battery needs charging or replacement.
Are there any specific safety precautions I should follow when repairing an electric bike?
When repairing an electric bike, it’s crucial to stay as cautious as a tightrope walker crossing a canyon. Follow these safety precautions: wear protective gear, disconnect the power source, and be aware of common issues like faulty wiring or damaged batteries.
When should I seek professional help for repairing my electric bike?
I should seek professional help for repairing my electric bike when it is necessary to replace parts instead of repairing them. Regular maintenance benefits the electric bike by ensuring optimal performance and prolonging its lifespan.
What are some regular maintenance tips to keep my electric bike in good working condition?
Regular maintenance tips for electric bikes include keeping the battery charged, cleaning and lubricating the chain regularly, checking tire pressure, inspecting brakes and cables, and tightening loose bolts. Troubleshooting battery problems may require professional help.
Conclusion
In conclusion, repairing an electric bike can be a simple and straightforward process if the steps are followed correctly. By identifying the problem, gathering the necessary tools, and disconnecting the power source, you can safely inspect and test the battery and check the motor and wiring connections.
Regular maintenance and troubleshooting common issues are essential for keeping your electric bike in optimal condition. Remember to always prioritize safety and seek professional help if needed.
For example, John had a problem with his electric bike’s motor, but after following these steps, he was able to fix it and enjoy a smooth and efficient ride once again.