Changing out a bike pedal might look like a challenging job, but don’t worry, my fellow bike lovers! Armed with a handful of tools and a little bit of know-how, you can quickly become an expert at replacing those old pedals. Believe me, after you feel the glide of a fresh pedal, you’ll be puzzled at how you ever managed with the previous ones.
Now, I know what you’re thinking – ‘But I’m not a bike mechanic!’
Well, neither am I. But after years of riding and tinkering with my own bike, I’ve learned a thing or two about replacing pedals. And let me tell you, it’s not rocket science. In fact, it’s a relatively simple process that can be done in just a few minutes with the right tools and a little bit of patience.
So, let’s dive into the world of pedal replacement and get you back on the road in no time.
Key Takeaways
- Basic knowledge and tools are required for pedal replacement.
- Choose the correct size and type of pedal and use a pedal wrench and lubricant for installation.
- Regularly check and maintain pedal tightness and alignment for safety and optimal performance.
- Clean and lubricate pedals regularly, but avoid using excessive cleaning agents that can damage them.
Gather the Necessary Tools and Supplies
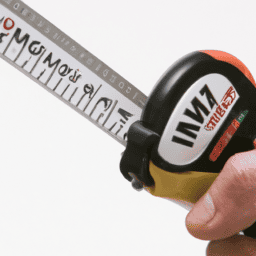
Before you can get started, you’ll need to grab the tools and supplies you’ll be using. These may include a pedal wrench and some lubricant, which can be found at bike shops or online retailers. When selecting a pedal wrench, look for one that is sized to fit the specific type of pedal you are replacing. Cost-effective options for bicycle pedal replacements can also be found online or at your local bike shop.
It’s important to know how to properly tighten pedals without tools. One tip is to use your hand to tighten the pedal as much as possible before using the wrench. This will ensure a secure fit and prevent the pedal from becoming loose over time.
Now that you have everything you need, it’s time to move on to the next step: removing the old pedal.
Remove the Old Pedal
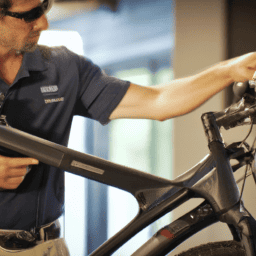
First, it’s time to bid farewell to the old trusty foot-holder and get ready for the new addition to your ride. Pedal removal techniques vary depending on the type of pedal you have, but most require a pedal wrench or Allen key.
It’s important to note the left pedal is threaded in reverse, so you need to turn it clockwise to remove it, while the right pedal is threaded normally, so turn it counterclockwise. When removing the old pedal, be mindful of common pedal wear patterns.
If the pedal is stuck, you can use a lubricant like WD-40 to loosen it. However, if the pedal is severely worn, it may be time to replace the entire crank arm.
Once you have successfully removed the old pedal, it’s time to move on to the next step and install the new pedal.
Install the New Pedal
Now that you’ve successfully removed the old foot-holder, it’s time to upgrade to the new, sleek pedal that will take your cycling experience to the next level. When installing the new pedal, it’s important to ensure proper alignment to avoid any discomfort or injury while riding. Here are some tips to keep in mind:
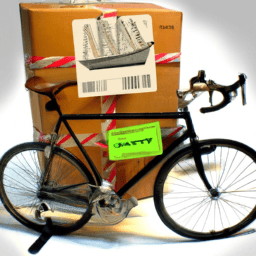
- Choose the right pedal for your type of cycling, whether it’s mountain biking, road biking, or commuting.
- Look for pedals with a secure attachment system, such as a threaded spindle or clipless mechanism.
- Apply a small amount of lubricant to the threads of the spindle before screwing in the pedal to prevent damage or stripping.
- Make sure the pedal is tightened securely using a pedal wrench or hex key.
Check that the pedal is aligned correctly with the crank arm, as a misaligned pedal can cause uneven wear and reduced efficiency.
Once you’ve installed the new pedal, it’s time to test it out and ensure it’s functioning properly. Don’t forget to also check the other pedal for any signs of wear or damage, as it’s important to maintain both pedals for a smooth and safe cycling experience.
Test the New Pedal
Now that I’ve installed the new pedal on my bike, it’s important to test it out to make sure it’s functioning properly.
First, I’ll check to make sure the pedal is tightened securely by giving it a firm tug. If it feels loose, I’ll need to tighten it further.
Next, I’ll spin the pedal to ensure it rotates smoothly without any wobbling or clicking sounds.
This will ensure that my bike is safe to ride and prevent any accidents or damage to the bike.
Check for Proper Tightness
To ensure the pedal is securely fastened, you’ll want to check its tightness. I highly recommend using a torque wrench to tighten the pedal to the manufacturer’s recommended torque specifications. This will help to prevent over-tightening or under-tightening, which can both cause damage to the pedal or the crank arm.
One of the most common mistakes to avoid when checking for proper tightness is using improper tools or techniques. For example, using a regular wrench instead of a torque wrench can result in over-tightening, which can lead to stripped threads or even a broken crank arm. It’s also important to make sure that the pedal is tightened evenly, as uneven tightening can lead to a wobbly pedal or even damage to the threads.
Once you’ve checked for proper tightness, you can move on to testing the pedal for smooth rotation.
Test the Pedal for Smooth Rotation
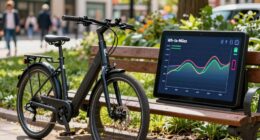
Before you take your ride, give the pedal a spin to make sure it rotates smoothly. Pedal maintenance is crucial for a smooth ride, and troubleshooting rotation issues can save you from potential accidents. Here are three tips to consider when testing your pedal for smooth rotation:
-
Check for any wobbling or shaking in the pedal. If the pedal feels unstable or wobbles, it may be due to a loose crank or damaged bearing. In this case, it’s essential to tighten the crank or replace the bearing.
-
Look out for any grinding or scraping sounds when you rotate the pedal. This may indicate that the bearings are worn out or damaged, and they need to be replaced.
-
Ensure that the pedal rotates freely without any resistance. If you feel any resistance, it may be due to a misaligned chain or a damaged crank. In this case, realign the chain or replace the crank to avoid any further issues.
Pedal maintenance isn’t a one-time task; it’s an ongoing process that requires regular attention. In the next section, we’ll discuss some maintenance tips to keep your pedals in top condition.
Maintenance Tips
As someone who frequently replaces bicycle pedals, I know how important it is to regularly check pedal tightness and maintain clean, lubricated pedals.
Loose pedals can cause a dangerous accident, so I make it a habit to always check the tightness before riding.
I also recommend cleaning and lubricating pedals as needed to ensure a smooth and safe ride.
Regularly Check Pedal Tightness
Make sure you check the tightness of your pedals regularly, as loose pedals can cause accidents and injuries. As I’ve learned through years of cycling, the importance of pedal maintenance can’t be overstated.
One of the most common mistakes when checking pedal tightness is assuming that once a pedal is tightened, it’ll stay that way forever. Pedals can come loose over time due to wear and tear, which is why it’s crucial to check their tightness regularly.
To ensure your pedals are tight, follow these four steps:
- Use a pedal wrench to tighten the pedals to the recommended torque setting.
- Check the pedals after every ride, as they may loosen up from vibrations.
- Make sure the pedals are securely fastened to the crank arm.
- Replace worn or damaged pedals immediately, as they can cause accidents.
Regularly checking the tightness of your pedals is just one aspect of pedal maintenance. To keep your pedals in top condition, remember to clean and lubricate them as needed.
Clean and Lubricate Pedals as Needed
Keeping your pedals clean and lubricated is essential for their optimal performance and longevity. It’s important to regularly clean the pedals to remove any dirt, debris, or rust that may accumulate over time.
One common mistake that people make is using excessive amounts of cleaning agents such as soap and water, which can cause damage to the pedals. Instead, use a gentle cleaning solution such as a bike-specific cleaning spray, and a soft-bristled brush to remove any stubborn grime.
After cleaning the pedals, it’s important to lubricate the moving parts. This helps to prevent rust and corrosion, as well as reduce friction between the moving parts. Use a bike-specific lubricant and apply it sparingly to the pedal threads, bearings, and any other moving parts.
Be careful not to over-lubricate, as excess lubricant can attract dirt and debris, leading to further damage. By taking care to clean and lubricate your pedals regularly, you can ensure that they perform optimally and last for many rides to come.
Frequently Asked Questions
How do I know if I need to replace my bicycle pedal?
As a seasoned cyclist, I can tell if I need to replace my pedal by checking for signs of wear like looseness or wobbling. Common issues include stripped threads or bent axles. It’s crucial to replace a worn pedal to avoid accidents.
Can I use any type of pedal on my bicycle or are there specific types?
When it comes to pedal compatibility, it’s essential to choose the right pedal for your bike. Not all pedals are created equal, and different bikes require different types. Be sure to do your research and select a pedal that is compatible with your specific bike model.
Are there any safety precautions I should take before attempting to replace my bicycle pedal?
Oh, sure, I’ll just start tearing apart my bike without any safety gear or proper tools. That’s a great idea. Of course there are precautions to take before attempting to replace a pedal – wear gloves, eye protection, and make sure you have the right tools for the job.
Do I need any special skills or knowledge to replace a bicycle pedal?
Replacing a bicycle pedal requires basic mechanical skills and knowledge of pedal replacement tools. Proper pedal installation technique is crucial to ensure a secure fit. Familiarity with bike components and maintenance is helpful.
How often should I replace my bicycle pedals?
As an experienced cyclist, I perform regular pedal maintenance and check for signs of wear. Pedals should typically be replaced every 6-12 months, depending on usage and wear. Proper maintenance can extend their lifespan.
Conclusion
In conclusion, replacing a bicycle pedal is a simple task that can be done with a few basic tools and supplies. By following the steps outlined, you can easily remove the old pedal and install a new one. Remember to test the new pedal before taking it out on a ride, to ensure it’s securely fastened and functioning properly.
Maintenance is key to keeping your pedals in good condition. Make sure to regularly clean and lubricate them to prevent rust and wear. Also, check the tightness of your pedals every so often to avoid them becoming loose during a ride.
With these tips in mind, you can confidently replace your bicycle pedal and keep your ride smooth and safe. So, saddle up and start pedaling with precision and pride.