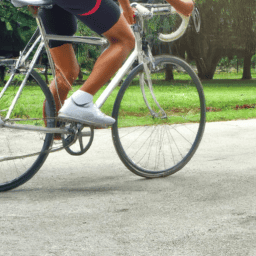
When I made the choice to set off on a nationwide biking journey, it was clear to me that I had to secure a dependable method for transporting my bike to the launch location. The process of sending a bike across the nation might seem overwhelming, but with proper planning and understanding, it can be executed with ease and efficiency.
In this article, I will share my experience and provide a step-by-step guide on how to ship a bicycle across the country.
First, it is important to choose the best shipping method for your needs. There are several options available, including shipping by air, ground, or sea. Each method has its own unique advantages and disadvantages, such as cost, time frame, and level of security. By taking the time to research your options and weigh the pros and cons, you can select the shipping method that is best suited for your specific situation.
In the following sections, I will guide you through the process of preparing your bike for shipping, packing it for transport, and receiving it at its destination.
Key Takeaways
- Choosing the best shipping method requires comparing costs and evaluating timeframes.
- Specialty bike shipping companies offer more specialized services but can be more expensive.
- Packing and shipping the bike yourself is the most cost-effective option but requires more time and effort.
- Use a reputable bike shipping company and inspect the bike for damage upon arrival.
Choose the Best Shipping Method for Your Needs
When shipping your bike cross-country, it’s important to choose the best shipping method that fits your needs and budget. This requires comparing costs and evaluating timeframes.
The most common options for shipping a bike include using a shipping carrier, a specialty bike shipping company, or packing and shipping the bike yourself. Shipping carriers like UPS, FedEx, and USPS offer affordable shipping options for bikes, but they may not provide the level of protection that your bike needs during transit.
Specialty bike shipping companies, on the other hand, offer more specialized services, such as custom packaging and handling, but they can be more expensive. Packing and shipping the bike yourself is the most cost-effective option, but it requires more time and effort on your part.
Ultimately, it’s important to choose a shipping method that meets your budget and time constraints. Once you have chosen your shipping method, it’s time to prepare your bike for shipping.
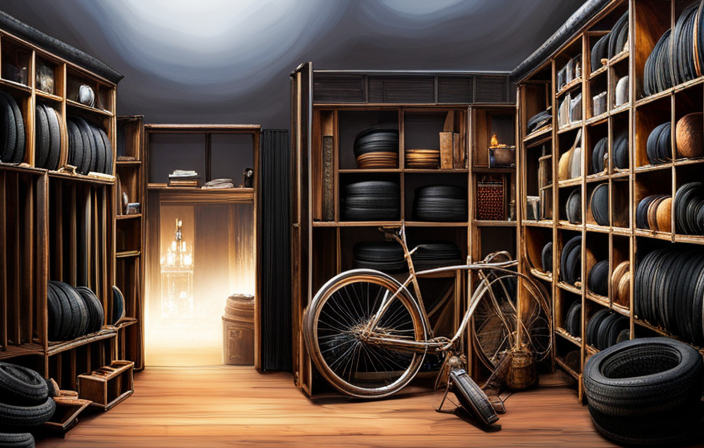
Prepare Your Bike for Shipping
Before you send your trusty two-wheeled companion off on its journey, give it a little TLC to ensure it’s ready to hit the road.
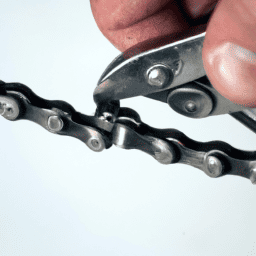
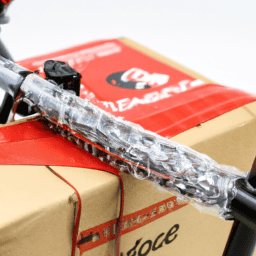
First, make sure to invest in protective gear such as foam tubing, bubble wrap, and zip ties. These materials will help prevent scratches, dents, and other damages during transit. Additionally, disassembly will also help protect your bike. Remove the pedals, handlebars, and wheels, and securely wrap them with protective materials.
Next, clean your bike thoroughly before shipping it. This will not only make it look good but also prevent any dirt or debris from scratching the bike during transport.
Finally, take pictures of your bike before disassembly and packaging. This will help you in case you need to file a claim for damages during shipping.
With these precautions, you can rest easy knowing that your bike will arrive at its destination in one piece.
Now, let’s move on to the next section and learn how to pack your bike for transport.
Pack Your Bike for Transport
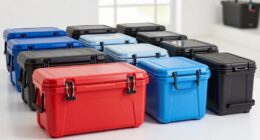
When it comes to packing my bike for transport, I always make sure to choose the right box or case. This means selecting one that’s sturdy enough to withstand any bumps or jostles during shipping.
Once I have the appropriate container, I take care to secure my bike inside it, using padding and other materials to protect the frame and components.
Finally, I always label my box with clear shipping instructions, ensuring that it arrives at its destination safely and on time.
Choose the Right Box or Case
First things first, you’ll want to grab a sturdy box or case that fits your bike snugly to ensure safe transport. Box dimensions are important to consider, as you want to make sure your bike fits comfortably inside without too much extra space for it to move around. A box that is too big could cause your bike to shift during transport and potentially get damaged. On the other hand, a box that is too small could cause the bike to be cramped and perhaps even damage it during packing.
When choosing a box or case, it’s important to also consider the protective materials you’ll need to keep your bike safe during transport. The following table outlines some common protective materials you may want to consider using during the packing process:
| Protective Material | Purpose |
|---|---|
| Bubble wrap | Protects delicate parts such as the frame and wheels from scratches and impacts |
| Foam tubing | Provides cushioning for the bike’s frame and handlebars |
| Plastic zip ties | Keeps the bike’s components securely in place |
With the right box and protective materials, your bike should be well-prepared for transport. The next step is to secure your bike inside the box to ensure it doesn’t shift or get damaged during transit.
Secure Your Bike Inside the Box
Now that you’ve got the right box and materials, it’s time to buckle down and make sure your bike is as secure as a knight in shining armor for its journey.
First, consider your padding options. Bubble wrap, foam, and packing peanuts are all excellent choices for securing your bike inside the box. Wrap the bike frame and wheels in bubble wrap, paying special attention to the delicate parts like the derailleur and handlebars. Use foam or packing peanuts to fill in any gaps and keep the bike from shifting during transit.
Secondly, box size considerations are crucial when securing your bike. The box should be large enough to accommodate your bike and padding materials, but not so large that the bike can shift around inside. If the bike is too small for the box, it can be easily damaged during transit.
As a general rule of thumb, choose a box that is at least 6 inches longer and wider than your bike. With proper padding and box size, your bike will be ready for its cross-country journey.
Now, it’s time to label your box with clear shipping instructions and ensure a safe arrival at its final destination.
Label Your Box with Clear Shipping Instructions
Make sure your box stands out with clear shipping instructions so it arrives at its destination safely and on time. This means you need to design your shipping label properly.
Your shipping label should include your name, address, phone number, and the recipient’s name and address. Make sure the label is printed clearly and that the ink is not smudged or faded. You can also add a fragile sticker or a this side up sticker to indicate that your box contains a delicate item.
When it comes to shipping label placement, make sure it is placed on the top of the box and that it is not covered by any tape or other labels. This will ensure that the label is visible to the shipping company and that they can handle your box with care.
Additionally, it’s always a good idea to include a copy of your shipping label inside the box, just in case the label on the outside gets damaged or falls off during transit.
By following these simple steps, you can ensure that your box arrives at its destination safely and on time.
Now that you have your box securely packed and labeled, it’s time to ship your bike.
Ship Your Bike
If you wanna send your bike cross-country, it’s best to use a shipping company that specializes in transporting two-wheelers. These companies have the expertise and equipment to ensure your bike arrives at its destination in the same condition it was sent.
Here are some steps to follow when shipping your bike:
-
Choose a reputable bike shipping company. Look for reviews and recommendations to find a company that has experience shipping bikes and a good track record of delivering them safely.
-
Prepare your bike for shipping. Remove any accessories or loose parts, and protect the frame and wheels with padding and/or bubble wrap. Put the bike in a bike box or use a specialized bike shipping case.
-
Choose your shipping method. Ground shipping is usually the most cost-effective option, but if you need your bike to arrive faster, air shipping is also available. International bike shipping options are also available for those shipping overseas.
-
Schedule your pickup and pay for your shipment. Make sure to keep your tracking number handy so you can track your bike’s progress.
Once you’ve shipped your bike, the next step is to receive it at its destination.
Receive Your Bike at its Destination
Now that my bike’s arrived at its destination, it’s time to inspect it for any damage that may have occurred during shipping.
Once I’ve confirmed that everything looks good, I can start reassembling my bike.
Finally, it’s time to hit the road and enjoy my cross-country adventure!
Inspect Your Bike for Damage
Before you hit the road, take a look at your bike to check for any damages. Inspecting your bike for damage is an important step that will help you identify any issues that may have occurred during transit. Check for scratches, look for dents, and pay close attention to any components that may have been dislodged or damaged in transit.
To help you understand the importance of inspecting your bike for damage, take a look at this table:
| Damage | Emotional Response |
|---|---|
| Scratches on the frame | Disappointment and frustration |
| Dents on the frame | Anger and disbelief |
| Damaged components | Fear and anxiety |
As you can see, damage to your bike can evoke a range of emotions. By inspecting your bike before you begin reassembling it, you can identify any damage and take the necessary steps to address it. From there, you can move on to the next step of reassembling your bike.
Reassemble Your Bike
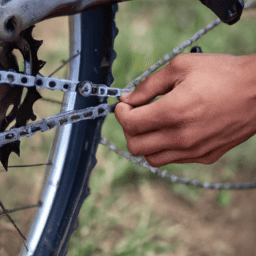
To reassemble your bike, start by gathering all the necessary tools and parts. You’ll need a set of allen wrenches, a pedal wrench, a chain tool, and a bike pump.
Before you start reassembling your bike, make sure that all the parts are in good condition and free of damage. Inspect the frame, handlebars, pedals, wheels, and brakes to ensure that everything is in working order.
Once you have all the necessary tools and parts, you can start reassembling your bike. The first step is to attach the handlebars to the stem using the appropriate allen wrench.
Next, attach the pedals to the cranks using the pedal wrench. Use the chain tool to reattach the chain to the gears and make sure it is properly tensioned.
Finally, inflate the tires to the appropriate pressure using the bike pump. Common mistakes include not tightening bolts enough or attaching parts in the wrong order.
By taking your time and following these steps, you can reassemble your bike with confidence and be ready for your cross-country adventure!
Enjoy Your Cross-Country Adventure!
As I set out on my epic journey, I couldn’t help but feel a rush of excitement and anticipation. The wind was blowing through my hair as I pedaled along, taking in the stunning scenery that surrounded me.
However, I knew that in order to truly enjoy this cross-country adventure, I needed to stay organized and plan ahead. One of the most important things to consider when embarking on a bike trip is finding bike-friendly accommodations. This can be a challenge at times, but with a little research, it’s definitely doable.
From campsites to hotels, there are plenty of options available for cyclists. It’s important to check ahead of time to ensure that the accommodations you choose are equipped to handle your bike and provide safe storage.
By staying organized and finding bike-friendly accommodations, you’ll be able to enjoy your cross-country adventure without any unnecessary stress or hassle.
Frequently Asked Questions
Are there any restrictions on shipping bicycles across state lines or internationally?
Customs requirements vary by country when shipping bicycles internationally. Properly packing a bike for shipment is important to avoid damage. Research and follow specific customs guidelines and use a reputable shipping company.
What is the average cost of shipping a bicycle across country?
Based on my experience, the average cost of shipping a bicycle across the country ranges from $50-$200 depending on the shipping method. Properly prepare your bike for shipping by removing pedals, wheels, and securing everything tightly.
Will the shipping company provide insurance for the bike during transport?
Better safe than sorry. Most shipping companies offer insurance coverage options for an additional fee. However, it’s important to understand the shipping company’s liability and what is covered in case of damage or loss during transport.
Can I track the shipment of my bike online?
Yes, most shipping companies offer tracking options for your bike shipment that can be accessed online. This allows you to monitor the delivery time estimation and ensure that your bike arrives on schedule.
What should I do if my bike is damaged during shipping?
If your bike is damaged during shipping, take photos and document the damage. Contact the shipping company immediately to file a claim. If they refuse to compensate you, consider legal options.
Conclusion
In conclusion, shipping a bicycle across the country may seem daunting, but it can be done efficiently and safely with the right preparation and shipping method.
It’s important to choose a reputable shipping company and properly prepare and pack your bike for transport. Remember to remove any accessories, secure loose parts, and protect fragile areas like the frame and wheels.
According to a recent study, bike shipping demand has increased by 25% in the past year due to the rise in popularity of cycling and pandemic-related travel restrictions. This means more people are shipping their bikes to explore new destinations and maintain their fitness routines.
By following these tips and taking care of your bike during shipping, you can ensure it arrives at its destination in good condition and ready for your next adventure.