Hello, biking enthusiasts! You’ve landed here because you’re interested in mastering the art of photographing your bicycle like a professional. Don’t worry, I’ve got you covered! As an expert in teaching how to photograph bicycles professionally, I possess the knowledge and skills to guide you through becoming proficient in this area.
In this article, I’ll show you the steps to take in order to master the art of shooting your bike. So let’s get started!
The first step is all about preparation. You need to make sure your bike is set up correctly and that all your equipment is in order. This includes making sure your brakes are working properly and that everything else on the bike is functioning without issue.
Once you’ve done that, it’s time for some practice – so grab your camera and let’s hit the road!
Photography Basics For Motorcycle Shots
Taking a great shot of your motorcycle is like riding a bike: once you learn how to do it, you never forget.
Whether you’re using a digital camera or a film camera, the basics of photography are the same and they all start with understanding shutter, aperture, depth of field, and shutter speed.
Shutter speed is the amount of time the camera records light when taking a photo; this is measured in fractions of seconds.

Aperture controls the amount of light that passes through your lens; this is measured in f-stops.
Depth of field refers to how much of your image appears sharp and clear in focus; this can be adjusted using both shutter speed and aperture settings.
Armed with the knowledge of these three elements, you can start shooting beautiful photos of your motorbike.
With practice and experimentation, you’ll soon have an eye for capturing stunning images.
With each shot taken, you’ll get closer to mastering motorcycle photography.
Now let’s move on to discussing aperture settings for motorcycle photography…
Aperture Settings For Motorcycle Photography
When it comes to creating dynamic shots of your bike, you want to make sure your aperture settings are right.
I recommend using aperture priority mode on your camera and setting the aperture to f/8 or higher. This will help you achieve a shallower depth of field that will draw attention to your bike and help separate it from the background.
Next, select the focus point that best emphasizes what you want in focus. For example, if you’re shooting a head-on shot of the bike, choose a focus point that emphasizes its headlights or grill. If you’re shooting a side profile shot, select a focus point that captures its curves and lines.
Finally, consider using a longer lens for more creative shots. This will give you more flexibility when composing different angles and capturing multiple bikes in one frame. Going with this approach can really add some dynamism to your shots and take them up a notch!
Ready to capture all those details? Let’s do it!
Capturing The Details Of Your Motorcycle
You may have heard the theory that capturing the details of your motorcycle is nearly impossible. Well, I’m here to tell you that it’s not. With a few simple steps and the right tools, you can get stunning shots of every part of your bike.
Here are five tips for taking detail shots:
- Use a large aperture setting to blur the background and focus on the bike.
- Use a macro lens to get close-up shots of small parts such as valve covers, drivetrain components, or crank arms.
- Take advantage of natural light or use an off-camera flash to highlight details in hard-to-reach areas.
- Experiment with different angles and perspectives to capture interesting details.
- Use a polarizing filter to reduce glare and increase color saturation on metal surfaces.
Capturing all the intricate details of your motorcycle is an art form in itself – one that requires patience, practice, and precision. However, if you take your time and experiment with different techniques, you’ll be able to create stunning shots that will make any bike enthusiast proud. With the right approach and dedication, you can make your photos stand out from the crowd.

Now let’s look at some tips for blurring the background of your motorcycle for added drama and impact.
Tips For Blurring The Background Of Your Motorcycle
Hey there! If you’re looking to get the perfect shot of your motorcycle with a blurred background, then you’ve come to the right place.
First, let’s talk about lens choice. A telephoto lens is the way to go here, as it will let you blur the background while keeping your motorcycle in focus.
Next, let’s look at aperture settings. Using a shallow depth of field is key here, so try to get your aperture settings as low as possible.
Finally, distance from the subject is important too. Try to get your bike as close to the camera as possible, as this will make it easier to blur the background.
That’s all you need to know, so get out there and start snapping!
Lens Choice
Hey there! As a bike shooting instructor, I’m here to share my tips on blurring the background of your motorcycle.
The lens you choose is important for taking photos of your great bike, so let’s chat about it!
When photographing motorcycles, you’ll want to use a prime lens with a wide aperture. This will allow you to focus on your bike and blur out the background.
For example, if you have an f/1.8 lens, then it will give you more bokeh and create a beautiful effect. Additionally, using a long focal length can also help in separating the subject from its environment.
So if you’re looking to capture the perfect photo of your bike, I suggest utilizing these techniques when choosing your lens. You’ll be sure to get some amazing shots that really bring out the true beauty of your ride!
Aperture Settings
Now that you know about lenses, let’s talk about aperture settings.
Aperture settings are what dictate how much light enters the camera and affect the depth of field in your photo.
It’s important to adjust these correctly when blurring the background of your motorcycle.
The larger the aperture setting (the lower the f-stop number), the more light enters and the more shallow depth of field you’ll have.
This is great for isolating your bike from its environment and creating a nice blur effect.
Additionally, it can also help you create a great ‘zoomed-in’ effect if you don’t have a lens with a high enough pixel count or megapixel rating.
Just make sure that whatever setting you use still keeps your image sharp, as having too small an aperture may result in less sharpness in your photos.
So play around with different aperture settings and find one that works best for capturing your bike at its finest!
Distance From Subject
Once you have the perfect aperture setting, it’s time to think about distance from your subject.
If you want to blur the background of your bike photo, you’ll need to get as close as possible for action shots and then move back a bit for different angles.
Keep in mind that the closer you are to your bike, the more shallow depth of field and blurred background effect you’ll achieve.
You also need to keep in mind what kind of shot you’re trying to capture before deciding how far away from the bike you need to shoot.
That said, make sure there’s still enough distance between yourself and your bike so that you can get a good view of the entire machine without coming too close.
Strategies For Capturing Motorcycle Saddle Shots
As a bicycle shooting instructor, I’m always looking for unique perspectives of the bike. One of my favorite shots is the saddle shot. It captures the side of the bike and creates a unique look with its flat lay composition.
To set up this shot, you’ll want to make sure your camera is on the same level as the bike seat. You can do this by using a tripod or even laying on the ground. Next, use your lens to frame up the side of the bike from one tire to another. This will ensure that all angles and parts of the bike are visible in your shot.
| Part | Position | Angle |
|---|---|---|
| Saddle | Center | Flat |
| Crank Arm | Bottom Left Corner | 45° |
| Handlebar | Top Right Corner | 30° |
| Tyre | Bottom Right Corner | 20° |
Now that you’ve framed up your shot, adjust each part of the bike according to its position in your frame: The saddle should be in the center and stay as flat as possible. The crank arm should be placed at a 45-degree angle at the bottom left corner. The handlebar should be positioned at a 30-degree angle at the top right corner.

And finally, place one tyre at a 20-degree angle at bottom right corner. With these tips in mind, you’re ready to capture an amazing saddle shot! To get an even more unique look, try capturing the crank arm for different perspectives.
Capturing The Crank Arm For A Different Look
Hey everyone, let’s talk about how to capture the crank arm for a different look!
First off, let’s talk about crank arm shots – what works, what doesn’t, and how to get the best shot.
After that, let’s discuss different angles – how to find the best angle for the shot and how to switch it up for an interesting look.
I’m excited to hear your ideas and help you get better shots of your bike!
Let’s get started!
Crank Arm Shots
Hey everyone! I’m here to give you some tips on how to capture the crank arm for a different look when shooting your motorcycle. Capturing the crank arm is a great way to add texture to your motorcycle photos, making them more interesting and dynamic. And it’s not as hard as you think!
So let me tell you about basic crank arm shots. To do this, you’ll need a studio setup with plenty of lighting so that the details of the motorcycle can be seen clearly in the photo. You’ll also need a tripod and camera lens that allows for a wide-angle shot – this will help capture the entire bike and its components. Additionally, don’t forget to adjust your shutter speed, aperture, and ISO settings according to light conditions in order to get sharp, clear images.
Finally, experiment with angles and framing! Try shooting from different perspectives or zooming in close on specific parts of the bike like the engine or exhaust pipe – this will give your photos an extra kick of uniqueness. With these tips in mind, you’ll be able to create stunning motorcycle photos that stand out from the rest!
Different Angles
Now that you know the basics of how to capture the crank arm, let’s talk about different angles and how they can be used to make your motorcycle photographs even more interesting.
Remember that it’s important to think about what your viewers will see when looking at your photo.
Different angles can really draw the viewer’s eye, making them look at specific parts of the motorcycle in a unique way.
Try shooting from up high or low down on the ground – this will give your photograph a whole new perspective.
You can also experiment with tight close-ups or wide angle shots, depending on what kind of look you’re going for.
If you want to make sure all the details of your bike are visible, try shooting from a variety of angles and distances until you get exactly what you’re after.
And don’t forget to have fun!
Experiment with different angles and framing until you find something that looks truly stunning – this is what makes photography so enjoyable!
With these tips in mind, I’m sure you’ll be able to take amazing motorcycle photos in no time!
Capturing The Side-On View Of Your Motorcycle
Hey there! Today we’ll be talking about how to capture the perfect side-on view of your motorcycle.
To get a great shot, it’s important to focus on three key areas: angles, lighting and composition.
Start by picking an angle that best showcases your bike – you can go for a low angle to make it look big and powerful, or a higher angle for a more intimate look.
Next, pick the right lighting – natural light is usually the best, but if you want to get creative you can experiment with artificial light.
Finally, use a good composition – create visual balance by positioning the bike in the frame, and add interest through foreground elements like rocks or gravel.
Have fun and get creative!
Angles
Hey there, bike-shooters! Today I’m going to talk about capturing the side-on view of your motorcycle. This is one of the must-have shots for any bike shoot and it can really make your whole bike look amazing in action photography.
First off, when shooting side-on you should focus on getting all angles of the three-quarter view. That means making sure you get a good shot of both sides of the bike as well as a front and back shot at a slight angle. This adds depth and movement to your photo, making it more interesting than just a straight side-on shot.
Once you have your three-quarter views nailed down, you can then start experimenting with other angles to capture the whole bike. Try shooting from below or above for some unique perspectives that will make your bike look awesome!
So get creative and experiment with different angles – you’ll be surprised at how many great shots you can get!
Lighting
Ok, now that we’ve got the angles down, let’s talk about lighting!
When it comes to shooting side-on views of a motorcycle, lighting is key. On an overcast day, you can get some great shots without having to worry too much about harsh light or shadows. However, if you’re shooting on a sunny day then you’ll want to pay close attention to how the light is hitting your bike.
Try using portrait mode as this can help balance out the colors and saturation in your shots. And if you find yourself in direct sunlight, try using some reflectors or scrims to soften the light and create beautiful shadows on your bike.
Overall, lighting is an important part of any bike shoot and it’s worth spending some time experimenting with different techniques until you find something that works for you. Don’t be afraid to get creative and try new things – who knows what kind of amazing shot you could come up with!
So take your time and have fun playing around with different lights and angles – I’m sure you’ll be happy with the results!
Composition
Now that we’ve talked about lighting, let’s talk about composition.
This is where you get to decide what people will see when they look at your photo of your steed.
You’ll want to make sure the composition is balanced and visually appealing – there’s no one-size-fits-all formula for this, so take some time and experiment with different angles and perspectives.
Try shooting from eye level or from above to capture stunning shots that draw in the viewer’s attention.
Don’t be afraid to move around and try a few different ideas until you find something that looks just right.
With a little practice, you’ll be able to create amazing shots of your motorcycle that you can be proud of!
How To Get A Good Motorcycle Photo
Now that you know how to capture the side-on view of your motorcycle, let’s move on to how to get a good motorcycle photo.
To make sure you can sell your bike with a great photo, it’s important to set up the shot properly. First things first: make sure the chain isn’t visible in any photos of mountain bikes. This can be done by rolling the bike forward or backwards slightly so the chain is out of sight when you take the shot. Once that’s taken care of, keep the motorcycle in focus from top to bottom and make sure nothing is out of place or distracts from its beauty.
Now that you’ve got your setup ready, you’ll want to adjust a few settings on your camera for optimal results. Use a wide aperture value like f/2.8 if your lens allows, as this will let more light into your shot and help blur out any distracting elements in the background. Additionally, consider increasing your shutter speed if there are any objects or people moving around in the frame for a crisp and clear image.
Finally, use a tripod if possible for stabilization purposes and ensure your framing is nice and even.
With these tips in hand, you’re now ready to take some awesome shots of your motorcycle! Just remember to keep an eye on all those little details like shadows and reflections as they have a huge impact on how photos turn out. Have fun snapping away!
Keeping The Motorcycle In Focus
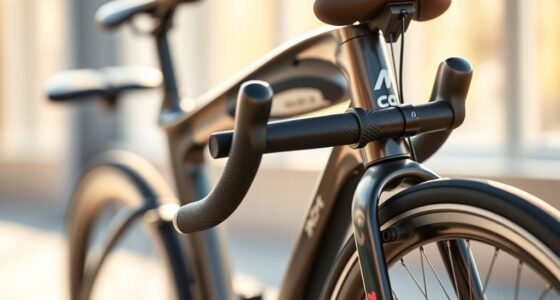
When it comes to shooting your bicycle, you want to make sure that you keep the entire bike in focus. To do this, start by setting your lens aperture to a higher number – this will help keep the rear wheel and chainstays from becoming blurred out. You also want to use a high-speed shutter so that the motion of the bicycle is frozen in time. If you don’t have access to a studio or a tripod, consider using Photoshop to fix any blurring that may occur.
It’s generally easier to focus on the front of your bike when shooting, but if you want an interesting angle, don’t be afraid to experiment with different shots! Take advantage of driveside shots by positioning yourself at an angle where you can get some great shots while also highlighting details like drivetrain components and chainrings.
When shooting your bike, it’s important to take care with each shot and adjust your settings accordingly. Don’t forget that you can always go back and edit later – experiment and have fun!
With patience and practice, you’ll soon be able to capture stunning images of your bike for all the world to see.
Taking Advantage Of Driveside Shots
Shooting your bike is all about taking advantage of driveside shots. A new bike can be a great opportunity to get creative with your photography! The key is to keep both eyes on your subject and make sure you frame it just right.
When you get familiar with the driveside angle, try increasing frames per second and use the big ring for an even more impressive look. With a little practice, you’ll have some stunning photos of your ride in no time!
Now that you’ve got the basics down, let’s move on to a few digital photography tips for motorcycle shots. You’ll want to make sure you adjust shutter speed and aperture settings so that your image comes out just right.
It’s also important to pay attention to lighting and composition when shooting your bike – this will make all the difference in capturing an incredible shot!
Ready to start snapping some photos? Grab your camera and let’s go!
Digital Photography Tips For Motorcycle Shots
As a bicycle shooting instructor, the first tip I’d give you is to make sure you have a good motorcycle to shoot. You need to capture its curves and details, so make sure it looks great from all angles.
For example, focus on the front wheel so that it stands out in your photo. This will draw the viewer’s eye to the beautiful design of your bike.
Secondly, use natural light when possible. When shooting outdoors, try to avoid direct sunlight and instead look for indirect light that will create softer shadows and give your photo a more even tone. This will help your bike stand out in the background and make the colors look much more vibrant.
Finally, experiment with different angles and perspectives when taking pictures of your bike. Move around it and try different shots until you find one that looks right to you. Don’t be afraid to get creative – this is what makes photography fun!
With these tips as a guide, you should have no problem taking some amazing shots of your motorcycle that you can be proud of! Onward now to uncovering the secrets of capturing great action shots…
Motorcycle Action Photography Tips
Now that you’ve got the basics of digital photography for motorcycle shots down, let’s move on to some more advanced techniques!
Motorcycle action photography is a great way to capture dynamic shots of your bike in motion. It requires a bit more skill and setup, but it can be a lot of fun and make for some awesome photos.
One important tip is when shooting an action shot, you’ll want to ensure your camera is pointed at 12 o’clock. This means that the background behind the motorcycle runs parallel to the ground and the camera lens will be pointing straight towards it. This technique gives photographers greater control over their composition as well as better depth-of-field with various focal lengths.
When you’re ready to get started with action shots, start out slow and work your way up from there — practice makes perfect! You’ll want to adjust your shutter speed and practice panning at different speeds until you find what works best for you.
With enough practice, you can get some really cool photos that show off all the details of your bike in motion!
Tips For Photographing Motorcycles In A Studio
Photographing motorcycles in a studio may seem like a daunting task, but with the right tools and techniques, you can get great shots.
When shooting your bike in the studio, there are some things to keep in mind. First, make sure you have enough space to capture the entire motorcycle without any obstacles getting in the way of your camera’s view.
Next, consider how much light you need for the finished photo and make sure that all of your lights are properly set up. Finally, plan out how you want to shoot your motorcycle and also think about any props or accessories that could enhance your photos.
Here is a list of tips to follow when shooting motorcycles in a studio:
- Adjust the angle of your camera’s lens to capture different perspectives of your motorcycle
- Utilize natural light sources from windows to create depth and contrast in photos
- Experiment with shutter speed settings on your camera’s lens to produce different effects
- Use small reflectors around the motorcycle’s body to highlight details
By following these tips and using proper lighting techniques, you will be able to capture stunning photographs of your motorcycle while also having fun doing it! With patience and practice, you will be able to take amazing shots that will show off all the beauty of your bike. From here, we can move onto enhancing those photos even further with Photoshop!
Using Photoshop To Enhance Your Motorcycle Photos
Using Photoshop to Enhance Your Motorcycle Photos is a great way to take your shooting skills to the next level. As a biking shooting instructor, I’m here to tell you that it’s not just about snapping a picture and hoping for the best — it’s about taking control of your photos and making them work for you.
Let me show you what I mean with this table below:
| Before | During | After |
|---|---|---|
| Set up your bike’s position | Focus on the details | Utilize Photoshop tools |
| Choose a good backdrop | Think about lighting | Adjust colors and contrast |
| Compose the shot carefully | Use angles wisely | Apply effects or filters |
When you’re shooting, you’ll be able to take advantage of all these tips and tricks. You’re taking control of how your photo looks, instead of relying on luck or chance. And when you’re using Photoshop, you can really make sure that your shots turn out exactly as envisioned! With a few simple tweaks, even amateur photos can look professional.
The possibilities are endless when it comes to capturing stunning motorcycle shots — so get creative and have fun!
Tips For Capturing Stunning Motorcycle Shots
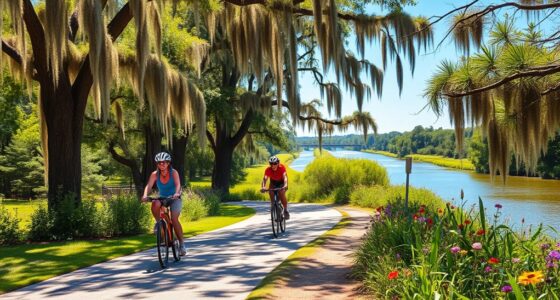
As a bicycle shooting instructor, I always give my students the same advice: pay attention to your surroundings. Even if you’re trying to capture the details of just one part of your bike, make sure you’re in an interesting backdrop. This adds depth and context to your photo.
It’s important to remember that capturing a stunning shot doesn’t always mean getting a close-up of your bike – sometimes it’s about setting the scene and going wide. Start by scouting out interesting locations with interesting backdrops that will help bring life to your photos. Then, get creative and experiment with different angles and perspectives that can add more interest to the shot.
Just remember to keep an eye on the lighting!
Frequently Asked Questions
What Are The Best Lighting Conditions For Motorcycle Photography?
If you want to take the best possible pictures of your bike, then the lighting conditions are key!
As a motorcycle photography instructor, I always recommend shooting in overcast or shaded conditions, as this will give you the most even light.
Direct sunlight can be tricky to work with and can create harsh shadows that might not make for the best images.
If it’s an overcast day, use a reflector or diffuser to help fill in any shadows if you need to.
The most important thing is to experiment and find out what works for you!
What Kind Of Lens Should I Use To Get The Best Quality Photos?
When it comes to getting the best quality photos of your bike, the lens you use is key.
I recommend using a wide-angle lens with a focal length between 16 and 35mm; this will help you capture more of the scene in one shot.
Additionally, look for lenses with fast apertures of f/2.8 or wider so you can capture better low-light images.
Finally, opt for lenses that are specifically designed for digital cameras as they will provide sharper images.
With these tips in mind, you should be able to get amazing photos of your bike every time!
What Is The Best Shutter Speed To Use To Capture Motion?
When capturing motion with your camera, the shutter speed is one of the most important factors to consider.
As a bicycle shooting instructor, I recommend using a shutter speed of at least 1/500th of a second for crisp and sharp photos. This will freeze any fast-moving objects in their tracks, allowing you to capture beautiful and dynamic shots.
If you want to create an artistic effect, try longer shutter speeds of 1/30th or slower to get the blur effect that implies movement.
With practice and patience, you’ll be able to master the perfect shutter speed for any motion photography situation!
How Can I Capture A Unique Perspective Of A Motorcycle?
Hey there, let me show you how to capture a unique perspective of a motorcycle.
A great way to do this is to shoot from lower angles, or even from the side. This will create an interesting look, as you’ll be able to tell the story more through imagery, rather than just by looking at it straight on.
Try getting up close and personal with the bike and focus on specific details that make it stand out.
You can also take multiple shots of the same angle and play around with different shutter speeds to create some really cool effects!
What Type Of Editing Software Should I Use To Enhance My Photos?
When it comes to editing your photos of a motorcycle, the right software can make all the difference! As a bike shooting instructor, I always recommend Adobe Photoshop as the best software for enhancing your photos.
It’s got a ton of features, making it super easy to adjust colors, crop and rotate images, apply filters and so much more! Plus, you can even create collages and get creative with text overlays.
So don’t worry about taking great shots – just let Adobe Photoshop do its magic!

Detail shots
There are a few basic rules to follow when shooting a bike, and one of the most important is to always take the shot from the drive side of the vehicle. This is because pictures of the other side don’t showcase the bike’s best qualities as well. If you’re displaying several pictures of your bike, it’s fine to take a shot of each side, but make sure the drive side is displayed prominently.
First, find a cool backdrop. You can also use a water bottle or helmet to give the photo a unique look. It’s also helpful to prop the front wheel or prop it up on something. The key is to position the prop on something so that it stays on the frame. Also, remember to shoot both sides of the engine. This will ensure that the photo is clear and well balanced. Once you’ve figured out the best background, start taking detail shots of your bike.
The angle of your photos is another important factor in taking great detail shots. A 30-60 degree angle is best for taking photos of bikes. The angle helps to capture the entire bicycle and landscape. You can also enlist the help of a friend to help you take the photo. The camera should have a tripod or timer to avoid shaking. Attempt the shot several times to get the right angle. If the first attempt doesn’t turn out, move to another location and try again.
Angled shots
You’ve probably seen pictures of bikes taken from a standing position, and while it’s true that these images aren’t the worst, you can make them look even better by taking a few different angles. For example, most photos of bikes are shot with point-and-shoot cameras set to auto mode or with a smartphone, but these photographs look much better when taken from a kneeling or squatting position.
The best angle for capturing an angle shot of your bike is to shoot from a level position, and make sure the horizon and the bike are level. This is known as the “Dutch angle” effect, and although it can result in slightly crooked photos, people won’t notice. Moreover, you shouldn’t crop your photo so tightly that it is not centered on the bike. Leaving some space around your bike is especially important if you plan to print it out later.
An angle shot of your bike is also a great way to show off the detail of your bike. Unlike photos in magazines, a front view of a bike will show more of the rim than the tyre, and an angle shot will display more of the bike’s unique design. However, it’s still a good idea to try to get close enough to your bike to show off the custom paintwork.
Low shutter speed
The first step to take when you want to shoot a motorcycle photo is deciding on a shutter speed. Shutter speed refers to how quickly your camera shutter opens and closes. Choosing a shutter speed that’s too fast or too slow will cause the photo to appear soft or blurry. If you want to avoid this problem, use a slow shutter speed. In most cases, this will result in a more dynamic photo.
For most shots, a low shutter speed is best for hand-holding. This type of photograph also provides a sense of movement, as the cyclist’s spokes are blurred and his or her body is in motion. A faster shutter speed would freeze the cyclist’s wheels in time, and its spokes would appear clearly in the background. However, if you want to take a bicycle photograph while it’s in motion, a slow shutter speed is the way to go.
Shutter speed can make or break a photo. The faster the shutter is open, the sharper the picture will be. A slow shutter speed produces motion blur, which can elevate your picture, but if you use it wrong, you can end up with a photo that looks flat. When focusing, make sure to use a tripod. Also, be sure to use a high ISO when taking a photo of a bike.
Choosing a light camera
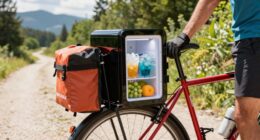
If you’re planning on taking a lot of photos on your bike trip, it’s important to choose a camera that is light enough to fit in your pocket. You can opt for a compact camera, such as a compact or a smartphone. The Sony RX100 series is a popular choice for cyclists, and its small size makes it easy to carry. Its large sensor and high image quality make it an excellent choice for cycling trips. In addition, this camera is still much smaller and easier to carry than the Panasonic LX3.
Moreover, a light camera is especially desirable for cyclists who tend to climb hills on their bikes. These cyclists are usually short and skinny, so it’s not a good idea to bring extra weight with them. On the other hand, flat roads are much less problematic because there isn’t much wind resistance to contend with, making it possible to take photographs of your ride with a light camera.
Styling your bike for photography
While it may seem a bit daunting, styling your bike for photography is an important part of the overall picture. Photographing a bike requires a lot of consideration – its placement in the frame and how the subject interacts with the bike will determine the overall quality of the photo. Even if you’re not a professional model, you can still do great photos if you have some tricks up your sleeve.
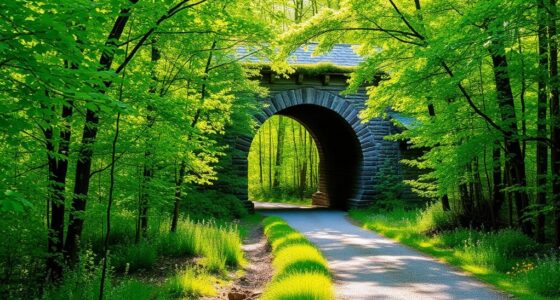
Choosing a good location
Choosing a good location to shoot your motorcycle is crucial for capturing the essence of your bike. First and foremost, the setting should be as clear and uncluttered as possible. While public spaces are ideal, there are also some special spots for motorcycle photography. However, these locations often require connections, special permits, or luck. For example, if you want to capture an industrial background with your bike, consider a disused foundry. These places usually have a distinct industrial flair that contrasts well with your modern motorcycle.
Choosing a good location for a motorcycle photo shoot requires knowing the right conditions and lighting conditions. You should start by selecting a location with relatively low sunlight and a shallow depth of field. This will avoid any out of focus areas. In addition, you should also determine when the best time of day for shooting is. Ideally, outdoor motorcycle photography is best performed early in the morning or late at night, when light is even and not too harsh. In some instances, a location with high sunlight is preferable to an open one.
The background should be uncluttered to draw attention to your motorcycle. If you’re taking an image outdoors, choose a location that is largely unobstructed, such as a field. A wall, metal shutters, or an empty road will work well. You should also think about what part of the bike you want to feature. For instance, you might want to capture the side of the bike, or a front-on shot. Depending on the type of bike, you might also want to capture the parts of the motorcycle that you find most interesting.
Conclusion
Shooting a motorcycle is an art form, and with the right techniques, you can capture beautiful photos that you’ll be proud to show off.
Whether you’re shooting in direct sunlight or using a long exposure to capture motion, these tips will help you take stunning images of your bike.
Just remember to experiment with different perspectives and lighting conditions, and don’t forget to have fun!
By following these steps, you’ll be well on your way to mastering the art of motorcycle photography.
And with a little bit of practice and patience, your shots will start rolling in like waves on the beach – each one more beautiful than the last!