For anyone who loves cycling, few experiences can be as aggravating as dealing with a bicycle wheel that wobbles. It upsets your balance, decreases the efficiency of your ride, and can even lead to long-term damage to your bicycle.
But don’t worry, straightening a bicycle wheel is a relatively simple task that can be done at home with just a few tools and some patience.
Imagine your bike wheel is like a pizza, with each spoke acting as a slice. Just like how a poorly cut pizza can result in uneven slices, a wheel with loose or tight spokes can cause the wheel to wobble.
But with the right tools and a bit of know-how, you can straighten your wheel and get back to enjoying a smooth ride. In this article, I’ll take you through the step-by-step process of identifying the problem, gathering your tools, loosening and tightening the spokes, and ultimately straightening your bicycle wheel.
Key Takeaways
- Identifying the problem is the first step in straightening a wobbly bicycle wheel.
- Small adjustments should be made frequently to avoid over-correcting and throwing off balance.
- Regular bike maintenance is important to prevent issues with the wheel and ensure a smooth ride.
- Using a truing stand can result in greater accuracy and is a better investment for serious cyclists.
Identify the Problem
Do you know what the problem is with your wobbly bike wheel? Let’s identify it together!
There are a few common causes of a wobbly bike wheel. One of the most common is a bent rim, which can happen from hitting a pothole or curb too hard. Another cause could be loose spokes, which can become loose over time and cause the wheel to wobble. Finally, a damaged or worn-out tire can also cause a wobbly wheel. To prevent these issues, it’s important to regularly inspect your bike and make any necessary repairs.
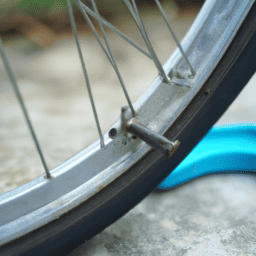
To identify the problem with your wobbly bike wheel, start by giving it a spin and watching for any wobbling or rubbing. If you notice a wobble, check your rim for any visible bends or dents. Next, check the tension of your spokes by squeezing them together in pairs and checking for any loose ones. Finally, inspect your tire for any visible damage or wear.
Once you’ve identified the issue, it’s time to gather your tools and get to work fixing it.
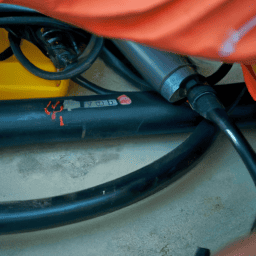
Gather Your Tools
Gather your tools.
You’ll need some basic tools to get started, like a wrench and a spoke key. Tool organization is key to make sure everything is within reach and easy to find. It’s also important to have a proper workspace – a stable surface to work on and good lighting to see the details.
Before starting, make sure you have all the necessary tools and organize them in a way that makes sense to you. This will help you avoid any unnecessary delays or interruptions during the process.
Once you have everything ready, it’s time to move on to the next step: loosen the spokes.
Loosen the Spokes
To loosen the spokes and begin straightening a bicycle wheel, I first use a spoke wrench to turn the nipples on each spoke. This process allows me to release tension on the wheel and adjust the alignment.
I typically use a truing stand, although it’s optional, to hold the wheel steady and provide a more accurate adjustment.
Use a Spoke Wrench
Using a spoke wrench is a simple and effective method for straightening a bicycle wheel. However, it’s important to use the spoke wrench efficiently to prevent further damage.
Before starting the process, it’s important to identify which spokes need to be adjusted. This can be done by spinning the wheel and looking for any wobbles or deformities. Once identified, use the spoke wrench to turn the nipples on the spokes in small increments. It’s important to turn each nipple the same amount to avoid creating new deformities.
When using the spoke wrench, it’s important to apply just enough force to turn the nipple. Over-tightening can cause the spoke to break, while under-tightening won’t have the desired effect. The spoke wrench should also be used in a way that prevents further damage. This can be done by holding the spoke in place while turning the nipple to avoid twisting or bending the spoke.
With the spoke wrench in hand, turn the nipples until the wheel is straightened and ready for the next step: turning the nipples.
Turn the Nipples
Once identified, it’s important to use the spoke wrench to turn each nipple the same amount to avoid creating new deformities when turning the nipples.
Common mistakes when turning the nipples include turning them too much or too little, or turning some more than others. This can lead to an uneven wheel or even cause the wheel to become warped.
It’s important to make small adjustments and check the wheel frequently to ensure it’s straightening out evenly. An alternative method to turning the nipples is to use pliers or an adjustable wrench to make adjustments. However, using these tools can be imprecise and may cause damage to the nipples or spokes.
If you don’t have access to a spoke wrench, it’s best to take your bike to a professional who can properly straighten the wheel.
Once the nipples have been adjusted and the wheel is straightened, the next step is to use a truing stand (optional) to further refine the wheel’s alignment.
Use a Truing Stand (optional)
Now that we’ve covered turning the nipples to adjust tension in the spokes, let’s talk about using a truing stand. A truing stand is a tool designed specifically for wheel maintenance and repair, and it can be a great investment for serious cyclists. The benefits of using a truing stand include greater accuracy and precision, as well as easier access to all parts of the wheel.
It allows you to make adjustments without having to hold the wheel in place or guess at where the problem areas are. However, truing stands can be expensive and take up a lot of space, so there are alternatives to consider. If you don’t have access to a truing stand, you can use your bike frame as a makeshift stand. Simply flip your bike upside down and rest the axle on the frame.
This will allow you to see where the wheel is out of true and make adjustments accordingly. Another option is to use zip ties or a rubber band to attach a pencil or similar straight object to your bike’s frame, which will give you a visual guide to work with. Whatever method you choose, remember to take your time and be patient.
Wheel truing can be a delicate process, and rushing can cause more harm than good. Now that we’ve discussed the benefits of using a truing stand and alternatives to consider, let’s move on to the next step: actually straightening the wheel.
Straighten the Wheel
To get your bike rolling smoothly again, simply give the wheel a gentle spin and look for any wobbles or bumps. If the wheel is misaligned, there are a few common causes, such as hitting a pothole or curb, improper wheel installation, and normal wear and tear. This is why preventative maintenance and regular wheel care are important to keep your bike in good working condition.
To straighten the wheel, you’ll need to use a spoke wrench to adjust the tension of the spokes that are pulling the wheel out of alignment. As you work on the wheel, keep the bike stationary and use a reference point, such as a brake pad, to gauge your progress. It’s important to make small adjustments to the spokes, checking the wheel after each one, to avoid over-correcting and making the problem worse.
Once the wheel is straightened, move on to the next step of tightening the spokes to ensure the wheel stays in place.
Tighten the Spokes
You’ll need a spoke wrench to adjust the tension of the spokes and ensure your bike’s smooth ride. The importance of tension can’t be overstated, as it affects the stability and durability of the wheel.
When tightening the spokes, it’s important to do so in a consistent pattern, starting at the valve stem and working your way around the wheel. This helps to maintain an even tension throughout.
Common mistakes to avoid include over-tightening and under-tightening the spokes. Over-tightening can cause the wheel to become too rigid and prone to cracking, while under-tightening can cause the wheel to become weak and unstable. It’s also important to avoid tightening one spoke too much, as this can throw off the balance of the wheel.
By using a spoke wrench and tightening the spokes in a consistent pattern, you can ensure your bike’s wheel is straight and sturdy for a smooth ride.
Frequently Asked Questions
How do I know if my bike wheel is out of alignment?
I can tell if my bike wheel is out of alignment by checking for signs like a wobble or rubbing against the brake pads. Tips for fixing it include adjusting the spokes or taking it to a professional.
Can I straighten a bent bike wheel without professional help?
Honestly, I used to think only pros could fix my wheel, but DIY methods work. I use a spoke wrench and truing stand to straighten my bent wheel. It takes patience and practice, but it’s worth it.
What causes a bicycle wheel to become bent or out of alignment?
Bicycle wheel misalignment can be caused by hitting curbs, potholes, or other obstacles. Prevention tips include avoiding rough terrain, checking tire pressure, and ensuring proper installation of wheels and brakes.
Is it safe to ride a bike with a bent wheel?
Riding a bike with a bent wheel is like driving a car with a flat tire: risky and damaging. Pros: none. Cons: worsened wheel damage, unstable ride, possible injury. Prevent bent wheels with proper maintenance techniques and care.
How often should I check and straighten my bike wheel?
It’s important to regularly check and maintain your bike wheel, as signs of wear and tear can lead to issues while riding. I check mine every few weeks and make adjustments as needed to ensure optimal performance.
Conclusion
Well, folks, after spending several hours trying to straighten my bicycle wheel, I’ve come to the conclusion that it’s a task best left to the professionals.
Despite following all the steps outlined in various online tutorials, my wheel remained stubbornly crooked, mocking me with its wobbling as I tried to ride.
It’s ironic, really. As someone who enjoys tinkering with mechanical objects and fixing things myself, I thought straightening a bike wheel would be a breeze. But alas, it proved to be a humbling experience, reminding me that sometimes even the simplest tasks can be deceptively difficult.
So, if you find yourself in a similar situation, don’t be like me. Save yourself the frustration and take your bike to a skilled mechanic who can fix the issue quickly and efficiently.
Trust me, it’s worth the investment.