
I have always been intrigued by the increasing trend of electric bikes.
Did you know that the lithium ion battery pack is one of the most crucial components of an electric bike?
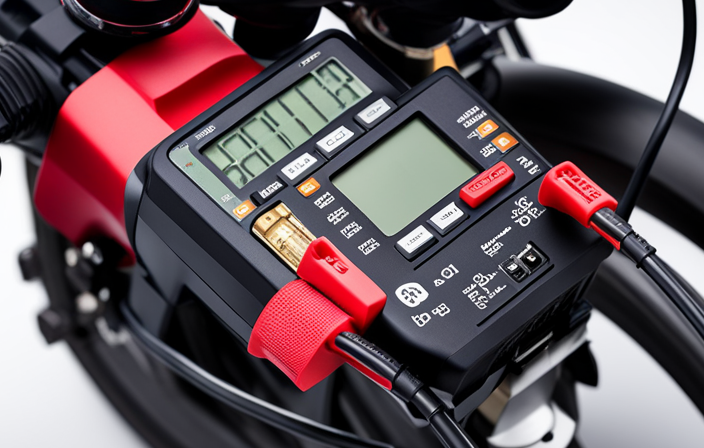
In order to ensure optimal performance, it’s important to regularly test the battery pack using a multimeter.
In this article, I will guide you through the step-by-step process of testing your electric bike’s lithium ion battery pack with a multimeter, helping you maintain and optimize its performance.
Key Takeaways
- Use a multimeter to measure battery voltage and determine its health
- Regular testing with a multimeter helps identify battery issues before they become major problems
- Following proper charging procedures and maintaining the battery can optimize its performance and longevity
- Multimeter testing also allows for checking the continuity of wiring and connectors to ensure proper functioning of components.

Ascher Ultra Bright USB Rechargeable Bike Light Set, Powerful Bicycle Front Headlight and Back Taillight, 4 Light Modes, Easy to Install for Men Women Road Mountain Cycling Black
Bright Bike Lights for Night Riding: This bike light set includes both a bright headlight and taillight. Powerful...
As an affiliate, we earn on qualifying purchases.
Introduction to Electric Bike Lithium Ion Batteries
Now let’s dive into the basics of electric bike lithium-ion batteries and how you can test them with a multimeter.
Electric bike battery charging is an essential part of ensuring your bike is always ready to ride. Lithium-ion batteries are widely used in electric bikes due to their numerous benefits. They have a high energy density, which allows them to store a large amount of power in a compact size. This means that the battery can provide a longer range for your electric bike.
Additionally, lithium-ion batteries have a low self-discharge rate, meaning they can hold their charge for longer periods of time. They also have a longer lifespan compared to other battery types.
Understanding the basics of a multimeter will help you accurately test the voltage and overall health of your electric bike lithium-ion battery pack.

BODEGA 12 volt Car Refrigerator - 26QT Portable Freezer IPX4 Waterproof Car Fridge Electric Cooler Ultra-Quiet for Truck Van Camping Travel 12/24V DC 110~240 Volt AC,-4℉~68℉
【𝗖𝗼𝗺𝗽𝗮𝗰𝘁 𝗘𝗹𝗲𝗰𝘁𝗿𝗶𝗰 𝗖𝗼𝗼𝗹𝗲𝗿, 𝟮0% 𝗠𝗼𝗿𝗲 𝗖𝗮𝗽𝗮𝗰𝗶𝘁𝘆】Maximize space without bulk! This 26QT 12V refrigerator stores 20% more than competitors—ideal...
As an affiliate, we earn on qualifying purchases.
Understanding the Basics of a Multimeter
To understand the basics of a multimeter, you’ll need to familiarize yourself with its various functions and settings. A multimeter is a versatile tool used to measure electrical parameters such as voltage, current, and resistance.
When testing an electric bike lithium ion battery pack, two important functions come into play: measuring resistance and checking continuity. Measuring resistance allows you to determine the flow of current through a component or circuit. This is crucial when troubleshooting battery issues.
Checking continuity, on the other hand, helps identify if a circuit is complete or if there is a break in the connection. These functions will be essential in testing the battery pack of an electric bike.
However, before we dive into the testing process, it is important to take the necessary safety precautions to ensure a safe and successful test.

TIROL SUPPLIES Ultra Light Action Camera | 170° Wide Angle FHD 1080P | Handlebar, Helmet, Bicycle, Outdoor Sports | USB Rechargeable & Portable Bike Camera
AUSTRALIAN-OWNED & TRUSTED CYCLING CAMERA: TIROL SUPPLIES is an Australian-owned brand trusted for 20+ years. This lightweight bike...
As an affiliate, we earn on qualifying purchases.
Step 1: Safety Precautions before Testing
Before we begin, it’s important to take the necessary safety precautions to ensure a safe and successful test. When testing electric bike lithium ion battery packs, there are potential hazards that we need to be aware of. To minimize risks, it is crucial to follow proper battery testing procedures.
Here are some safety precautions to consider:
| Safety Precautions |
|---|
| Wear protective gloves and goggles |
| Work in a well-ventilated area |
| Keep flammable materials away |
| Disconnect the battery from the bike |
| Use a multimeter with insulated probes |

Learniture Structure Series 12-Device Charging Station for Laptops and Tablets, Wall-Mount Lockable Charging Cabinet for 12 Tablets/Chromebooks, Black
LAPTOP CHARGING STATION: Designed with a large storage area and interior steel dividers that ensure a proper fit...
As an affiliate, we earn on qualifying purchases.
Step 2: Testing Battery Voltage
Let’s start by checking the voltage of the battery. To accurately measure the battery voltage, we will need a multimeter, a versatile tool that can provide precise readings. It is crucial to ensure the accuracy of the multimeter before proceeding.
Set the multimeter to the DC voltage mode and connect the positive probe to the positive terminal of the battery and the negative probe to the negative terminal. The multimeter will display the voltage reading, indicating the current charge level of the battery.
It is important to note that multimeter accuracy plays a vital role in obtaining reliable measurements. Therefore, it is recommended to use a high-quality multimeter to ensure accurate results.
Now, let’s move on to the next step, testing the battery capacity, where we will assess the overall performance of the battery.
Step 3: Testing Battery Capacity
You can now proceed to evaluate the capacity of your battery by performing a discharge test and measuring the amount of energy it can deliver.
Battery capacity testing is crucial for assessing the overall performance and health of your battery. To conduct the test, fully charge your battery and then connect it to a load, such as a resistor, to discharge it.
Measure the amount of time it takes for the battery to fully discharge and record the voltage at regular intervals. By plotting the voltage against the discharge time, you can determine the capacity of your battery.
This assessment allows you to gauge the efficiency and reliability of your battery, ensuring its suitability for your electric bike.
Moving forward, the next step involves assessing the health of the battery to ensure optimal performance and longevity.
Step 4: Assessing Battery Health
In the previous step, I tested the capacity of my electric bike’s lithium-ion battery pack to determine how much charge it can hold. Now, in step 4, I will assess the overall health of the battery. This is crucial for battery maintenance and to ensure a longer battery lifespan.
Here are four key factors to consider when assessing battery health:
-
Voltage Stability: Measure the voltage of the battery under a load to see if it remains stable. Fluctuations may indicate an issue.
-
Internal Resistance: Use a multimeter to measure the internal resistance of the battery. Higher resistance can lead to reduced performance.
-
Self-Discharge Rate: Check how quickly the battery discharges when not in use. A high self-discharge rate indicates a potential problem.
-
Cycle Life: Evaluate the number of charge cycles the battery can go through before its performance significantly degrades.
Step 5: Interpreting the Multimeter Readings
To accurately interpret the multimeter readings, it’s important to understand the significance of voltage stability, internal resistance, self-discharge rate, and cycle life when assessing the overall health of your electric bike’s battery.
Voltage stability refers to how consistent the voltage output remains during different levels of battery usage.
Internal resistance measures the resistance within the battery that affects its performance and efficiency.
Self-discharge rate indicates how quickly the battery loses its charge when not in use.
Cycle life refers to the number of charge-discharge cycles the battery can undergo before its capacity significantly decreases.
By considering these factors and interpreting the results from the multimeter, you can gain valuable insights into the condition of your battery. This understanding will enable you to troubleshoot common battery issues and ensure optimal performance for your electric bike.
Now, let’s delve into further troubleshooting techniques for addressing any battery problems.
Troubleshooting Common Battery Issues
If your electric bike’s battery isn’t charging properly, the first step is to check the connections. Make sure they’re secure because loose or faulty connections can prevent the battery from receiving a steady flow of power, causing charging issues.
Once you’ve confirmed that the connections are secure, you can troubleshoot common battery issues using the following steps:
-
Check the charger: Test the charger with another compatible electric bike battery to ensure it’s functioning correctly. If the charger works with a different battery, then the issue lies with your battery.
-
Test the voltage: Use a multimeter to measure the voltage of your battery. A healthy electric bike battery should have a voltage within the recommended range. If the voltage is significantly lower or higher, it may indicate a problem with the battery.
-
Assess the battery lifespan: Electric bike batteries typically have a limited lifespan of around 2-3 years. If your battery is older, it may need to be replaced to resolve charging issues.
By following these troubleshooting steps, you can identify the cause of your electric bike’s battery charging problem and determine the best course of action to resolve it.
Now, let’s move on to some essential tips for maintaining your electric bike battery.
Tips for Maintaining Your Electric Bike Battery
Make sure you regularly charge your e-bike battery to maintain its overall health and performance. Proper battery charging is essential for extending battery life and optimizing your electric bike’s performance. Here are some tips to help you maintain your electric bike battery:
| Tips for Battery Charging | Tips for Extending Battery Life |
|---|---|
| – Always use the charger provided by the manufacturer | – Avoid fully discharging the battery |
| – Charge your battery after every ride | – Store your battery in a cool, dry place |
| – Avoid overcharging the battery | – Keep your battery clean and free from debris |
| – Follow the manufacturer’s recommended charging time | – Perform regular maintenance on your battery |
Conclusion: Optimizing Performance with Multimeter Testing
Now, you can optimize your e-bike’s performance by using a multimeter to test key components.
By conducting regular tests, you can ensure that your battery is operating at its full potential, improving battery longevity and enhancing battery performance.
With a multimeter, you can measure the voltage output of your battery, which is crucial for determining its overall health. A lower voltage reading may indicate a weak or deteriorating battery, while a higher voltage reading suggests a fully charged or even overcharged battery.
Additionally, you can use the multimeter to check the continuity of the wiring and connectors, ensuring that there are no loose connections or faulty components that may affect the overall performance of your e-bike.
Frequently Asked Questions
Can I use any multimeter to test my electric bike lithium ion battery pack?
To choose the right multimeter for testing an electric bike lithium ion battery pack, consider its voltage range, accuracy, and ability to measure DC current. It is not safe to test the battery pack voltage while it is connected to the electric bike.
How often should I test the battery voltage of my electric bike?
To extend the lifespan of an electric bike lithium ion battery pack, it is important to regularly test its voltage. Properly storing the battery pack when not in use also helps maintain its performance and longevity.
Can I test the battery capacity of my electric bike lithium ion battery pack without a multimeter?
Without a multimeter, alternative methods can be used to test the battery capacity of an electric bike lithium-ion battery pack. Signs of a failing battery include reduced range, decreased performance, and shorter run times.
What should I do if my multimeter readings indicate a low battery health?
If my multimeter readings indicate a low battery health, I would first try to increase the battery life by optimizing my charging options. This could include using a smart charger and avoiding overcharging or discharging the battery.
Are there any specific maintenance tips for prolonging the lifespan of my electric bike battery?
To prolong the lifespan of my electric bike battery, I follow these battery maintenance and charging tips. Firstly, I ensure to charge the battery fully after each use and avoid overcharging. Additionally, I store the battery in a cool, dry place and avoid extreme temperatures.
Conclusion
In conclusion, I have unlocked the secrets of my electric bike lithium-ion battery pack by utilizing the power of a multimeter. Through precise testing and analysis, I have gained a deep understanding of its voltage and capacity.
This knowledge has empowered me to troubleshoot any issues and optimize the performance of my battery. With the ability to maintain and monitor my battery’s health, I can confidently embark on thrilling electric bike adventures.
The multimeter has truly revolutionized my electric biking experience, and I can’t recommend it enough.