For those passionate about cycling, experiencing a shaky or unstable bike seat ranks high on the list of frustrations. However, there’s no need to worry, as securing a bicycle seat is a straightforward process that requires minimal tools and some basic knowledge.
In this article, I will guide you through the process of tightening your bicycle seat step-by-step. I will explain how to identify the type of seat you have and what tools you will need, as well as how to remove the seat, tighten the bolt or clamp, and re-insert the seat.
By the end of this article, you will be able to confidently tighten your bicycle seat and hit the road with confidence.
Key Takeaways
- Proper seat adjustment is crucial for comfort and safety while riding a bike.
- Tightening bolts or clamps is important to ensure seat stability and prevent accidents.
- Regular bike checks are necessary to identify loose rail connections or worn out parts that may affect bike performance.
- Using the correct tool, applying even pressure, and checking torque specifications before tightening are essential for precise adjustments.
Identify the Type of Seat and Tools Needed
Before you can tighten your bike seat, you need to figure out what kind of seat it is and grab the appropriate tools, so let’s get started! Choosing the right seat is essential for comfortable and safe cycling. A properly fitting seat will help you maintain proper seat height, which is critical for efficient pedaling and avoiding discomfort or injury.
To determine the type of seat you have, first identify whether it’s a traditional saddle or a modern ergonomic seat. Traditional saddles are narrower and have a longer nose, while ergonomic seats are wider and have a more rounded shape. Once you’ve identified your seat type, you’ll need to grab a few tools.
For traditional saddles, you’ll need a wrench or an Allen key to adjust the bolt under the seat. For ergonomic seats, you may need a special tool, depending on the manufacturer’s design.
Now that you’ve identified your seat type and gathered the necessary tools, you may need to remove the seat from the bike to tighten it properly.
Remove the Seat
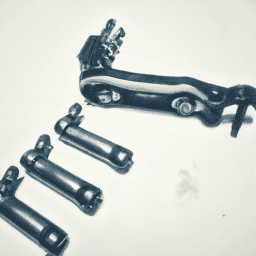
First, unscrew the clamp with a trusty wrench to free the saddle from the post. Proper seat removal is essential to ensure that the seat is reinstalled securely.
Once the clamp is loosened, lift the saddle and post from the bike frame. Be careful not to damage the post or any other parts of the bike during the removal process.
To make the process easy to follow, here are five points that’ll help you in removing your bicycle seat correctly:
- Use a wrench that fits the clamp bolt to avoid stripping the bolt head.
- Make sure that the bike is stable and that the saddle is level before attempting to remove it.
- Be gentle when lifting the saddle as it may still be attached to the post by a clamp bolt.
- Check the saddle for any signs of damage or wear and replace if necessary.
- Keep all removed parts in a safe place to avoid losing them.
With the seat now removed, the next step is to tighten the bolt or clamp.
Tighten the Bolt or Clamp
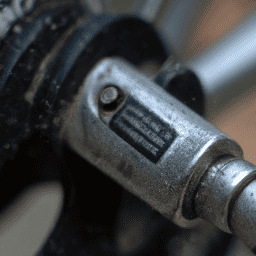
When tightening the bolt or clamp on a bicycle seat, it’s important to use the correct tool. A wrench or Allen key that fits the bolt or clamp should be used to ensure a secure fit.
Additionally, it’s important to apply even pressure to the bolt or clamp to prevent it from becoming loose during use. By following these two key points, you can ensure a comfortable and safe ride.
Use the Correct Tool
Using the correct tool is essential to properly tightening your bicycle seat. Here are four reasons why:
-
Proper tool selection ensures the right amount of torque is applied to the seat post, preventing it from slipping or coming loose.
-
Using the wrong tool, such as pliers or an adjustable wrench, can cause damage to the bolt or clamp, making it difficult to remove or adjust in the future.
-
A torque wrench is the best tool for the job, as it allows for precise adjustments without over-tightening or stripping the bolt.
-
Investing in a torque wrench can save you time and money in the long run, as it prevents the need for costly repairs or replacements due to improper tightening.
It’s important to remember that using the correct tool not only ensures a secure seat, but also avoids damage to your bike. Once you’ve selected the right tool, it’s time to move on to the next step of applying even pressure to the bolt or clamp.
Apply Even Pressure
To ensure a comfortable ride, make sure you evenly distribute pressure when adjusting your seat. Applying even pressure is crucial to prevent the seat from becoming loose or wobbly during your ride. This is especially important if you frequently ride on bumpy or uneven terrain.
One common mistake to avoid when adjusting your seat is using too much force. Applying excessive pressure can damage the seat or the seat post, making it difficult to adjust in the future. Additionally, it’s important to regularly check and maintain your seat to ensure it remains secure and in good condition. Neglecting maintenance can lead to the seat becoming loose or even falling off during a ride. With these tips in mind, you can confidently adjust your seat and enjoy a comfortable ride. Now, let’s move on to the next step of re-inserting the seat.
Re-Insert the Seat
Now that I’ve tightened the bolt or clamp, the next step is to re-insert the seat.
To do this, I need to align the seat with the post. This is important because if the seat is not aligned properly, it can cause discomfort and even injury while riding.
Align the Seat with the Post
Proper alignment of your bicycle seat with the post is crucial for a comfortable and safe ride. There are two important factors to consider when aligning your seat: adjusting the saddle angle and ensuring proper saddle height. The angle of your saddle can greatly affect your comfort and performance while riding. If the saddle is tilted too far forward or backward, it can cause discomfort and put unnecessary strain on your back, arms, and legs. To adjust the angle, use a level or eyeball it until it feels comfortable.
The other factor to consider is the importance of proper saddle height. If your saddle is too low, you won’t be able to pedal efficiently and you risk injuring your knees. If your saddle is too high, you’ll be overextending your legs and may experience discomfort in your hips and lower back. To determine the correct saddle height, sit on your bike with your feet on the pedals in their lowest position. Your leg should be almost fully extended but with a slight bend in your knee. Once you’ve adjusted the angle and height, tighten the bolt or clamp securely to keep the seat in place for your next ride.
Ensuring proper alignment and height of your bicycle seat will improve your riding experience and prevent discomfort or injuries. Now that your seat is in the correct position, it’s time to tighten the bolt or clamp to keep it secure.
Tighten the Bolt or Clamp
Once you’ve found the perfect alignment and height for your bike saddle, it’s crucial to secure it firmly with the bolt or clamp. Proper torque is essential to ensure that the seat doesn’t move or shift while you’re riding. Here are some tips on how to tighten your bike seat bolt or clamp:
-
Check the torque specifications: Before tightening the bolt or clamp, check the torque specifications provided by the manufacturer. Tightening the bolt too much can damage the seat or the post, while not tightening it enough can cause the seat to slip. Use a torque wrench to ensure that you’re applying the correct amount of force.
-
Use the right tool: Make sure you’re using the right tool to tighten the bolt or clamp. Depending on the type of bolt or clamp, you may need a hex key, a socket wrench, or a combination wrench. Using the wrong tool can damage the bolt or the clamp, making it difficult to tighten or loosen in the future.
-
Troubleshooting: If you’re having trouble tightening the bolt or clamp, make sure that the seat post is clean and free of debris. Dirt or grease can prevent the bolt or clamp from gripping the post properly. You may also need to adjust the position of the saddle slightly to ensure that the bolt or clamp is aligned properly.
Now that you’ve tightened the bolt or clamp, it’s time to test the seat to make sure it’s secure.
Test the Seat
Check if your bicycle seat is loose by giving it a firm shake while holding onto the handlebars. If it moves around easily, then it’s time to tighten it up. However, if you’re not sure, you can also sit on the seat and see if it wobbles or shifts when you move your weight around. It’s important to have a stable seat while riding to prevent accidents and discomfort.
To ensure that your seat is secure, you can perform a quick test after tightening the bolt or clamp. This test involves sitting on the bike and seeing if the seat moves in any direction when you shift your weight. You should also check the height of the seat to make sure it’s adjusted correctly for your riding style. A seat that’s too high or too low can cause discomfort and affect your balance.
| Issue | Possible Cause | Solution |
|---|---|---|
| Seat Adjustment | Seat is too high or low | Adjust seat height |
| Bolt or Clamp | Loose bolt or clamp | Tighten bolt or clamp |
| Rail Connections | Rail connections are loose | Tighten rail connections |
| Worn Parts | Worn out parts | Replace worn out parts |
It’s important to test your seat to make sure it’s stable and secure before going for a ride. By following these simple steps, you can ensure that your seat is adjusted correctly, and the bolt or clamp is tightened to prevent accidents and discomfort. Always remember to check your bike regularly to ensure that it’s in good condition and safe to ride.
Frequently Asked Questions
What is the recommended tightness for a bicycle seat?
To properly tighten a bicycle seat, it’s important to use the correct tools. I recommend using a torque wrench to ensure the seat is tightened to the manufacturer’s recommended torque setting, typically between 8-12 Nm.
Can I tighten a bicycle seat without removing it?
Adjusting saddle height without removing the bicycle seat is possible, but not recommended. Using a torque wrench ensures the correct tightness when reattaching the seat, preventing it from slipping or becoming too loose during rides.
What should I do if the bolt or clamp is stripped?
If the bolt or clamp is stripped, replacing stripped bolts with new ones is necessary. Alternatively, try alternative clamping methods, like using a hose clamp or zip ties, to secure the seat.
How often should I check the tightness of my bicycle seat?
Maintaining proper seat height is crucial for a comfortable and efficient ride. I check my seat tightness before every ride using a 5mm Allen key and torque wrench. Neglecting this can result in injury or discomfort.
Are there any common mistakes to avoid when tightening a bicycle seat?
When tightening a bicycle seat, it’s important to use proper tools and not over tighten. Over tightening can damage the seat post and cause it to become stuck. Always follow manufacturer’s recommendations and use a torque wrench if necessary.
Conclusion
Well, that’s it folks! Tightening your bicycle seat is a pretty simple process that can be done in just a few minutes with the right tools and a little bit of know-how.
Remember to identify the type of seat you have and gather the necessary tools before beginning. Once you’ve removed the seat, make sure to tighten the bolt or clamp securely before re-inserting it. And don’t forget to test the seat before hitting the road!
Overall, tightening your bicycle seat is an essential part of ensuring a safe and comfortable ride. Neglecting this task could lead to serious accidents or discomfort during long rides.
So, don’t wait until it’s too late to take action! With a few simple steps, you can ensure that your seat is secure and ready for whatever the road has in store. Trust me, your backside will thank you for it!