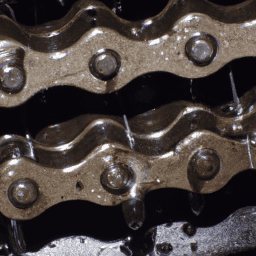

As someone who is passionate about biking, I recognize the critical need to keep your bike in top condition for both a smooth and secure journey. A key element to monitor is the tension of the chain. As time passes, your bike’s chain may become lax, leading to problems like reduced performance, the chain coming off, and potential accidents.
In this article, I will provide detailed instructions on how to tighten the chain on your bicycle to ensure your ride is safe and enjoyable. To get started, you will need a few tools, including a wrench, a chain tension tool, and a ruler.
Before tightening the chain, it’s crucial to determine the proper chain tension for your bike. An overly tight chain can cause unnecessary wear on the components, while a loose chain can lead to accidents. By following these step-by-step instructions, you can ensure that your chain tension is at the optimal level, making your ride smoother and safer.
So, let’s get started!
Key Takeaways
- Regular chain maintenance is crucial to avoid wear and tear on bike components and ensure proper chain tension.
- Loose chain can cause decreased efficiency, chain slippage, and falls, and should be tightened to avoid issues and prolong bike life.
- Chain tension adjustment requires a wrench, chain tension tool, and ruler, and involves loosening the rear wheel, pulling it back to adjust chain tension, and realigning the wheel and testing chain tension after adjusting.
- Additional tips for chain maintenance include checking and applying more oil if necessary, and regularly realigning the rear wheel and lubricating the chain to maintain its longevity and performance.
Gather the Necessary Tools
Before you get started, make sure you’ve got all the tools you need to tighten your bike chain! Bicycle maintenance is crucial to ensure your bike is running smoothly, and DIY repairs can save you money in the long run.
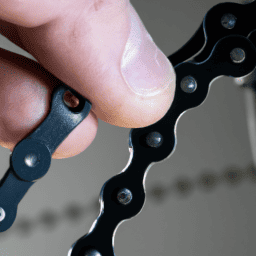
To tighten your bike chain, you’ll need a few simple tools: a wrench, a chain tool, and a ruler or tape measure. The wrench is used to loosen the nuts that hold the rear wheel in place. The chain tool allows you to push out the pins in the chain, making it easier to remove or add links. Finally, the ruler or tape measure is used to measure the distance between the rear axle and the bottom of the chain.
With these tools in hand, you’re ready to get started on tightening your bike chain! Now, let’s move on to determining the proper chain tension.
Determine the Proper Chain Tension
Once you’ve got your ride ready to roll, you’ll want to make sure it’s running smoothly by checking the tension on the ol’ metal snake. This step is crucial as a loose chain can cause a host of problems and even lead to accidents.
Here are some key things to keep in mind when determining the proper chain tension:
-
Importance of maintenance: Regular maintenance of your bike, including chain tightening, can extend the lifespan of your bike and ensure that it runs smoothly.
-
Signs of a loose chain: A loose chain can cause the pedals to slip, the chain to come off, or the gears to shift poorly. So, if you notice any of these signs, it’s time to check the chain tension.
-
Proper tension: The chain should be tight enough that it doesn’t sag or bounce, but not so tight that it puts unnecessary strain on the chain or gears.
-
Chain adjustment: If the tension is too loose or too tight, you’ll need to make some adjustments. This can be done by loosening the rear wheel and moving it forward or backward as needed.
Now that you know how to determine the proper chain tension, it’s time to move on to the next step of loosening the rear wheel. This will allow you to make the necessary adjustments and get your bike running smoothly again.
Loosen the Rear Wheel
Loosening the rear wheel is a crucial step towards achieving optimal performance and extending the lifespan of your ride. To begin, locate the quick-release lever or nuts that hold the rear wheel in place. Make sure you have the appropriate tools on hand, such as a wrench or a hex key, depending on what type of nuts or bolts your bike has.
Once you have the necessary tools, loosen the nuts or release the lever on the non-drive side of the wheel. You only need to loosen it enough to allow for some play in the wheel, so be careful not to loosen it too much. This will allow you to adjust the wheel alignment and the tension of the chain.
Before moving on to the next step, it’s also a good idea to check the chain lubrication and apply more oil if necessary. With the rear wheel loosened, you can now move on to the next step of adjusting the chain tension.
Adjusting the chain tension is a delicate process that requires precision and attention to detail. To do this, you’ll need to pull the rear wheel back until the chain is tight but not too tight. Once you’ve achieved the desired tension, tighten the nuts or close the quick-release lever to secure the wheel in place.
With the wheel realigned and the chain tension adjusted, your bike will be ready for a smooth and efficient ride.
Adjust the Chain Tension
To achieve optimal performance and extend the lifespan of your ride, you need to ensure that the tension of your bike’s chain is adjusted just right. This is a crucial step in bike maintenance that should be done regularly, especially if you frequently ride on tough terrains.
To adjust the chain tension, you need to refer to the manufacturer’s manual for the recommended chain slack measurement. The following table shows the recommended chain slack measurement for different types of bikes. It is important to note that chain wear can affect the chain slack measurement, so it’s best to inspect the chain for any signs of wear before making any adjustments. Additionally, regular chain lubrication can help maintain the chain’s longevity and performance.
| Bike Type | Chain Slack Measurement |
|---|---|
| Road bike | 1/2 inch to 5/8 inch |
| Mountain bike | 3/4 inch to 1 inch |
| BMX bike | 1/4 inch to 3/8 inch |
| Cruiser bike | 1/2 inch to 5/8 inch |
| Hybrid bike | 1/2 inch to 5/8 inch |
Now that you have determined the recommended chain slack measurement for your bike, you can adjust the tension by moving the rear wheel forward or backward as needed. Once you have achieved the recommended chain slack measurement, you can proceed to realign the rear wheel and test the chain tension.
Realign the Rear Wheel and Test the Chain Tension
After adjusting the chain tension, it’s important to check the alignment of the rear wheel and ensure that the bike’s performance is not affected.
When a chain becomes loose, it can cause unnecessary wear and tear on the bike’s components and lead to a decrease in efficiency. Regular chain maintenance is crucial to avoid these issues and keep the bike running smoothly.
To realign the rear wheel, first, loosen the bolts that hold the wheel in place and adjust the position until it is centered between the chainstays. Use a ruler or measuring tape to ensure that the wheel is aligned evenly on both sides.
Once the wheel is in the correct position, tighten the bolts back up and check the tension of the chain again. Signs of a loose chain on a bicycle include a clicking or clunking noise, difficulty shifting gears, or a chain that easily comes off the chainring or cassette.
By regularly checking and adjusting the chain tension, you can avoid these issues and prolong the life of your bike.
Frequently Asked Questions
How often should I tighten my bike chain?
I check my chain for wear indicators every 100-200 miles, and adjust as necessary. Proper chain maintenance frequency varies depending on riding conditions and mileage. Follow manufacturer guidelines and keep your chain clean and lubricated.
Can I use any lubricant on my chain after tightening it?
When applying chain lubricants, ensure proper application by following the manufacturer’s instructions. Use only lubricants specifically designed for bike chains. After tightening the chain, apply the lubricant evenly and wipe off any excess.
What are the signs that I need to replace my bike chain instead of just tightening it?
When my bike chain starts skipping gears or making loud noises, I know it’s time to replace it. I check for chain wear indicators or use a chain stretch measurement tool to determine if it’s stretched beyond repair.
Is it possible to over-tighten a bike chain?
Yes, it is possible to over-tighten a bike chain, which can lead to increased wear on the chain and gears. Proper chain tension balance is important for optimal performance and chain skipping prevention.
Will tightening my bike chain improve my bike’s overall performance?
Tightening the bike chain can improve overall performance by reducing wear and tear on the chain and sprockets, improving power transfer, and reducing the risk of the chain slipping. Loose chains can cause decreased efficiency and damage to the bike.
Conclusion
In conclusion, tightening the chain on a bicycle is a simple and straightforward process that can be done with just a few tools. However, it’s important to take the time to ensure that the proper tension is achieved in order to ensure safe and efficient riding.
Remember to gather all the necessary tools before beginning the process, including a wrench, a chain tensioner, and a ruler. Take the time to determine the proper chain tension and loosen the rear wheel before adjusting the tension.
Realign the rear wheel and test the chain tension before hitting the road. With these steps in mind, you’ll be able to confidently tighten the chain on your bicycle and enjoy a smoother ride.
So grab your tools and get ready to hit the road with a well-maintained bicycle. As the great poet Robert Frost once said, "Two roads diverged in a wood, and I – I took the one less traveled by, and that has made all the difference."Make sure your bicycle is in top shape so you can take that less traveled road with confidence and ease.