So, you want to transform your beach cruiser into an electric bike, huh? Well, you’ve come to the right place!
In this article, I’ll guide you through the step-by-step process of converting your trusty cruiser into a sleek and eco-friendly electric ride.
Don’t worry if you’re not a DIY expert – with a little research, some handy tools, and the right conversion kit, you’ll be cruising with electric power in no time.
Let’s get started!
Key Takeaways
- Slide front wheel into fork dropouts and tighten axle nuts or quick-release skewer securely.
- Attach pedals, ensuring correct threading and tightness with a pedal wrench.
- Reattach seat and adjust to desired height.
- Check brakes, gears, and chain for proper functioning.
Assess Your Beach Cruiser
Before you start converting your beach cruiser into an electric bike, it’s important to assess its current condition and make sure it’s suitable for the conversion.
The first step is to thoroughly inspect your bike to assess its overall condition. Check for any signs of wear and tear, such as rust, bent frames, or damaged components. Ensure that the frame is sturdy and in good shape, as it will need to support the additional weight of the electric components.
Next, determine the compatibility of your bike with an electric conversion kit. Consider factors such as the size and type of wheels, the frame design, and the available space for the battery and motor.
Research and Choose an Electric Conversion Kit
To research and choose an electric conversion kit, start by comparing the available options and reading customer reviews. Electric conversion kits are a popular choice for transforming a regular beach cruiser into an electric bike. These kits come with all the necessary components to convert your bike, including a motor, battery, and controller. By comparing the different kits on the market, you can find one that suits your needs and budget. To help you make an informed decision, here is a table highlighting the pros and cons of three popular electric conversion kits:
| Electric Conversion Kit | Pros | Cons |
|---|---|---|
| Kit A | – High power motor – Long battery life |
– Expensive – Difficult installation |
| Kit B | – Affordable – Easy installation |
– Lower power motor – Limited battery life |
| Kit C | – Compact size – Lightweight |
– Lower power motor – Short battery life |
Gather the Necessary Tools and Materials
Now that you’ve chosen an electric conversion kit, it’s time to gather all the tools and materials you’ll need for the conversion process.
One of the most crucial aspects is choosing the right battery. Ensure that the battery you select has the appropriate voltage and capacity to meet your desired range and power requirements. Additionally, consider factors such as weight, size, and compatibility with the electric motor and controller.
Properly installing the electric motor is another important step. Make sure to follow the manufacturer’s instructions and secure the motor tightly to the bike frame. You may need to modify the frame or use mounting brackets for a secure fit.
With the right tools and materials, you’ll be ready to remove the existing bike components and begin the electric conversion process smoothly.
Remove the Existing Bike Components
First, start by disconnecting the battery from the motor and controller. This is an important step to ensure safety and prevent any accidental electrical discharge.
Assessing compatibility is crucial when removing the existing bike components. Make sure that the electric conversion kit you have is suitable for your beach cruiser’s frame.
Next, you’ll need to upgrade the frame if necessary. This may involve reinforcing certain areas or making modifications to accommodate the new electric components. Additionally, consider the weight and balance of the bike to ensure optimal performance.
Once the battery is disconnected and compatibility assessed, you can proceed to install the electric conversion kit seamlessly.
With the existing components removed and the frame upgraded, you’ll be ready to transform your beach cruiser into an electric bike.
Install the Electric Conversion Kit
Disconnect the battery and ensure that the electric conversion kit is compatible with your current components.
When choosing the right battery for your electric bike conversion, it is important to consider factors such as capacity, voltage, and weight. A lithium-ion battery is commonly used for its high energy density and long lifespan.
Once you have selected the appropriate battery, you can proceed with installing the electric conversion kit. Troubleshooting common conversion kit issues may include ensuring proper wiring connections, checking for any loose or damaged components, and calibrating the motor controller. It is also important to refer to the manufacturer’s instructions and seek professional assistance if needed.
With the electric conversion kit properly installed, you can now move on to the next step of connecting the motor and battery, which will provide the power needed for your electric bike.
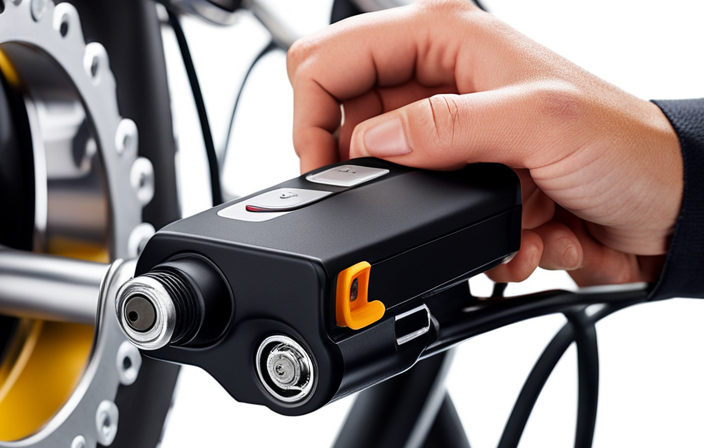
Connect the Motor and Battery
To complete the installation, you’ll need to connect the motor and battery, ensuring a secure and proper connection. Here’s how you can do it:
-
Motor Placement:
-
Carefully mount the motor on the designated spot on the bike’s frame, ensuring it is aligned properly.
-
Use the provided brackets and screws to secure the motor in place.
-
Double-check that the motor is positioned correctly and is not obstructing any other bike components.
-
Battery Capacity:
-
Determine the suitable battery capacity based on your desired range and power requirements.
-
Choose a battery that fits securely on your bike’s frame and has the necessary voltage and amp-hour rating.
-
Connect the battery to the motor using the provided cables, making sure to match the positive and negative terminals correctly.
Once the motor and battery are connected, you can proceed to secure and test the wiring to ensure everything is functioning correctly.
Secure and Test the Wiring
Make sure you securely fasten the wiring connections and then proceed to test them to ensure everything is functioning properly.
When working with electrical components, it is important to take safety precautions to prevent any accidents or damage. First, double-check that all wires are properly insulated and protected from any potential sources of damage, such as sharp edges or moving parts. Additionally, make sure to use the correct gauge of wire for your specific setup to prevent overheating and possible fire hazards.
Once the connections are secure, it is time to test the wiring. Start by turning on the power and checking if all the electrical components are working as expected. If you encounter any issues, refer to the troubleshooting tips in the manual or seek professional assistance.
With the wiring properly secured and tested, it’s time to reassemble your beach cruiser, ensuring all components are securely fastened and aligned.
Reassemble Your Beach Cruiser
Once you’ve finished securing and testing the wiring, it’s time to reassemble your beach cruiser.
Start by reattaching the handlebars to the stem, ensuring they are straight and aligned with the front wheel. Use a torque wrench to tighten the bolts to the manufacturer’s specifications.
Next, install the front wheel by sliding it into the fork dropouts and tightening the axle nuts or quick-release skewer securely.
Attach the pedals, making sure they are threaded correctly and tightened with a pedal wrench.
Then, reattach the seat and adjust it to your desired height.
Finally, check all other components such as the brakes, gears, and chain to ensure they are functioning properly.
Now, it’s time to take a test ride and make any necessary adjustments.
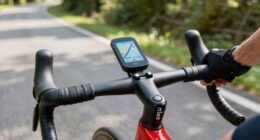
Take a Test Ride and Make Adjustments
Now that your beach cruiser has been reassembled, it’s time to take it for a test ride and make any necessary adjustments.
Test ride benefits are twofold: not only will you get a feel for your newly converted electric bike, but you’ll also be able to identify any potential issues or areas that require tweaking.
Begin by ensuring that the brakes are functioning properly. Test the acceleration and deceleration capabilities, making note of any inconsistencies or unusual sounds.
Check the alignment of the wheels and handlebars, as well as the overall stability and balance of the bike. If any adjustments are needed, refer to the troubleshooting tips provided in the user manual.
Enjoy Your New Electric Beach Cruiser!
Get ready to have a blast on your brand new e-beach cruiser! As I mentioned earlier, electric bikes offer numerous benefits that make them a great choice for beach cruising. Not only do they provide a smooth and effortless ride, but they also allow you to explore longer distances without getting tired. Plus, you’ll be doing your part for the environment by reducing your carbon footprint. To ensure that your electric beach cruiser stays in top condition, here are some maintenance tips to keep in mind:
-
Regularly check the tire pressure and inflate them as needed to ensure optimal performance.
-
Keep the chain clean and lubricated to prevent rust and maintain smooth operation.
-
Inspect the battery regularly and charge it according to the manufacturer’s instructions.
-
Store your e-beach cruiser in a cool and dry place to protect it from extreme weather conditions.
By following these tips, you can prolong the lifespan of your electric beach cruiser and enjoy many more exciting rides along the coast. So, hop on and let the electric power take you on memorable beach adventures!
| Maintenance Tips |
|---|
| Check tire pressure regularly |
| Clean and lubricate chain |
| Inspect and charge the battery |
| Store in a cool and dry place |
Frequently Asked Questions
How much does it cost to convert a beach cruiser into an electric bike?
Converting a beach cruiser to an electric bike can cost around $500-$1000. The benefits of this conversion include increased speed, effortless pedaling, and reduced environmental impact. It’s a cost-effective way to enjoy the perks of an electric bike.
Can I still pedal my beach cruiser after it’s been converted into an electric bike?
Yes, you can still pedal your beach cruiser after it’s been converted into an electric bike. This allows you to have the benefits of both electric and manual power, providing flexibility and exercise. Regular maintenance and battery care are essential for optimal performance.
How long does it take to install an electric conversion kit on a beach cruiser?
Installing an electric conversion kit on a beach cruiser: Is it worth the time and effort? The installation process typically takes around 2-3 hours and requires basic mechanical skills. However, the convenience and benefits of an electric bike make it a worthwhile endeavor.
Are there any special skills or tools required to complete the conversion process?
Special skills and tools are not required to complete the conversion process. However, basic knowledge of bicycle maintenance and some common tools like wrenches and screwdrivers will be helpful in the installation of the electric conversion kit.
Can I choose the speed and power settings of my electric beach cruiser?
Yes, you can customize the speed and adjust the power settings of your electric beach cruiser. With the right controller and programming, you can tailor the performance to suit your preferences and riding conditions.
Conclusion
After successfully converting my beach cruiser into an electric bike, I can confidently say that the effort was well worth it.
The process was challenging at times, but with the right tools and a bit of patience, I was able to transform my beloved bike into a powerful and efficient mode of transportation.
Riding my new electric beach cruiser is like harnessing the wind itself, as I effortlessly glide along the streets with a sense of freedom and exhilaration.
It’s truly a game-changer that has added a new level of excitement to my daily commutes.