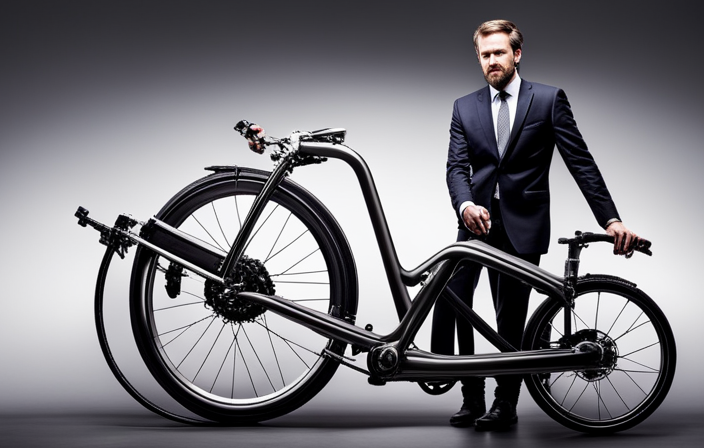

I recall my initial experience riding an electric bike – it felt like a burst of energy flowing through me, effortlessly pushing me forward. If you’ve ever fantasized about feeling that exhilaration, then you’re in for a treat.
In this article, I will show you step by step how to transform your ordinary pedal bike into an electrifying machine. So buckle up, grab your tools, and get ready to embark on this exciting journey of bike electrification.
Let’s dive in!
Key Takeaways
- Consider weight distribution and secure attachment when mounting the battery
- Choose appropriate locations for mounting the throttle and pedal assist sensor
- Ensure proper installation of pedals, crankset, and bottom bracket
- Regularly maintain and service the electric bike for optimal performance and safety

2026 Upgrade 9800Lumen Bike Light for Night Riding,Super Bright 6 LED Headlight,Aluminum 10 Mode Rechargeable Bicycle Light Front and Rear,360°Rotatable Brackt,Waterproof,Runtime 72 hr,Road Shockproof
【700DAYS Support] 】:If your bike light have any problem, please to pass us on through Amazon for the...
As an affiliate, we earn on qualifying purchases.
Assess Your Bike’s Compatibility for Conversion
Before you begin, make sure your bike’s frame and components are suitable for conversion.
Assessing your bike’s compatibility is an essential step in the conversion process. First, consider the frame material; steel and aluminum are ideal choices due to their strength and durability.
Next, examine the bike’s fork to ensure it can accommodate the weight and torque of an electric motor. Check the dropouts, as they need to be compatible with the motor axle size. Additionally, evaluate the bottom bracket for compatibility with the motor’s mounting system.
Lastly, assess the bike’s brakes and gearing system, as they may need to be upgraded to handle the increased speed and power of the electric motor.
Once you have determined your bike’s compatibility, you can move on to gathering the necessary tools and equipment for the conversion process.

Wahoo KICKR V6 Smart Indoor Trainer
WiFi Connectivity - Offering a robust 2.4 GHz Wi-Fi connection, the new KICKR transfers ride data to your...
As an affiliate, we earn on qualifying purchases.
Gather the Necessary Tools and Equipment
You’ll need to gather all the tools and equipment necessary for the conversion. Choosing the right tools is crucial for a successful electric bike conversion.
First, you’ll need a set of wrenches and screwdrivers to remove the bike’s components. Additionally, a torque wrench will ensure proper tightening of bolts and nuts. A multimeter is essential for testing and troubleshooting electrical connections.
Safety goggles and gloves are a must to protect yourself during the process. When working with electricity, it’s vital to take proper safety precautions. Make sure to disconnect the battery before touching any wires and wear insulated gloves when handling electrical components. By following these safety measures, you can avoid accidents and injuries.
Now that you have gathered your tools and know the importance of safety, let’s move on to the next step and choose the right electric bike conversion kit.

Garmin Tacx Neo 2T Smart Trainer
Material: metal, plastic
As an affiliate, we earn on qualifying purchases.
Choose the Right Electric Bike Conversion Kit
To select the appropriate electric bike conversion kit, make sure to consider factors like your bike’s specifications, desired range, and power requirements. Here are three key factors to keep in mind when choosing an electric bike conversion kit:
-
Compatibility: Ensure that the kit is compatible with your bike’s frame and wheel size. Electric bike conversion kits come in various sizes and configurations, so make sure to choose one that fits your bike seamlessly.
-
Power and Range: Determine the power and range you need for your electric bike. Consider factors like terrain, distance, and intended use to determine the motor power and battery capacity that will best suit your needs.
-
Quality and Features: Look for a conversion kit that offers high-quality components and reliable features. Consider factors like motor efficiency, battery life, and ease of installation.
By carefully considering these factors, you can choose the right electric bike conversion kit that will enhance your biking experience and provide the benefits of electric bikes.
Now, let’s move on to the next section and learn how to remove the pedals, crankset, and bottom bracket.

Wahoo Fitness KICKR CORE 2 ZWIFT COG and Click - Orange Cog 3rd Generation
KICKR CORE Zwift is the smarter way to start riding indoors. The new KICKR CORE builds on the...
As an affiliate, we earn on qualifying purchases.
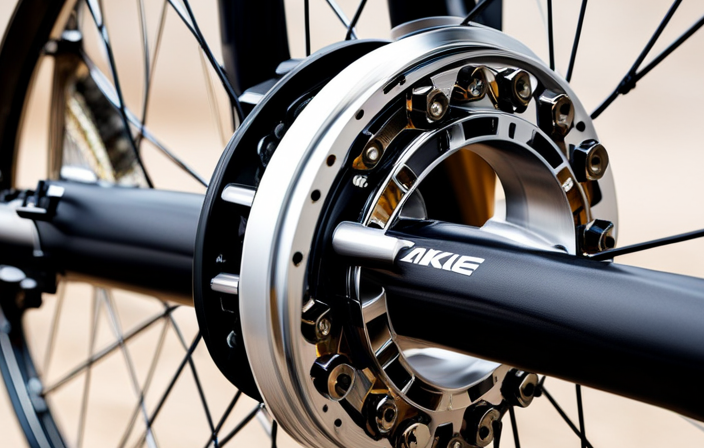
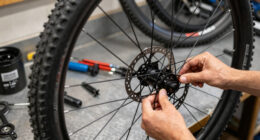
Remove the Pedals, Crankset, and Bottom Bracket
Once you’ve gathered the necessary tools, start by loosening the bolts on the pedals using a wrench. This is an essential step in the process of turning your pedal bike into an electric bike. Removing the pedals, crankset, and bottom bracket will allow you to install the electric bike conversion kit properly. Here is a helpful table to guide you through the process:
| Tools Needed |
|---|
| Wrench |
| Allen key |
| Screwdriver |
| Steps |
|---|
| Loosen pedal bolts using a wrench |
| Remove pedals |
| Use an Allen key to remove the crankset |
| Remove the bottom bracket using a wrench or screwdriver |
Bike modification is a fantastic way to transform your regular bike into an alternative mode of transportation. After completing the removal of the pedals, crankset, and bottom bracket, the next step is to install the electric bike conversion kit’s motor.
Install the Electric Bike Conversion Kit’s Motor
Now that everything is removed, it’s time to install the motor from the electric bike conversion kit. Follow these motor installation tips to ensure a smooth process and avoid common issues:
-
Position the motor: Determine the ideal location for the motor on your bike frame. Choose a spot that provides proper clearance and doesn’t interfere with other components.
-
Secure the motor: Use the provided mounting brackets and hardware to securely attach the motor to the frame. Double-check that it is tightly fastened to prevent any movement during operation.
-
Connect the motor cables: Follow the manufacturer’s instructions to connect the motor cables to the battery and controller. Ensure proper alignment and tight connections to avoid any electrical issues.
-
Test the motor: Before riding, perform a thorough test of the motor. Check for any abnormal noises, vibrations, or overheating. Troubleshoot any issues promptly to ensure a safe and reliable electric bike conversion.
With the motor successfully installed, it’s time to connect it to the battery and controller for the next step in the conversion process.
Connect the Motor to the Battery and Controller
Make sure you carefully follow the manufacturer’s instructions to properly connect the motor to the battery and controller for a successful electric bike conversion.
First, locate the connectors on the motor, battery, and controller. Identify the positive and negative terminals on each component.
Connect the motor wires to the controller, ensuring a secure and tight connection.
Then, connect the battery to the controller, matching the positive and negative terminals. Double-check all connections to ensure they are properly secured.
Once connected, test the system by turning on the bike. Troubleshooting common issues with electric bike conversions may include checking for loose connections, ensuring the battery is fully charged, and inspecting the wiring for any potential damage.
With the motor, battery, and controller properly connected, you are now ready to mount the battery on the bike frame, integrating it seamlessly into your electric bike setup.
Mount the Battery on the Bike Frame
To securely mount the battery on your bike frame, ensure that you have chosen a suitable location that provides stability and easy access for charging. The mounting position should be sturdy and secure, as the battery is an essential component of your electric bike conversion.
It is important to consider the battery capacity when selecting the mounting position. A higher capacity battery may be larger and heavier, requiring a more robust mounting location. Additionally, take into account the weight distribution of the bike to maintain proper balance and stability.
Once the battery is securely mounted, you can proceed to install the throttle and/or pedal assist sensor, which will allow you to control the electric assistance provided by the motor.
Install the Throttle and/or Pedal Assist Sensor
You’ll need to first determine the appropriate location for mounting the throttle and/or pedal assist sensor on your bike frame. This step is crucial to ensure proper functionality and ease of use.
Here are four key considerations for installing the throttle and troubleshooting the pedal assist sensor:
-
Choose a convenient location on the handlebars for the throttle, ensuring it is within easy reach while maintaining a comfortable grip on the handlebars.
-
Mount the throttle securely, using the provided clamp or adhesive, making sure it is firmly attached to prevent any movement during rides.
-
For the pedal assist sensor, locate the sensor bracket on the bottom bracket shell of the bike frame and attach the sensor securely.
-
Test the functionality of both the throttle and pedal assist sensor before proceeding to the next step.
With the throttle and pedal assist sensor successfully installed, we can now move on to reinstalling the pedals, crankset, and bottom bracket.
Reinstall the Pedals, Crankset, and Bottom Bracket
Now that the throttle and pedal assist sensor are securely installed, we can focus on reinstalling the pedals, crankset, and bottom bracket. This step is of utmost importance as it ensures that the power from the motor is efficiently transferred to the bike’s drivetrain.
Follow these steps to successfully reinstall the pedals, crankset, and bottom bracket:
-
Begin by removing any dirt or debris from the bottom bracket shell using a brush or rag.
-
Apply a small amount of grease to the threads of the bottom bracket and insert it into the shell.
-
Tighten the bottom bracket using a bottom bracket tool, ensuring it is secure and aligned properly.
-
Attach the crankset to the bottom bracket, making sure it is aligned and tightened to the manufacturer’s specifications.
-
Finally, reinstall the pedals, ensuring they are threaded correctly and tightened securely.
By completing these steps, you will have successfully reinstalled the pedals, crankset, and bottom bracket, allowing for a smooth and efficient electric bike conversion.
Now let’s move on to testing the electric bike conversion for functionality.
Test the Electric Bike Conversion for Functionality
Once you’ve completed the installation process, it’s important to ensure the electric bike conversion is functioning properly. Testing the electric bike conversion is crucial to ensure a safe and reliable ride.
There are several testing methods you can employ to check the functionality. First, check the battery level and ensure it is fully charged. Next, test the throttle and make sure it responds smoothly. You should also test the pedal assist system to ensure it engages and disengages properly.
If any issues arise during testing, there are troubleshooting tips you can follow to identify and fix the problem. By thoroughly testing the electric bike conversion, you can address any issues before hitting the road.
Transitioning into the next section, let’s now discuss how to adjust and fine-tune the electric bike’s performance.
Adjust and Fine-Tune the Electric Bike’s Performance
To optimize your ride, it’s important to make adjustments and fine-tune the performance of your newly converted electric bicycle. Here are some key areas to focus on:
-
Tire Pressure: Check and adjust the tire pressure regularly to ensure optimal grip and efficiency.
-
Gearing: Experiment with different gear ratios to find the right balance between power and speed.
-
Brake Adjustment: Ensure that your brakes are properly aligned and adjusted for maximum stopping power.
-
Battery Placement: Position the battery in a way that balances the weight distribution of the bike, improving stability and handling.
By fine-tuning these aspects of your electric bike, you can greatly improve efficiency and increase speed.
Once you’ve optimized the performance of your bike, it’s time to learn how to ride and control it effectively, ensuring a safe and enjoyable experience.
Learn How to Ride and Control Your Electric Bike
Take some time to familiarize yourself with the controls and handling of your new electric ride. Electric bike safety is of utmost importance, so it is crucial to understand how to properly operate your electric bike.
Start by adjusting the seat height to ensure a comfortable and stable riding position. Familiarize yourself with the throttle, which controls the speed of the electric motor. Get to know the pedal-assist system and how to switch between different levels of assistance. Practice braking, both with the handbrakes and the regenerative braking system.
Learn how to navigate corners smoothly and maintain balance. Understanding the intricacies of your electric bike will not only enhance your riding experience but also contribute to your overall safety.
Now that you have mastered the controls and handling, let’s explore how to maintain and service your electric bike regularly.
Maintain and Service Your Electric Bike Regularly
Make sure you regularly check the tire pressure, clean the chain, and lubricate the moving parts to keep your electric bike running smoothly. Regular maintenance is crucial for the longevity and performance of your electric bike.
By following a few simple steps, you can avoid common issues and ensure that your bike is always in top condition. Troubleshooting may be required from time to time, such as diagnosing electrical problems or replacing worn-out components.
Upgrading and customizing your electric bike is also an exciting option to enhance its capabilities, whether it’s installing a more powerful motor or adding additional batteries for extended range. However, before you embark on any modifications, it’s important to adhere to safety precautions and local laws, ensuring that your electric bike remains safe and legal to ride.
Adhere to Safety Precautions and Local Laws
Always remember to adhere to safety precautions and local laws when riding your electric bike, ensuring your own safety and the safety of others.
When it comes to safety measures, it is crucial to wear a helmet, as it provides protection for your head in case of an accident. Additionally, make sure to follow the speed limits and traffic rules specific to your area.
Familiarize yourself with the legal requirements for electric bikes, such as registration, licensing, and age restrictions. Check your local laws to determine if you need to have lights, reflectors, or a horn installed on your electric bike.
Enjoy the Benefits of Your Upgraded Electric Bike
To fully enjoy the benefits of your upgraded e-bike, you should explore new routes and experience the thrill of effortless speed. One way to enhance your riding experience is to improve battery life. By properly maintaining and charging your e-bike’s battery, you can ensure that it lasts longer and provides consistent power throughout your rides.
Regularly check the battery’s charge level and avoid letting it fully drain, as this can shorten its lifespan. Additionally, finding the best riding routes can make a significant difference in your enjoyment of the upgraded e-bike. Look for paths that offer scenic views, minimal traffic, and smooth surfaces to maximize your riding pleasure.
Utilize online resources and community forums to discover popular routes and gain insights from experienced riders. Happy riding!
Frequently Asked Questions
How can I assess my bike’s compatibility for conversion?
To assess your bike’s compatibility for conversion, start by examining the frame and fork for any damage or wear. Check if there is enough space to fit the necessary components, such as the motor and battery. Consider the weight capacity and compatibility of the brakes and gears.
What are the necessary tools and equipment required for the conversion process?
To modify a bike into a DIY electric bike, you will need a conversion kit, including a motor, battery, controller, and wiring. Other necessary tools include wrenches, pliers, screwdrivers, and a bike stand for easier installation.
How do I choose the right electric bike conversion kit for my bike?
To choose the right electric bike conversion kit, consider the three main types: front wheel, rear wheel, and mid-drive. Factors to consider include motor power, battery capacity, compatibility with your bike, and your budget.
Are there any specific safety precautions or local laws I should adhere to while converting my bike?
When converting a pedal bike into an electric bike, it is important to consider electric bike conversion safety and legal requirements. Adhering to local laws and wearing proper safety gear can ensure a safe and legal conversion process.
How can I maintain and service my electric bike regularly to ensure its longevity and optimal performance?
To prolong the lifespan and ensure optimal performance of your electric bike, regular maintenance is crucial. This includes checking and lubricating the chain, inspecting the battery and electrical connections, and keeping the tires properly inflated.
Conclusion
In conclusion, converting a pedal bike into an electric bike is a rewarding and exciting endeavor. With the right tools and equipment, along with a compatible bike and a quality conversion kit, you can transform your ordinary bike into a powerful and efficient electric machine.
Just like a caterpillar morphing into a butterfly, your bike will experience a metamorphosis that allows it to soar to new heights. So take the plunge, follow the steps, and soon you’ll be enjoying the benefits of your upgraded electric bike.
Happy riding!