Are you tired of riding in the dark on your electric bike? Are you wondering how to light up your path and stay safe? Look no further!
In this comprehensive guide, we’ll walk you through the step-by-step process of turning on the light on your electric bike. From familiarizing yourself with the bike’s controls to troubleshooting common light issues, we’ve got you covered.
So, grab your bike and let’s shed some light on the road ahead!
Key Takeaways
- Locate the light switch on the handlebar or control panel
- Check the battery level regularly and keep it between 20% and 80%
- Press the power button to turn on the bike’s power
- Activate the display panel to adjust light settings and personalize preferences
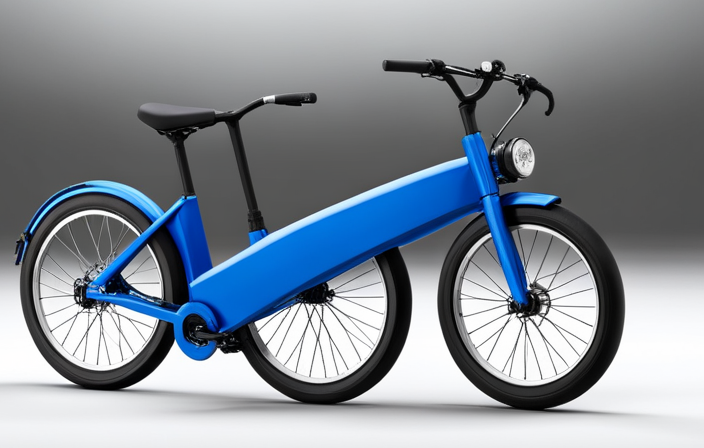
Familiarizing Yourself with the Bike’s Controls
You’ll need to familiarize yourself with the bike’s controls before you can turn the light on. Understanding the bike controls is crucial for a seamless riding experience.
Start by locating the handlebar, where you’ll find various features and buttons. Look for the control panel, which is usually positioned near the center of the handlebar. This panel allows you to access different functions, including the light switch.
Take a moment to study the layout and labels on the control panel. Each bike may have different symbols or icons, so it’s essential to understand what each one represents.
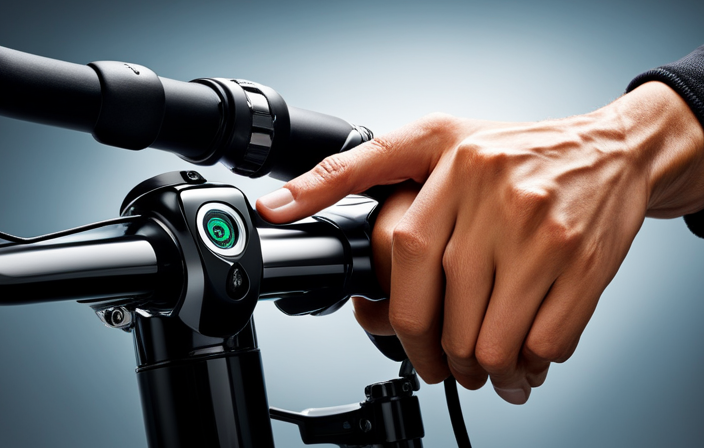
Once you’ve grasped the basic functions, locate the light switch. It is commonly marked with a light bulb symbol. By pressing or flipping this switch, you can easily turn the light on and illuminate your path.
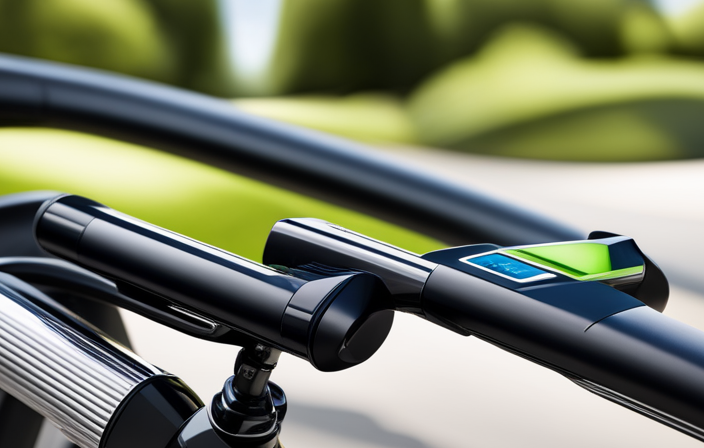
Locating the Light Switch
To find the switch, look for a small button or lever near the handlebars. The light switch location on electric bikes can vary depending on the model, but it is typically located within easy reach of the rider’s thumb or fingers. Some bikes have a dedicated switch for the lights, while others may have a multifunctional button that controls various features, including the lights. Make sure to familiarize yourself with your specific bike’s controls to locate the light switch easily.
Using bike lights at night is crucial for your safety and visibility. It not only helps you see the road ahead but also makes you more visible to other road users. Once you have found the light switch, you can turn on the lights and ride confidently in low-light conditions.
Now, let’s move on to checking the battery level.
Checking the Battery Level
When checking the battery level, it’s important to know how much power is left in order to plan your ride accordingly. To check the battery level on your electric bike, locate the battery indicator on the display panel. This indicator will show you the current charge level of your battery.
It’s recommended to regularly check the battery level to ensure you have enough power for your desired distance. Proper battery maintenance is crucial for prolonging battery life. To maximize the lifespan of your battery, avoid completely draining it and try to keep it between 20% and 80% charged. This will help prevent excessive wear and tear on the battery cells.
Now that you know how to check the battery level, let’s move on to turning on the bike’s power and getting ready for your ride.
Turning on the Bike’s Power
To start your ride, simply press the power button on the control panel. This button is usually located near the handlebars, within easy reach. Once you press the power button, the bike’s power system will activate, and you’ll be ready to go.
Here are four key things to keep in mind when turning on your electric bike:
-
Check the battery level: Before starting your ride, it’s important to ensure that the battery has enough charge. You can do this by glancing at the battery indicator on the control panel.
-
Safety precautions: Always make sure that you are in a safe and stable position before turning on the bike’s power. This will help you maintain balance and prevent any accidents.
-
Listen for the startup sound: When you press the power button, listen for a startup sound or a beep. This indicates that the bike’s power system has successfully turned on.
-
Confirm the bike’s readiness: Take a quick look at the control panel to ensure that all the necessary indicators, such as speed, assist level, and battery level, are active and functioning properly.
Once you have turned on the bike’s power, you can proceed to activate the display panel, which will provide you with additional information about your ride.
Activating the Display Panel
To activate the display panel, simply press the corresponding button on the control panel.
The display panel is an essential part of your electric bike as it provides important information about your ride and allows you to access various settings.
Once activated, you will be able to see your speed, battery level, and distance traveled.
Additionally, the display panel also allows you to activate the headlight on your electric bike. This is crucial for ensuring visibility and safety, especially when riding in low light conditions or at night.
To activate the headlight, navigate to the display panel settings and select the option to turn on the headlight. By doing so, you can have a clear view of the road ahead.
Next, we will delve into accessing the settings menu, where you can personalize your bike’s features and preferences.
Accessing the Settings Menu
Accessing the settings menu allows you to customize the features and preferences of your bike.
To access the settings menu, locate the display panel on your electric bike. This panel is usually located on the handlebars or near the center of the bike. Once you have located the display panel, press the power button to turn it on.
Use the buttons on the display panel to navigate through the menu options until you find the settings menu.
Once you have accessed the settings menu, look for the option to customize light settings. This option will allow you to adjust the brightness, mode, and other settings related to the lights on your electric bike.
By customizing the light settings, you can ensure optimal visibility and safety while riding.
To navigate to the lights option, simply scroll through the settings menu until you find the appropriate category.
Navigating to the Lights Option
Once you have located the display panel, simply scroll through the settings menu until you find the category for adjusting the lights on your e-bike.
To navigate to the lights option, follow these steps:
- Press the power button on the display panel to turn on the e-bike.
- Use the arrow buttons to scroll through the menu options until you see the settings icon.
- Press the settings icon to enter the settings menu.
- Within the settings menu, continue scrolling until you find the lights option.
Once you have successfully navigated to the lights option, you can proceed to adjust the light settings according to your preference.
This will allow you to select the light mode that best suits your needs.
Selecting the Light Mode
When you have reached the lights option, you can easily choose the light mode that suits your preferences. Ensure proper light alignment by adjusting the light intensity using the controls provided. Here is a table to help you understand the different light modes available:
| Light Mode | Description |
|---|---|
| Low | Provides a dim light for conserving battery |
| Medium | Offers a moderate amount of brightness for regular use |
| High | Gives a bright light for enhanced visibility |
By selecting the appropriate light mode, you can ensure that you have the desired level of brightness while riding your electric bike. Once you have adjusted the light intensity, you can proceed to the next step of adjusting the brightness level.
Adjusting the Brightness Level
To adjust the brightness level, simply use the provided controls to increase or decrease the intensity of the light. On most electric bikes, you can find these controls near the handlebars or on the display panel. By adjusting the brightness level, you can customize the lighting to suit your preference and riding conditions.
If you’re riding in a well-lit area, you may want to lower the brightness level to conserve battery power. On the other hand, if you’re riding in low light conditions or at night, increasing the brightness level will enhance visibility and safety.
Additionally, some electric bikes allow you to adjust the angle of the light, allowing you to direct the beam where you need it most.
Once you have adjusted the brightness level and angle, you can move on to choosing between steady or flashing light modes, which we will cover next.
Choosing Between Steady or Flashing Light
Now that you have adjusted the brightness level of your electric bike’s light, it’s time to choose between a steady light or a blinking light.
The steady light emits a continuous beam of light, providing a consistent source of illumination. This is particularly helpful when riding in low-light conditions or on dark roads, as it allows other road users to easily see you. The steady light also helps improve visibility and reduces the risk of accidents.
On the other hand, the blinking light flashes intermittently, which can attract attention and make you more noticeable to others on the road. However, it may not provide as much visibility as the steady light.
Now that you understand the benefits of using a steady light, let’s move on to testing the functionality of the light.
Testing the Light Functionality
Before proceeding, it’s important to ensure that the light on your electric bike is functioning properly. To test the light functionality, follow these steps:
- Turn on the bike’s power and locate the light switch or button.
- Press or toggle the switch to activate the light.
- Check if the light turns on and stays steady or flashes, depending on your preference.
- If the light doesn’t turn on, check the battery connection and make sure it’s securely attached.
- Ensure that the light bulb is not burnt out by visually inspecting it or replacing it with a new one.
- If the light still doesn’t work, consider upgrading your bike’s lighting system to a more reliable and brighter option.
Troubleshooting common light issues will be discussed in the next section, where we will address potential problems and provide solutions.
Troubleshooting Common Light Issues
If your bike’s light is not functioning properly, troubleshooting common light issues can help you identify and solve the problem. Here are some steps to troubleshoot the connections and replace light bulbs:
-
First, check the connections between the light and the battery or power source. Ensure that all the cables are securely connected and free from any damage or corrosion.
-
If the connections are fine, then the issue might be with the light bulb itself. To replace the light bulb, refer to the manufacturer’s instructions or user manual. Usually, you would need to remove the casing or cover of the light and carefully unscrew the old bulb. Replace it with a new bulb of the same type and wattage.
-
After replacing the light bulb, test the functionality by turning on the light. If it still doesn’t work, consider seeking professional help or contacting the manufacturer for further assistance.
To ensure the longevity and proper functioning of the light, it is crucial to maintain and clean it regularly.
Maintaining and Cleaning the Light
To keep your bike light in optimal condition, make sure to regularly clean and maintain it. Cleaning techniques for your electric bike light will depend on the specific model, but most can be wiped clean with a soft cloth and mild soap and water. Avoid using harsh chemicals or abrasive materials that could damage the light. Additionally, check the light for any loose or damaged parts and tighten or replace them as needed. It’s important to keep the light free from dirt, dust, and moisture to ensure it functions properly. Regularly inspect the wiring and connections to make sure they are secure and undamaged. By following these maintenance tips, you can ensure your bike light stays in top shape for years to come. Now, let’s move on to using additional light accessories to enhance your biking experience.
Using Additional Light Accessories
Using extra light accessories can enhance your biking experience by increasing visibility and safety. When it comes to bike light installation, choosing the right light accessories is crucial. Here are three essential accessories to consider:
-
Headlights: Invest in a powerful headlight that emits a bright beam to illuminate the path ahead. Look for headlights with multiple brightness settings and a long battery life.
-
Taillights: A taillight is essential for visibility from behind. Opt for a taillight with a flashing mode to grab the attention of drivers and ensure they can see you, especially in low-light conditions.
-
Reflective gear: In addition to lights, wearing reflective gear such as vests, arm bands, and ankle straps can greatly increase your visibility. These accessories reflect light from car headlights, making you more noticeable on the road.
By incorporating these additional light accessories into your biking routine, you can stay safe and visible on the road, ensuring a worry-free ride.
Staying Safe and Visible on the Road
Make sure you wear bright and reflective clothing to stay safe and visible on the road.
Nighttime visibility is crucial when riding your electric bike, as it can be difficult for drivers to see you in the dark. Reflective clothing helps to increase your visibility by reflecting light from car headlights, making you more noticeable.
It is important to choose clothing that has reflective strips or patches on the front, back, and sides. This will ensure that you are visible from all angles. Additionally, consider wearing a reflective vest or jacket for added visibility.
Remember, the more visible you are, the safer you will be on the road. So, make it a priority to wear bright and reflective clothing every time you ride your electric bike at night.
Frequently Asked Questions
How do I change the light bulb on my electric bike?
To change the light bulb on your electric bike, start by locating the light assembly. Depending on the model, you may need to remove a cover or unscrew the assembly.
Once exposed, carefully remove the old bulb and replace it with a new one of the same type and wattage.
If you’re still experiencing light issues after changing the bulb, consider troubleshooting the wiring connections or checking the battery power.
Can I use a different type of light on my electric bike?
Switching up the light on your electric bike? No worries, there are a plethora of alternative light options available in the market.
To make the best choice, consider reputable brands known for their stellar performance, like [insert best light brands here]. These brands offer a range of lights designed specifically for electric bikes, ensuring optimal brightness, energy efficiency, and durability.
So go ahead, illuminate your ride with a new light that suits your style and needs!
How often should I clean and maintain the light on my electric bike?
To clean and maintain the light on your electric bike, start by disconnecting the light from the power source.
Use a soft cloth or sponge to gently wipe away any dirt or debris on the surface of the light.
For stubborn stains, you can use a mild soap and water solution.
After cleaning, make sure the light is completely dry before reconnecting it to the power source.
Regularly check for any loose connections or damage to ensure proper functioning.
Are there any regulations or laws regarding the use of lights on electric bikes?
To ensure your safety and comply with regulations, it’s crucial to understand the rules regarding lights on electric bikes.
The brightness of the light must meet specific regulations, typically ranging from 300 to 1000 lumens.
Additionally, the required light colors vary depending on your location. For example, in some areas, a white light is required at the front, and a red light at the rear.
Familiarize yourself with the regulations in your region to ensure your electric bike’s lights meet the necessary requirements.
Can I adjust the angle or direction of the light on my electric bike?
To adjust the angle or direction of the light on your electric bike, look for a small screw or lever near the light housing. Loosen the screw or move the lever to change the position of the light.
Adjusting the light angle has several benefits, including increased visibility and improved safety during nighttime rides. A brighter light can help you see the road ahead more clearly, making your rides safer and more enjoyable.
Conclusion
As you embark on your electric bike journey, remember that the light represents more than just illumination. It symbolizes safety, visibility, and a connection to the world around you.
By understanding the bike’s controls, locating the light switch, and ensuring the battery is charged, you can activate this powerful symbol.
Maintain and clean the light, and consider using additional accessories to enhance your visibility.
As you ride, let the light guide you, and may it serve as a beacon of safety on your path.