So you want to turn your regular bike into an electric bike without spending a fortune on a kit? Well, you’re in luck because I’ve got the step-by-step guide for you.
Imagine cruising up hills effortlessly and zipping through traffic with ease. With just a few tools and some know-how, you can transform your bike into an eco-friendly mode of transportation.
Get ready to revolutionize your ride and embrace the world of electric biking!
Key Takeaways
- Assess the bike’s compatibility and gather the necessary tools and materials.
- Remove the rear wheel, install the motor, and connect it to the battery.
- Install the controller and throttle following the manufacturer’s instructions.
- Mount the battery on the bike frame, wire and connect all the components properly.

RKJ Electric Bike for Adults, 2200W, 30/32MPH, 75 Miles, 48V 15.6AH Removable Battery, 7-Speed, 3 Modes, Full Suspension, Dual Disc Brakes, 20" All-Terrain Fat Tires, UL 2849 Certified Ebike
🔥 2200W PERFORMANCE: Powerful 750W motor (2200W Peak) delivers massive torque for 30° hills. Default 20MPH for city...
As an affiliate, we earn on qualifying purchases.
Assess Your Bike’s Compatibility
First, assess if your bike’s frame and components are compatible with an electric conversion. Check the frame for any signs of damage or weaknesses. It needs to be sturdy enough to support the added weight of the electric components.
Next, consider the drivetrain components such as the chain, cassette, and derailleurs. Make sure they are in good condition and functioning properly to handle the increased torque from the electric motor. Ensure they are clean, well-lubricated, and properly adjusted.
Another important aspect to consider is the battery capacity. Measure the available space on your bike to determine the appropriate size and type of battery to use. Take into account the range you desire and the weight you are willing to carry.
Once you have checked the compatibility of your bike’s components and measured the battery capacity, you can gather the necessary tools and materials. This will include an electric motor, controller, battery, wiring, and mounting brackets. With these in hand, you can proceed to the next step of the conversion process.
To gather the necessary tools and materials for the electric conversion, follow these important steps.
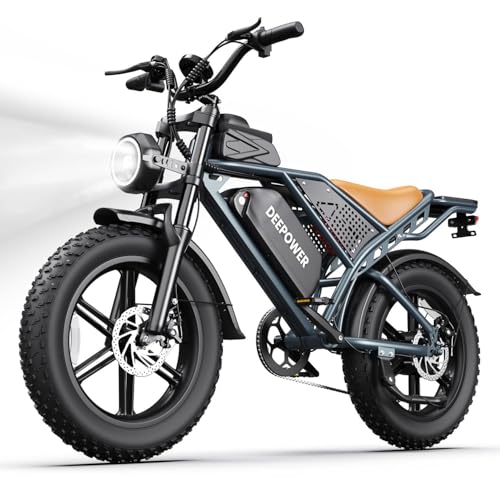
DEEPOWER QS7 Electric Bike for Adults, 2000W Peak Power 28MPH E-Bike, 48V 20Ah/35Ah/60Ah Battery Options, 35–180 Mile Range, 20” Fat Tire Ebike, 7-Speed All-Terrain Electric Bicycle
【High-Torque Electrified Thrills】 The Deepower electric motorcycle for adults delivers unmatched power with its Peak 2000W motor, reaching...
As an affiliate, we earn on qualifying purchases.
Gather the Necessary Tools and Materials
To gather the necessary tools and materials, you’ll need a flathead screwdriver and a pair of wire cutters. These tools will be essential for the process of converting your bike into an electric bike.
Here are the four items you will need:
-
Electric motor: This is the heart of your electric bike conversion. It will provide the power needed to propel your bike forward.
-
Battery: A high-quality battery is crucial for a long-lasting and efficient electric bike. It will store the energy needed to power the motor.
-
Controller: The controller acts as the brain of your electric bike, regulating the power flow from the battery to the motor. It ensures smooth and controlled acceleration.
-
Wiring harness: This is a set of wires and connectors that will enable you to connect the motor, battery, and controller together. It is important to choose a wiring harness that is compatible with your specific bike model.
Once you have gathered these tools and materials, you can move on to the next step of the conversion process: removing the rear wheel and installing the motor. This will be the key component in transforming your bike into an electric powerhouse.

TST Electric Bike for Adults 1500W Peak 20" Fat Tire All- Terrain E-Bike 60 Miles 28 MPH Electric Dirt Bike - 48V 15 AH Battery Tested to Safety Tested to UL 2849 Powered Electric Bicycle
𝗣𝗼𝘄𝗲𝗿𝗳𝘂𝗹 𝗘𝗹𝗲𝗰𝘁𝗿𝗶𝗰 𝗕𝗶𝗸𝗲: This adult electric bike is equipped with a 1500W peak power motor and 90N.M torque,...
As an affiliate, we earn on qualifying purchases.
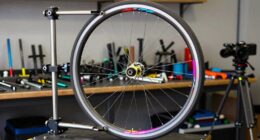
Remove the Rear Wheel and Install a Motor
Once you’ve gathered the necessary tools and materials, it’s time to remove the rear wheel and install the motor. This step is crucial in the electric bike conversion process.
First, find a suitable location to work on your bike. Place it on a bike stand or flip it over and secure it to a table or workbench.
To remove the rear wheel, start by shifting the gears to the smallest chainring and the smallest rear cog. This will loosen the tension on the chain. Then, use a wrench to loosen the bolts holding the axle nuts in place. Carefully slide the wheel out, making sure to detach the chain from the rear derailleur.
Next, it’s time to install the bike motor. Begin by aligning the motor’s axle with the dropouts on the bike frame. Make sure the motor is centered and level. Once aligned, tighten the axle nuts to secure the motor in place. Ensure that the motor is securely attached to the frame.
Now that the motor is installed, it’s time to connect it to the battery. Transitioning into the next step, you’ll need to locate the battery compartment and connect the motor’s wiring to it.

TST Electric Bike for Adults, 1500W Peak Motor, 28 MPH, 20" x 4.0" Fat Tire E-Bike, 48V 15Ah Removable Battery, Dual Disc Brakes, Dual Suspension, LCD & APP, UL 2849 Certification
Powerful 1500W Peak Motor (90 N.m) – Conquer steep 30° inclines with ease, delivering explosive acceleration and a...
As an affiliate, we earn on qualifying purchases.
Connect the Motor to the Battery
Now that the motor is securely attached to the frame, it’s time to connect it to the battery. This step is crucial in ensuring that your electric bike runs smoothly and efficiently.
To successfully connect the motor to the battery, follow these steps:
-
Motor power requirements: Before connecting the motor to the battery, it’s important to understand the power requirements of your motor. Check the motor’s specifications to determine the voltage and current it needs to operate optimally.
-
Battery capacity and voltage compatibility: Select a battery that has the appropriate capacity and voltage compatibility with your motor. Ensure that the battery can provide enough power to meet the motor’s requirements and that the voltage matches the motor’s specifications.
-
Connect the positive and negative terminals: Identify the positive and negative terminals on both the motor and the battery. Use appropriate connectors, such as wires with terminal connectors or Anderson connectors, to securely attach the positive and negative terminals together.
-
Insulate the connections: Once the terminals are connected, insulate them properly using heat shrink tubing or electrical tape. This will protect the connections from moisture and prevent any short circuits.
By following these steps, you can successfully connect your motor to the battery and ensure that your electric bike operates smoothly.
Now, let’s move on to the next section where we will install the controller and throttle for complete functionality.
Install the Controller and Throttle
You’ll need to attach the controller and throttle to your electric bike in order to control its speed and functionality. Installing the controller and throttle is a crucial step in converting your regular bike into an electric one.
The controller acts as the brain of the electric system, regulating the power flow from the battery to the motor. The throttle, on the other hand, allows you to control the speed of the bike by adjusting the amount of power delivered to the motor.
To install the controller, locate a suitable spot on the bike frame where it can be securely mounted. Ensure that the wires are properly connected according to the manufacturer’s instructions. Troubleshooting common installation issues may involve checking for loose connections, making sure the wires are not damaged, and ensuring that the controller is properly grounded.
Next, attach the throttle to the handlebars using the provided mounting bracket. Connect the throttle wire to the controller, following the wiring diagram provided. Troubleshooting may involve checking for any loose connections or damaged wires.
Once the controller and throttle are securely installed, you can transition to the next section where you will learn how to mount the battery on the bike frame.
Mount the Battery on the Bike Frame
To securely mount the battery on the bike frame, find a suitable location that ensures stability and accessibility. Consider the following mounting options:
-
Frame Triangle: The most common choice is to mount the battery within the bike’s triangle frame. This position provides stability and keeps the weight centered.
-
Rear Rack: If your bike has a rear rack, you can attach the battery to it using mounting brackets. This option is convenient and leaves the triangle frame free for other accessories.
-
Water Bottle Cage: Some bikes have multiple water bottle cage mounts. You can use an adapter to attach the battery to one of these mounts, providing a secure and easily accessible location.
-
Saddle Bag: Another option is to mount the battery in a saddle bag, which can be attached to the seat post or saddle rails. This keeps the battery out of sight and leaves the frame free from clutter.
When considering battery capacity, choose one that suits your needs and riding style. Higher capacity batteries offer longer range but may be heavier. It’s important to find a balance between range and weight to ensure optimal performance.
Now that the battery is securely mounted on the bike frame, the next step is to connect it to the motor and controller. This will enable the electric assist functionality and complete the conversion process.
Connect the Battery to the Motor and Controller
Once the battery is securely mounted on the bike frame, you can easily connect it to the motor and controller. This step is crucial for the proper functioning of your electric bike conversion.
To begin, locate the wires coming out of the battery and identify the corresponding wires on the motor and controller. Most batteries will have a positive (red) and negative (black) wire, which need to be connected to the corresponding terminals on the motor and controller. It’s important to ensure a secure connection by tightening the connectors properly using a wrench or pliers.
Sometimes, you may encounter common connection issues, such as loose wires or faulty connectors. If you face any of these problems, carefully inspect the wires for any damage or loose connections. Ensure that all the terminals are clean and free from corrosion. If you find any damaged wires or connectors, replace them immediately to ensure a reliable and safe connection.
Now that the battery is connected to the motor and controller, you can move on to the next step of the conversion process, which is to install the sensor and magnets for pedal assist. This will enhance the performance and efficiency of your electric bike by providing a seamless transition between pedaling and electric power.
Install the Sensor and Magnets for Pedal Assist
Now that the battery is securely connected to the motor and controller, it’s time to install the sensor and magnets for pedal assist. The pedal assist sensor plays a crucial role in detecting the rotation of the pedals and sending signals to the motor to provide electric assistance.
Troubleshooting common issues with pedal assist sensors can save you from potential headaches. One common issue is a loose connection between the sensor and the controller. Ensure that all the connections are tight and secure. Another issue could be a faulty sensor. In this case, you may need to replace it with a new one.
When it comes to magnet placements for optimal pedal assistance, there are a few options to consider. One common placement is attaching the magnets to the pedal cranks. This allows for precise detection of pedal rotation. Another option is placing the magnets on the spokes of the rear wheel. This method provides a smoother pedal assist experience. Experimenting with different magnet placements can help you find the most efficient and comfortable setup for your electric bike.
With the sensor and magnets in place, you are now ready to adjust the brakes and gears for electric operation. This ensures that your bike functions smoothly and safely when using the electric motor.
Adjust the Brakes and Gears for Electric Operation
With the sensor and magnets in place, it’s important to adjust the brakes and gears for electric operation to ensure smooth and safe functioning of the bike. When converting a regular bike into an electric one, it’s crucial to make these adjustments to optimize the performance of the electric components.
First, let’s focus on adjusting the brake pads. Electric bikes typically have more weight due to the battery and motor, so it’s essential to have well-adjusted brake pads for efficient stopping power. Start by loosening the brake pad bolts and aligning the pads with the rim of the wheel. Make sure they are evenly spaced and not rubbing against the tire. Then, tighten the bolts securely and test the brakes to ensure they engage smoothly and effectively.
Next, we need to adjust the derailleur to ensure seamless shifting of gears. This step is crucial for a comfortable and efficient riding experience. Begin by shifting the bike into the highest gear and using the barrel adjuster to fine-tune the tension of the derailleur cable. Ensure that the chain moves smoothly between gears without any skipping or excessive noise.
Test and Fine-Tune the Electric Conversion
To ensure optimal performance, you should test and fine-tune the electric conversion of your bike. This step is crucial in identifying any potential issues and troubleshooting them before hitting the road. Here are four key areas to focus on during the testing and fine-tuning process:
-
Battery Performance: Begin by fully charging the battery and testing its capacity. Take note of the range and duration of the battery on different terrains and speeds. This will give you an understanding of its capabilities and help you plan your rides accordingly.
-
Motor Efficiency: Measure the motor’s power output and observe how well it integrates with your pedaling. Assess the responsiveness and smoothness of the motor’s assistance. Keep an eye out for any unusual noises or vibrations that may indicate an issue with the motor.
-
Controller Functionality: Test the controller by adjusting the speed settings and observing how well it regulates the motor’s power output. Ensure that the throttle and pedal assist functions are working correctly and that the motor responds appropriately to your inputs.
-
Overall Performance: Take your bike for a test ride and evaluate its overall performance. Pay attention to factors such as acceleration, hill climbing ability, and top speed. Note any discrepancies or areas where improvements can be made.
Once you have thoroughly tested and fine-tuned your electric conversion, you can proceed to the next step: installing lights and reflectors for safety. It’s essential to make your bike visible to others, especially when riding at night or in low light conditions.
Install Lights and Reflectors for Safety
Once you have completed the testing and fine-tuning of your electric conversion, it’s important to install lights and reflectors on your bike for safety. Safety measures are crucial when riding an electric bike, and one of the most important aspects is visibility. By adding lights and reflectors, you increase your chances of being seen by other road users, especially during low-light conditions or at night.
Start by installing a front light on your handlebars. This will not only illuminate your path but also make you more visible to oncoming traffic. Choose a powerful light that has a long battery life, ensuring that it will last throughout your ride. Additionally, consider mounting a rear light on your seatpost or rear rack. This light will alert motorists approaching from behind, making it easier for them to spot you.
In addition to lights, attach reflective strips or stickers to various parts of your bike, such as the frame, pedals, and wheels. These reflective elements will increase your visibility from all angles, especially when light is directed towards them. Reflective clothing can also be worn to further enhance your visibility.
By prioritizing safety and increasing your visibility with lights and reflectors, you can greatly reduce the risk of accidents while riding your electric bike.
Now that your bike is equipped with the necessary safety measures, let’s move on to considering accessories for convenience.
Consider Adding Accessories for Convenience
When it comes to adding accessories for convenience, you might want to consider a bike basket or a pannier bag to easily carry your belongings while riding. These accessories not only provide extra storage space but also make your cycling experience more convenient.
Here are three accessory options to consider:
-
Bike Basket: A bike basket is a simple yet effective accessory that can be easily attached to the front or rear of your bike. It provides a convenient space to carry small items such as groceries, bags, or even a small pet. Look for a sturdy and durable basket that can handle the weight of your belongings.
-
Pannier Bags: Pannier bags are designed to attach to the sides of your bike rack, offering larger storage capacity compared to a bike basket. They are ideal for carrying larger items like laptops, clothing, or camping gear. Make sure to choose pannier bags that are waterproof to protect your belongings from rain or splashes.
-
Handlebar Bag: A handlebar bag is a small accessory that attaches to your handlebars, allowing you to easily access items while riding. It is perfect for storing small essentials like your phone, wallet, keys, or snacks. Look for a handlebar bag that is securely attached and has compartments to keep your belongings organized.
By adding accessories such as a bike basket, pannier bags, or a handlebar bag, you can enhance your riding experience by having extra storage and convenience. These accessories make it easier to carry your belongings while keeping them secure and easily accessible.
Now, let’s transition into the next section where you will learn how to maintain and care for your electric bike.
Learn How to Maintain and Care for Your Electric Bike
Make sure you regularly clean and lubricate the chain of your electric bike to maintain its performance and extend its lifespan. Electric bike maintenance is essential for keeping your bike in top shape and avoiding common issues that may arise.
One of the most important tasks is cleaning and lubricating the chain. This should be done every few weeks or whenever you notice dirt or grime buildup. Start by using a soft brush to remove any debris from the chain. Then, apply a bicycle-specific degreaser to break down any grease or oil. Use a rag or brush to scrub the chain thoroughly. Once clean, dry the chain and apply a lubricant specifically designed for bicycle chains. This will help reduce friction and prevent wear.
In addition to chain maintenance, there are other common issues that may need troubleshooting. For example, if you notice a decrease in battery performance, make sure to check the connections and ensure they are secure. If the battery still doesn’t hold a charge, it may need to be replaced.
Another common issue is a loose or misaligned brake. Check the brake pads and adjust them if necessary. Additionally, regularly inspect the tires for wear and tear and keep them properly inflated.
Ride and Enjoy Your Newly Converted Electric Bike
Riding and enjoying your newly converted electric bike is a thrilling experience that allows you to effortlessly cruise through your surroundings. After successfully converting your bike, there are a few things you can do to improve the battery life and troubleshoot common issues that may arise.
To improve battery life, it is important to properly charge and store your battery. Make sure to fully charge the battery before each ride and avoid overcharging it. Additionally, storing the battery in a cool and dry place when not in use can help prolong its lifespan.
When it comes to troubleshooting common issues, one of the most common problems is a loss of power. If you experience this, check the battery connections to ensure they are secure. Also, make sure the battery is properly seated in its mount. If the issue persists, it may be necessary to check the motor and controller connections.
Now that you are familiar with how to improve battery life and troubleshoot common issues, it’s time to share your experience and spread the word about eco-friendly transportation. By promoting the benefits of electric bikes, you can help inspire others to make the switch and contribute to a greener future.
Share Your Experience and Spread the Word about Eco-Friendly Transportation
After converting my bike into an electric bike, I couldn’t contain my excitement and wanted to share my experience with others. Spreading awareness about sustainable commuting is crucial in today’s world, where the need for eco-friendly transportation options is more apparent than ever.
I started by talking to friends and family, explaining the benefits of electric bikes and how they can contribute to a greener environment. I highlighted the reduced carbon emissions and the health benefits of cycling, such as improved cardiovascular health and reduced stress levels. I even organized a small gathering where I showcased my newly converted electric bike and gave demonstrations on how to convert a regular bike into an electric one.
To reach a wider audience, I turned to social media platforms. I created posts and videos detailing the step-by-step process of converting a bike into an electric bike, along with the cost savings and environmental advantages. I also joined online communities and forums dedicated to sustainable commuting, where I shared my journey and answered questions from enthusiasts looking to make the switch.
Additionally, I contacted local environmental organizations, offering to give presentations on sustainable commuting and the benefits of electric bikes. By sharing my experience and knowledge, I hoped to inspire others to embrace eco-friendly transportation options and make a positive impact on the environment.
Spreading awareness about sustainable commuting is essential for a greener future. By sharing my experience and knowledge, I hope to encourage others to join the movement towards eco-friendly transportation. Together, we can make a difference in preserving our planet for future generations.
Frequently Asked Questions
How can I assess my bike’s compatibility for an electric conversion?
To assess my bike’s compatibility for an electric conversion, I must first determine its requirements.
Start by checking the frame for strength and stability, as electric motors can add weight and stress. Look for sufficient space to accommodate the battery and controller.
Assess the dropouts for compatibility with an electric hub motor or the ability to mount a mid-drive motor.
Consider the fork and brakes for compatibility with the increased speed and weight.
What tools and materials do I need to gather before starting the conversion?
To start the bike frame modification, you’ll need a few tools and materials.
Firstly, gather an angle grinder or a hacksaw for cutting and removing unnecessary parts of the frame.
Next, you’ll need a welder to attach necessary brackets and supports for the electric components.
Additionally, gather a drill and appropriate drill bits for creating holes for cable routing.
Lastly, consider the battery placement and gather zip ties or Velcro straps to securely fasten it to the frame.
Are there any specific instructions on how to connect the motor to the battery?
To connect the motor to the battery, first ensure battery compatibility with the motor. It’s like finding the perfect match for a puzzle piece—it needs to fit just right.
Once you have compatible components, follow these steps:
1) Identify the positive and negative terminals on the motor and battery.
2) Connect the positive terminals together and do the same for the negative terminals.
3) Secure the connection with appropriate connectors or soldering.
How do I install the sensor and magnets for pedal assist?
To install the pedal sensor for pedal assist on your electric bike, begin by locating the crank arm on the side opposite the chain. Remove the existing pedal and attach the sensor to the crank arm using the provided screws.
Ensure the sensor is aligned properly with the chainring.
Next, attach the magnets to the pedal using adhesive.
Troubleshooting pedal assist issues may involve checking the alignment of the sensor and magnets, as well as ensuring a proper connection to the controller.
What are some tips for maintaining and caring for my newly converted electric bike?
After converting my bike into an electric one, I’ve learned a few tips for maintaining and caring for it.
Firstly, proper battery maintenance is crucial to ensure optimal performance. Regularly check the battery’s charge level and avoid overcharging or discharging it completely.
Additionally, troubleshooting common issues like motor malfunctions or electrical problems is essential.
Don’t forget to keep the bike clean and lubricate the chain regularly to prevent wear and tear.
Conclusion
In conclusion, converting my bike into an electric bike without buying a kit was a rewarding and environmentally-friendly project.
Assessing my bike’s compatibility and gathering the necessary tools and materials allowed me to successfully remove the rear wheel and install a motor.
Connecting the motor to the battery and installing the controller and throttle were crucial steps in the process.
I also added accessories for convenience and learned how to maintain and care for my electric bike.
As the saying goes, ‘Where there’s a will, there’s a way.’ I encourage others to explore this DIY project and spread the word about eco-friendly transportation options.