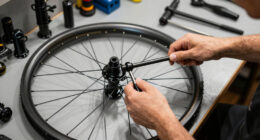
For anyone who rides a bike, ensuring your tires are properly inflated ranks highly for a smooth and secure journey. Regardless if you are an experienced cyclist or a beginner, mastering the use of a bike air pump is a crucial ability every rider needs to have.
In this article, I will guide you through the step-by-step process of using a bicycle air pump to inflate your tires correctly and efficiently.
Before we dive into the details, it’s important to note that there are different types of air pumps available on the market, each with its unique set of features and compatibility. Therefore, it’s crucial to understand the type of air pump you have and the valve type of your bike tires before proceeding.
Once you have identified your air pump and tire valve, it’s time to move on to the next step – checking your tire pressure.
Key Takeaways
- Different types of air pumps are available for different needs: floor pumps for home use, hand pumps for on-the-go use, and CO2 inflators for compact and lightweight use.
- Proper alignment of the valve with the pump head is crucial to avoid air leakage or valve connection issues.
- Properly inflated tires improve bike handling, prevent unnecessary wear and tear, and can extend the lifespan of the tire and save money in the long run.
- Regular maintenance and inspection of tires and air pumps is important for safety and optimal performance.

2026 Upgrade 9800Lumen Bike Light for Night Riding,Super Bright 6 LED Headlight,Aluminum 10 Mode Rechargeable Bicycle Light Front and Rear,360°Rotatable Brackt,Waterproof,Runtime 72 hr,Road Shockproof
【700DAYS Support] 】:If your bike light have any problem, please to pass us on through Amazon for the...
As an affiliate, we earn on qualifying purchases.
Understand the Different Types of Air Pumps
Get ready to choose the perfect air pump for your bike with these tips on the different types of pumps! There are three main types of air pumps that you can use for your bicycle: floor pumps, hand pumps, and CO2 inflators.
Each pump is designed differently to match the different types of valves used in bike tires. Floor pumps are the most commonly used type of pump for home use. They come with a foot stand and a long hose for easy pumping.
Hand pumps, on the other hand, are small and portable, making them perfect for on-the-go use. Lastly, CO2 inflators are the most compact and lightweight type of pump. They use compressed CO2 gas to inflate your tires quickly and efficiently.
Regardless of the type of pump you choose, make sure to keep it clean and well-maintained for optimal performance.
Now that you understand the different types of air pumps, it’s important to check your tire pressure regularly to ensure a smooth and safe ride.

Best Bright Bike Light for Night Riding, USB-C Rechargeable Bicycle Light, Bicycle Headlight Set, Daytime Running Light, Waterproof Bike Headlight Taillight for Adult Kid Mountain MTB Off-Road Cycling
【Great for Safe Night Riding】The bike lights are designed for safe night riding, featuring 6pcs TG3 LED beads...
As an affiliate, we earn on qualifying purchases.
Check Your Tire Pressure
You’ll feel like a bird soaring through the sky when your tires are properly inflated, just like a hot air balloon taking off. The importance of proper tire pressure cannot be overstated.
Not only does it make your ride smoother and more comfortable, but it also increases your bike’s efficiency and can prevent accidents. To ensure your tire pressure is at the right level, you’ll need to use tools for measuring tire pressure.
A tire pressure gauge is a simple device that can be found at any bike shop or online. It’s important to choose the right gauge for your bike’s tires, as different gauges are calibrated for different pressure ranges.
When checking your tire pressure, make sure your tires are cold and haven’t been ridden in at least an hour. Remove the cap from the valve and press the gauge onto the valve stem until you hear a hiss of air.
The gauge will give you a reading in PSI (pounds per square inch) or BAR (atmospheres), depending on the gauge you’re using. If the reading is below the recommended range for your bike, use your pump to inflate the tire to the correct pressure.
Once you’ve checked both tires and inflated as necessary, you’re ready to hit the road. Now, it’s time to attach the pump head to the valve.
DARKBEAM 6000LM Bike Headlight USB-C Rechargeable, High Lumen Super Bright Bike Light Set for Night Riding, 12+5 Modes Waterproof Bicycle Lights for Road, Mountain, Cycling
SUPER BRIGHT HEADLIGHT & WARNING TAILLIGHT: Bike headlight using new upgraded 2 LED beads with high lumens. Easily...
As an affiliate, we earn on qualifying purchases.
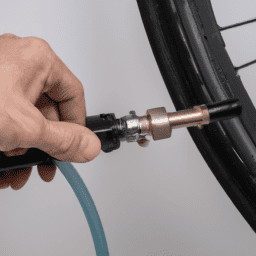
Attach the Pump Head to the Valve
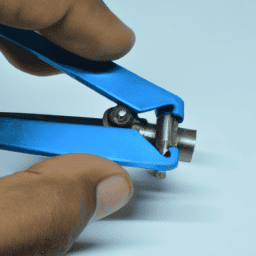
First, I need to identify the valve type on my bike tire. There are two common types: Presta and Schrader. Once I know the valve type, I can securely attach the pump head to the valve.
To do this, I need to unscrew the valve cap, press the pump head onto the valve, and lock it in place.
Identify the Valve Type
To determine the valve type on your bike tire, simply take a close look at the valve and identify if it’s a Schrader or Presta valve. Valve maintenance is important to ensure a proper connection, and troubleshooting valve connection issues is essential for a smooth ride.
Here are some details to help identify the valve type:
- Schrader valves are wider and have a spring-loaded pin in the middle that’s depressed when the pump head’s attached.
- Presta valves are narrower and have a small lock nut at the top that needs to be unscrewed before attaching the pump head.
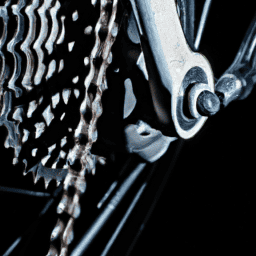
- Schrader valves are commonly found on mountain bikes, while Presta valves are typically used on road bikes.
- Some bike tires may have a combination valve that can be used with either type of pump head.
Once you’ve identified the valve type, securely attaching the pump head’s the next step.
How to Securely Attach the Pump Head
Attaching the pump head securely is crucial to avoid any air leakage or valve connection issues, so make sure to align the valve with the pump head and give it a quick twist to lock it in place.
Before attaching the pump head, make sure that the valve stem is free of dirt or debris that may prevent the pump head from sealing properly.
It’s also important to note that different valves require different pump heads, so make sure to use the correct pump head for your valve type.
Securing Pump Head: Tips, Tricks | Common Mistakes to Avoid.
One common mistake when attaching the pump head is not aligning the valve properly with the pump head. This can cause air leakage and difficulty in inflating your tires.
Another mistake is not tightening the pump head enough, which can also lead to air leakage. By following these tips and avoiding common mistakes, you can securely attach the pump head and ensure a successful inflation.
In the next section, we’ll discuss how to inflate your tires to the correct pressure.

Bike Lights for Night Riding with Bell, Super Bright Bicycle Reflectors, USB Rechargeable Bike Lights Front and Back, Water-Resistant, 4+5 Modes Headlight Taillight Set for Safety, Men, Women & Kids
Is the Gator 320 bright enough for everyday night riding? Yes. The Gator 320 includes a bright white...
As an affiliate, we earn on qualifying purchases.
Inflate Your Tires
Make sure your tires are properly inflated by checking the recommended PSI on the sidewall of the tire. The importance of tire pressure cannot be overstated as it affects the overall performance of your bicycle. Riding on underinflated tires makes it harder to pedal and increases the risk of flat tires, while overinflation can cause a harsh ride and potential damage to the tire. Once you’ve determined the ideal PSI for your tires, it’s time to inflate them using your bicycle air pump.
To inflate your tires, attach the pump head securely to the valve and begin pumping. Keep an eye on the pressure gauge to ensure that you’re reaching the recommended PSI. It’s important to avoid overinflation, so periodically check the pressure and release air if necessary. Use the table below as a guide for the recommended PSI based on the type of bicycle and tire size. Once you’ve reached the desired pressure, disconnect the pump head and check the pressure again to ensure that it hasn’t dropped during the process. Properly inflated tires not only make for a smoother ride, but also improve your bike’s handling and can prevent unnecessary wear and tear.
| Bike Type | Tire Size | Recommended PSI |
|---|---|---|
| Road Bike | 700c | 80-130 |
| Mountain Bike | 26" | 30-50 |
| BMX | 20" | 35-60 |
| Hybrid | 700c | 50-70 |
| Cruiser | 26" | 40-60 |
Ensuring that your tires are properly inflated is a crucial step in maintaining your bike’s performance and extending its lifespan. With the help of your bicycle air pump and the recommended PSI guide, you can easily and quickly inflate your tires to the correct pressure. Remember to periodically check your tire pressure and avoid overinflation, as this can cause damage to your bike and make for an uncomfortable ride.
Disconnect the Pump Head and Check Pressure Again
Now that I’ve inflated my tires using the bicycle air pump, it’s important to safely remove the pump head.
To do this, I’ll first release the pressure in the hose by pressing the lever or button on the pump head. Then, I’ll carefully twist and pull the pump head away from the valve stem.
Once the pump head is disconnected, I’ll double-check my tire pressure using a gauge to ensure proper inflation.
How to Safely Remove the Pump Head
First, before removing the pump head, you’ll want to release any remaining air pressure by pressing down on the lever or button. This safety precaution will prevent any sudden release of air and potential injury. If the lever or button doesn’t release any air, double-check that the valve is securely attached and try again. If you’re still having issues, consult the troubleshooting section of your pump’s manual.
To safely remove the pump head, grasp the lever or button and pull it straight off the valve stem. Do not twist or wiggle the pump head as this can damage the valve or cause the pump head to become stuck.
Once the pump head is removed, double-check your tire pressure to ensure proper inflation.
Double-Check Your Tire Pressure to Ensure Proper Inflation
After removing the pump head, make sure to give your tires a quick check to ensure they’re properly inflated. Proper tire pressure is crucial for a safe and comfortable ride. It ensures that your bike handles well, reduces the risk of a flat tire, and even improves your bike’s efficiency. Additionally, maintaining proper tire pressure can extend the lifespan of your tires, saving you money in the long run.
To check your tire pressure, you can use a pressure gauge. This tool measures the air pressure inside your tire and tells you whether it’s too low, too high, or just right. Using a pressure gauge helps you achieve more accurate inflation and ensures that both tires have the same pressure. By maintaining proper tire pressure, not only will you have a safer and smoother ride, but you’ll also be able to ride longer and more efficiently.
Frequently Asked Questions
What is the recommended tire pressure for a bicycle?
The ideal tire pressure for a bicycle varies based on the tire width and rider weight, typically ranging between 80-120 psi. Maintaining proper tire pressure improves ride quality, reduces the risk of flats, and increases efficiency.
Can I use a car air pump to inflate my bicycle tires?
Using a car pump for bike tires has pros and cons. It can inflate quickly but it’s easy to overinflate or damage the tire. I recommend using a bicycle pump for accuracy. Here are tips for using one with ease.
How often should I check my tire pressure?
I check my tire pressure every two weeks to ensure optimal pressure for the type of riding I’m doing. Checking frequency may vary based on riding conditions, but it’s important to monitor tire pressure regularly for safety and performance.
What is the difference between a floor pump and a portable pump?
As they say, "different strokes for different folks."The advantage of a floor pump is its stability and efficiency in inflating tires quickly. However, a portable pump offers the benefit of convenience and portability for on-the-go inflation.
How do I know if my pump head is compatible with my valve?
To determine valve compatibility, identify the type of valve on your tire (Presta or Schrader). Check your pump head fitting to see if it matches the valve type. A mismatched fitting can cause air leaks or difficulty inflating.
Conclusion
Well folks, we’ve made it to the end of our journey on how to use a bicycle air pump. I hope you’re feeling confident and ready to tackle the world of tire inflation with ease.
But before you go off on your merry way, let’s take a moment to reflect on what we’ve learned. First and foremost, we’ve discovered that there are a multitude of air pump options out there, each with their own unique features and quirks.
And let’s not forget the importance of checking your tire pressure before attempting to inflate. But most importantly, we’ve learned that the act of inflating a tire is not to be taken lightly. It requires precision, patience, and a steady hand.
So next time you find yourself struggling to inflate your tire, just remember the wise words of this article and take a deep breath. You’ve got this.