
Picture yourself cruising along the highway on your bike, feeling the wind whip through your hair and the steady hum of the wheels below you. But what do you do when your chain begins to squeak and impede your pedaling?
Fear not, for I am here to guide you through the art of waxing a bicycle chain. In this article, I will share with you the precise steps and techniques to ensure a well-lubricated and efficient chain, allowing you to enjoy your rides to the fullest.
Key Takeaways
- Waxing a bicycle chain reduces friction and wear, allowing for smoother and more efficient pedaling.
- Regular waxing helps to protect the chain from dirt and grime, extending its lifespan and saving money in the long run.
- Properly waxed chains exhibit smooth power transmission, no dirt or debris buildup, and improved durability and efficiency.
- Common mistakes to avoid when waxing a chain include applying too much wax, not cleaning the chain thoroughly, and inadequate adhesion of the wax, which can decrease effectiveness and reduce the chain’s lifespan and performance.
Gather the necessary supplies
Gather all the necessary supplies before starting to wax your bicycle chain. Waxing your chain offers several benefits, including improved performance, reduced friction, and increased durability. To begin the process, you will need a clean rag, degreaser, a chain cleaner tool, a brush, and a wax-based lubricant.
Step by step, here’s how to wax your bicycle chain.
First, remove the chain from the bicycle by using a chain breaker tool.
Then, soak the chain in a degreaser solution to remove any dirt or grime.
Next, scrub the chain using a chain cleaner tool and a brush to ensure it’s thoroughly clean.
Finally, apply a generous amount of wax-based lubricant to the chain, making sure to cover every link.
With all the supplies ready, let’s move on to the next step of removing the chain from the bicycle.
Remove the chain from the bicycle
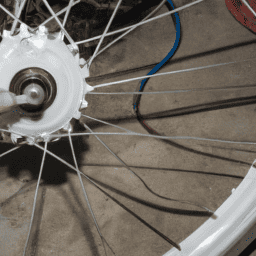
First, you’ll need to carefully detach the chain from your bike. Start by using a chain tool to remove the pin that connects the chain to the bike. Make sure to keep track of any small parts, such as washers or clips, that may come off with the chain. Once the chain is detached, set it aside for now.
Reinstalling the chain after waxing will be a breeze, as the wax creates a smooth and clean surface that allows for easy installation. The benefits of waxing your chain are numerous. Not only does it reduce friction and wear, but it also repels dirt and grime, extending the life of your chain. Additionally, waxing helps to keep your drivetrain running smoothly and quietly.
With the chain removed, it’s time to move on to the next step: cleaning it thoroughly.
Clean the chain thoroughly
To properly clean your chain, you’ll want to ensure that every link is free from dirt and grime. Start by removing grease and any other debris that may have accumulated on the chain. Use a degreaser and a chain cleaning tool to get into all the nooks and crannies of the chain. Scrub gently, but thoroughly, making sure to remove all the dirt.
Once the chain is clean, rinse it with water and pat it dry with a clean cloth. It’s important to completely dry the chain before moving on to the next step of waxing. This will ensure that the wax adheres properly to the chain.
Now that the chain is clean and dry, you can move on to preparing the wax mixture.
Prepare the wax mixture
Once the chain is clean and dry, you can start preparing the wax mixture. It is crucial to use the right wax mixture to ensure optimal lubrication and protection for your bicycle chain. Using the wrong wax mixture can lead to poor performance and potential damage to the chain. To help you understand the importance of choosing the right wax, here is a comparison table:
| Wax Type | Pros | Cons |
|---|---|---|
| Commercial Wax | Provides excellent lubrication and protection. | Can be expensive. |
| DIY Beeswax Mixture | Cost-effective and easy to make. | Requires more frequent reapplication. |
| Dry Wax | Doesn’t attract dirt and debris. | Not as durable in wet conditions. |
While there are alternative methods of lubricating a bicycle chain, using a wax mixture offers superior performance and longevity. Now that you understand the significance of the right wax mixture, let’s move on to the next step of dipping the chain into the wax.
Dip the chain into the wax
Next, you’ll want to immerse the chain into the wax mixture. This step is crucial as it ensures that the entire chain is coated with the wax.
When dipping the chain, make sure to hold it by the ends so that you don’t get any wax on your hands. Gently lower the chain into the wax and let it sit for a few seconds. This allows the wax to penetrate the innermost parts of the chain and provides a thorough coating.
Once the chain is fully submerged, slowly lift it out of the wax and give it a few seconds to drip off any excess. This is where the drying process begins. The wax will bond with the chain, creating a protective layer that reduces friction and repels dirt and grime. This results in a smoother and longer-lasting chain.
Now, let’s move on to the next step, allowing the chain to cool and harden.
Allow the chain to cool and harden
After immersing the chain in the wax mixture, you should let it cool and harden. The cooling process is crucial as it allows the wax to solidify, creating a protective barrier on the chain.
During this time, the wax seeps into the crevices and coats each individual link, ensuring thorough coverage. Imagine the chain slowly cooling down, with the once liquid wax now transforming into a solid state.
As it hardens, the wax forms a durable shield, preventing dirt, grime, and moisture from reaching the inner components of the chain. This hardening time typically takes around 10-15 minutes, but it may vary depending on the ambient temperature.
Once the chain is cool and hardened, it’s time to remove any excess wax, which I’ll explain in the next section.
Remove any excess wax
After allowing the chain to cool and harden, it’s time to remove any excess wax. This step is crucial to ensure optimal chain performance. Excess wax can attract dirt and debris, which can lead to increased friction and decreased efficiency. To remove the excess wax, simply take a clean cloth and gently wipe the chain, making sure to remove any visible residue. This will leave a clean and smooth surface, ready for the road.
Now, let’s talk about the benefits of waxing a bicycle chain. Waxing provides several advantages over traditional lubricants. Firstly, it creates a dry and clean coating that doesn’t attract dirt or grime. This means less cleaning and maintenance. Secondly, waxing reduces chain wear and friction, resulting in a smoother and quieter ride. Lastly, waxing is environmentally friendly as it doesn’t contain harmful chemicals.
In the table below, I’ve compared waxing to traditional lubricants for bike chains:
| Waxing | Traditional Lubricants |
|---|---|
| Dry and clean coating | Oily and attracts dirt |
| Less cleaning and maintenance | Regular cleaning required |
| Reduced chain wear and friction | Increased chain wear and friction |
| Environmentally friendly | Contains harmful chemicals |
Now that we’ve removed any excess wax and discussed the benefits of waxing, it’s time to reinstall the chain onto the bicycle.
Reinstall the chain onto the bicycle
To put the chain back on the bike, simply align the links with the gears and slide it into place. Make sure the chain is properly seated on both the front and rear gears. Here are some techniques to ensure a smooth reinstallation:
- Apply gentle pressure to guide the chain onto the gears.
- Rotate the pedals slowly to help the chain settle into position.
- Check for any kinks or twists in the chain and straighten them out.
- Use a chain tool or quick link to reconnect the chain if necessary.
Reinstalling a waxed chain offers several benefits. The wax coating reduces friction, providing a smoother and more efficient ride. It also repels dirt and grime, extending the lifespan of both the chain and the gears.
Once the chain is back on the bike, it’s time to test its performance and make any necessary adjustments.
Test the chain’s performance
Now, you can check how well the chain is performing by taking the bike for a test ride. Start by evaluating the durability of the chain. Pay attention to any signs of wear or stretching, such as excessive noise or skipping gears. A well-waxed chain should have minimal friction and noise.
Next, measure the efficiency of the chain. Observe how smoothly it shifts gears and how quickly it accelerates. A properly waxed chain should provide smooth and efficient power transmission.
Additionally, look for any signs of dirt or debris buildup on the chain, as this can affect its performance. By testing the chain’s durability and efficiency, you can ensure that the waxing process has been successful.
Moving forward, to maintain optimal performance, it is important to maintain a regular waxing schedule.
Maintain regular waxing schedule
It’s important to consistently keep up with a regular schedule for waxing to maintain optimal performance.
Regularly waxing your bicycle chain brings a multitude of benefits. Firstly, it reduces friction and wear, allowing for smoother and more efficient pedaling. Additionally, the wax acts as a protective barrier, preventing dirt and grime from accumulating on the chain, which can cause it to become noisy and less efficient. Moreover, regular waxing extends the lifespan of your chain, saving you money in the long run.
To ensure the best results, it’s crucial to avoid common mistakes when waxing. One common mistake is applying too much wax, which can lead to a buildup that attracts more dirt. Another mistake is not thoroughly cleaning the chain before waxing, as this can prevent proper adhesion of the wax.
By maintaining a regular waxing schedule and avoiding these mistakes, you can enjoy a smoother and longer-lasting bicycle chain.
Frequently Asked Questions
How often should I wax my bicycle chain?
As a cycling enthusiast, I highly recommend waxing your bicycle chain every 200-300 miles. Not only does wax provide a cleaner and quieter ride, but it also offers superior performance compared to alternative chain lubricants.
Can I use any type of wax for my bicycle chain?
Yes, you can use different types of wax for your bicycle chain. The benefits of waxing a bicycle chain include reduced friction, improved performance, and increased durability.
Should I wear gloves while waxing the chain?
Yes, wearing gloves while waxing the chain has several benefits. It protects your hands from the wax and any potential chemicals, prevents dirt and grime from getting on your hands, and provides better grip. To prevent wax buildup on the chain, wipe off any excess wax and ensure you apply a thin, even layer.
Can I use a brush to clean the chain instead of removing it from the bicycle?
Using a brush to clean the chain without removing it has its pros and cons. It saves time and effort, but it may not completely remove all dirt and grime.
Is it necessary to remove excess wax from the chain after dipping it?
To properly maintain a bicycle chain, it is important to remove excess wax after dipping. This ensures smooth and efficient functioning of the chain. Waxing a chain offers benefits like reduced friction, increased durability, and improved shifting performance.
Conclusion
So there you have it, my friends – a step-by-step guide on how to wax a bicycle chain. By following these instructions and maintaining a regular waxing schedule, you can ensure that your chain stays clean, lubricated, and performs at its best.
Now, I know what some of you might be thinking – isn’t waxing a bicycle chain time-consuming and unnecessary? Well, let me tell you, the benefits far outweigh the effort. A properly waxed chain will last longer, run smoother, and require less frequent maintenance.
So go ahead, give it a try and experience the difference for yourself. Happy riding!