Switching out bicycle grips might appear to be a challenging endeavor, however, it’s genuinely a straightforward procedure that can be achieved in a handful of steps. Having replaced my own bicycle grips on various occasions, I can vouch for its simplicity and the notable impact it has on enhancing the comfort and efficiency of your cycling experience.
To get started, you’ll need a few tools and supplies, including a pair of pliers, a flathead screwdriver, rubbing alcohol, and a new set of grips. Once you have everything you need, it’s time to remove the old grips and prepare the handlebars for the new ones.
With a little bit of patience and attention to detail, you’ll have a fresh set of grips in no time. So let’s get started and learn how to change bicycle grips!
Key Takeaways
- Choosing the right grip material is crucial for comfort and control.
- Proper alignment and positioning of the new grips is important for safety and comfort.
- Testing the new grips for comfort and control before riding is recommended.
- Consider factors such as shock absorption, slip prevention, and hand fatigue when selecting new grips.
Gather Your Tools and Supplies
Before you can start changing your bicycle grips, you’ll need to gather all the tools and supplies you’ll need. First, you’ll need to choose the right materials for your new grips. There are different grip styles available in the market, so it’s important to choose the one that suits your riding style and comfort level. Some grips are made of rubber, while others are made of foam or silicone. You should consider the texture, thickness, and shape of the grips when making your choice.
Once you’ve chosen the new grips, you’ll need a screwdriver to remove the old grips. You can also use rubbing alcohol to help loosen the old grips from the handlebars. This will make it easier to remove them without damaging the handlebars.
With all the tools and supplies ready, you can now move on to the next step of removing the old grips.
Remove the Old Grips
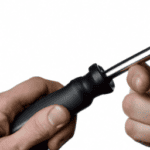
First, take hold of the end of the symbol of your riding experience, the rubbery extension of your handlebars, and pull it back towards you with a firm grip. If the grip is stubborn, use a flathead screwdriver and slide it between the grip and handlebar, then twist to loosen the grip.
Slowly work the screwdriver around the grip until it comes loose. Be careful not to scratch or damage the handlebar while removing the grip.
After the grip is removed, clean the grip adhesive residue off the handlebar with rubbing alcohol or other cleaning solution that’s safe for your handlebar material.
If you want to change to an alternative grip material, such as leather or cork, now’s a good time to prepare the handlebars for the new grips. Make sure the handlebars are clean and dry before installing the new grips. If the handlebars are metal, you may want to roughen the surface slightly with sandpaper to help the new grip adhere better.
With the old grip off and the handlebars prepped, it’s time to move on to the next step of installing the new grips.
Prepare the Handlebars
Now that you’ve removed the old grips, it’s time to get your handlebars ready for the new ones by cleaning them thoroughly and, if necessary, roughening the surface for better adhesion. Here are some steps to follow:
-
Clean handlebars: Use a mild soap and warm water to clean the handlebars thoroughly. This will remove any dirt, grease, or grime that may prevent the new grips from adhering properly.
-
Roughen the surface: If the handlebars are smooth, it may be necessary to roughen the surface to help the new grips stick better. You can use sandpaper or a wire brush to create a slightly rougher surface for better adhesion.
-
Lubricate handlebars: Once the handlebars are clean and roughened, it’s a good idea to lubricate them with rubbing alcohol or a specialized grip solution. This will help the new grips slide on smoothly and prevent them from twisting or slipping during use.
Now that the handlebars are prepped and ready, it’s time to move on to the next step: installing the new grips.
Install the New Grips
Once you’ve got your handlebars prepped, it’s time to get a grip and install those babies! Choosing the right grips is important for your comfort and control while riding.
There are various types of grip materials such as rubber, foam, and silicone. Rubber grips are the most popular and offer good grip and durability. Foam grips are lightweight and provide good shock absorption, making them suitable for off-road riding. Silicone grips are known for their excellent grip and comfort, but they tend to wear out faster than rubber or foam.
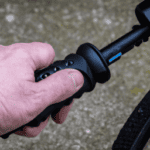
To install the new grips, simply slide them over the handlebars and make sure they are evenly positioned. Then, give them a good twist to ensure a snug fit. Some grips come with an adhesive backing that helps keep them in place.
If your grips don’t have this feature, you can use a small amount of rubbing alcohol or hairspray on the inside of the grip to make it easier to slide onto the handlebars. Once the grips are securely in place, you’re ready to test them out on the road and see how they feel.
Test Your New Grips
Now that I’ve installed my new bike grips, it’s important to test them out.
First, I’ll check to make sure they’re properly aligned and adjusted to my liking.
Then, I’ll take my bike for a test ride to see how they feel and make any necessary adjustments.
Testing my new grips will ensure a comfortable and safe ride.
Check for Proper Alignment
Ensure your grips are aligned perfectly by checking their position on the handlebars. This step is crucial because having poorly aligned grips can cause discomfort and even affect your control of the bike. To properly check for alignment, sit on your bike and hold the handlebars as you would when riding. Look at the grips and make sure they are positioned evenly on both sides of the handlebars. You can use a ruler or measuring tape to measure the distance between the end of the grip and the brake levers on both sides of the handlebars. The distance should be the same.
Additionally, it is important to consider the grip size and material when selecting new grips. The grip size should be comfortable for your hands, and the material should provide adequate grip and durability. Rubber and silicone are popular grip materials because they are soft and provide good grip, but they do wear out faster than other materials. On the other hand, leather and cork are durable and provide a classic look, but may not have as much grip as rubber or silicone. It’s important to choose the right grip material for your riding style and preferences.
Now that your grips are aligned and you have chosen the best grip material and size for you, it’s time to take your bike for a test ride and see how the new grips feel.
Take Your Bike for a Test Ride
To truly feel the difference your new grips make, take your bike for a spin and experience the comfort and control for yourself. Here are some things to keep in mind during your test ride:
-
Pay attention to the comfort level of your new grips. Do they feel more comfortable than your old ones? Are they too soft or too hard?
-
Compare the comfort level to the style of the grips. Did you sacrifice style for comfort or vice versa? Is the trade-off worth it?
-
Test the grip’s ability to absorb shock. Ride over some bumps or rough terrain and see how well the grips absorb the impact.
-
Check the grip’s ability to prevent slipping. Ride in wet or damp conditions and see if the grips provide enough traction.
-
Finally, pay attention to any hand fatigue or discomfort. If you experience any discomfort, adjust the grip’s position or consider trying a different grip.
By taking your bike for a test ride, you can ensure that your new grips provide the comfort and control you need for a more enjoyable ride. Remember to pay attention to the comfort level, style, shock absorption, slip prevention, and hand fatigue during your ride.
Frequently Asked Questions
How do I know when it’s time to replace my bicycle grips?
I know it’s time to replace my bicycle grips when I notice signs of wear such as cracks, tears, or a loss of grip. Regular maintenance, like cleaning and proper storage, can prolong their lifespan. Choosing the right material, such as rubber or silicone, can also make a difference.
Can I reuse my old grips or do I need to buy new ones?
I prefer to repurpose my old bicycle grips instead of buying new ones. However, if they are worn out, eco-friendly options like cork or recycled rubber are available.
What’s the difference between different types of bicycle grips?
Oh boy, let’s talk about the thrilling topic of bicycle grips. Foam and rubber are the materials of choice, each with their own pros and cons. Lock on grips provide security, while slip on grips offer flexibility. Choose wisely, my friends.
How tight should I make the new grips?
When installing new bicycle grips, it’s important to use proper technique and not over tighten them. This can cause damage to the grips and make them difficult to remove in the future.
Can I install new grips without removing my brake levers and shifters?
I wondered if I could install new grips without removing my brake levers and shifters. After some research and experimentation, I found repositioning options and compatibility concerns. It is possible, but not always recommended for optimal grip placement and safety.
Conclusion
Changing bicycle grips is a simple task that can greatly improve your riding experience. With just a few tools and some new grips, you can easily upgrade your bike’s handlebars and enjoy a more comfortable and secure grip.
During my own grip replacement, I found that having a screwdriver, a pair of scissors, and some rubbing alcohol on hand made the process much smoother. Removing the old grips can be a bit tricky, but using the scissors to cut them off and the alcohol to loosen any adhesive made it much easier.
Once the old grips were off, I made sure to clean the handlebars thoroughly and let them dry before installing the new grips.
One example of the benefits of changing grips is a friend of mine who had been experiencing hand fatigue during long rides. After replacing his grips with a more ergonomic and cushioned option, he noticed a significant decrease in hand fatigue and was able to ride for longer periods of time comfortably.
Overall, changing your bike’s grips is a quick and easy way to improve your riding experience and make your bike feel like new again.
