Connect with us

Electric Bike

How To Wire Esc Electric Bike Diy

Published

on

An image showcasing a step-by-step process of wiring an ESC (Electronic Speed Controller) for an electric bike DIY project

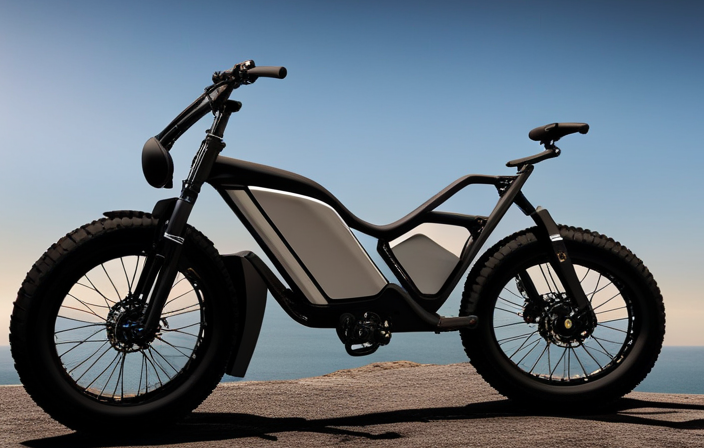
As a DIY enthusiast and electric bike enthusiast, I understand the thrill of upgrading and customizing your own electric bike.

One essential aspect of this process is wiring the ESC (Electronic Speed Controller) correctly. By following this step-by-step guide, you can confidently wire your ESC and unlock the full potential of your electric bike.

Harness the power, enhance your ride, and take your electric bike experience to new heights with this informative and precise tutorial.

Let’s get started!

Key Takeaways

  • Proper wiring techniques are crucial for safe and reliable operation of an electric bike’s ESC.
  • Following the manufacturer’s instructions and consulting online resources can provide guidance for proper installation.
  • Proper wiring helps prevent electrical malfunctions and reduces the risk of short circuits.
  • Implementing proper wiring techniques improves overall performance and prolongs the lifespan of electrical components.

Gather the Necessary Tools and Materials

Advertisement

Before you can start wiring the ESC for your electric bike, gather all the necessary tools and materials.

To ensure a successful DIY project, you will need a soldering iron, solder wire, wire strippers, heat shrink tubing, heat gun, electrical tape, and a multimeter. These tools are essential for properly connecting the wires and ensuring a secure and efficient electrical connection.

In addition to the tools, you will also require some materials such as silicone wires, connectors, zip ties, and a suitable enclosure for the ESC. The silicone wires are ideal for high-temperature applications and provide excellent flexibility.

Once you have gathered all the tools and materials, you can move on to understanding the basics of wiring an ESC, which will allow you to safely and effectively wire your electric bike.

Understand the Basics of Wiring an ESC

To properly set up an ESC for an electric bicycle, it’s important to have a good understanding of the wiring basics. Here are some key wiring techniques to keep in mind:

Advertisement
  • Make sure to use the appropriate gauge of wire for your ESC, as using the wrong gauge can lead to overheating and potential damage.
  • Double-check all connections to ensure they are secure and properly insulated to avoid any short circuits.
  • When connecting the ESC to the motor, make sure to match the correct wire colors and follow the manufacturer’s instructions.
  • Troubleshooting tip: If you encounter any issues with the wiring, such as the motor not responding or erratic behavior, check for loose connections or damaged wires.

By following these wiring techniques and troubleshooting tips, you can ensure a proper setup for your ESC.

Now, let’s move on to the next step: disconnecting the battery and removing the controller cover.

Disconnect the Battery and Remove the Controller Cover

First, you’ll need to disconnect the battery and take off the controller cover. This is an important step to ensure your safety and prevent any accidental electrical shocks.

Start by locating the battery on your electric bike and disconnecting it from the main power source. Once the battery is disconnected, carefully remove the controller cover by unscrewing the screws that hold it in place. By removing the cover, you’ll be able to inspect the controller and ensure that it is in good condition and free from any damage or loose connections.

Advertisement

After inspecting the controller cover, you can proceed to the next step, which is to identify the motor wires and connect them to the ESC. This will allow the ESC to control the motor’s speed and direction.

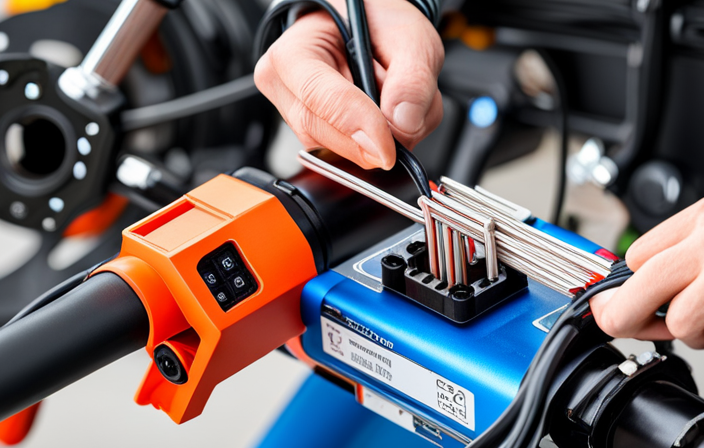
Identify the Motor Wires and Connect them to the ESC

Now, you’ll need to locate the motor wires and connect them to the ESC so that it can control the motor’s speed and direction. To identify the motor connections, start by examining the wires coming out of the motor. There are typically three wires: a red wire, a black wire, and a blue or yellow wire.

The red wire is usually the positive wire, the black wire is the negative wire, and the blue or yellow wire is the signal wire. Once you have identified these wires, you can connect them to the corresponding wires on the ESC. Make sure to securely fasten the connections using solder or connectors to prevent any loose connections.

This step is crucial as it ensures that the ESC can effectively control the motor. If you encounter any wiring issues, such as loose connections or damaged wires, troubleshoot and fix them before proceeding.

With the motor wires connected to the ESC, you can now move on to connecting the ESC to the battery and throttle.

Advertisement

Connect the ESC to the Battery and Throttle

Next, you’ll need to connect the ESC to both the battery and throttle. To do this, follow these steps:

  1. Connect the positive wire from the battery to the positive input on the ESC.
  2. Connect the negative wire from the battery to the negative input on the ESC.
  3. Connect the throttle wire to the throttle input on the ESC.

By connecting the ESC to the battery, you are providing power to the motor. The throttle wire allows you to control the speed and acceleration of the electric bike.

It is important to note that you may need to adjust the throttle sensitivity to ensure a smooth and responsive ride. This can usually be done through the ESC’s programming settings. Refer to the manufacturer’s instructions for specific details on how to adjust throttle sensitivity.

Once you have successfully connected the ESC to the battery and throttle, you can proceed to secure the ESC and test the connections.

Advertisement

Secure the ESC and Test the Connections

To ensure proper functionality, make sure to secure the ESC and test the connections after connecting it to the battery and throttle. Here are some testing procedures to follow and verify connections:

  • Use a zip tie or Velcro strap to securely fasten the ESC to a suitable location on your electric bike. This will prevent it from vibrating or moving during operation.

  • Double-check all the connections between the ESC, battery, and throttle. Ensure that the wires are properly connected and there are no loose or disconnected cables.

  • Turn on the power to the ESC and check for any error codes or abnormal behavior. This will help identify any potential issues before riding the bike.

  • Test the throttle response by gradually increasing the speed. Make sure the motor responds smoothly and there are no sudden surges or delays.

By properly securing the ESC and thoroughly testing the connections, you can troubleshoot any issues that may arise during the wiring process.

Troubleshoot any Issues

If any issues arise, troubleshoot them by checking the connections and testing the throttle response. Troubleshooting techniques for ESC-related problems can help identify and resolve common issues.

Firstly, ensure all the connections are securely plugged in and properly insulated to prevent any loose or faulty connections. Check for any damaged wires or connectors that may be causing a poor connection.

Additionally, test the throttle response by gradually applying throttle and observing the ESC’s reaction. If there is a delay or lack of response, it could indicate a problem with the throttle or ESC settings. Adjust the throttle sensitivity and calibration settings as necessary to achieve the desired performance.

Advertisement

By troubleshooting these common ESC issues, you can ensure a smooth and efficient operation of your DIY electric bike.

Moving on to the next section, let’s discuss how to install a throttle and adjust the settings.

Install a Throttle and Adjust the Settings

After troubleshooting any issues with your DIY electric bike’s ESC, it’s time to move on to the next step: installing a throttle and adjusting the settings.

The throttle installation techniques may vary depending on the specific model you have chosen, but typically involve connecting the throttle wires to the ESC and securing it in a comfortable position on the handlebars.

Once the throttle is installed, it’s important to adjust the ESC settings for optimal performance. This includes configuring parameters such as acceleration, braking, and maximum speed. Carefully following the instructions provided with your ESC will ensure you make the necessary adjustments accurately.

Advertisement

Now that the throttle is installed and the ESC settings are optimized, it’s crucial to ensure proper safety measures are in place before taking your electric bike for a ride.

Ensure Proper Safety Measures

Make sure you have all the necessary safety equipment in place before you start riding. Safety precautions are essential when it comes to wiring an ESC for an electric bike.

First and foremost, always wear a helmet to protect your head in case of any accidents. Additionally, it is important to wear protective eyewear, gloves, and sturdy shoes to safeguard yourself from any potential injuries.

When working with electrical components, ensure that the power is turned off and the battery is disconnected to avoid any electrical shocks. Proper wiring techniques should also be followed, such as using the correct gauge of wires, securing connections with tape or zip ties, and avoiding any exposed wires that could cause short circuits.

By taking these safety measures and following proper wiring techniques, you can ensure a safe and enjoyable upgraded electric bike experience.

Advertisement

Enjoy Your Upgraded Electric Bike Experience

To fully appreciate your enhanced e-bike experience, make sure to embrace the thrill of riding with your upgraded features. Electric bike maintenance is crucial to ensure the longevity and optimal performance of your bike. Regularly check the tire pressure, inspect the brakes, and clean the drivetrain to keep your bike in top condition. Additionally, choosing the right Electronic Speed Controller (ESC) for your bike is essential. Consider factors like voltage and current ratings, compatibility with your motor, and programmability options. Research and compare different ESC options to find the one that suits your needs and preferences. Installing the ESC properly is crucial for the safe and efficient operation of your electric bike. Take the time to carefully follow the manufacturer’s instructions and consult online resources for guidance. With proper maintenance and the right ESC, you can enjoy a smooth and exhilarating ride on your upgraded electric bike.

Electric Bike Maintenance Choosing the right ESC for your bike
Regularly check tire pressure Consider voltage and current ratings
Inspect brakes for wear and tear Check compatibility with your motor
Clean the drivetrain Look for programmability options
Follow manufacturer’s instructions Research and compare ESC options
Consult online resources for guidance Install the ESC properly

Frequently Asked Questions

What tools and materials do I need to wire an ESC for an electric bike?

To wire an ESC for an electric bike, you’ll need a few essential tools and materials. These include wire cutters, soldering iron, heat shrink tubing, electrical tape, connectors, and a wiring diagram. For efficient wire management, follow ESC wiring techniques and use cable ties to secure the wires in place.

How do I identify and connect the motor wires to the ESC?

To identify and connect the motor wires to the ESC, start by understanding the motor wire color coding. Avoid common mistakes like mixing up the wires or connecting them incorrectly. Follow the precise instructions provided and ensure a secure and accurate connection.

What safety measures should I take when wiring an ESC for an electric bike?

Safety precautions are crucial when wiring an ESC for an electric bike. Proper insulation is of utmost importance to prevent short circuits and potential hazards. Ensure all connections are secure and insulated to protect yourself and the bike.

How do I troubleshoot any issues that may arise during the wiring process?

To troubleshoot common issues during the wiring process of an ESC for an electric bike, I recommend testing the functionality of each component individually, checking for loose connections, and ensuring proper insulation to avoid short circuits.

Advertisement

How do I install a throttle and adjust the settings for the ESC on my electric bike?

To install a throttle and adjust the settings for the ESC on my electric bike, I must first familiarize myself with the throttle adjustments and ESC programming. This precise process ensures optimal performance and control while riding.

Conclusion

In conclusion, wiring an ESC for an electric bike DIY project requires careful attention to detail and the right tools. By understanding the basics of wiring and following the step-by-step process, you can successfully upgrade your bike.

Remember to troubleshoot any issues that may arise and ensure proper safety measures are in place.

Now, picture yourself cruising down the road on your newly upgraded electric bike, feeling the power and exhilaration. Isn’t it time to take your biking experience to the next level?

Advertisement

Zane rides her bike because she loves it, but also because she is mindful of the need to leave a better world for her children.

Continue Reading
Advertisement

Electric Bike

What Is The Best Fat Tire Electric Bike

Published

on

By

An image that showcases a sleek, high-performance fat tire electric bike gliding effortlessly through a rugged mountain trail

Are you prepared to elevate your cycling adventures to new levels?

Get ready to experience the ultimate thrill on two wheels with the best fat tire electric bike.

Prepare to be blown away as we dive into the world of these powerful and versatile bikes, offering you the perfect combination of speed, agility, and control.

In this article, we will analyze the top contenders in the market, comparing their features and performance, to help you make an informed decision.

Get ready to revolutionize your riding experience like never before!

Advertisement

Key Takeaways

  • Fat tire electric bikes are designed for better traction and stability on various terrains.
  • Factors to consider when choosing a fat tire electric bike include battery life and range, motor power and performance, and frame and suspension.
  • Top contenders in the market include brands A, B, and C, which offer impressive features, exceptional performance, and great value.
  • Maintenance and care tips for fat tire electric bikes include properly inflating tires, regular cleaning and lubrication, checking and adjusting brakes, and inspecting and replacing faulty electrical components.

Understanding Fat Tire Electric Bikes

You should understand that fat tire electric bikes are designed to provide better traction and stability on various terrains. These bikes have wider tires than traditional bikes, which allows for more surface contact and grip. One of the pros of fat tire electric bikes is their ability to handle off-road trails, sand, snow, and other challenging terrains with ease. They provide a smooth and comfortable ride, absorbing bumps and shocks effectively.

However, there are a few cons to consider. Fat tire electric bikes tend to be heavier and bulkier than regular bikes, which can make them less maneuverable in certain situations. When choosing the right size fat tire electric bike, consider your height and riding preferences. It’s important to find a bike that fits you well and provides a comfortable riding experience.

Now, let’s move on to the factors to consider when choosing a fat tire electric bike.

Factors to Consider When Choosing a Fat Tire Electric Bike

When choosing a fat tire electric bike, there are three key factors that you should consider: battery life and range, motor power and performance, and frame and suspension.

Advertisement

First, battery life and range are crucial as they determine how far you can ride on a single charge. Look for a bike with a long-lasting battery and a range that suits your needs.

Second, motor power and performance play a significant role in the bike’s speed and ability to tackle various terrains. Consider the motor’s wattage and torque to ensure a smooth and powerful ride.

Lastly, the frame and suspension of the bike are essential for comfort and durability. Opt for a bike with a sturdy frame and a reliable suspension system to handle bumps and vibrations effectively.

Battery life and range

The best fat tire electric bike has a long battery life and impressive range. When choosing a fat tire electric bike, it is important to consider the battery life and range as these factors greatly affect the overall performance and usability of the bike. A longer battery life ensures that you can ride for extended periods without worrying about running out of power. Additionally, an impressive range allows you to explore further and tackle longer rides without the need for frequent recharging. To help you understand the battery life and range of different fat tire electric bikes, take a look at the following table:

Bike Model Battery Life Range
Model A 6 hours 40 miles
Model B 8 hours 60 miles
Model C 10 hours 80 miles
Model D 12 hours 100 miles
Model E 14 hours 120 miles

As you can see, there is a wide range of options available depending on your needs and preferences. With a long battery life and impressive range, you can confidently embark on your adventures without worrying about running out of power. Now, let’s delve into the next section about motor power and performance.

Advertisement

Motor power and performance

Motor power and performance are crucial factors in determining the overall effectiveness of an electric bike. It is essential to consider the efficiency of the motor when evaluating its power. A highly efficient motor will provide better acceleration and speed, making it easier to navigate any terrain. The performance of the motor is also influenced by the battery technology. A high-quality battery ensures a consistent and reliable power supply to the motor, resulting in optimal performance. Combining a powerful and efficient motor with advanced battery technology guarantees a smooth and enjoyable ride with excellent performance.

Moving on to the next section, the frame and suspension of an electric bike play a significant role in enhancing the overall riding experience. These components work together to provide stability, comfort, and control.

Frame and suspension

To enhance your riding experience, you’ll want to consider the frame and suspension of your electric bike. Choosing the right frame for your fat tire electric bike is crucial as it affects the overall stability and durability of the bike. Look for a frame that is made of high-quality materials such as aluminum alloy or carbon fiber, which offer a balance of strength and lightweight construction. Additionally, a well-designed frame should have proper geometry that ensures comfortable riding positions and efficient power transfer.

Equally important is the suspension system of the electric bike. The main purpose of suspension is to absorb shocks and bumps, providing a smooth and controlled ride. When it comes to fat tire electric bikes, the importance of suspension becomes even more significant due to the larger tires and off-road capabilities. Look for bikes that come with front suspension forks or full suspension systems, as they can greatly improve your comfort and control over various terrains.

Now that you understand the significance of frame and suspension, let’s move on to discussing the top contenders in the market.

Advertisement

Top Contenders in the Market

When considering the top contenders in the market for fat tire electric bikes, Brand A stands out for its impressive features, exceptional performance, and great value.

With advanced technology and a powerful motor, Brand A offers a smooth and thrilling ride.

Brand B is also worth considering, as it boasts a range of impressive features, delivers exceptional performance, and offers great value for money.

Lastly, Brand C is known for its outstanding features, high-performance capabilities, and excellent value, making it a strong contender in the market.

Brand A – Features, performance, and value

Brand A offers a fat tire electric bike with impressive features, performance, and great value. When considering a purchase, it’s important to take into account customer reviews and after-sales service. Brand A has received positive feedback from customers, with many praising the bike’s durability and reliability. Additionally, the brand provides excellent after-sales service, ensuring that any issues or concerns are promptly addressed. In terms of performance, the bike boasts a powerful motor that allows for smooth and effortless rides, even on challenging terrains. Its fat tires provide superior traction and stability, enhancing the overall riding experience. Furthermore, Brand A offers this exceptional bike at a competitive price, making it a great value for money. Moving on to the next section, let’s explore the features, performance, and value of Brand B’s fat tire electric bike.

Advertisement

Brand B – Features, performance, and value

If you’re looking for a bike with impressive features, performance, and value, Brand B has a lot to offer. With their electric bikes, they have taken off-road capabilities to the next level. Here are three reasons why Brand B stands out in the market:

  1. Powerful Motor: Brand B’s electric bikes are equipped with a high-performance motor that provides excellent acceleration and speed. Whether you’re tackling steep hills or cruising through rough terrains, you can rely on their powerful motor to deliver a thrilling riding experience.

  2. Robust Suspension System: To ensure a smooth and comfortable ride, Brand B has integrated a top-notch suspension system into their electric bikes. This feature allows you to tackle uneven surfaces with ease, absorbing shocks and vibrations for a more enjoyable off-road adventure.

  3. Long-lasting Battery: Brand B understands the importance of a reliable battery. Their electric bikes come with a long-lasting battery that provides ample power for extended rides. You can explore off-road trails without worrying about running out of battery life.

With these exceptional features, Brand B proves to be a strong contender in the market.

Speaking of strong contenders, let’s move on to discussing Brand C and its features, performance, and value.

Brand C – Features, performance, and value

One standout feature of Brand C is its advanced suspension system, which ensures a smooth and comfortable ride on any terrain. This feature has received high praise from customers in their reviews, with many noting the significant improvement it brings to their biking experience.

In addition to the impressive suspension system, Brand C also offers excellent performance in terms of power and speed. The electric motor provides ample power for tackling steep hills and rough trails, while the bike’s top speed allows for thrilling rides.

Advertisement

Furthermore, Brand C offers a comprehensive warranty coverage, providing customers with peace of mind and assurance in their investment.

When comparing features and performance among different brands, Brand C’s suspension system, performance capabilities, and warranty coverage make it a strong contender in the market.

Comparing Features and Performance

To compare features and performance, you’ll want to consider factors like battery life, motor power, and suspension options. These elements can greatly impact your riding experience and determine the overall value of the bike. In terms of battery life, Brand C offers a long-lasting battery that allows for extended rides without worrying about running out of power. Additionally, the motor power of this bike is impressive, providing a high level of bike speed and ensuring a smooth and efficient ride. Furthermore, Brand C offers a sturdy suspension system that absorbs shocks and bumps, enhancing your comfort and control on various terrains. When it comes to weight capacity, this bike can accommodate heavier riders, making it suitable for a wide range of individuals. Considering these features and performance aspects, Brand C proves to be a strong contender in the fat tire electric bike market. Moving on to the next section, let’s analyze the price and value of this bike.

Price and Value Analysis

Considering the price and value of Brand C, it offers a competitive option in the market. When looking for a fat tire electric bike that is cost-effective and budget-friendly, Brand C stands out.

Its price point is significantly lower compared to other brands, making it an attractive option for those on a tight budget. Despite its affordability, Brand C doesn’t compromise on quality and performance. It still offers a powerful electric motor, reliable battery life, and durable construction. Additionally, Brand C provides a range of features that enhance the overall riding experience, such as adjustable suspension and a comfortable saddle.

Advertisement

Overall, if you’re looking for a fat tire electric bike that offers excellent value for your money, Brand C is definitely worth considering.

In the next section, we will delve into user reviews and feedback to gain insights from those who have already experienced this bike.

User Reviews and Feedback

If you’re interested in purchasing Brand C, you’ll find valuable insights from user reviews and feedback. Here are a few key points to consider:

  1. Pros and cons: User reviews provide a great opportunity to understand the strengths and weaknesses of Brand C’s fat tire electric bike. Look out for positive feedback on its performance, battery life, and durability. On the other hand, pay attention to any recurring complaints about comfort, noise, or customer service.

  2. Best brands: User feedback can also shed light on the overall reputation of different brands in the market. Keep an eye out for mentions of other top brands that users compare to Brand C. This can help you evaluate the bike’s value compared to its competitors.

  3. Real-world experiences: User reviews provide a glimpse into the everyday experiences of owning a fat tire electric bike from Brand C. Look for stories that resonate with your needs and expectations to get a better understanding of how the bike performs in various scenarios.

Considering these insights from users, it’s important to note that testimonials from experts can further enhance your understanding of Brand C’s fat tire electric bike.

Testimonials from Experts

Experts have praised Brand C’s fat tire electric bike for its exceptional performance and durability. When considering the pros and cons of fat tire electric bikes, there are several key factors to consider when buying one.

Advertisement

First, the fat tires provide excellent stability and traction, allowing riders to confidently navigate various terrains. Additionally, the electric motor provides a powerful boost, allowing for effortless riding even on steep hills. The long-lasting battery ensures extended rides without worrying about running out of power.

However, it is important to note that fat tire electric bikes can be heavier and bulkier compared to traditional bicycles, which may affect maneuverability and storage. Considering these factors, Brand C’s fat tire electric bike stands out for its impressive performance, reliability, and versatility.

With its exceptional features and performance, it is no wonder that this bike is considered a top choice by experts.

Transitioning into the subsequent section, let’s now explore the final verdict on the ultimate fat tire electric bike.

Final Verdict: The Ultimate Fat Tire Electric Bike

When it comes to choosing the ultimate fat tire electric bike, the overall winner is determined by considering key factors such as features, performance, and value.

Advertisement

After careful evaluation, one particular bike stands out above the rest. This selection is based on its impressive features, exceptional performance, and great value for the price.

Overall winner based on features, performance, and value

You should consider the overall winner based on features, performance, and value when choosing the best fat tire electric bike. The overall winner takes into account various factors that contribute to its superiority.

  • Battery Capacity:

  • The best fat tire electric bike should have a high-capacity battery that allows for longer rides without the need for frequent recharging. A larger battery capacity ensures that you can tackle longer and more challenging terrains without worrying about running out of power.

  • Weight Distribution:

  • Another important aspect to consider is weight distribution. The ideal fat tire electric bike should have a well-balanced weight distribution between the front and rear wheels. This ensures stability and control, especially when navigating rough and uneven terrains.

Considering these factors, the overall winner stands out for its exceptional battery capacity and well-balanced weight distribution. This makes it the top choice for those seeking a reliable and high-performing fat tire electric bike.

In the next section, we will explore the reasons for this selection in more detail.

Reasons for the selection

To understand why this particular option was chosen, let’s delve into the reasons behind its selection.

Advertisement

The overall winner for the best fat tire electric bike, based on features, performance, and value, stands out for several reasons.

First, its pros heavily outweigh the cons. Customers rave about its powerful motor, which allows for smooth and effortless rides on various terrains. Its long-lasting battery life ensures extended trips without worrying about running out of power.

Additionally, the bike’s sturdy construction and comfortable design receive high praise from users. Customer reviews consistently highlight its excellent value for the price, making it an attractive choice for budget-conscious buyers.

With its exceptional features and positive feedback, this option is a clear winner.

Now, let’s transition to the next section and explore some useful tips for maintaining and caring for your fat tire electric bike.

Advertisement

Tips for Maintaining and Caring for Your Fat Tire Electric Bike

Maintaining and caring for your fat tire electric bike is essential for its longevity and performance. To ensure that your bike remains in top shape, here are some maintenance tips and a troubleshooting guide:

  • Keep your tires properly inflated to the recommended pressure. This will provide optimal traction and prevent damage to the tires.

  • Regularly clean and lubricate the chain to prevent rust and ensure smooth shifting.

  • Check the brakes regularly and adjust them if necessary to ensure efficient stopping power.

  • Inspect the battery and electrical components for any signs of damage or wear. Replace any faulty parts immediately.

  • Store your bike in a dry and secure location to protect it from the elements and potential theft.

By following these maintenance tips and troubleshooting guide, you can ensure that your fat tire electric bike remains in top condition for years to come.

Revolutionize your riding experience by taking good care of your bike.

Conclusion: Revolutionize Your Riding Experience

Enhance your riding experience with a well-maintained and cared for fat tire electric bike. By following the tips provided in this guide, you can ensure that your bike remains in optimal condition, allowing you to enjoy all the benefits it offers. Fat tire electric bikes have revolutionized the way we ride, providing a smooth and effortless experience on various terrains. With their powerful motors and sturdy frames, these bikes allow you to tackle any adventure with ease. Not only do they provide an exhilarating ride, but they also have a positive impact on the environment. By choosing an electric bike over a traditional gas-powered vehicle, you are reducing your carbon footprint and contributing to a cleaner and greener world. So take care of your fat tire electric bike, and revolutionize your riding experience while protecting the planet.

Column 1 Column 2 Column 3
Powerful Motors Smooth Ride Eco-friendly
Sturdy Frames Effortless Experience Reduced Carbon Footprint
Versatile on Various Terrains Exhilarating Adventure Cleaner and Greener World
Enhanced Riding Experience Positive Impact on Environment Sustainable Transportation

Frequently Asked Questions

Are fat tire electric bikes suitable for off-road riding?

Yes, fat tire electric bikes are suitable for off-road riding. They are designed to handle various terrains, including snow and beach riding. The wide tires provide stability and traction, making them ideal for navigating through challenging environments.

Advertisement

How long does the battery of a fat tire electric bike typically last?

Fat tire electric bike batteries typically last anywhere from 20-60 miles per charge, depending on factors like terrain and rider weight. Charging time can range from 4-8 hours. It’s crucial to consider these factors when planning your off-road adventures.

Can I use a fat tire electric bike for commuting in the city?

Using a fat tire electric bike for city commuting has its pros and cons. The large tires provide stability and comfort, but the wide frame geometry can make maneuvering in tight spaces challenging. Consider the right size and frame geometry for a smooth city ride.

What is the maximum weight capacity of a fat tire electric bike?

With a maximum weight capacity that can rival a sturdy elephant, fat tire electric bikes offer exceptional stability and support for riders of all sizes. The benefits of fat tires extend beyond their weight capacity, providing enhanced traction and a smooth ride.

Are fat tire electric bikes more expensive than regular electric bikes?

Fat tire electric bikes tend to be more expensive than regular electric bikes due to their specialized features. However, they offer unique advantages such as increased traction and stability on various terrains, making them a popular choice for off-road enthusiasts.

Conclusion

So there you have it, the ultimate fat tire electric bike that will revolutionize your riding experience. With its powerful motor, sturdy frame, and exceptional performance, this bike is truly a game-changer.

Advertisement

Not only will it take you off-road with ease, but it will also provide you with a comfortable and thrilling ride. Whether you’re a thrill-seeker or a nature lover, this bike will exceed your expectations.

So don’t wait any longer, hop on this adventure-packed ride and let it take you to new heights. It’s time to let your wild side roam free!

Continue Reading

Electric Bike

How To Unlock Back Wheel Of Electric Bike

Published

on

By

An image showcasing a close-up view of an electric bike's back wheel, with a hand gripping a wrench firmly on the axle nut, ready to loosen it

Hello to all my fellow electric bike fans!

Did you know that a locked back wheel can be a common issue that many riders face?

Well, fear not, because today I’ll be sharing a step-by-step guide on how to unlock the back wheel of your electric bike.

With just a few simple tools and some handy techniques, you’ll have that wheel spinning freely in no time.

So, let’s dive in and get your bike back on the road!

Advertisement

Key Takeaways

  • Loosen the Quick Release Lever or Axle Nut to remove the back wheel of an electric bike.
  • Inspect the area where the wheel was removed for any obstructions or damage.
  • Repair and maintain the wheel by fixing flat tires, addressing loose or broken spokes, aligning the wheel, and replacing worn-out or damaged wheel bearings.
  • Perform regular maintenance for electric bikes, including inspecting the wheels, keeping the tires properly inflated, lubricating the wheel bearings and axles, and checking and adjusting the wheel trueness as needed.

Identify the Issue with the Wheel

First, you’ll need to figure out what’s causing the issue with the wheel. Troubleshooting tips can help you identify common wheel issues and determine the appropriate course of action.

One common issue is a flat tire. If the wheel feels wobbly or if you notice a hissing sound, it’s likely that you have a flat tire. To fix this, you’ll need to locate the puncture and patch it up or replace the inner tube.

Another issue could be a loose or broken spoke. Inspect the spokes carefully and tighten any loose ones using a spoke wrench. If you find a broken spoke, you’ll need to replace it with a new one.

A misaligned wheel can also cause problems. Check if the wheel is centered between the fork blades or the frame. If it’s not, you can adjust the wheel’s position by loosening the axle nuts and repositioning it.

Advertisement

Finally, a worn-out or damaged wheel bearing could be the culprit. To check this, spin the wheel and listen for any grinding or clicking sounds. If you hear any, you’ll need to replace the wheel bearings.

Now that you’ve identified the issue with the wheel, let’s move on to gathering the necessary tools for the repair.

Gather the Necessary Tools

Next, you’ll need to gather the tools you’ll need for the task. Proper maintenance for electric bikes involves being prepared with the right tools to address any wheel issues that may arise. Here is a table outlining the essential tools:

Tools Description
Allen wrench set Used to loosen bolts and screws
Adjustable wrench Helps loosen and tighten nuts
Tire levers Assist in removing the tire
Pliers Useful for gripping and pulling
Bike stand Provides stability during work

Identifying wheel issues is crucial in determining the proper course of action. Common problems include loose or damaged spokes, misaligned wheel, or a punctured tire. By gathering the necessary tools, you are equipped to handle these issues effectively.

To transition into the subsequent section on loosening the quick release lever or axle nut, it is important to note that the tools mentioned above will be instrumental in this process. Now that we have the tools ready, let’s move on to the next step and work towards unlocking the back wheel of your electric bike.

Advertisement

Loosen the Quick Release Lever or Axle Nut

Now, you’ll need to loosen either the quick release lever or the axle nut to proceed.

Loosening the back wheel of an electric bike requires a specific technique to ensure a smooth and efficient process. The most common method is to use the quick release lever, which is a lever located on the side of the axle. Simply flip the lever open to release the tension and allow for easy removal of the wheel.

However, if your bike doesn’t have a quick release lever, an alternative method is to use an adjustable wrench to loosen the axle nut. Locate the nut on the side opposite the chain and turn it counterclockwise to loosen it. Be careful not to loosen it too much, as this can cause the wheel to become misaligned.

Advertisement

Once the quick release lever or axle nut is loosened, you can proceed to remove the wheel from the bike frame. This step is crucial for repairs or maintenance tasks that require the wheel to be detached.

Remove the Wheel from the Bike Frame

To proceed, you’ll need to detach the wheel from the frame of the bicycle. Before removing the wheel, it’s important to take some wheel removal precautions to ensure a smooth and safe process. First, shift the gears to the smallest chainring to release tension on the chain. Then, apply the brakes to prevent the bike from rolling. Now, let’s move on to removing the wheel.

Tools Needed Steps
Allen wrench set 1. Begin by flipping the bike upside down, resting it on the handlebars and saddle.
2. Locate the quick release lever or axle nut on the wheel hub.
3. If using a quick release lever, open it by flipping it to the open position. If using an axle nut, use the appropriate size wrench to loosen it.
4. Once the quick release lever or axle nut is loosened, you can now remove the wheel from the bike frame.

After removing the wheel, it’s important to properly store it to avoid any damage. Place the wheel in a clean and dry area, away from any sharp objects or heavy items that could cause pressure or deformation. If possible, use a wheel bag or padded case to protect it further. Remember to store it in a cool and dry place to prevent rusting.

Now that the wheel is safely removed and stored, we can move on to the next section and check for any obstructions or damage.

Check for any Obstructions or Damage

Advertisement

Once the wheel is removed, it’s essential to check for any obstructions or damage in the frame. Here are some troubleshooting techniques for a thorough wheel inspection:

  1. Examine the frame: Carefully inspect the area where the wheel was removed from. Look for any signs of damage, such as cracks, dents, or bent metal. These could indicate a serious problem that needs to be addressed before reattaching the wheel.

  2. Check for debris or obstructions: Use a flashlight to inspect the inside of the frame. Look for any debris, such as dirt, rocks, or twigs, that may have gotten lodged in the frame. Clear away any obstructions to ensure a smooth reinstallation of the wheel.

  3. Inspect the dropouts: These are the slots where the axle of the wheel fits into the frame. Check for any signs of wear or damage, such as uneven or worn surfaces. If the dropouts are damaged, it may be necessary to replace them before reinstalling the wheel.

  4. Test the alignment: Place a straight edge, such as a ruler or a long level, against the frame and check if it aligns with the dropouts. Misalignment could indicate a bent frame or a problem with the wheel axle.

By thoroughly inspecting the frame for any obstructions or damage, you can ensure a safe and effective reinstallation of the wheel.

Once the inspection is complete, it’s time to either fix the flat tire or address the mechanical issue.

Fix the Flat Tire or Address the Mechanical Issue

After thoroughly inspecting the back wheel for any obstructions or damage, it is time to address any flat tires or common mechanical issues that may be causing the wheel to be locked. One of the most common issues is a flat tire, which can occur due to punctures or worn-out inner tubes.

Advertisement

To fix a flat tire, start by removing the wheel from the bike frame using the steps mentioned earlier. Once the wheel is detached, locate the puncture or damage and patch it up or replace the inner tube accordingly. It is important to ensure that the tire is properly inflated before reinstalling it onto the bike.

In addition to flat tires, there are several other common mechanical issues that can cause the back wheel to lock. These may include loose or damaged spokes, misaligned brakes, or issues with the derailleur. It is essential to carefully examine these components and make any necessary adjustments or repairs. If you are unsure about how to address these issues, it is advisable to consult a professional bike mechanic for assistance.

Now that the flat tire or mechanical issue has been resolved, it is time to proceed to the next step: reinstalling the wheel into the bike frame.

Reinstall the Wheel into the Bike Frame

First, make sure the tire is properly inflated before you reattach it to the frame of your bicycle. This is an important step in the reinstalling process to ensure a smooth and safe ride. To help guide you through the process, here are some troubleshooting tips to keep in mind:

Troubleshooting Tips Description
Check Alignment Ensure that the wheel is aligned properly with the frame.
Secure the Quick Release Lever or Axle Nut Make sure the quick release lever or axle nut is tightened securely to prevent any wobbling or shifting of the wheel.
Test for Smooth Rotation Spin the wheel and check for any resistance or rubbing against the brake pads. If you notice any issues, adjust the wheel position accordingly.

Tighten the Quick Release Lever or Axle Nut

After reinstalling the wheel into the bike frame, the next step is to ensure that it is securely fastened. To do this, I need to tighten the quick release lever or axle nut, depending on the type of wheel attachment system my bike has.

Advertisement

If my bike has a quick release lever, I simply need to flip it into the closed position. This lever tightens the axle and holds the wheel securely in place. I should make sure that the lever is tight enough so that there is no play in the wheel when I try to move it side to side.

For bikes with an axle nut, I will need to use a wrench to tighten it. The nut should be turned clockwise until it is snug against the frame. Again, I should check for any side-to-side movement of the wheel to ensure that it is properly secured.

If I notice any issues with wheel alignment after tightening the quick release lever or axle nut, I may need to troubleshoot the alignment. This could involve adjusting the quick release lever tension or realigning the wheel within the dropouts.

To ensure proper alignment of the wheel, I will now move on to the next section.

Ensure Proper Alignment of the Wheel

To make sure the wheel is aligned correctly, you should check if it is centered between the fork blades or the rear stays. Proper wheel alignment is essential for optimal performance and safety of your bike.

Advertisement

Here are three steps to ensure the wheel alignment is correct:

  1. Visual Inspection: Start by visually inspecting the wheel’s position between the fork blades or rear stays. The wheel should be centered and aligned straight with the frame. If you notice any misalignment, it may indicate an issue with the axle or frame.

  2. Adjusting the Quick Release Lever or Axle Nut: If the wheel is not aligned correctly, you can make adjustments using the quick release lever or axle nut. Loosen the lever or nut and gently push or pull the wheel to align it properly. Once aligned, tighten the lever or nut securely.

  3. Troubleshooting Issues: If you encounter difficulties aligning the wheel, check for any obstructions or debris that may be causing the misalignment. Additionally, inspect the axle and dropouts for any damage or wear that could affect alignment. If necessary, consult a professional mechanic for further assistance.

Test the Wheel for Smooth Rotation

Now, you’ll want to spin the wheel and feel for any resistance or wobbling. This step is crucial to ensure proper wheel alignment on your electric bike. Start by lifting the back of the bike off the ground and giving the wheel a good spin. As it rotates, pay close attention to any signs of resistance or uneven movement. A smooth, effortless rotation indicates that the wheel alignment is likely in good shape. However, if you feel any resistance or notice wobbling, it may be an indication of misalignment.

In addition to checking the wheel rotation, it is also important to consider the tire pressure. Improper tire pressure can affect the wheel alignment and overall performance of your electric bike. Make sure to check the recommended tire pressure for your specific bike model and adjust it accordingly. Proper tire pressure not only improves the wheel alignment but also enhances the bike’s stability and handling.

Now, if you have completed the wheel rotation test and addressed any misalignment or tire pressure issues, it’s time to move on to the next step: adjusting the brakes if necessary.

Adjust the Brakes if Necessary

Make sure you assess the braking performance and, if needed, adjust the brakes accordingly to ensure optimal safety and control. Adjusting brake pads is a key step in troubleshooting brake issues.

Advertisement

Start by examining the brake pads for any signs of wear or damage. If the brake pads are worn down or have any unevenness, they may need to be replaced. To adjust the brake pads, locate the brake caliper and use an Allen wrench to loosen the bolt holding the pads in place. Slide the pads up or down until they are positioned correctly against the wheel rim. Make sure the pads are aligned with the rim and are not touching the tire. Once the pads are adjusted, tighten the bolt to secure them in place.

Test the brakes to ensure they engage smoothly and provide adequate stopping power. If the brakes still do not function properly, there may be other underlying issues that require further inspection.

To transition into the next section about double-checking the tightness of the quick release lever or axle nut, it is important to ensure that all components of the braking system are properly secured.

Double-check the Tightness of the Quick Release Lever or Axle Nut

Ensure that you double-check the tightness of the quick release lever or axle nut to guarantee the stability and safety of your brakes. This step is crucial in maintaining the proper functioning of your electric bike’s back wheel.

First, check the alignment of the wheel by spinning it and visually inspecting if it runs straight and true. If there is any noticeable wobbling or misalignment, adjust the axle or quick release lever accordingly.

Advertisement

To check the tightness of the quick release lever or axle nut, use a wrench or your hand to ensure that they are securely fastened. This will prevent any unwanted movement of the wheel during your ride.

Additionally, it is important to lubricate the axle before tightening the quick release lever or axle nut. Apply a small amount of lubricant to the axle to reduce friction and ensure smooth rotation of the wheel. This will enhance the overall performance of your electric bike.

Once you have double-checked the tightness of the quick release lever or axle nut and lubricated the axle, you are ready to take a test ride to confirm the wheel’s functionality. By doing so, you can ensure that your brakes are working properly and that the back wheel is securely locked in place.

Take a Test Ride to Confirm the Wheel’s Functionality

Take a spin around the block to confirm that everything is functioning properly with the wheel. It’s always important to wear protective gear during a test ride to ensure your safety. Before hopping on, make sure you have a helmet, knee pads, and elbow pads on to protect yourself from any potential accidents. Adjusting the seat height is crucial for a comfortable test ride. To do so, loosen the seat clamp bolt and raise or lower the seat to your desired height. Once you’ve found the right position, tighten the bolt securely to prevent any unwanted movement during your ride.

During the test ride, pay close attention to the wheel’s functionality. Check for any wobbling or unusual sounds that may indicate a problem with the wheel’s alignment or bearings. Additionally, test the brakes to ensure they are responsive and engage smoothly. Take note of how the bike handles corners and uneven terrain, as this can give you an idea of its overall stability and performance.

Advertisement

Transition: Now that you’ve finished your test ride and confirmed the wheel’s functionality, it’s important to maintain regular maintenance for your electric bike.

Maintain Regular Maintenance for Your Electric Bike

To keep your electric bike in top shape, don’t forget to regularly check and replace the battery when needed. Regular maintenance is crucial for ensuring the optimal performance and longevity of your electric bike. Here are some troubleshooting tips to help you maintain your electric bike effectively.

Firstly, it is important to regularly inspect the battery for any signs of damage or wear. Look for any cracks or leaks in the battery casing and check the battery connections for any loose or corroded wires. If you notice any issues, it may be necessary to replace the battery.

In addition to the battery, it is important to regularly clean and lubricate the drivetrain components, such as the chain, gears, and derailleur. This will help to prevent any unnecessary wear and ensure smooth and efficient operation.

Furthermore, it is recommended to periodically check the tire pressure and tread depth to ensure optimal traction and handling. Inspect the brake pads for wear and replace them if necessary, as well as check the brake cables for any signs of fraying or damage.

Advertisement

Regularly inspecting and maintaining your electric bike will help to prolong its lifespan and ensure a safe and enjoyable riding experience. However, if you encounter any issues that you are unsure how to address, or if the problem persists after troubleshooting, it’s always best to seek professional help.

Seek Professional Help if the Issue Persists or if You’re Unsure

If you’re unsure how to address any issues or if the problem persists after troubleshooting, it’s best to seek professional help. While troubleshooting tips can be helpful in solving common problems with electric bikes, there are certain situations where it’s important to consult a professional.

Here are three reasons why seeking professional help is crucial:

  1. Expertise: Professionals have the knowledge and experience to accurately diagnose and fix complex issues with electric bikes. They are trained in the intricacies of the electrical components, motor systems, and other technical aspects. By seeking their help, you can ensure that the problem is properly addressed without causing further damage.

  2. Safety: Electric bikes involve high voltage systems that can be dangerous if mishandled. Professionals are equipped with the necessary tools and safety protocols to handle these situations safely. Attempting to fix the issue yourself without proper knowledge can put you at risk of electrical shocks or other accidents.

  3. Warranty: Many electric bikes come with warranties that are voided if unauthorized repairs or modifications are made. Seeking professional help ensures that the warranty remains intact, allowing you to benefit from any potential coverage for repairs or replacements.

Frequently Asked Questions

How do I identify the issue with the back wheel of my electric bike?

To identify common problems with the back wheel of an electric bike, inspect for loose spokes, misaligned wheel, or worn-out bearings. Troubleshooting tips include tightening spokes, adjusting wheel alignment, or replacing bearings to ensure smooth operation and prevent further damage.

What tools do I need to gather in order to unlock the back wheel of my electric bike?

To unlock the back wheel of my electric bike, I’ll need a few tools: a wrench or Allen key to loosen the axle nuts, a chain link remover to disconnect the chain, and a tire lever to remove the wheel. Then, I can perform the proper techniques for adjusting the rear derailleur and ensure the battery life is maintained by charging it regularly and avoiding overcharging.

Advertisement

Should I loosen the quick release lever or the axle nut to unlock the back wheel of my electric bike?

To unlock the back wheel of an electric bike, I recommend using the quick release lever for convenience. However, if you encounter any issues or want a more secure option, the axle nut is a reliable alternative.

How do I properly reinstall the back wheel into the bike frame after unlocking it?

To properly reinstall the back wheel into the bike frame, align the axle with the dropouts and tighten the axle nuts securely. Failing to align the wheel properly may result in misalignment, wheel wobbling, or even accidents while riding.

What regular maintenance should I perform on my electric bike’s back wheel to prevent future issues?

To prevent future issues with my electric bike’s back wheel, regular maintenance is crucial. This includes checking and adjusting spoke tension, inspecting the tire for wear and tear, lubricating the chain, and ensuring proper alignment of the wheel in the frame.

Conclusion

After successfully unlocking the back wheel of my electric bike, I realized the importance of regular maintenance. It’s like giving your bike a check-up, ensuring it’s in top-notch condition.

Remember, a well-maintained bike is a smooth ride, just like a well-oiled machine. So, don’t neglect the regular checks and keep your bike running smoothly.

Advertisement

And if you encounter any persistent issues or feel unsure, it’s always best to seek professional help. Your bike will thank you for it!

Continue Reading

Electric Bike

What Is The Best Electric Mini Bike

Published

on

By

An image showcasing a sleek electric mini bike, its compact frame and vibrant color palette standing out against a picturesque background

I have found that the electric mini bike market offers a wide range of options for enthusiasts like me. With numerous choices available, it can be challenging to decide which one stands out as the top pick.

Did you know that electric mini bikes can reach speeds of up to 30 miles per hour? In this article, I will guide you through the factors to consider and share my top picks for daily commuting, off-road adventures, and even mini bikes designed specifically for kids.

Let’s dive in and find the perfect electric mini bike for you!

Key Takeaways

  • Model 2 is a top contender in the electric mini bike market, with impressive features and positive customer feedback.
  • Model 3 stands out in terms of performance, offering powerful acceleration, excellent handling, and responsiveness.
  • Model 3 is a practical choice for daily commuting and longer journeys, with a long range and quick charging capabilities.
  • Electric mini bikes offer several benefits, including eco-friendliness, cost-effectiveness, and convenient transportation options. However, they also have limitations such as limited range and higher upfront costs compared to traditional bicycles.

An Introduction to Electric Mini Bikes

Electric mini bikes are a popular choice for riders looking for a compact and eco-friendly mode of transportation. These bikes offer numerous advantages, as well as some drawbacks.

Advertisement

One of the main pros of electric mini bikes is their compact size, which makes them perfect for navigating crowded city streets and parking in tight spaces. Additionally, electric mini bikes are environmentally friendly, producing zero emissions and helping to reduce air pollution.

On the other hand, these bikes typically have a limited range and lower top speed compared to larger motorcycles.

When it comes to different types of electric mini bikes, there are various options available, ranging from foldable models to off-road versions.

Overall, understanding the pros and cons, as well as the different types of electric mini bikes, is crucial for making an informed decision when choosing the best option for your needs.

Factors to Consider When Choosing an Electric Mini Bike

When choosing an electric mini bike, there are important factors to consider.

Advertisement

First and foremost is the battery life. A longer battery life ensures that you can ride for a longer duration without needing to recharge. It is crucial to check the battery capacity and estimated range before making a decision.

Another important factor is the weight and portability of the electric mini bike. A lightweight and portable bike makes it easier to carry and transport, especially if you need to store it in a small space or take it on public transportation.

Considering these factors will help you find an electric mini bike that suits your needs and preferences.

Now, let’s explore the top electric mini bikes for daily commute.

Top Electric Mini Bikes for Daily Commute

Advertisement

When it comes to choosing an electric mini bike for daily commuting, there are several top models to consider.

Model 1 offers a range of features and benefits, such as a lightweight frame and powerful motor, making it ideal for navigating through traffic.

Model 2, on the other hand, boasts a longer battery life and comfortable seating, perfect for those longer commutes.

Model 1 – Features and Benefits

You’ll love the convenience and agility of the Model 1 mini bike with its impressive features and benefits. This electric mini bike offers exceptional performance and is highly regarded by customers.

Advertisement

Here’s why the Model 1 stands out:

  • Powerful motor: The Model 1 is equipped with a high-performance motor that delivers excellent speed and acceleration.
  • Long battery life: With its advanced battery technology, the Model 1 provides an impressive range, allowing for longer rides without worrying about running out of power.
  • Lightweight and compact design: The Model 1 is designed to be lightweight and compact, making it easy to maneuver and store.
  • Comfortable riding experience: The Model 1 comes with a comfortable seat and adjustable handlebars, ensuring a smooth and enjoyable ride.

When comparing the Model 1’s performance and reading customer reviews, it’s clear that this mini bike offers an exceptional riding experience.

Now, let’s move on to the next section to explore the features and benefits of the Model 2.

Model 2 – Features and Benefits

Now let’s delve into the impressive features and benefits of the Model 2, which will surely enhance your riding experience.

The Model 2 boasts an impressive top speed of 20 miles per hour, making it perfect for zipping around town or exploring off-road trails. With its powerful electric motor, you’ll have no trouble tackling steep hills or uneven terrain.

The battery life of the Model 2 is equally impressive, allowing you to ride for up to 40 miles on a single charge. This means you can enjoy extended rides without worrying about running out of power.

Advertisement

The Model 2 also features a comfortable and ergonomic design, ensuring a smooth and enjoyable ride every time.

Now, let’s move on to the exciting features and benefits of the Model 3.

Model 3 – Features and Benefits

Let’s explore the impressive features and benefits of the Model 3, which will greatly enhance your riding experience.

The Model 3 is a standout in the world of electric mini bikes, with its sleek design and powerful performance. When compared to other electric mini bikes, the Model 3 stands out for its exceptional range, reaching up to 70 miles on a single charge.

Customer reviews and ratings consistently praise the Model 3 for its smooth ride, comfortable seating, and easy handling. Riders appreciate the Model 3’s quick acceleration and responsive braking system.

Advertisement

With its top speed of 30 mph, the Model 3 is perfect for both urban commuting and leisurely rides.

Now, let’s transition to the next section and discover the best electric mini bikes for off-road adventures.

Best Electric Mini Bikes for Off-Road Adventures

When it comes to electric mini bikes for off-road adventures, there are several models worth considering.

Model 1 offers a powerful motor and sturdy construction, making it ideal for tackling rough terrains.

Model 2 boasts advanced suspension and excellent maneuverability, ensuring a smooth and comfortable ride.

Advertisement

Lastly, Model 3 stands out with its long battery life and high top speed, perfect for those seeking thrilling off-road experiences.

Each model has its own unique features and benefits, catering to different preferences and needs.

Model 1 – Features and Benefits

You’ll love the features and benefits of Model 1, the best electric mini bike on the market. Here’s a comparison of its features and pricing options:

  • Lightweight and compact design that makes it perfect for urban commuting
  • Powerful electric motor that provides a smooth and efficient ride
  • Long-lasting battery life that allows for extended trips without recharging

When it comes to pricing options, Model 1 offers great value for your money. With competitive pricing and flexible payment plans, it’s an affordable choice for anyone looking to invest in an electric mini bike.

Now, let’s transition into discussing Model 2 and its features and benefits.

Model 2 – Features and Benefits

Now, let’s take a look at the features and benefits of Model 2 – it’s packed with impressive qualities.

Advertisement

When it comes to performance comparison, Model 2 stands out with its powerful motor and advanced suspension system. This electric mini bike offers a smooth and comfortable ride, making it perfect for both urban commuting and off-road adventures.

Customer reviews have been overwhelmingly positive, praising the bike’s durability and reliability. Users have also raved about its long battery life and quick charging capabilities.

Model 2 is designed with convenience in mind, featuring a lightweight frame and foldable design for easy storage and transportation.

With its impressive features and positive customer feedback, Model 2 is definitely a top contender in the electric mini bike market.

Moving on to Model 3, let’s explore its features and benefits.

Advertisement

Model 3 – Features and Benefits

Let’s take a closer look at the features and benefits of Model 3 – it’s got some impressive qualities.

In terms of performance, the Model 3 stands out when compared to other electric vehicles on the market. It boasts a powerful electric motor that delivers instant acceleration and a smooth, quiet ride. The Model 3 also offers excellent handling and responsiveness, making it a joy to drive.

In addition, its long range and quick charging capabilities make it a practical choice for both daily commuting and longer journeys. When it comes to comparison, the Model 3 often outperforms its competitors in terms of acceleration, top speed, and overall driving experience.

Now, let’s shift our focus to electric mini bikes for kids, which offer a fun and exciting ride for young adventurers.

Electric Mini Bikes for Kids

When it comes to electric mini bikes for kids, there are several models that offer impressive features and benefits.

Advertisement

Model 1, for example, boasts a powerful motor and a sturdy frame, making it perfect for off-road adventures.

Model 2, on the other hand, focuses on safety with features like a speed limiter and a reliable braking system.

Lastly, Model 3 stands out for its long battery life and comfortable seating, ensuring hours of fun for your little one.

Model 1 – Features and Benefits

The Model 1 electric mini bike offers a range of impressive features and benefits. When comparing it to traditional mini bikes, the Model 1 stands out in terms of performance and speed. Here are some key reasons why the Model 1 is a top choice:

  • Powerful electric motor for quick acceleration
  • Lightweight design for easy maneuverability
  • Long battery life for extended riding sessions
  • Adjustable seat and handlebars for a comfortable fit
  • Safety features such as LED lights and disc brakes

With its powerful motor, the Model 1 delivers excellent performance and speed, surpassing what traditional mini bikes can offer. Its lightweight design allows riders to navigate tight spaces effortlessly. Additionally, the long battery life ensures that riders can enjoy longer rides without interruptions. The adjustable seat and handlebars provide a customized fit for riders of all sizes. Lastly, the safety features of LED lights and disc brakes ensure a secure riding experience.

Next, let’s explore the features and benefits of Model 2.

Advertisement

Model 2 – Features and Benefits

Now that we’ve explored the features and benefits of Model 1, let’s move on to Model 2 and see how it compares.

When it comes to performance analysis, Model 2 truly stands out. Its powerful electric motor delivers impressive acceleration and top speeds, making it perfect for those who crave a thrilling ride. Additionally, the advanced suspension system ensures a smooth and comfortable experience, even on rough terrains. With its long-lasting battery life and quick charging capabilities, Model 2 offers a reliable and convenient riding experience.

Comparing it to Model 1, Model 2 surpasses in terms of speed and handling, making it a great choice for adrenaline junkies.

Now, let’s dive into the features and benefits of Model 3 without further delay.

Model 3 – Features and Benefits

Let’s take a closer look at what makes Model 3 stand out in terms of performance and design.

Advertisement

The Model 3 is known for its impressive performance, offering a range of up to 250 miles on a single charge. Its top speed of 140 mph is unmatched in the world of electric mini bikes.

The Model 3 also boasts a sleek and futuristic design, with aerodynamic lines and a minimalist approach. Compared to other electric mini bikes, the Model 3 stands out with its superior range and speed. In terms of design, it sets itself apart with its modern aesthetic and attention to detail.

Overall, the Model 3 offers a combination of performance and design that is hard to beat in the electric mini bike market.

Moving forward, let’s delve into the conclusion and final thoughts.

Conclusion and Final Thoughts

Overall, I’ve gathered enough information to make an informed decision about the best electric mini bike.

Advertisement

When considering the pros and cons of electric mini bikes, there are several factors to consider.

On the positive side, electric mini bikes are eco-friendly, as they produce zero emissions and help reduce our carbon footprint. They are also more cost-effective than traditional bicycles, as they require less maintenance and do not require fuel.

However, electric mini bikes have some limitations. They have a limited range and require recharging, which can be inconvenient for longer rides. Additionally, they are typically more expensive upfront compared to traditional bicycles.

In terms of comparison, electric mini bikes offer the advantage of motor assistance, making them easier to ride uphill or over long distances. On the other hand, traditional bicycles provide a more active and physically engaging experience.

Ultimately, the best choice depends on individual preferences and needs.

Advertisement

Frequently Asked Questions

What is the average battery life of an electric mini bike?

The average battery life of an electric mini bike depends on several factors, including the average battery capacity and how it is used. Factors such as terrain, rider weight, and speed can affect the battery life as well.

Are electric mini bikes legal on public roads?

Electric mini bikes are not legal on public roads in many areas due to safety concerns. While they offer benefits like being eco-friendly and cost-effective, their small size and limited speed make them unsuitable for road use.

Can electric mini bikes be charged using a regular power outlet?

Yes, electric mini bikes can be charged using a regular power outlet. They usually have a standard charging port, and their power requirements are compatible with household outlets, making it convenient to charge them at home.

Are there any age restrictions for riding electric mini bikes?

Age restrictions for riding electric mini bikes vary by location and model. It’s important to check local laws and manufacturer guidelines. Safety is paramount, so wearing protective gear and following recommended guidelines is crucial for a fun and safe riding experience.

How fast can an electric mini bike go?

Electric mini bikes can reach speeds of up to 30 miles per hour, depending on the model. Some of the top electric mini bike models known for their speed include the Razor MX350 and the Coleman Powersports CT200U.

Advertisement

Conclusion

After carefully considering all the factors, it’s clear that the best electric mini bike for you will depend on your specific needs and preferences.

Whether you’re looking for a daily commuter, an off-road adventure companion, or a mini bike for your kids, there are options available that will suit your requirements.

Remember to consider factors such as range, speed, and durability when making your decision.

With so many choices on the market, it’s important to do your research and read reviews from other users to ensure you make the best choice for your electric mini bike.

Advertisement

Continue Reading
Advertisement

Affiliate disclaimer

As an affiliate, we may earn a commission from qualifying purchases. We get commissions for purchases made through links on this website from Amazon and other third parties.

About us

We are a passionate team driven by the belief that cycling is a fantastic and accessible way to stay active while enjoying the beauty of the outdoors. Our mission is to share our love for cycling with as many people as possible. We provide a welcoming environment for individuals of all ages, abilities, and backgrounds to come together and ride bikes. With Ralf’s visionary leadership, Zane’s expertise in cycling adventures, and Olivia’s dedication to community building, we strive to create a vibrant space where everyone can experience the joy of cycling. Through group rides, workshops, and inclusive events, we inspire and empower individuals to embrace an active lifestyle. Join us in our quest to pedal together, embrace the joy of cycling, and foster connections that last a lifetime.

Advertisement

Trending