
To install and align clipless pedals, start by applying a little grease to the pedal threads and screw the right and left pedals into their correct cranks firmly but not overly tight. Next, adjust the cleats on your shoes by loosening the bolts, then position them so your foot’s ball lines up with the pedal axle and your knee tracks over the pedal during each stroke. Tighten everything securely and test your setup, ensuring comfort and efficiency—keep going to learn more details for the perfect fit.
Key Takeaways
- Apply grease to pedal threads before installation and tighten securely without over-tightening.
- Confirm correct threading for right and left pedals to ensure proper attachment.
- Adjust cleat position on shoes for optimal foot alignment with the pedal axle.
- Loosen and reposition cleats to achieve proper lateral, fore-aft, and rotational alignment.
- Test clip-in and clip-out, then tighten cleat bolts securely after adjustments.

Are you ready to improve your cycling experience by installing and aligning clipless pedals? Starting with the basics, proper pedal maintenance is vital to guarantee your system works smoothly and lasts longer. Before you begin, gather the right tools—usually an Allen wrench or pedal wrench—and make sure your bike is stable. Proper pedal maintenance involves checking for dirt, debris, or damage on the pedals and cleats. Regularly cleaning these components prevents unnecessary wear and ensures smooth engagement and release. When installing new pedals, apply a small amount of grease to the pedal threads to prevent seizing and make future removal easier. Tighten them securely but avoid over-tightening, which can strip the threads or damage the crankarms.
Proper pedal maintenance and correct cleat adjustment enhance cycling comfort and efficiency.
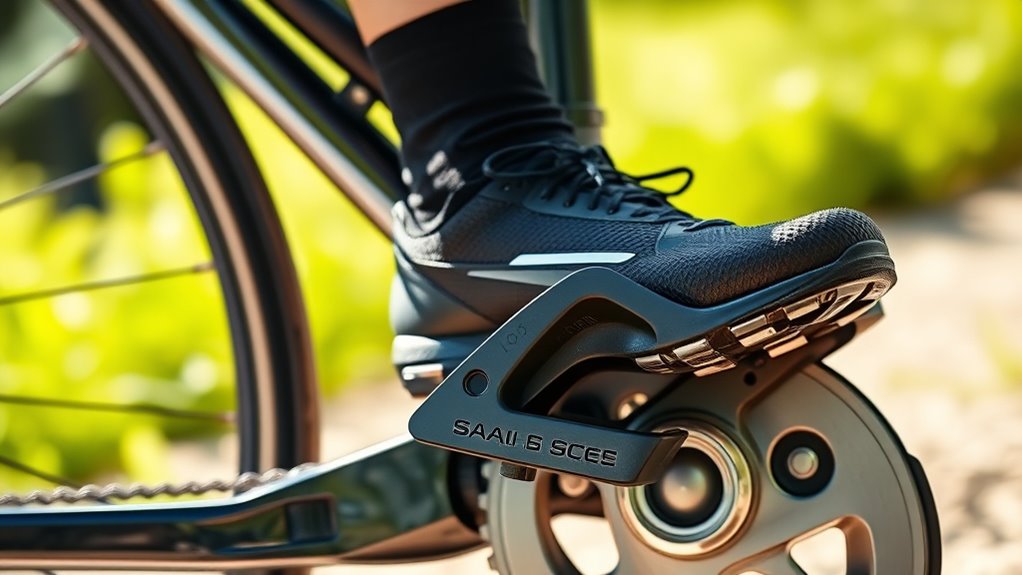
Once the pedals are installed, focus on cleat adjustment, a key step to optimize comfort and efficiency. Your cleats connect your shoes to the pedals, so their position directly impacts your riding comfort and power transfer. To get started, loosen the cleat bolts and position the cleats on your shoes so that the ball of your foot lines up with the pedal axle when clipped in. This alignment reduces strain on your knees and ankles, preventing discomfort over longer rides. When tightening the cleats, ensure they’re snug but not overly tight—this allows for minor adjustments as you fine-tune the position.
Next, pay attention to cleat alignment by checking for lateral, fore-aft, and rotational positioning. Misaligned cleats can cause hot spots, numbness, or knee pain. To fine-tune, clip into the pedals and observe your foot position; you want your knee directly over the pedal axle during the pedal stroke. Adjust the cleats to correct any misalignment, tightening the bolts securely once satisfied with the fit. Remember, small adjustments can make a big difference, so take your time and test ride after each change.
Throughout this process, remember that proper pedal maintenance and cleat adjustment aren’t one-and-done tasks. Regularly inspect your pedals and cleats for wear or damage, replacing them when necessary. Properly aligned cleats and well-maintained pedals improve power transfer, reduce injury risk, and make clipping in and out effortless. Additionally, paying attention to couple compatibility can help prevent joint strain and improve overall riding efficiency. By dedicating time to these details, you’ll notice a significant boost in your cycling comfort and performance. Once everything’s set, double-check all bolts and fastenings before heading out on your ride. With your pedals correctly installed and aligned, you’re now ready to enjoy a smoother, more efficient cycling experience.

Schwinn Wayfarer Hybrid Bike, 700c Mens and Womens Bike, 7-Speed Hybrid Bicycle, Retro Steel Frame, Front and Rear Linear Pull Brakes, Fenders, Cargo Space, Adult Bicycle
HYBRID BICYCLE: Ride in comfort and vintage style with the Wayfarer by Schwinn. With 700c wheels, this mens...
As an affiliate, we earn on qualifying purchases.
Frequently Asked Questions
Can I Use Clipless Pedals With Any Cycling Shoes?
You can’t use clipless pedals with any cycling shoes because of cycling shoe compatibility and pedal compatibility. Most clipless pedals are designed for specific cleat systems, like SPD or Look, which need compatible shoes. Check your shoes for the cleat mounting system and confirm they match the pedal’s compatibility. Using the right combination improves safety, efficiency, and comfort, so always verify your shoes and pedals are compatible before riding.
How Often Should I Replace Cleats on My Pedals?
You should replace your cleats when you notice significant cleat wear or if your pedal lifespan is affected, usually every 3 to 6 months depending on riding frequency. Don’t ignore worn cleats—they can cause slipping or inefficient pedaling. Regularly check for uneven wear, cracked or loose cleats, and replace them promptly to maintain peak pedal engagement, safety, and performance. This keeps your cycling experience smooth and safe.
Are Clipless Pedals Suitable for Mountain Biking?
Yes, clipless pedals are suitable for mountain biking. They offer advantages like better control, improved power transfer, and increased safety because your feet stay securely on the pedals. You can choose from various clipless pedal types, such as SPD or mountain-specific models, to match your riding style and terrain. This setup helps you navigate tricky trails confidently while enjoying the benefits of a secure, efficient pedal connection.
How Do I Adjust Tension for Easy Clip-In and Release?
Imagine your pedal tension is a gentle tide, guiding your foot in and out effortlessly. To adjust, locate the release adjustment screw on your cleat or pedal, then turn it clockwise for more tension or counterclockwise for less. This fine-tunes your pedal tension, making clip-in easier or more secure. Regularly check and tweak your release adjustment to match your riding style, ensuring safety and comfort with each pedal stroke.
What Safety Precautions Should I Take When Installing Pedals?
When installing pedals, prioritize pedal safety by wearing gloves to protect your hands and make certain a firm grip. Use the correct tools, like a pedal wrench, to prevent slips that could cause injury. Always double-check that pedals are securely tightened to avoid accidents while riding. Be mindful of tool safety by keeping your workspace organized and handling tools carefully to prevent cuts or damage. These precautions keep you safe during installation and riding.
AVASTA 26 Inch Hybrid Bike, Lightweight Step-Through Hi-Ten Steel Frame for City Commuting, 6 Speed Comfort Bicycle with Light in Elegant Black with Stylish Beige Tires for Woman Female
🚴♀️【Premium Frame & Effortless Assembly】The AVASTA Astrid hybrid bike features a sturdy high tensile steel frame designed for...
As an affiliate, we earn on qualifying purchases.
Conclusion
Once you’ve installed and aligned your clipless pedals, you’re ready to hit the road. Think of it like tuning a musical instrument—you’ll get smoother, more efficient rides as you become more familiar with your setup. Just remember, patience and practice are key. As you pedal along, your confidence will grow like a seedling reaching for the sun. Keep adjusting and riding, and soon you’ll wonder how you ever biked without them.

AVASTA 26 Inch Hybrid Bike, Lightweight Step-Through Hi-Ten Steel Frame for City Commuting, 6 Speed Comfort Bicycle with Metal Basket in Elegant Black with Stylish Beige Tires for Woman Female
🚴♀️【Premium Frame & Effortless Assembly】The AVASTA Vela hybrid bike features a sturdy high tensile steel frame designed for...
As an affiliate, we earn on qualifying purchases.
VEVOR Hybrid Bike, Lightweight Aluminum Frame Bike, 700c Wheel Men and Women Hybrid Bicycle, Step-Through Adult Urban City Commuter Bikes with 7-Speed Shimano Drivetrain, Dual Brake, Adjustable Seat
Hybrid Bike: The bicycle features a corrosion-resistant and lightweight aluminum alloy frame, offering durability and a weight capacity...
As an affiliate, we earn on qualifying purchases.