To install a front-hub motor kit, start by selecting compatible components and preparing your bike, ensuring the frame and brake system are suitable. Remove the existing front wheel and brake parts carefully. Mount the hub motor onto the fork, then connect all electrical wiring, including the controller, display, and throttle, securing everything neatly. Finish by tightening fasteners and checking alignment. If you keep going, you’ll find detailed steps to help you complete a safe, smooth installation.
Key Takeaways
- Check frame compatibility, axle length, and brake type before component selection and installation.
- Remove existing wheel, tire, and freewheel, ensuring proper organization for reassembly.
- Mount the hub motor securely in the fork dropout, align the rotor, and tighten all nuts and quick releases.
- Connect electrical components, including wiring harnesses, display, throttle, and brake sensors, ensuring correct plug orientation.
- Perform safety checks, reassemble the wheel, and test ride to verify motor function and proper handling.
Selecting the Appropriate Components and Preparing Your Bike
Before installing a front-hub motor kit, you need to select compatible components and prepare your bike properly. Start by examining your bike frame to ensure it can handle the motor’s axle length and mounting hardware. Check that the frame clearance is sufficient for the motor and any additional components. Choose a front hub motor kit that matches your wheel size and brake type, whether V-brake or disc brake. Pick a battery pack that aligns with the motor’s voltage and current needs, like a 52V 13.5Ah Panasonic NCRB for balanced performance. Gather essential tools such as wrenches, screwdrivers, and zip ties, and consider optional safety parts like torque arms. Confirm all component specifications beforehand to guarantee compatibility and a smooth installation process. Additionally, understanding the construction time involved in assembling your kit can help you plan your project effectively. Being aware of the installation complexity can also assist in determining whether professional assistance might be needed. Moreover, reviewing essential safety precautions can help prevent potential issues during installation.
Removing the Existing Front Wheel and Brake System
Start by loosening the brake cable and quick release lever to free the front wheel from the bike frame. Next, use a wrench or socket to remove the axle nuts, supporting the wheel so it doesn’t fall. Finally, if your bike has disc brakes, carefully remove the rotor from the hub without damaging it. Additionally, consider inspecting the protective styling benefits of the wheel components to ensure no damage occurs during removal. To prevent any mishandling, ensure you properly support the wheel during removal to avoid unnecessary strain on the spokes or hub components. Remember that handling the wheel with care helps maintain the structural integrity of the components during disassembly. Proper support and gentle handling are especially important to preserve the city-to-country living experience, as well as the longevity of your bike parts. Understanding the self watering plant pots can also help you care for your garden efficiently once the bike maintenance is complete.
Loosen Brake Cables
To remove the front wheel and brake system, first loosen the brake cable from the brake caliper or lever to free the wheel. This step guarantees the brake isn’t restricting removal. If your bike has a quick-release skewer, open the lever and carefully lift out the wheel. For bikes with axle nuts, use a wrench to loosen and remove the nuts securing the wheel to the fork. If your bike has a brake rotor, detach it from the hub with the appropriate tool. Keep all parts organized for reinstallation. Here’s a quick overview:
| Step | Action | Tools Needed |
|---|---|---|
| 1 | Loosen brake cable | None |
| 2 | Open quick-release skewer | Skewer lever |
| 3 | Loosen axle nuts | Wrench |
| 4 | Detach brake rotor | Rotor tool |
| 5 | Remove front wheel | Hands |
Remove Quick Release
How do you remove the front wheel and brake system? First, loosen the quick release and open the skewer to release the wheel from the fork. If your bike has rim brakes, disconnect or release the brake cable from the brake calipers. For disc brakes, use an Allen wrench or socket to remove the brake rotor from the wheel before detaching it. Carefully lift the front wheel out of the dropout, avoiding damage to the fork or brake components. Keep all parts organized for reuse or disposal. Remember that trust issues can sometimes arise if components are not handled carefully, so double-check all connections during reinstallation. Additionally, ensure the proper installation of all parts to prevent safety hazards during riding.
Detach Existing Freewheel
Before removing the front wheel, you need to detach the existing freewheel from the hub. Start by deflating the tire completely, then carefully pry the tire and tube off the rim with tire levers for reuse or replacement. Loosen the brake cable and quick release lever to free the wheel from the frame. Next, use a freewheel remover tool and the correct socket—usually 1-1/8″ or 3/8″—to unscrew the freewheel from the hub. If needed, widen the remover’s hole with a 9/16″ drill bit to fit the threads. Carefully unscrew and remove the freewheel, keeping all components organized for reinstallation or transfer. Proper removal facilitates a smooth transition to installing your new front-hub motor kit.
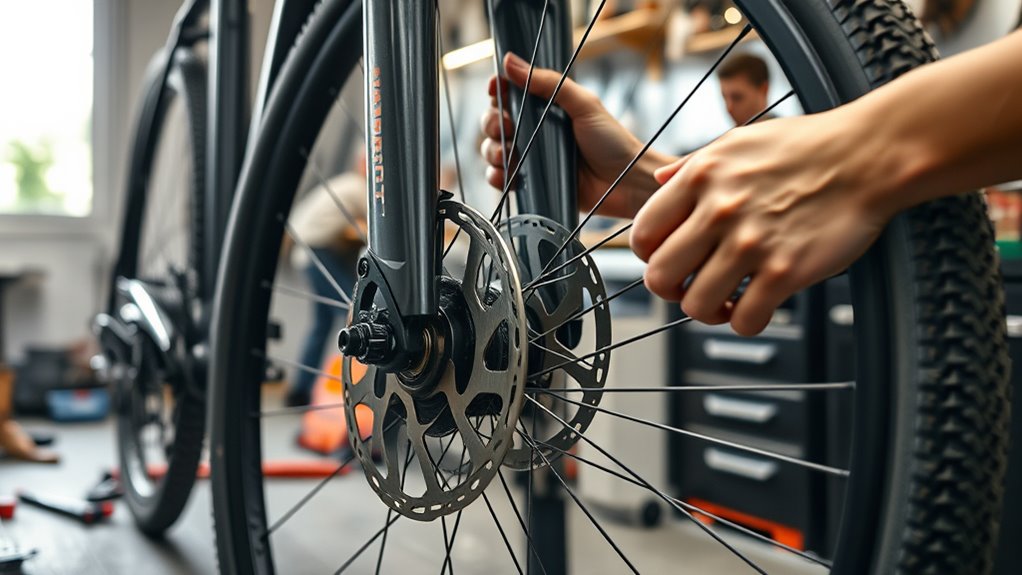
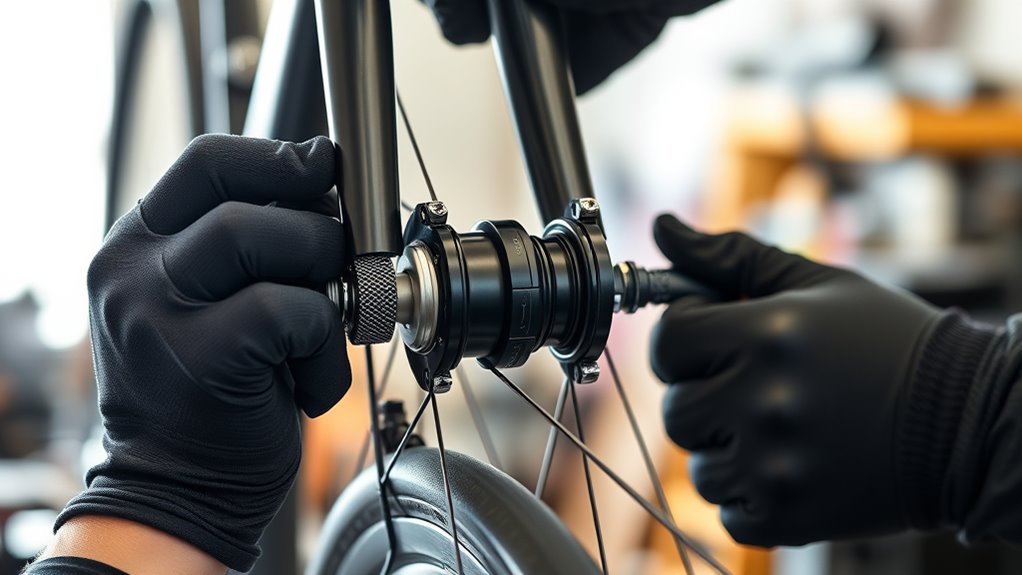
Installing the Hub Motor Onto the Front Fork
Start by lining up the hub motor within the front fork dropout, making sure it’s centered and the disc brake mount is correctly positioned. Secure the motor with the provided nuts or quick-release hardware, tightening them firmly with a wrench. Then, check that the wheel spins freely without wobbling and connect the wiring harness to the controller, ensuring the plug is properly aligned. For optimal performance, verify that the front‑hub motor is installed correctly to prevent issues during operation. Additionally, double-check the compatibility of your motor with the specific bicycle model to ensure smooth installation and operation. Ensuring the motor matches the vehicle specifications can help avoid potential damage and improve overall performance, extending the lifespan of your motor components. Moreover, selecting a reliable conversion kit can significantly impact the overall durability and efficiency of your e-bike setup.
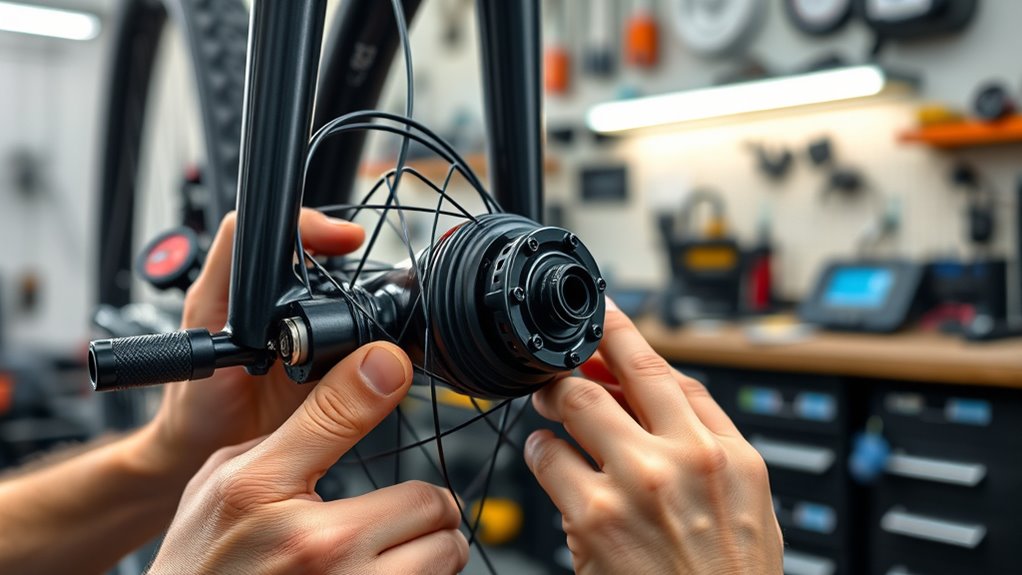
Proper Wheel Alignment
To guarantee proper wheel alignment when installing the hub motor onto the front fork, begin by centering the hub within the dropout. Ensure the axle aligns with the fork’s spacing for a secure fit, which is essential for smooth riding. Check that the rotor or disc brake mount is securely attached and aligned with the brake caliper. Gradually tighten the mounting nuts with a 7/8″ socket wrench, evenly distributing pressure to prevent wobbling. Confirm the wheel spins freely without rubbing against the fork or brake components before tightening all fasteners. Proper wheel alignment in your Front Hub Motor Kit is critical for your Electric Bike’s pedal assist performance, ensuring enough power delivery from a single charge and ideal integration with your bike’s frame.
- Center the hub within dropout
- Check rotor and brake caliper alignment
- Tighten nuts gradually and evenly
- Spin the wheel freely, avoiding rubbing
- Adjust for straightness relative to fork and frame
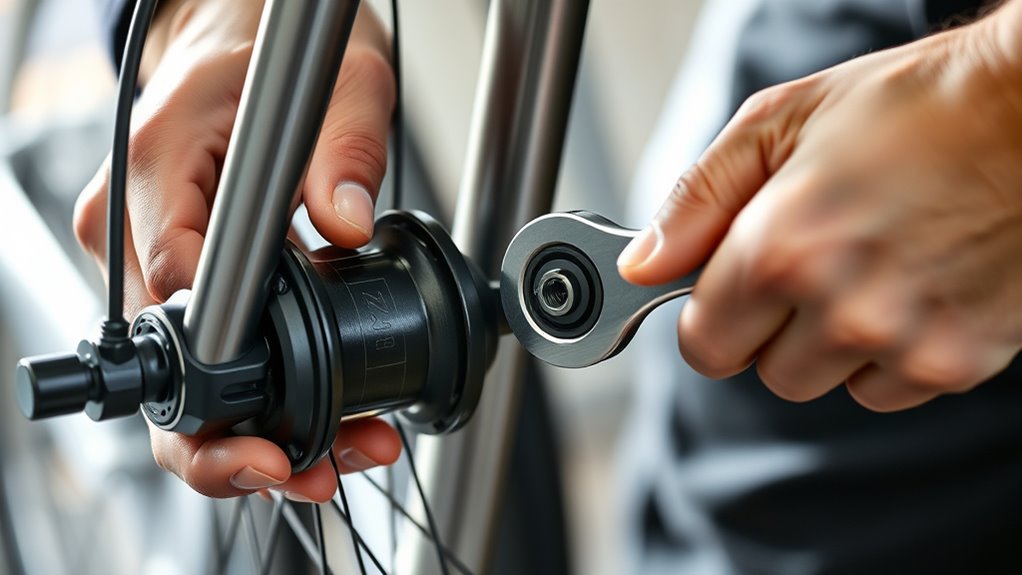
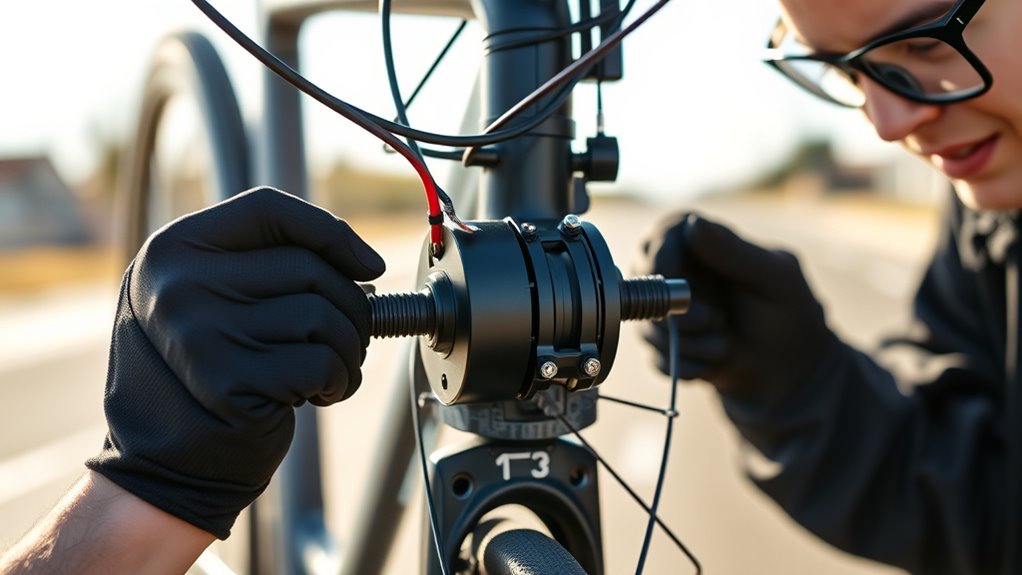
Securing the Motor Fit
Ensuring the hub motor is securely fitted onto the front fork is essential for safe and efficient riding. Start by aligning the axle so it sits flush within the fork dropout, maintaining proper spacing. Use the provided nuts and tighten them evenly with a 7/8-inch socket wrench to prevent wobbling. Install a torque arm on the motor side to stop axial movement and improve safety. Confirm that the wheel is centered and the disc brake rotor aligns correctly with the caliper, spinning freely. Double-check that the motor is firmly seated and the wheel is free of wobble or misalignment before proceeding. Proper Mazda Tuning techniques can also help optimize your vehicle’s performance and safety. Below is a table summarizing key steps:
| Step | Tool Needed | Purpose |
|---|---|---|
| Align axle | No tools | Proper fit within fork |
| Tighten nuts | Socket wrench | Secure motor to fork |
| Install torque arm | Torque arm | Prevent axial movement |
Brake Compatibility Checks
Before installing the hub motor, it’s important to verify your bike’s brake compatibility. Check whether your front fork has V-brake mounts or disc brake mounts to confirm the kit fits properly. For disc brakes, remove the existing rotor and attach it to the new hub, aligning the arrow on the rotor with wheel rotation. Make sure the wheel is centered in the dropout and the axle is fully seated before tightening nuts or quick-release levers. Use washers if needed to prevent freewheel binding and guarantee smooth wheel rotation. Additionally, attach a universal torque arm on the motor side to prevent the axle from slipping or rotating during use. Ensuring the correct brake setup not only enhances safety but also optimizes brake performance during your ride. Proper brake compatibility ensures safety and effective operation of your e-bike. Understanding your bike’s components and setup can help you adapt and optimize your e-bike experience. Being aware of sound design principles can also help you troubleshoot or enhance the auditory cues during your ride.
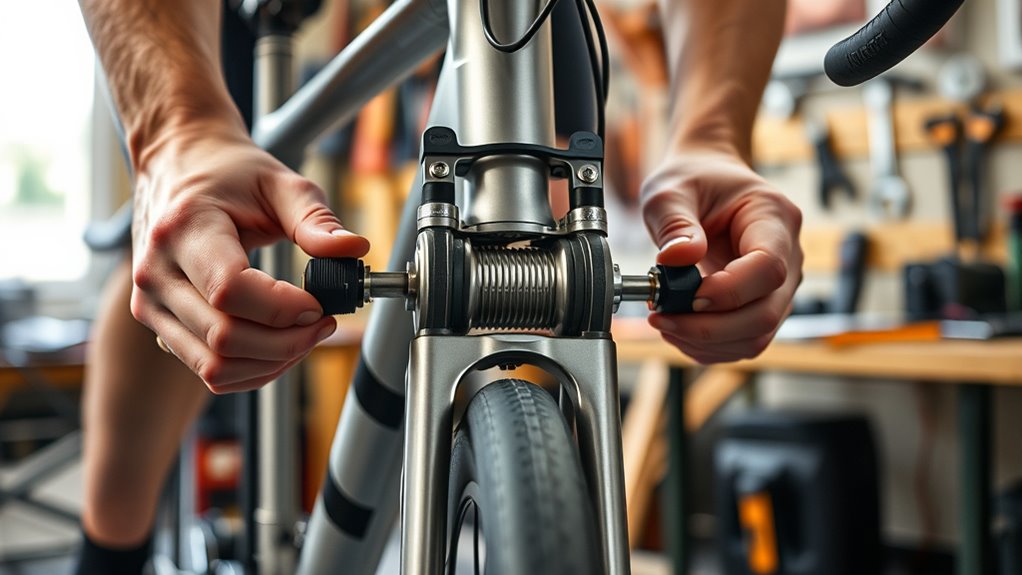
Connecting the Wiring Harness and Electrical Components

Start by matching the color-coded wiring plugs from the motor harness, LCD display, throttle, brake sensors, and controller, making sure all arrows and pins align correctly. Connect each plug firmly, ensuring proper engagement without forcing them. Secure the wiring harness to the bike frame with zip ties, routing it neatly along the fork and frame to prevent damage or interference during riding. Before connecting the battery, pull back the rubber housing on the Anderson connectors, then plug in the red and black wires, making sure they only fit one way for correct polarity. Use the provided connection clip to lock the Anderson connectors together securely, preventing accidental disconnection. Double-check all connections for a snug fit, proper insulation, and no pinched or exposed wires before powering on the system for testing.
Mounting the Display, Throttle, and Handlebar Controls
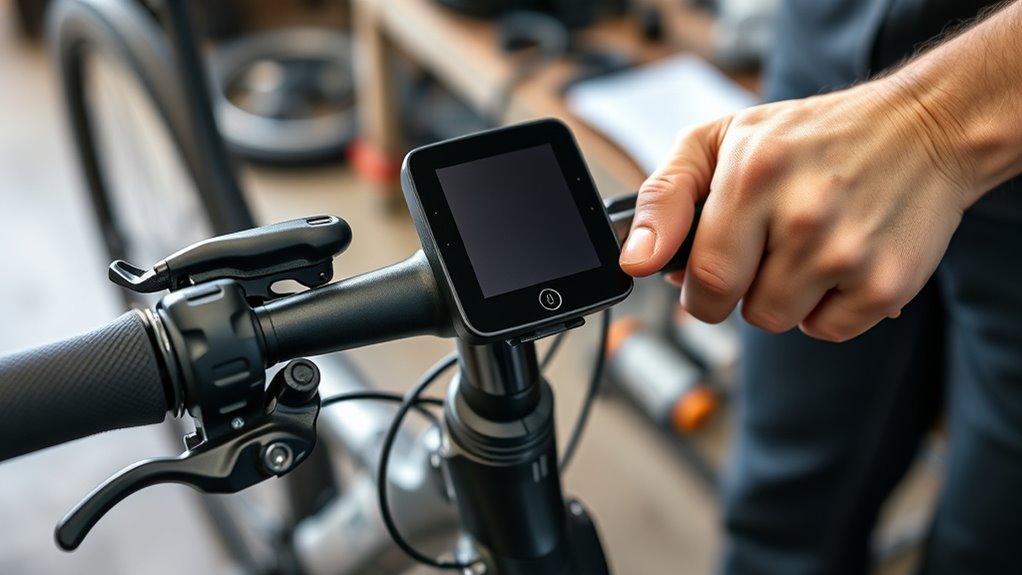
To mount the display, position it at the center of your handlebars for the best visibility and secure it with the provided bracket, making sure it’s firmly attached. Next, install the throttle on the left side of the handlebar, tighten it with an Allen wrench, and lock the slide in place. On the right handlebar, attach the cruise control switch, e-brakes, and shifter, positioning them for easy access. After disconnecting the handlebar grips with compressed air, reinstall them, ensuring all controls are properly aligned and securely attached. Finally, connect all wiring from the display, throttle, and controls to the main harness, verifying correct plug orientation and securing connections with zip ties. This ensures a safe, functional setup ready for riding.
Final Assembly and Safety Checks
Once you’ve completed the assembly, it’s essential to perform thorough safety checks to guarantee everything functions properly and remains secure during rides. Start by tightening all fasteners with a 5mm Allen wrench to prevent loosening. Ensure the front wheel spins freely without wobble or obstructions, confirming proper installation. Next, inspect the wiring for secure routing, good insulation, and protection from dirt and water to avoid damage. Reinstall the front wheel onto the frame, tightening all nuts and quick releases to the manufacturer’s specifications. Finally, take a short test ride to verify the motor activates correctly, brake sensor deactivation works, and the bike handles smoothly. Completing these checks helps ensure your bike is safe and ready for regular use.
Programming the Motor and Fine-Tuning Settings
Before you begin riding, you’ll need to program your motor and fine-tune its settings to guarantee ideal performance and safety. First, connect the motor’s controller to your Windows PC using a compatible USB programming cable. Then, install the manufacturer’s software or firmware tuning app to access key parameters. Focus on adjusting the following:
- Max speed to stay within local legal limits (15–28 mph)
- Acceleration and deceleration rates for smooth response
- Regenerative braking strength for efficient stopping
- Power limits to prevent motor overheating
- Wheel size settings for accurate speed readings
Once you’ve made your adjustments, save the settings. Perform test rides to verify that everything functions correctly and that ride quality improves.
Conducting a Test Ride and Ensuring Safe Operation
Make certain your motor and wiring are secure and undamaged before starting your test ride. Check all connections to ensure they’re tight and free of damage. Once confirmed, power on your bike and begin with gentle acceleration to test the motor’s response. Pay attention to how smoothly it engages and whether the brakes function properly during the ride. Ensure the wheel spins freely without wobbling or unusual noises, indicating proper installation. Adjust assist levels and speed limits on your display to match local regulations and personal safety needs. Take a short ride in a safe, open area to verify that all systems operate correctly. This quick test helps identify any issues early, ensuring safe, reliable performance before regular use.
Frequently Asked Questions
How Fast Is a 5000W Hub Motor?
You’re wondering how fast a 5000W hub motor can go. Typically, it can reach speeds of 35-45 mph on flat terrain if you have the right gearing and no legal limits. However, your actual speed depends on factors like wheel size, rider weight, and terrain. Keep in mind, many areas restrict e-bike speeds to 20-28 mph, so check local laws and adjust your settings for safe riding.
How Do You Install a Bike Conversion Kit?
Ever wonder how to turn your regular bike into an e-bike? You start by gathering all components, then remove your front wheel, making way for the hub motor. Carefully attach the motor to the fork, connect the wiring harness to the controller, and route cables neatly. Finally, reinstall the wheel, tighten everything securely, and test to make certain smooth rotation. That’s how you convert your bike into an electric ride!
How Does a Geared Hub Motor Work?
A geared hub motor works by using planetary gears inside the hub shell to increase torque and reduce speed. When you power it, the gears rotate around a central sun gear, transmitting motion to the wheel efficiently. This design makes the motor lighter and more compact, ideal for hill climbing and portability. The freewheel mechanism lets the wheel spin freely when the motor isn’t engaged, ensuring smooth riding.
How Fast Is the 48V 500W Hub Motor?
You might be surprised to learn that a 48V 500W hub motor can reach speeds of around 20 to 28 mph. This range depends on factors like rider weight and terrain. Typically, the motor accelerates quickly to its top speed, which is often limited by your bike’s controller or local laws. For safety and legality, many riders set their speed limiters to 20 mph on public roads.
Conclusion
As you pedal down the quiet street, the gentle hum of your new front-hub motor whispers promises of adventure. With each turn of the wheel, you realize that all those careful steps—connecting wires, adjusting settings—have come together seamlessly. The bike feels alive beneath you, effortlessly gliding forward as if it’s been waiting for this moment. Now, with the wind in your face and a smile on your lips, you know your journey has just begun.