TL;DR

Get sports gear delivered free — and shop member deals
- Fast, free delivery on millions of items
- Access to Prime Big Deal Days deals on October 6–7
- Prime Video, Amazon Music and more included
The best mountain bike accessories cover four jobs: protect you, help you fix common problems, carry water and essentials, and support route finding. Start with a well-fitting helmet, water, a phone, and repair supplies, then add protection, lighting, storage, and navigation based on terrain, ride length, and bike compatibility.
A five-minute walk back to the car feels a lot longer when your rear tire is flat, your phone is at 4 percent, and the trailhead is out of sight. A few well-chosen mountain bike accessories can turn that ride-ending problem into a quick trailside fix.
You don’t need to buy every gadget on the shop wall. The right setup depends on terrain, ride length, weather, and how your bike is used. A short spin on familiar paths calls for less gear than a remote, rocky all-day ride.
This guide lays out what to prioritize, how to build a practical repair and comfort kit, and which fit and compatibility details can save you money. The aim is simple: carry what helps, skip what gets in your way, and make changes gradually as your riding grows.
Start with a well-fitting helmet, then add gloves and eye protection that suit your riding conditions.
Check valve type, bike fasteners, and tire setup before choosing a pump, multitool, tube, or tubeless repair kit.
Pick a bottle or hydration pack based on frame space, comfort, and access to water on your route.
Carry more food, clothing, first aid, and navigation on long or remote rides than on familiar local loops.
Test accessory fit and pack security on a short ride before relying on them over rough terrain.
Start with protection that stays comfortable on rough trails
Mountain bike accessories should start with a correctly fitted helmet, because protection only helps when it sits securely and feels comfortable enough to wear for the whole ride. Add gloves and eye protection for grip and debris, then choose pads based on your speed, terrain, and confidence.
A helmet that rocks from side to side or leaves a pressure spot can distract you on every descent. Ask a qualified bike-shop fitter to help if you’re unsure, and follow the helmet maker’s fit and replacement guidance. Gloves can reduce palm friction and soften the sting of trail chatter; clear or tinted glasses help keep dust, insects, and low branches out of your eyes.
For rocky, steep, or fast trails, knee and elbow pads can add useful coverage. They should stay put while you pedal and bend your joints without pinching. For example, if you ride a loose local descent where you often dab a foot, try low-profile knee pads on a gradual ride before wearing them for a long climb.
Protection is not a promise that you won’t get hurt. Build skills progressively, and consider a qualified coach when you’re new to technical trails or want to increase speed. A stable, secure fit matters more than flashy features: loose pads sliding toward your ankles are little help when the trail turns rocky.
Choose protection you can wear correctly for the entire ride. If it shifts, rubs, or restricts your movement, adjust the fit or choose another model.
As an affiliate, we earn on qualifying purchases.
Build a repair kit that can actually fix a trail-side flat
Mountain bike accessories for repairs should let you handle common problems without packing a full workshop. A sensible starting kit includes a multitool that fits your bike’s fasteners, tire levers, an inflation method, and either a spare tube or tubeless plugs that match your setup.
Before buying, check your valve type, wheel and tire setup, and the bolt fittings on your bike. That quick inspection prevents a frustrating mismatch: a pump that won’t attach to your valve or a multitool missing the size you need. Practise using the kit at home, where a clean floor and good light beat wet roots and fading daylight.
Tubeless tires can reduce pinch flats and let some riders run lower tire pressure, but they still need compatible rims and tires, maintained sealant, and a plan for punctures that won’t seal. A plug can help with some small holes; a tube can get you moving again when a tubeless fix fails. Neither setup makes flats impossible.
Imagine hearing the sharp hiss of air halfway through a ride. If you’ve practised removing the tire and know whether your pump fits the valve, the repair is a task—not a mystery. For a beginner, a local shop can show how to use a plug kit and check tire pressure safely.
- Check compatibility: note your valve, tire setup, and bike fasteners.
- Pack the basics: multitool, tire levers, pump or CO₂ inflator, and tube or tubeless plugs.
- Practise at home: test the tools before you depend on them outdoors.
- Inspect after rides: replace used plugs and check sealant as the tire maker recommends.
Choose a bottle or hydration pack that suits your ride
A bottle is simple; a hydration pack carries more. The better choice depends on your frame space, ride duration, and personal comfort, not on which option looks more serious. Either way, water should be easy to reach and secure over bumps.
A bottle and cage work well on many bikes, especially for shorter rides with easy refill stops. But a small frame or full-suspension layout may leave little room for a bottle. Try the cage with the bike’s shock and frame clearance in mind; a bottle that fits in the garage but hits the frame during suspension movement is not a useful solution.
A hydration pack can carry extra water, food, a light layer, and repair supplies. It also adds weight to your back, which some riders dislike on hot climbs. For example, on a two-hour loop with one refill point, a bottle may feel cooler and less bulky; on a longer route with no water access, a pack offers room for more water and a wind shell.
Small hip, saddle, and frame packs keep essentials close without a large backpack. The tradeoff is space: a tiny tool strap may fit a tube and levers but leave no room for food or a jacket. Keep storage secure, clear of moving parts, and protected from mud where needed.
Try your loaded setup on a familiar ride before taking it far from help. If a pack bounces or a bottle rattles loose, adjust the straps or mounting position. Carrying extra water is useful only when it stays comfortable and accessible.
Match your carry kit to the trail and time you’ll be out
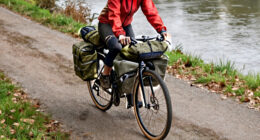
The kit you carry depends on terrain and ride length. For a short loop near home, water, a phone, and basic flat-repair supplies may be enough; a remote all-day outing calls for more food, clothing, first aid, and navigation. Think of your pack as a small safety margin, not a reason to bring the whole garage.
On a familiar 45-minute ride close to the trailhead, you might carry a bottle, phone, compact multitool, tire levers, and a tube or tubeless plugs. On a long route with rough ground and no easy exit, add food, a light layer, identification, a small first-aid kit, and a way to follow the route offline.
Compact storage—such as a tool strap or minimalist frame bag—can keep essentials close without a full pack. But a strap must hold firm over repeated impacts and keep tools from rubbing the frame. Check it before the ride and again after a bumpy section; a dropped tool is hard to retrieve from a creek crossing.
Use this quick comparison as a starting point, then adjust for weather, local conditions, and your experience. It is not a substitute for telling someone your plan on a remote outing.
| Ride | Useful starting kit | Why add more? |
|---|---|---|
| Short, familiar loop | Water, phone, basic repair supplies | Stay ready for a flat or a delayed return. |
| Long day ride | Extra food, layer, first aid, navigation | Distance and changing conditions increase the time between help. |
| Remote or rough route | More water, offline route, repair backup, emergency essentials | Exits and reliable phone coverage may be limited. |
Choose what matches your actual route rather than the most extreme ride you can imagine. A heavy pack can feel like a damp blanket on a hot climb, so add items for a reason and test the load before committing to a long day.
Use lights and navigation that work when the trail gets hard to follow
Mountain bike accessories for visibility and navigation should match where and when you ride. A light meant to help you be seen is not automatically suitable for illuminating an unlit trail at speed, and a GPS unit is only useful if it has power and a route you can access.
For night riding, choose a purpose-built light with a beam and runtime suited to your trail and pace. Check the maker’s runtime claims against the mode you plan to use; brighter settings often use power faster. Before heading out after dark, test the mount, charge the battery, and bring a backup plan if the route is remote.
A bike computer, GPS device, or phone app can guide you through unfamiliar turns. Download offline maps when coverage may be weak, and keep your phone protected and charged. For example, if a fork in the trail appears under a canopy where your phone loses signal, an offline map can keep you on your planned route without a loading screen.
GPS trackers and connected devices can add useful features, but they still depend on battery life and, in some cases, signal coverage. Set them up at home and learn the basic controls before a complicated ride. Navigation is a backup for good route planning, not a reason to ignore trail signs or official closures.
Keep your setup simple enough to use with cold fingers or in fading light. If you spend more time tapping through screens than watching the trail, change the mount or simplify the display. Your eyes belong on the path ahead.
Check fit and compatibility before you spend money
Compatibility and fit matter more than extra features. Before you buy an accessory, check that it fits your bike, stays secure on rough ground, and leaves room for steering, pedaling, suspension, and cables. A product can have clever features and still be wrong for your frame.
Look at the details that affect your specific setup: valve type, tire and rim compatibility, handlebar diameter, frame mounting points, and available clearance. For instance, a frame bag that looks roomy online may rub a shock or interfere with a bottle cage on your bike. Measure the space and check the maker’s dimensions instead of guessing from a product photo.
Fit applies to people as much as bikes. A pack that swings when you lean into a corner can distract you, while gloves that bunch at the fingertips can make shifting feel clumsy. Test accessories on a short, familiar ride before taking them onto rough terrain.
Prioritize safety, reliability, and comfort over a long shopping list. A beginner may get more value from a properly fitted helmet and a repair kit they know how to use than from a premium GPS device. Prices vary by brand and region, so compare current local options and avoid assuming a higher price guarantees a better fit.
E-mountain bikes need extra care around electrical accessories. Use chargers and battery-related products approved for your model, and follow the bike maker’s instructions. If a connection, mount, or battery detail is unclear, ask the manufacturer or a qualified shop rather than experimenting with electrical parts.
Frequently Asked Questions
What accessories do I need for my first mountain bike ride?
Start with a well-fitting helmet, water, a phone, and basic flat-repair supplies. Gloves and eye protection can improve comfort and help protect you from grit and branches. Practise using your repair tools at home before heading out.
Is a hydration pack better than a water bottle?
A bottle is easy to refill and keeps weight off your back, while a hydration pack carries more water and room for food or a layer. Your choice depends on frame space, ride length, and comfort. Try the setup on a short ride before committing to a full day.
Are tubeless tires worth it for mountain biking?
Tubeless tires can reduce pinch flats and support lower pressures when the rims and tires are compatible. They still need sealant maintenance, and some punctures require plugs or a spare tube. Keep a repair plan even if you ride tubeless.
Do I need knee pads or elbow pads?
Pads can add coverage on rocky, steep, or fast trails, or when you want extra protection while building skills. Choose pads that stay in place and let you move normally. If they pinch or slide while pedaling, adjust the fit before riding harder terrain.
How bright should a mountain bike light be?
It depends on whether you need to be seen or light an unlit trail. Night riding on dark trails calls for a purpose-built light with a beam and runtime suited to your speed and route. Check runtime on the setting you plan to use, and test the mount and battery before leaving.
Do mountain bike accessories fit every bike?
No. Check dimensions, valve type, mounting points, tire and rim compatibility, and frame clearance before purchasing. For e-MTB charging or battery accessories, follow the bike maker’s instructions and use compatible equipment.
Conclusion
Build your setup around the problems you’re most likely to face: staying protected, carrying water, fixing a flat, and finding your way back. Start with the basics, check compatibility, and add gear as your rides get longer or more technical.
Then test the whole kit close to home. A good accessory setup should feel less like luggage and more like a quiet safety net—there when you need it, out of your way when you don’t.
Halloween Picks
halloween
As an affiliate, we earn on qualifying purchases.