Connect with us

Electric Bike

Mountain Bike Electric-Which One Is The Best

Published

on

An image showcasing a lineup of mountain bikes with sleek frames, powerful motors, and robust suspension systems

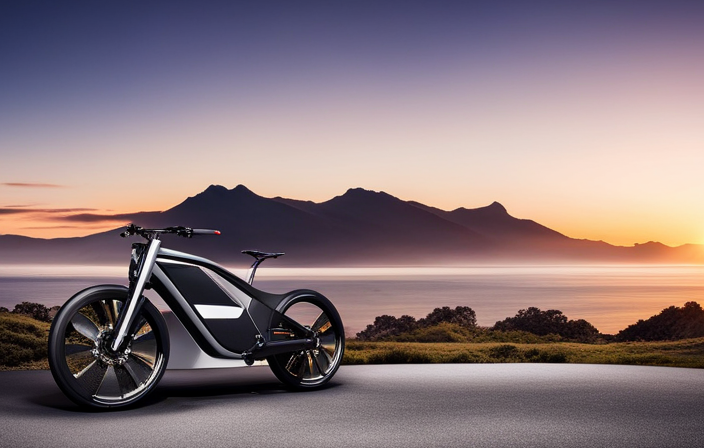
As I stood at the top of the trail, my heart raced with anticipation. The mountain bike electric hummed beneath me, ready to conquer the rugged terrain ahead.

Choosing the best mountain bike electric can be a daunting task, with a plethora of models and features to consider. But fear not, fellow adventurers, for in this article, we will explore the different types, motor specifications, frame materials, and more.

So grab your helmet and let’s dive into the world of mountain bike electric and discover which one reigns supreme.

Key Takeaways

  • Consider the motor power and battery range when choosing an electric mountain bike.
  • Take into account your riding style and the terrain you will be riding on.
  • Pay attention to the suspension system and braking system of the bike.
  • Look for additional features such as wheel size, drivetrain options, and electronic shifting.

Types of Mountain Bike Electric Models

There’s a wide variety of mountain bike electric models to choose from. When it comes to motor power, some models are equipped with a powerful motor that can handle steep inclines and rough terrains effortlessly. These bikes usually have a motor power ranging from 500 to 750 watts, providing a boost to your pedaling power.

Advertisement

On the other hand, there are models with a lower motor power, typically ranging from 250 to 350 watts, which are better suited for less demanding terrains and casual rides.

Battery range is another crucial factor to consider. Some bikes offer a longer battery range, allowing you to go on longer rides without worrying about running out of power. Others have a shorter battery range, making them more suitable for shorter commutes or leisurely rides.

When choosing the best mountain bike electric model, it’s important to consider your riding style and terrain.

Consider Your Riding Style and Terrain

Take into account your preferred style of riding and the type of terrain you typically encounter. This will help you choose the best mountain bike electric model that suits your needs.

When considering your riding style, think about whether you prefer a more aggressive approach or a smoother, more leisurely ride. Different electric mountain bikes are designed to accommodate various riding techniques, so it’s important to find one that matches your style.

Advertisement

Additionally, the type of terrain you usually encounter should be taken into consideration. If you frequently ride on rough and rocky trails, you may want a bike with larger tires and a sturdy suspension system. On the other hand, if you mostly ride on smoother surfaces, a bike with smaller tires and less suspension may be more suitable.

Don’t forget to also consider maintenance tips when choosing your electric mountain bike, as different models may require different levels of care.

In the next section, we will discuss motor and battery specifications, which are important factors to consider when making your final decision.

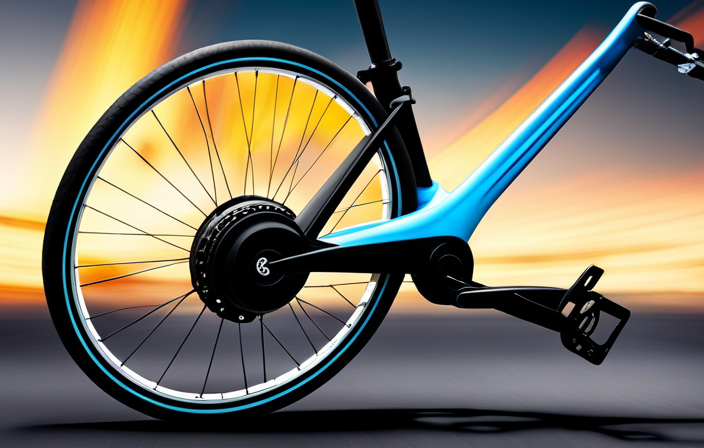
Motor and Battery Specifications

Advertisement

Consider your riding style and the type of terrain you typically encounter when looking at motor and battery specifications for your new electric mountain bike.

The motor efficiency is an important factor to consider. A more efficient motor will provide better power output and longer battery life. Look for motors with high torque and power ratings to ensure a smooth and powerful ride.

Additionally, battery life is crucial, especially if you plan on riding for long distances or on challenging terrain. Look for bikes with larger battery capacities or the option to add a second battery for extended rides. A longer battery life will allow you to explore more trails without worrying about running out of power.

With these motor and battery specifications in mind, let’s transition into discussing the next important aspect of electric mountain bikes: frame material and design.

Frame Material and Design

When choosing your new electric mountain bike, think about the frame material and design that will suit your riding style and terrain.

Advertisement

The frame material plays a crucial role in determining the bike’s weight and durability. Aluminum frames are lightweight and offer excellent stiffness, making them ideal for riders who prioritize speed and efficiency. On the other hand, carbon fiber frames are even lighter and provide superior shock absorption, making them a great choice for riders who want a smoother and more comfortable ride.

Additionally, consider the aesthetics and color options of the bike. Some brands offer a wide range of color options, allowing you to choose a bike that matches your personal style.

As we transition into the next section about the suspension system, it’s important to note that the frame material and design play a significant role in the overall performance and ride quality of your electric mountain bike.

Suspension System

Advertisement

In my experience with mountain bike electric, I have found that there are two main types of suspension systems to consider: air suspension and coil suspension.

Air suspension uses compressed air to provide a smooth and adjustable ride, while coil suspension relies on metal coils for a more consistent and durable feel.

Another important consideration is whether to opt for a front suspension or a dual suspension system.

Front suspension is ideal for riders who primarily stick to smooth trails, while dual suspension offers enhanced comfort and control for more challenging terrain.

Air vs. Coil Suspension

If you’re looking for a smoother ride, you’ll love the difference between air and coil suspension. Both suspension systems have their own benefits and drawbacks, so it’s important to understand their differences before making a decision.

Advertisement

Here are five things to consider when weighing the options:

  • Adjustability: Air suspension allows for easy adjustment of the spring rate and sag, making it customizable to your preferences and riding style.
  • Lightweight: Air suspension is typically lighter than coil suspension, which can improve overall bike weight and maneuverability.
  • Sensitivity: Coil suspension offers a more sensitive and plush feel, providing better small bump compliance and traction on rough terrains.
  • Durability: Coil suspension is generally more durable and can withstand heavy impacts without losing performance.
  • Maintenance: Air suspension requires regular maintenance, including checking air pressure and seals, while coil suspension is relatively low maintenance.

Now, let’s dive into the next section and explore the differences between front suspension and dual suspension setups.

Front Suspension vs. Dual Suspension

Let’s compare the benefits of front suspension and dual suspension setups. Front suspension is a popular choice among mountain bike enthusiasts due to its simplicity and effectiveness. It consists of a suspension fork attached to the front wheel, providing improved control and comfort on rough terrain. On the other hand, dual suspension offers even greater performance and comfort by incorporating a rear suspension system in addition to the front suspension. This allows for better traction, reduced fatigue, and increased stability, especially on technical trails.

To help visualize the advantages of each setup, let’s take a look at the following table:

Front Suspension Dual Suspension
Improved control and comfort Enhanced traction and stability
Effective on rough terrain Reduced fatigue on long rides
Suitable for most riders Ideal for technical trails
Lower cost and maintenance Increased shock absorption
Lighter weight Smoother ride experience

In the next section, we will explore the importance of a high-performance braking system for electric mountain bikes.

Braking System

When it comes to the braking system on a mountain bike electric, there are two main options to consider: hydraulic disc brakes and mechanical disc brakes.

Advertisement

Hydraulic disc brakes use fluid to transfer force from the brake lever to the brake caliper, resulting in excellent stopping power and modulation.

On the other hand, mechanical disc brakes rely on cables to transfer force, and while they may not offer the same level of power as hydraulic brakes, they are generally more affordable and easier to maintain.

Ultimately, the choice between hydraulic and mechanical disc brakes will depend on your specific needs and preferences as a rider.

Hydraulic Disc Brakes

Choose the mountain bike with hydraulic disc brakes for the best performance.

Hydraulic disc brakes offer numerous benefits compared to other braking systems. They provide consistent and powerful stopping power, regardless of the riding conditions or terrain. With hydraulic brakes, you can have precise control over your bike’s speed, allowing for quick and efficient stops. Additionally, these brakes are self-adjusting, reducing the need for frequent maintenance.

Advertisement

When it comes to maintenance, it’s important to keep the hydraulic fluid clean and ensure the brake pads are in good condition. Some of the best brands and models known for their hydraulic disc brakes include Shimano, SRAM, and Magura. However, it’s important to consider the disadvantages of hydraulic disc brakes, such as the higher cost and the need for specialized tools for maintenance.

Moving onto the next section about mechanical disc brakes, they also have their own set of advantages and disadvantages.

Mechanical Disc Brakes

Mechanical disc brakes are an alternative to hydraulic disc brakes and have their own unique advantages and disadvantages. Unlike hydraulic disc brakes, mechanical disc brakes use a cable to activate the caliper, which then applies pressure to the rotor.

One advantage of mechanical disc brakes is that they are generally more affordable than hydraulic ones. They are also easier to maintain and repair, as they do not require bleeding or specialized tools.

However, mechanical disc brakes tend to have less stopping power compared to their hydraulic counterparts. They also require more hand effort to fully engage, which can be tiring on long rides.

Advertisement

Overall, mechanical disc brakes are a reliable option for those on a budget or who prefer simpler maintenance.

Moving on to the next section about wheel size and tires, it is important to consider how these factors can impact your ride.

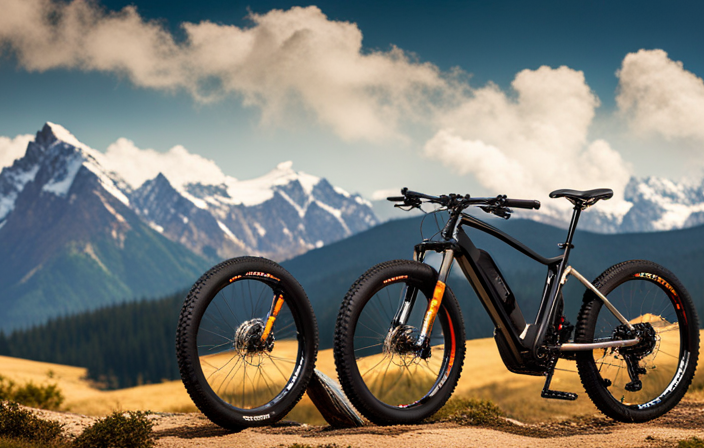
Wheel Size and Tires

For the best mountain bike electric, you should consider the wheel size and tires. The wheel size affects the overall performance and ride quality of the bike. Generally, mountain bikes come in three wheel sizes: 26 inches, 27.5 inches, and 29 inches. Each size has its advantages and disadvantages. Smaller wheels, like the 26 inches, offer increased maneuverability and a more nimble feel on the trails. On the other hand, larger wheels, like the 29 inches, provide better momentum and roll over obstacles more easily. Tire pressure also plays a crucial role in determining the bike’s performance. Higher tire pressure results in less rolling resistance, but sacrifices grip and comfort. Conversely, lower tire pressure increases traction and comfort, but it may cause more rolling resistance. Considering your riding style and the terrain you’ll be tackling, choose the wheel size and tire pressure that best suits your needs. Now, let’s move on to the next section about components and features.

Components and Features

When it comes to components and features on a mountain bike, there are a few key points that deserve attention.

First, the drivetrain options play a crucial role in determining the bike’s performance and efficiency.

Advertisement

Second, a dropper seatpost can greatly enhance the rider’s comfort and control, allowing for quick adjustments in saddle height on the fly.

Lastly, electronic shifting has revolutionized the way we shift gears, providing precise and effortless gear changes with the push of a button.

These components and features are essential considerations when looking for the best mountain bike for your needs.

Drivetrain Options

There’s no denying that electric drivetrains have revolutionized the mountain bike industry. With their ability to provide consistent power assistance, these drivetrains have greatly enhanced the overall riding experience.

When it comes to choosing the best electric mountain bike, considering the drivetrain options is crucial. Here are three key factors to consider:

Advertisement
  1. Drivetrain Efficiency: Electric drivetrains offer excellent efficiency by seamlessly integrating the motor’s power with the rider’s pedaling effort. This ensures a smooth and natural feel while riding, without any power surges or lags.

  2. Gear Range: A wide gear range is essential for conquering various terrains. Electric mountain bikes often come with drivetrains that offer a wide range of gears, allowing riders to effortlessly tackle steep uphill climbs and maintain speed on flat sections.

  3. Shift Performance: The shifting performance of the drivetrain is equally important. Look for a system that provides precise and quick shifting, ensuring smooth gear transitions without any delay or chain drops.

Considering these factors will help you choose the electric mountain bike with the drivetrain that best suits your riding style and preferences.

Now, let’s explore the next section about dropper seatposts.

Dropper Seatpost

One important feature to consider for an enhanced riding experience is the dropper seatpost. This adjustable height seatpost allows riders to quickly and easily lower or raise their saddle depending on the terrain. Not only does this provide added convenience, but it also improves overall control and maneuverability on the trails. With the ability to lower the seatpost, riders can drop their center of gravity, making it easier to navigate steep descents and technical sections. On the other hand, raising the seatpost allows for better pedaling efficiency on flat or uphill sections. Additionally, the dropper seatpost enhances saddle comfort by allowing riders to find their ideal riding position. This feature is especially beneficial for long rides or when transitioning between different types of terrain. Moving on to the next section about electronic shifting, it is another key component to consider when choosing the best electric mountain bike.

Electronic Shifting

Electronic shifting is a convenient feature that allows riders to easily change gears with the touch of a button. It offers several advantages that make it a popular choice among mountain bike enthusiasts.

Here are three key advantages of electronic shifting:

Advertisement
  1. Precision: Electronic shifting provides precise and accurate gear changes, ensuring a smooth and efficient ride. It eliminates the risk of missed shifts or chain drops, allowing riders to focus on the trail ahead.

  2. Customization: With electronic shifting, riders can customize their shifting preferences, adjusting the speed and responsiveness of gear changes to suit their riding style. This level of customization enhances the overall riding experience and performance.

  3. Durability: Electronic shifting systems are designed to withstand the rigors of off-road riding. They are built to be resistant to dirt, mud, and water, ensuring consistent performance in all weather conditions.

However, there are also some disadvantages to consider:

  1. Cost: Electronic shifting systems tend to be more expensive than traditional mechanical shifting components.

  2. Complexity: The technology behind electronic shifting can be complex, requiring regular maintenance and potential troubleshooting.

  3. Battery dependency: Electronic shifting systems rely on batteries, which need to be charged or replaced regularly. A dead battery can leave riders unable to shift gears.

Considering these advantages and disadvantages, it is important to weigh them against your budget and maintenance preferences when choosing a mountain bike with electronic shifting. Transitioning to the subsequent section about price range and budget considerations, it is essential to consider these factors alongside the performance benefits of electronic shifting.

Price Range and Budget Considerations

When considering a mountain bike electric, budget is an important factor to take into account. The price range for electric mountain bikes can vary significantly, depending on the brand, features, and overall performance considerations. It’s crucial to determine your budget and prioritize the features that are most important to you.

While higher-priced electric mountain bikes often offer advanced features and better performance, there are also more affordable options available that can still provide a satisfactory riding experience. It’s essential to find the right balance between your budget and the performance you desire.

Once you have established your budget and identified the features you need, it’s time to delve into reviews and recommendations to find the best electric mountain bike that meets your requirements.

Advertisement

Reviews and Recommendations

To find the ideal electric mountain bike for your needs, it’s helpful to read reviews and recommendations from experienced riders. They can provide valuable insights into the performance, durability, and overall satisfaction of different electric mountain bike models.

When comparing electric and non-electric mountain bikes, it’s important to consider the added benefits and drawbacks that come with an electric motor. Electric mountain bikes offer the advantage of extra power and assistance, making it easier to conquer steep climbs and cover greater distances. However, they require regular maintenance and care to ensure optimal performance, including battery charging, motor maintenance, and regular inspections.

When reading reviews, pay attention to comments about battery life, ease of maintenance, and overall durability. This will help you make an informed decision and find the best electric mountain bike for your adventures.

  • Battery life: Look for reviews that mention the battery life and how long it lasts on a single charge. This will give you an idea of how far you can ride before needing to recharge.

  • Maintenance requirements: Consider the maintenance needs of the electric mountain bike, such as motor maintenance and battery care. Reviews can provide insights into how easy or difficult it is to maintain the bike.

  • Durability: Read reviews that discuss the overall durability of the electric mountain bike, including any issues with the frame, components, or electrical system. This will help you assess the long-term reliability of the bike.

Frequently Asked Questions

How long does the battery of a mountain bike electric typically last before needing to be recharged?

The battery lifespan of a mountain bike electric can vary depending on factors such as usage and terrain. On average, it typically lasts between 20-50 miles before needing to be recharged. Charging frequency will depend on individual usage patterns.

Are mountain bike electric models suitable for riders of all skill levels, or are they more geared towards experienced riders?

Electric bikes offer numerous benefits such as improved speed and reduced effort. They are suitable for riders of all skill levels, providing an enjoyable experience for both beginners and experienced cyclists. Electric bikes have distinct advantages over regular bikes.

Advertisement

Can mountain bike electric models be used in rainy or wet conditions without damaging the electrical components?

Yes, mountain bike electric models can be used in rainy or wet conditions without damaging the electrical components. They typically have waterproofing requirements in place to ensure the safety and functionality of the bike in such conditions.

Are there any maintenance or servicing requirements specific to mountain bike electric models?

Maintaining electric mountain bikes requires specialized maintenance, such as regular cleaning, checking for loose connections, and inspecting the battery. The battery life varies, but most models last between 20-50 miles before needing a recharge.

Are there any restrictions or regulations regarding the use of mountain bike electric models on public trails or in certain areas?

Mountain bike electric regulations and trail restrictions vary depending on the location. It’s crucial to check local laws and regulations before riding an electric mountain bike on public trails or in certain areas to ensure compliance and avoid any penalties or restrictions.

Conclusion

After researching and analyzing the various mountain bike electric models, I have found that there is no one-size-fits-all answer to the question of which is the best. Factors such as riding style, terrain, motor and battery specifications, frame material and design, suspension system, wheel size and tires, components and features, as well as price range and budget considerations all play a role in determining the ideal mountain bike electric. Each individual must find the bike that aligns with their personal preferences and needs. Just as every mountain has its own unique features and challenges, so too does each rider require a bike that suits their specific journey.

Advertisement

Zane rides her bike because she loves it, but also because she is mindful of the need to leave a better world for her children.

Continue Reading
Advertisement

Electric Bike

How To Turn On Ancheer Electric Bike

Published

on

By

An image showcasing a person wearing a helmet, mounting their Ancheer Electric Bike, firmly holding the handlebars, effortlessly flipping the power switch, and confidently gliding away amidst a scenic backdrop

As I grip the smooth handlebars of my Ancheer electric bike, I feel a rush of excitement. With just a push of a button, I am whisked away into a realm of easy movement and exhilarating velocity.

In this article, I will guide you through the intricacies of turning on your own Ancheer electric bike. From checking the battery level to engaging the throttle, each step will be explained in detail, empowering you to embark on thrilling adventures with ease.

Let’s dive in and unlock the power of your Ancheer electric bike!

Key Takeaways

  • Press the power button to check the battery level.
  • Locate the power button on the Ancheer e-bike to turn it on.
  • Press and hold the power button to activate the bike’s power system and access additional features.
  • Check the battery indicator light on the handlebar console to determine the battery level.

Check the Battery Level

Check the battery level by pressing the power button on the Ancheer electric bike. This step is crucial to ensure that the bike has enough power for your ride.

Advertisement

The battery level is displayed on the bike’s control panel, indicating the percentage of charge remaining. If the battery level is low, you may need to charge it before starting your ride. Simply connect the charger to the battery and plug it into a power source.

In case the battery needs replacement, consult the user manual or contact Ancheer customer support for assistance.

Now that you have checked the battery level, let’s move on to the next step and locate the power button on the bike.

Locate the Power Button

Locating the power button on your Ancheer e-bike is easy. Once you have found it, you can perform various functions with it.

Here are three important things you can do with the power button:

Advertisement
  1. How to troubleshoot power button issues: If you encounter any problems with the power button, such as it not turning on or not functioning properly, check the connections and ensure that the battery is charged. If the issue persists, consult the user manual or contact Ancheer customer support for assistance.

  2. How to turn off the Ancheer electric bike: To turn off the bike, press and hold the power button for a few seconds until the display turns off. This will conserve battery power and ensure that the bike is completely powered down.

  3. How to turn on the Ancheer electric bike: To turn on the bike, simply press the power button once. You should see the display light up, indicating that the bike is ready to use.

Now that you know how to locate and operate the power button, let’s move on to the next step of pressing and holding the power button for other functions.

Press and Hold the Power Button

Press and hold the power button to access additional features and settings on your Ancheer e-bike. The power button is usually located on the handlebar or the control panel of the bike.

When you press and hold the power button, you activate the bike’s power system and turn it on. This allows you to start using the bike and take advantage of its electric assistance.

Advertisement

The power button is a crucial component of the bike, as it is responsible for turning the bike on and off. Once you have pressed and held the power button, you can then look for the battery indicator light, which will show you the current battery level of the bike.

This is important information to have, as it will let you know when it’s time to recharge the battery.

Look for the Battery Indicator Light

To find out the current battery level of your Ancheer e-bike, simply take a quick glance at the battery indicator light. It is located on the handlebar console and consists of a series of LED lights that indicate the remaining charge in your bike’s battery. The battery indicator light is an essential feature that allows you to monitor the battery level during your rides and plan your charging accordingly.

Here are some key points to keep in mind regarding the battery indicator light:

  • Green light: Indicates a full or almost full battery charge.
  • Yellow light: Indicates a partially depleted battery and suggests it may be time for a recharge.
  • Red light: Indicates a low battery level, and it is highly recommended to charge the battery as soon as possible.

Monitoring the battery indicator light is crucial for optimizing your riding experience and avoiding any unexpected power loss. Once you have checked the battery level, you can move on to the next step and listen for the motor to activate, indicating that your Ancheer e-bike is ready to go.

Listen for the Motor to Activate

Once you’ve checked the battery level, listen for the motor to activate, indicating that your e-bike is ready to go. Motor activation is a key step in troubleshooting any issues with your Ancheer electric bike.

Advertisement

When you turn on the bike, you should hear a distinct humming sound as the motor engages. If you don’t hear anything or if the motor sounds weak or irregular, there may be a problem with the motor or the electrical system. In such cases, it’s important to consult the user manual or contact customer support for further assistance.

Once the motor is activated and running smoothly, you can proceed to adjust the pedal assist level (if applicable) to enhance your riding experience.

Adjust the Pedal Assist Level (if applicable)

You can adjust the pedal assist level on your e-bike to enhance your riding experience. Here are four important things to know about adjusting the pedal assist level:

  1. Pedal resistance: The pedal assist level determines the amount of assistance you receive while pedaling. Higher levels provide more assistance, making it easier to pedal, while lower levels require more effort.

  2. Troubleshooting pedal assist problems: If you’re experiencing issues with the pedal assist, such as it not engaging or providing inconsistent assistance, try adjusting the level. Sometimes, a simple change in the assist level can solve the problem.

  3. Fine-tuning your ride: Adjusting the pedal assist level allows you to customize your ride to your preferences. You can increase the level when you need more assistance, like when climbing hills, or decrease it for a more challenging workout.

  4. Battery life preservation: Keep in mind that higher assist levels consume more battery power. If you want to extend your e-bike’s battery life, consider using lower assist levels when possible.

Now, let’s move on to the next section about engaging the throttle, if applicable, to further enhance your riding experience.

Engage the Throttle (if applicable)

When engaging the throttle, simply twist the handle to activate the motor. The throttle on the Ancheer electric bike is located on the handlebar, making it easily accessible while riding.

Advertisement

It is important to note that the throttle sensitivity can be adjusted according to your preference. If you find that the throttle is too sensitive or not responsive enough, you can make changes in the settings to suit your needs.

Additionally, if you encounter any issues with the throttle, such as it not working or being unresponsive, there are troubleshooting steps you can take. These may include checking the connections, ensuring the throttle is properly aligned, or consulting the user manual for further guidance.

Now, let’s move on to the next step and test the brakes and gears.

Test the Brakes and Gears

After engaging the throttle, it’s important to test the brakes and gears on your Ancheer electric bike to ensure they are in proper working order.

Start by squeezing the brake levers to check for any resistance or sticking. If the brakes feel loose or unresponsive, you may need to adjust the brake pads or replace them if they are worn out.

Advertisement

Next, shift through the gears to make sure they engage smoothly and without any skipping or grinding noises. Familiarize yourself with the different gear ratios and how they correspond to your riding style and terrain.

Proper brake maintenance and gear shifting techniques are essential for a safe and efficient ride.

Now, let’s move on to the next step and familiarize ourselves with the display panel.

Familiarize Yourself with the Display Panel

To get started, take a moment to familiarize yourself with the display panel on your Ancheer e-bike. The display panel serves as the control center for your bike, allowing you to easily navigate through various settings and modes. Here are a few key things to keep in mind:

  • Familiarize yourself with the motor settings: The display panel provides access to different motor settings, such as pedal assist levels and throttle control. Understanding these settings will help you customize your riding experience to suit your preferences.

  • Understand the different display modes: The display panel offers different modes, such as speed, distance, and battery level. Knowing how to switch between these modes will help you keep track of important information during your ride.

  • Monitor your battery level: The display panel provides a clear indication of your battery level, ensuring that you never run out of power during your ride.

  • Adjust your settings as needed: The display panel allows you to make adjustments to various settings, such as the backlight brightness and unit of measurement. Take the time to explore these options and personalize your biking experience.

Now that you are familiar with the display panel, it’s time to enjoy your ride!

Advertisement

Enjoy Your Ride!

Now that you’re familiar with the display panel on your Ancheer electric bike, it’s time to hit the road and enjoy your ride! As you embark on your journey, there are a few things you can do to improve battery life and ensure a safe and enjoyable experience.

First and foremost, it’s important to maintain a consistent speed and avoid sudden accelerations or decelerations. This will help conserve battery power and extend your riding range. Additionally, be mindful of the terrain you’re riding on. Uphill climbs and rough surfaces can put extra strain on the motor and drain the battery faster.

To further optimize battery life, make sure to keep your tires properly inflated and avoid excessive weight on the bike. Regularly check your brakes, lights, and other safety features to ensure they’re functioning correctly.

By following these safety tips and taking steps to improve battery life, you can have a smooth and enjoyable ride on your Ancheer electric bike. So, hop on, buckle up, and embrace the thrill of electric biking!

Frequently Asked Questions

How do I charge the battery of my Ancheer electric bike?

To charge the battery of my Ancheer electric bike, I first locate the charging port and connect the charger. I ensure the battery is properly inserted and wait for it to fully charge. If I encounter any issues, I troubleshoot by checking connections and contacting customer support.

Advertisement

Can I turn on the electric bike without using the power button?

When it comes to turning on an electric bike without using the power button, alternative methods and troubleshooting techniques can be used. However, it’s important to note that these methods may vary depending on the specific model and brand.

What should I do if the battery indicator light does not turn on?

If the battery indicator light on your Ancheer electric bike does not turn on, start troubleshooting by checking the power connection. Ensure that the battery is properly connected and securely attached.

How can I adjust the pedal assist level on my Ancheer electric bike?

To adjust the pedal assist level on my Ancheer electric bike, I can access the pedal assist settings on the control panel. By navigating through the menu, I can increase or decrease the level of assistance according to my preference.

Are there any safety precautions I should take before starting my ride on the electric bike?

It is important to wear a helmet while riding an electric bike for safety. To ensure a safe ride, proper maintenance is essential. Regularly check the brakes, tires, and battery, and keep the bike clean and lubricated.

Conclusion

And there you have it! Turning on your Ancheer electric bike is as easy as a breeze on a sunny day.

Advertisement

Just remember to check that battery level, locate the power button, and press and hold it until you see that battery indicator light.

Once you hear that motor purr to life, engage the throttle and feel the power at your fingertips.

Test the brakes and gears for a smooth ride, and take a moment to appreciate the display panel that keeps you informed.

Now, it’s time to hit the road and let the adventure begin!

Advertisement

Continue Reading

Electric Bike

How To Turn Mountain Bike Into Electric Bike

Published

on

By

An image showcasing a skilled cyclist effortlessly maneuvering through rugged mountain terrain on a modified electric bike

Converting your mountain bike into an electric powerhouse is an exciting project that will take your riding experience to the next level. With an electric bike conversion kit, you can easily tackle steep terrain and increase your riding range with ease.

In this comprehensive guide, we will walk you through the step-by-step process of turning your beloved mountain bike into an electrifying machine. Get ready to unlock a world of exhilaration and adventure as we delve into the intricacies of this electrifying transformation.

Key Takeaways

  • Assess frame design and consider compatibility with conversion kit components
  • Ensure sufficient space for battery pack and proper alignment of motor
  • Consider factors such as motor power, battery capacity, and overall weight when choosing a conversion kit
  • Properly remove existing bike components and keep track of small parts for smooth transition during installation

Assessing Your Mountain Bike’s Compatibility

Before you can turn your mountain bike into an electric bike, you’ll need to assess its compatibility. Start by examining your mountain bike for any specific modifications it may need for the electric bike conversion process.

Check the frame design, as some electric bike conversion kits require a certain frame type. Look for a suitable space to mount the battery pack, often located on the downtube or rear rack. Ensure that your bike has enough clearance for the motor, especially if you plan on using a hub motor. Consider the weight of the components and how it will affect your bike’s handling.

Advertisement

Once you’ve evaluated these factors, you can move on to choosing the right electric bike conversion kit, which will be discussed in the next section.

Choosing the Right Electric Bike Conversion Kit

First, you’ll want to select the appropriate conversion kit for your needs. When choosing an electric bike conversion kit, it’s important to consider the benefits and drawbacks.

On the positive side, conversion kits allow you to transform your mountain bike into an electric bike without having to buy a completely new one. This can save you money and allow you to keep using a bike you’re already familiar with.

However, there are some drawbacks to consider as well. Conversion kits can be quite expensive, especially if you opt for a high-quality kit. Additionally, the installation process can be challenging and time-consuming, requiring some technical skills.

Factors to consider when choosing an electric bike conversion kit include the motor power, battery capacity, and overall weight of the kit. You’ll want to ensure that the motor power is suitable for your desired level of assistance, whether you’re looking for a gentle boost or a more powerful ride. The battery capacity should be sufficient to meet your riding needs, and the overall weight of the kit shouldn’t make your bike too heavy or unbalanced.

Advertisement

Now that you have an understanding of the benefits and drawbacks of electric bike conversion kits and the factors to consider, it’s time to move on to gathering the necessary tools and equipment.

Gathering the Necessary Tools and Equipment

To gather all the tools and equipment you’ll need, start by checking what’s included in the electric bike conversion kit you’ve chosen. Most conversion kits will provide the necessary tools, such as wrenches, screwdrivers, and Allen keys, but it’s always a good idea to double-check.

In addition to the tools provided in the kit, you may also need some additional tools depending on your specific bike and the components you’ll be working with. Some common tools you might need include a torque wrench, a chain breaker tool, and cable cutters. Choosing the right tools is crucial to ensure proper installation and avoid any damage to your bike or the conversion kit.

Advertisement

Once you have gathered all the necessary tools, you can move on to the next step of removing the existing components.

Removing the Existing Components

Now, you’ll need to remove the components currently on your bike.

Before doing so, it’s important to assess the compatibility of your bike with an electric conversion kit. Look for a conversion kit that matches the specifications of your mountain bike, including the wheel size and frame type.

Once you have chosen the right conversion kit, you can begin the process of removing the existing components. Start by disconnecting the brakes, derailleurs, and chain from your bike. Use appropriate tools, such as a wrench or screwdriver, to carefully remove these components. Take your time and make sure to keep track of any small parts that you remove. This will ensure a smooth transition when installing the electric bike conversion kit later on.

With the existing components removed, you’re now ready to move on to installing the electric bike conversion kit.

Advertisement

Installing the Electric Bike Conversion Kit

Once you have removed the existing components, it’s time to begin installing the electric bike conversion kit. To ensure a smooth installation, follow these steps:

  • Carefully read the instructions provided with the kit.
  • Begin by installing the motor correctly on the frame. Make sure to align it properly and tighten all bolts securely.
  • Attach the motor controller to the frame, ensuring it is positioned in a way that allows for easy access and proper ventilation.
  • Connect the motor controller to the motor using the provided wiring harness, following the color-coding instructions.

Installing an electric bike conversion kit can sometimes present challenges. Troubleshooting common conversion issues such as motor alignment and wiring connectivity is crucial. Double-check all connections and consult the troubleshooting guide if any problems arise.

Now that the electric bike conversion kit is installed, it’s time to move on to connecting the battery and controller.

Connecting the Battery and Controller

Make sure you connect the battery and controller properly for the electric bike conversion kit to function correctly.

Advertisement

Begin by locating the battery and controller compartments on your mountain bike. Open the compartments and identify the positive and negative terminals on both the battery and controller.

Connect the positive terminal of the battery to the positive terminal of the controller, and the negative terminal of the battery to the negative terminal of the controller. Ensure the connections are secure and tight.

Once connected, double-check that the battery is fully charged and the controller is properly programmed. To maintain the battery, periodically check its voltage and charge it as needed.

Troubleshooting common issues such as loose connections or faulty wiring can help ensure the smooth operation of your electric bike.

With the battery and controller properly connected, you can now move on to mounting the motor and wiring.

Advertisement

Mounting the Motor and Wiring

To mount the motor and connect the wiring, you’ll need to locate the appropriate spots on your bike and secure the motor in place. Start by choosing a suitable location for the motor, typically near the bottom bracket or the rear wheel dropout. Ensure that the motor is aligned properly with the chain and sprocket. Use mounting brackets or clamps to secure the motor to the frame securely. Next, connect the wiring between the motor and the controller. Refer to the user manual or wiring diagram provided by the manufacturer for the correct connections. Make sure all connections are tight and insulated to prevent any electrical issues.

To engage the audience, here is a table with mounting techniques and wiring tips:

Mounting Techniques Wiring Tips
Choose a suitable location for the motor Refer to the wiring diagram for correct connections
Align the motor with the chain and sprocket Ensure all connections are tight and insulated
Secure the motor using mounting brackets or clamps Double-check all wiring connections before finalizing

Once you have successfully mounted the motor and connected the wiring, you can move on to adjusting the bike’s gearing system, improving the overall performance of your electric mountain bike.

Adjusting the Bike’s Gearing System

Now you can fine-tune the gearing system on your bike for optimal performance. Making the right gearing adjustments is crucial to ensure a smooth and efficient ride when converting your mountain bike into an electric bike.

One important aspect to consider is the gear ratio optimization. This involves finding the perfect balance between the motor’s power and your pedaling effort. Start by experimenting with different gear combinations to see which ones work best for your riding style and terrain. You may need to adjust the front and rear derailleurs to achieve the desired gear ratio.

Advertisement

Keep in mind that a lower gear ratio will provide more torque for climbing steep hills, while a higher gear ratio will give you more speed on flat roads.

Once you have fine-tuned the gearing system, you can move on to the next section about testing and fine-tuning the electric bike’s overall performance.

Testing and Fine-Tuning the Electric Bike

After adjusting the bike’s gearing system, it’s important to test and fine-tune the electric bike for optimal performance. Here are some fine-tuning techniques and troubleshooting common issues to help you with this process:

  1. Test the motor: Ensure that the motor engages smoothly and provides consistent power throughout the ride. Check for any unusual noises or vibrations.

  2. Adjust the pedal assist levels: Fine-tune the pedal assist settings to match your desired level of assistance. Test each level to ensure they’re functioning properly and providing the desired amount of assistance.

  3. Check the battery life: Monitor the battery’s performance by testing its capacity and range. Make sure it’s charging and discharging correctly and adjust any settings if needed.

  4. Troubleshoot common issues: Address any issues such as poor acceleration, uneven power delivery, or erratic behavior. Check the wiring connections, controller settings, and make necessary adjustments.

Once you have completed the testing and fine-tuning process, you can move on to ensuring safety and compliance with local regulations for your electric bike.

Ensuring Safety and Compliance

Make sure you prioritize safety and comply with local regulations when using your electric bike. Ensuring safety is crucial to prevent accidents and injuries. Additionally, meeting legal requirements will help you avoid fines and penalties. Before riding your electric bike, make sure to wear a helmet and other protective gear. Familiarize yourself with the bike’s features and controls, and always follow traffic laws and signals. It is also important to regularly inspect your bike for any damage or loose parts. Maintain a safe speed and be aware of your surroundings. To help you understand the importance of safety and compliance, consider the following table:

Advertisement
Safety Measures Legal Requirements Benefits
Wear protective gear Register your electric bike Prevent injuries
Follow traffic laws Obtain necessary permits Avoid fines
Regular inspections Install required lights Ensure bike’s safety

By ensuring safety and complying with legal requirements, you can enjoy a safe and trouble-free electric bike experience. Now let’s move on to maintaining and servicing your electric bike.

Maintaining and Servicing Your Electric Bike

Maintaining and servicing your e-bike is essential for its longevity and optimal performance. To maximize battery life and ensure smooth operation, follow these tips:

  • Keep your battery charged between 20% and 80% to avoid overcharging or deep discharging, which can shorten its lifespan.
  • Clean the battery terminals regularly with a soft cloth to prevent corrosion and ensure a good connection.
  • Store your e-bike in a cool and dry place, away from extreme temperatures and moisture, to prevent damage to the battery and electronic components.

Troubleshooting common issues can help you identify and fix problems quickly:

  • Check the connections and wiring for any loose or damaged parts.
  • Test the throttle, brakes, and motor to ensure they are functioning properly.
  • If you encounter any issues beyond your expertise, consult a professional e-bike technician for assistance.

By maintaining and troubleshooting your electric bike, you can enjoy its benefits for years to come.

Now, let’s explore how to upgrade and customize your e-bike.

Upgrading and Customizing Your Electric Bike

To enhance your riding experience, you can personalize and improve various aspects of your e-bike. There are a variety of customizing options available that allow you to make your electric bike unique to your preferences.

One way to upgrade your e-bike is by improving its performance. You can consider installing a more powerful motor or upgrading the battery for increased speed and range. Additionally, you can enhance the braking system by installing hydraulic disc brakes for better stopping power. Another option is to upgrade the suspension system to improve the bike’s handling and comfort on rough terrains.

Advertisement

Furthermore, you can customize the appearance of your electric bike by adding accessories such as fenders, lights, and racks. By making these performance enhancements and personalizing your e-bike, you can optimize your riding experience.

Now, let’s explore different riding modes and power levels.

Exploring Different Riding Modes and Power Levels

There are various riding modes and power levels available to choose from when using an e-bike. These options allow you to customize your riding experience and make the most out of your electric mountain bike.

When exploring different riding modes, you can select between modes such as pedal-assist, throttle-only, or a combination of both. Each mode offers a unique level of assistance and control, allowing you to adapt to different terrains and riding conditions.

Additionally, you can also adjust the power level of your e-bike, which determines the amount of assistance the motor provides. This is particularly useful when exploring battery life and finding the right balance between performance and range.

Advertisement

Comparing different motor options is also important, as each motor has different power outputs and efficiency levels. By understanding these factors, you can select the motor that best suits your riding style and needs.

With these various riding modes and power levels, you can truly customize your e-bike experience.

Now, let’s move on to some tips and tricks for maximizing performance.

Tips and Tricks for Maximizing Performance

Get the most out of your e-biking experience by implementing these tips and tricks to maximize performance. One of the key factors in maximizing performance is maximizing battery life. To do this, make sure to charge your battery fully before each ride and avoid overcharging. Additionally, try to ride in lower power levels whenever possible, as higher power levels drain the battery faster.

Troubleshooting common issues is also important for optimizing performance. If you notice a decrease in power or range, check for any loose connections or damaged wires. Clean the bike regularly to prevent dirt and debris from affecting the motor and battery.

Advertisement

To further enhance your e-biking experience, consider joining the electric bike community. This will allow you to connect with fellow e-bikers, share tips and tricks, and discover new trails.

Joining the Electric Bike Community

Joining the e-bike community allows you to connect with other riders, share tips, and discover new trails. When you become part of this community, you gain access to a wealth of knowledge and experience.

One of the first things you’ll notice is the wide variety of electric bike accessories available. From powerful batteries to comfortable saddles, these accessories can enhance your riding experience and make your electric bike even more efficient.

Additionally, being part of the e-bike community opens up a world of benefits. Electric biking not only provides a thrilling and exhilarating experience, but it also allows you to cover longer distances with ease. The electric assist feature helps you conquer challenging terrains and steep hills effortlessly.

Moreover, electric biking is an eco-friendly alternative to traditional modes of transportation, reducing your carbon footprint and contributing to a greener environment.

Advertisement

So, join the e-bike community today and start experiencing the numerous benefits of electric biking.

Frequently Asked Questions

Can I convert any type of mountain bike into an electric bike?

Yes, you can convert any type of mountain bike into an electric bike. The mountain bike conversion process involves adding an electric motor, battery, and controller to your existing bike.

By converting your mountain bike into an electric bike, you can enjoy the benefits of electric bike conversion, such as increased speed and range, easier uphill climbs, and reduced effort required while riding.

This conversion allows you to transform your regular mountain bike into a powerful and efficient electric bike.

How much does an electric bike conversion kit typically cost?

Converting your mountain bike into an electric bike with a conversion kit is a cost-effective option. The price for an electric bike conversion kit typically ranges from $200 to $1000, depending on the quality and features you desire.

Advertisement

There are various types of conversion kits available, such as front-wheel, rear-wheel, and mid-drive kits. Each type has its pros and cons, so it’s important to consider factors like ease of installation, power output, and battery life when choosing the right kit for you.

Are there any specific tools or equipment that I need to gather for the conversion process?

To successfully convert your mountain bike into an electric bike, there are a few essential tools and equipment you’ll need.

  • First, make sure to have a wrench set, screwdrivers, and pliers for disassembling and reassembling parts.

  • Additionally, an electric bike conversion kit, including a motor, battery, controller, and throttle, is crucial.

  • When choosing a battery, consider its capacity, voltage, and weight.

  • Avoid common mistakes like improper wiring or mismatched components.

  • Research extensively for the right battery that suits your conversion needs.

Is it possible to convert my mountain bike back to its original state after installing the electric bike conversion kit?

Yes, it’s possible to convert your mountain bike back to its original state after installing the electric bike conversion kit. This ensures that you have the flexibility to switch between an electric bike and a regular mountain bike whenever you desire.

The mountain bike conversion process offers numerous benefits. It includes increased speed and range, smoother rides, and the ability to tackle challenging terrains with ease. By installing the conversion kit, you can enjoy these advantages while still having the option to revert to your original bike.

Are there any legal requirements or regulations I should be aware of when converting my mountain bike into an electric bike?

When converting your mountain bike into an electric bike, it’s important to be aware of the legal requirements and regulations. Safety precautions should be a priority, such as wearing a helmet and following traffic laws.

Advertisement

Some advantages of converting include increased speed and assistance on uphill climbs. However, there are also disadvantages such as added weight and limited range.

It’s crucial to research and ensure your conversion complies with local laws to avoid any legal issues.

Conclusion

Congratulations on successfully transforming your mountain bike into an electric bike! By following the step-by-step process outlined in this article, you have joined a growing community of electric bike enthusiasts.

Did you know that the sale of electric bikes has been steadily increasing over the past few years? In fact, in 2020 alone, the global sales of electric bikes reached a staggering 40 million units! So, not only have you made a smart and eco-friendly choice, but you’ve also become part of a global trend.

Get out there and enjoy your new electric bike adventure!

Advertisement

Continue Reading

Electric Bike

How To Turn On Fiido Electric Bike

Published

on

By

An image showcasing a person wearing a helmet, standing beside a Fiido electric bike

Positioned between the excitement of embarking on a new journey and the eagerness of becoming proficient with innovative technology, activating a Fiido electric bike opens the door to a realm of easy exploration.

In this guide, I will walk you through the precise steps to activate your Fiido electric bike and unleash its full potential.

From connecting the battery to adjusting the settings, prepare to embark on a thrilling ride as we delve into the intricacies of powering up your Fiido electric bike.

Key Takeaways

  • The Fiido electric bike can be activated by pedaling on the bike, with a motion sensor engaging the motor for effortless propulsion.
  • The activation process from pedaling to electric power is smooth and seamless.
  • Regular maintenance, such as checking tire pressure, brakes, and chain, is important for optimal performance.
  • The electric motor of the Fiido electric bike provides convenience and assistance, making uphill climbs and long distances more manageable.

Unpack your Fiido electric bike and ensure all parts are present and in working condition.

First, unpack your Fiido electric bike and make sure all the parts are present and in working condition. Begin by carefully inspecting the bike for any damages during shipping or handling. Look for any scratches, dents, or loose components. It is crucial to ensure that the bike is in perfect condition before using it.

Advertisement

Next, test the brakes by gently squeezing the brake levers. Make sure they engage smoothly and that the brake pads make proper contact with the wheel rims. If there are any issues with the brakes, consult the user manual for troubleshooting steps or contact customer support.

Once you have completed the inspection and brake test, you can proceed to connect the battery to the bike by inserting the connectors into their corresponding slots. This will power the bike and enable it to function properly for your rides.

Connect the battery to the bike by inserting the connectors into their corresponding slots.

To connect the battery to your Fiido electric bike, simply insert the connectors into their corresponding slots. Here is a step-by-step guide on how to do it:

  1. Ensure that both the bike and the battery are turned off before connecting them.

  2. Locate the battery compartment on the bike, usually located near the rear wheel.

  3. Align the connectors on the battery with the slots on the bike. The connectors are usually color-coded for easy identification.

  4. Gently push the connectors into their corresponding slots until they are securely connected.

Troubleshooting common issues when connecting the battery to the Fiido electric bike and exploring the benefits of using an electric bike and how it can enhance your daily commute are important discussion ideas.

Once the battery is connected, make sure it is fully charged before turning on the bike.

Advertisement

Make sure the battery is fully charged before turning on the bike.

Before you start riding, ensure that the battery is fully charged. Properly charging the battery is essential for the optimal performance of your Fiido electric bike. Here are some battery charging tips to follow:

  1. Use the original charger provided by Fiido to avoid any compatibility issues.
  2. Plug the charger into a standard electrical outlet and connect it to the charging port on the battery.
  3. Monitor the charging progress through the LED indicator on the charger. It will typically turn green when the battery is fully charged.

To troubleshoot common battery charging issues, check for loose connections, damaged cables, or faulty charging ports. If you encounter any problems, refer to the user manual or contact Fiido customer support for assistance.

Now, let’s move on to locating the power button on the bike’s control panel or handlebar.

Locate the power button on the bike’s control panel or handlebar.

You can easily find the power button on the bike’s control panel or handlebar. The power button is a vital component of the fiido electric bike, responsible for turning on the bike and activating its various functions.

Advertisement

However, in some cases, users may encounter issues with the power button not working. Troubleshooting common issues with the power button on a fiido electric bike involves checking the battery connection, ensuring the power button is not stuck or damaged, and verifying that the bike is not in a locked or anti-theft mode.

If the power button still doesn’t work, there are alternative methods to turn on the bike. These methods may include using the key to activate the bike or accessing the bike’s settings menu to enable a different power-on option. By familiarizing yourself with these troubleshooting techniques, you can easily overcome any power button-related challenges.

Now, press and hold the power button for a few seconds until the bike’s display lights up, indicating that the bike is ready for use.

Press and hold the power button for a few seconds until the bike’s display lights up.

Advertisement

Simply hold the power button down for a few seconds and the bike’s display will illuminate. This is an essential step in turning on your Fiido electric bike.

Once the display lights up, you gain access to crucial information about your bike’s battery level and other important data.

To ensure the smooth functioning of your electric bike, it is vital to regularly perform maintenance tasks. This includes keeping the battery charged, inspecting the tires for wear and tear, and checking the brakes for proper functioning.

Troubleshooting common electric bike issues is also an important aspect of maintenance. If you encounter any problems, such as a loss of power or unusual noises, refer to the user manual for troubleshooting instructions.

Now, check the display screen for battery level and other important information.

Advertisement

Check the display screen for battery level and other important information.

After holding down the power button, take a look at the display screen to see the battery level and other important information.

The display screen of your Fiido electric bike provides you with crucial details about your ride. It shows the battery level, allowing you to monitor how much power you have left before needing to recharge. This information is essential for planning your routes and ensuring you don’t run out of battery in the middle of your ride.

Additionally, the display screen provides insights into your speed, distance traveled, and pedal assist level. To extend the battery life of your Fiido electric bike, consider adjusting your pedal assist level and reducing your speed when necessary.

Furthermore, it is important to maintain the display screen by keeping it clean and avoiding any physical damage. By doing so, you can ensure that the screen continues to provide accurate and reliable information.

Now, adjust the settings on the display screen, such as speed and pedal assist levels, according to your preferences, to enhance your overall riding experience.

Advertisement

Adjust the settings on the display screen, such as speed and pedal assist levels, according to your preferences.

To enhance your overall riding experience, adjust the settings on the display screen, like speed and pedal assist levels, according to your preferences.

The display screen on the Fiido electric bike allows you to easily customize various aspects of your ride. To begin, press the power button on the display screen to turn it on.

Once it is on, you can navigate through the various settings using the buttons on the display screen. To adjust the speed, simply use the up and down arrows to increase or decrease the desired speed level.

Additionally, you can customize the pedal assist levels by selecting the desired level from the options available on the display screen.

Remember to put on a helmet and any other safety gear before mounting the bike, ensuring a safe and enjoyable ride.

Advertisement

Put on a helmet and any other safety gear before mounting the bike.

Before mounting the bike, make sure to put on a helmet and any other necessary safety gear. Safety is paramount when engaging in mountain biking, and choosing the right size helmet is crucial to protect your head from potential injuries. To ensure a proper fit, measure the circumference of your head and refer to the manufacturer’s sizing chart. Additionally, don’t forget to wear knee and elbow pads, as well as sturdy shoes, to safeguard your body during the ride. Once you are fully geared up, sit on the bike, place your feet on the pedals, and start pedaling to activate the electric motor. By following these mountain biking tips and prioritizing safety, you can enjoy a thrilling ride while minimizing the risk of accidents.

Sit on the bike, place your feet on the pedals, and start pedaling to activate the electric motor.

Once you’re seated on the bike, simply place your feet on the pedals and start pedaling to activate the electric motor. This action triggers the motion sensor, which then engages the electric motor, propelling you forward effortlessly.

Electric bike maintenance is simplified with the Fiido electric bike, as the motor is designed to be low-maintenance and durable.

One of the key benefits of electric bikes is the assistance they provide, allowing you to travel longer distances and conquer challenging terrains with ease.

The smooth activation of the electric motor ensures a seamless transition from pedaling to electric power, providing a delightful riding experience.

Advertisement

So, buckle up, helmet securely fastened, and enjoy your ride on your newly turned-on Fiido electric bike!

Enjoy your ride on your newly turned-on Fiido electric bike!

Get ready to experience the thrill of riding your brand new Fiido electric bike! Now that you have successfully turned it on, it’s time to delve into the world of electric bike maintenance.

Regular maintenance is essential to keep your electric bike running smoothly and efficiently. Start by checking the tire pressure, brakes, and chain regularly. Cleaning the bike after every ride helps to remove dirt and debris, ensuring optimal performance. Additionally, don’t forget to charge the battery after each use to maximize its lifespan.

Now, let’s talk about the benefits of electric bikes. They offer a convenient and eco-friendly mode of transportation, reducing our carbon footprint. Electric bikes also provide a great alternative to traditional bicycles, especially for those who may have physical limitations or need assistance with pedaling. The electric motor adds an extra boost, making uphill climbs and long distances more manageable.

Moreover, electric bikes promote a healthier lifestyle by encouraging regular exercise and outdoor activities. So, hop on your Fiido electric bike and embark on an exciting journey, knowing that you are not only enjoying the ride but also contributing to a greener future.

Advertisement

Frequently Asked Questions

How long does it take to fully charge the Fiido electric bike battery?

It takes approximately X hours to fully charge the Fiido electric bike battery. To extend its battery life, you can follow these steps: minimize high-speed riding, avoid frequent stops and starts, and use pedal assist mode whenever possible. Additionally, the Fiido electric bike offers various charging options such as using a standard wall outlet or a portable battery charger.

Can I charge the Fiido electric bike battery while it is still connected to the bike?

Yes, you can charge the Fiido electric bike battery while it is connected to the bike. However, it is recommended to disconnect the battery for optimal charging time and to extend the battery life.

Is it necessary to adjust the settings on the display screen before riding the Fiido electric bike?

Yes, it is necessary to adjust the settings on the display screen before riding the Fiido electric bike. These adjustments can include things like selecting the desired mode, adjusting the pedal assist level, and checking battery life.

What is the maximum speed that the Fiido electric bike can reach?

The Fiido electric bike has a remarkable maximum speed of 25 mph, allowing for swift and efficient transportation. Its exceptional acceleration performance ensures quick and smooth acceleration, making it ideal for urban commuting.

Are there any specific maintenance tasks that should be performed regularly to keep the Fiido electric bike in good condition?

Regular maintenance is essential to keep the Fiido electric bike in good condition. Some tips include cleaning the bike regularly, checking tire pressure, lubricating the chain, inspecting the brakes, and ensuring all electrical components are functioning properly.

Advertisement

Conclusion

I carefully unpacked my Fiido electric bike, ensuring that all the parts were intact and in proper working condition. After connecting the battery, I made sure it was fully charged before I was ready to turn on the bike.

With a firm grip on the handlebar, I located the power button and pressed it for a few seconds. As if by magic, the bike’s display screen came to life, allowing me to customize the settings to my liking.

Equipped with my helmet and safety gear, I mounted the bike and started pedaling, feeling the electric motor seamlessly kick in. With a sense of excitement, I embarked on a thrilling ride, effortlessly gliding through the streets on my newly activated Fiido electric bike.

Continue Reading
Advertisement

Affiliate disclaimer

As an affiliate, we may earn a commission from qualifying purchases. We get commissions for purchases made through links on this website from Amazon and other third parties.

About us

We are a passionate team driven by the belief that cycling is a fantastic and accessible way to stay active while enjoying the beauty of the outdoors. Our mission is to share our love for cycling with as many people as possible. We provide a welcoming environment for individuals of all ages, abilities, and backgrounds to come together and ride bikes. With Ralf’s visionary leadership, Zane’s expertise in cycling adventures, and Olivia’s dedication to community building, we strive to create a vibrant space where everyone can experience the joy of cycling. Through group rides, workshops, and inclusive events, we inspire and empower individuals to embrace an active lifestyle. Join us in our quest to pedal together, embrace the joy of cycling, and foster connections that last a lifetime.

Advertisement

Trending