
Start by taking stock of your gear and removing non-essentials. Pack lightweight essentials like sleeping bags and pads at the bottom, keeping heavier items like food and water in the middle near your back for balance. Place quick-access items such as snacks, rain gear, and navigation tools at the top or in external pockets. Secure external gear with straps, and organize hydration readily available. To learn more tips for a well-balanced pack, continue exploring these packing strategies.
Key Takeaways
- Organize gear into sections (shelter, clothing, food, accessories) using packing cubes for easy access and efficient space use.
- Pack lightweight, compressible items at the bottom, heavy items near your back in the middle, and essentials at the top for quick access.
- Secure external gear with straps and lash points, tightening straps after packing to ensure stability and prevent shifting.
- Keep frequently used items like snacks, rain gear, and navigation tools in top compartments or external pockets for quick retrieval.
- Use compression sacks and lightweight bottles to reduce volume and weight, maintaining a balanced, comfortable pack for multi-day trips.
Take Stock of Your Gear

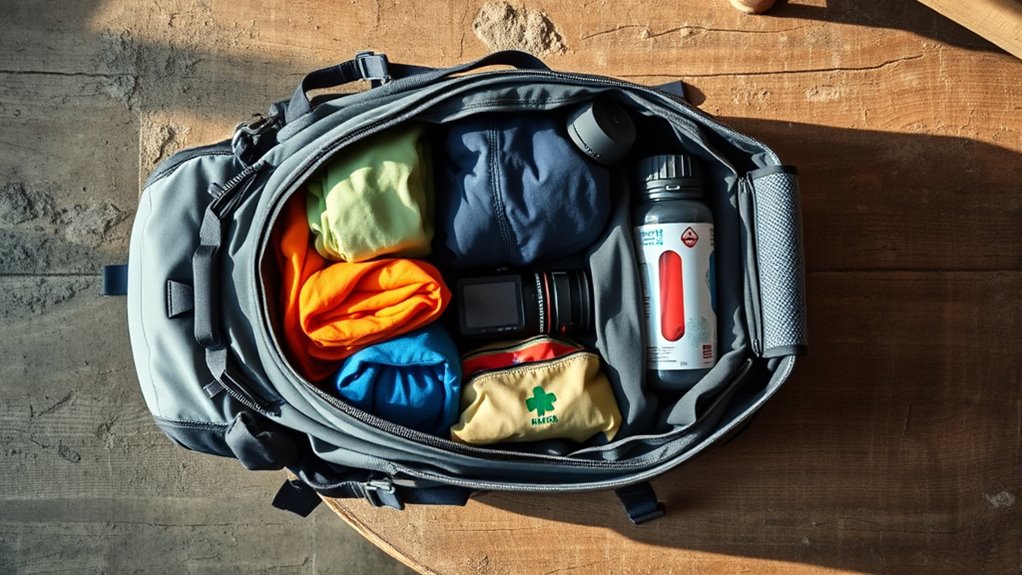
Have you ever started packing only to realize you’ve forgotten essential items? The first step is to take stock of your gear. Lay everything out so you get a clear view of what you have and spot any unnecessary items. Use packing cubes to organize your gear into sections—shelter, clothing, food, and accessories—making it easier to find what you need. Check the weight of each item and remove non-essentials to keep your pack light; aim for under 25-30 pounds for multi-day trips. Be mindful of multi-use items that can serve multiple functions, reducing overall volume and weight. This organization helps you pack efficiently, prevents overpacking, and ensures you have everything you need without carrying unnecessary weight. Incorporating organized storage solutions can further streamline your packing process and improve your overall experience, especially when considering multifunctional gear that serves more than one purpose. Paying attention to weight management is crucial to avoid fatigue during your journey, as understanding the importance of efficient packing can make all the difference in comfort and convenience. Additionally, utilizing necessary, functional, and performance cookies can help you optimize your packing strategy by tracking your packing habits and preferences for future trips.
Packing Items for the Bottom of Your Pack
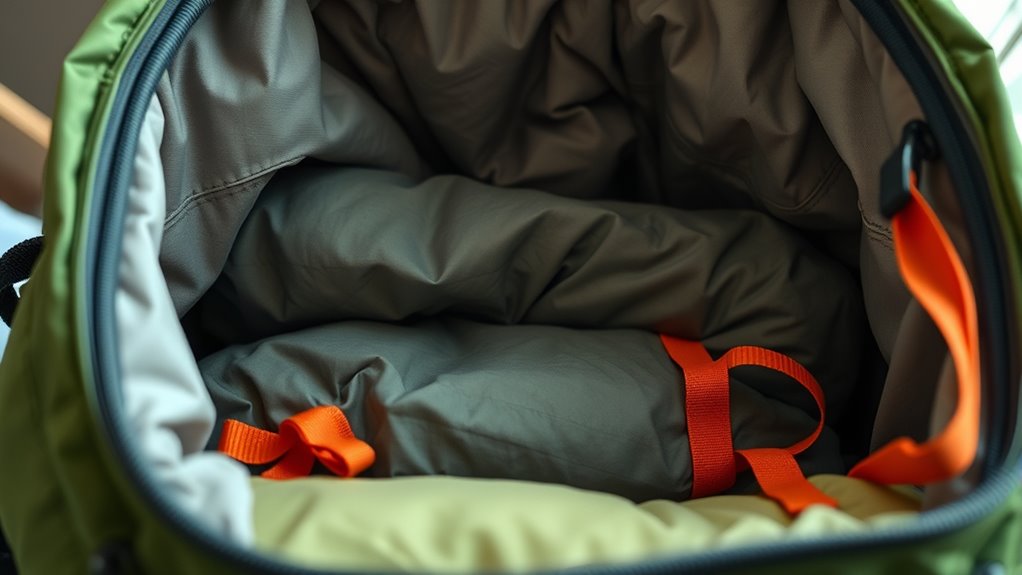
Packing the bottom of your pack with lightweight, compressible items is essential for maximizing space and maintaining stability on your multi-day tour. Use compression sacks to reduce the volume of bulky gear, like sleeping bags and pads, preventing shifting and making the most of limited space. Place non-essential camp items, such as pillows and extra clothes, at the bottom to keep your main compartment organized and accessible. To protect your gear from moisture and rain, line the bottom with a waterproof liner or trash bag. Keep the lightest gear at the very bottom to ensure proper pack balance, preventing top-heaviness that could cause instability. Additionally, studies show that optimal angles for pinball machines can enhance gameplay performance, which is similar to how proper weight distribution in your pack improves comfort and stability during your hike. Proper packing techniques also contribute to home cleaning by maintaining a tidy and organized environment, which can make packing easier and more efficient. Keeping your gear well-organized helps to mental wellbeing, reducing stress and making your preparations more enjoyable. This strategic packing helps distribute weight evenly, making your hike more comfortable and manageable. Properly weight distribution minimizes fatigue and strain, making long hikes more manageable and enjoyable. For example, incorporating natural materials like lightweight fabrics can also reduce overall pack weight and improve comfort.
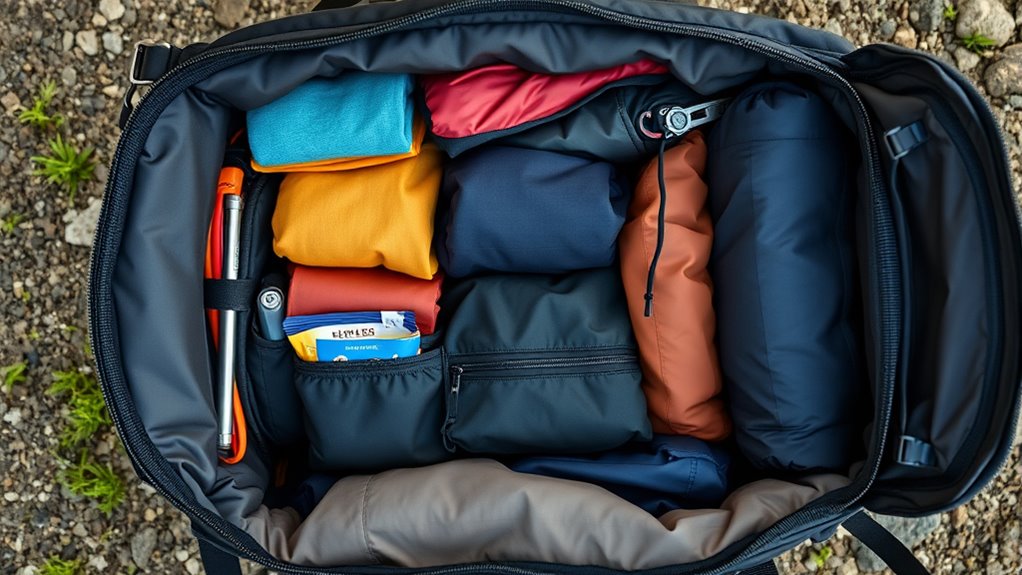
Arranging Gear in the Middle Section

To guarantee your pack stays balanced and comfortable, place the heaviest and bulkiest items, such as food, stove, and water reservoir, in the center near your back. This keeps your center of gravity close to your body, reducing strain and improving stability. Use packing cubes or compressible sacks to organize core gear and fill gaps around heavy gear, securing everything tightly. Place essential shelter components, like the tent, toward the top of the middle section for easy access. Distribute other heavy items, such as bear canisters and extra clothing, around the core gear to maintain side-to-side balance. Proper arrangement prevents shifting during movement and keeps your pack stable, making your multi-day tour more comfortable and manageable. Incorporating weight distribution techniques can further enhance your pack’s stability and comfort during long treks. Additionally, cultural traditions related to packing and gear organization in different regions can offer valuable insights for varied environments. Being mindful of your packing strategy can also help you adapt to unexpected situations or terrain changes during your journey, especially when considering the importance of pre-trip planning to anticipate different packing needs. Incorporating box packing methods can optimize space and ensure quicker access to frequently used items, which is especially useful in emergency situations.
Organizing the Top of Your Pack

Keep essentials like rain jackets, first-aid kits, and water filters at the top of your pack for quick access when weather turns or emergencies arise. Store frequently used snacks and water purification devices in external pockets or at the top to grab them easily on the trail. Use the pack’s lid or external compartments for items like maps, headlamps, or chargers that you need to reach fast. Additionally, consider managing camper toilets and other maintenance supplies in accessible compartments to handle unexpected situations efficiently. Remember that monitoring newborn safety guidelines during outdoor activities is crucial to ensure the well-being of young children in your group. Incorporating community engagement strategies can also help you stay informed on best practices and safety tips for outdoor adventures. Being aware of digital literacy programs can aid in educating seniors on safe and playful communication methods, which is useful when planning group outings involving elderly participants.
Quick-Access Items
Organizing the top of your pack for quick access guarantees you can grab essential items without hassle. Keep small essentials like lip balm, sunscreen, and maps in lightweight dry sacks or zippered pouches in the top compartment, so they’re easy to access. Store frequently used items such as trail snacks, rain jackets, and first-aid kits at the top, ensuring you can grab them during breaks or sudden weather changes. Place items needed during the day, like sunglasses or a headlamp, in external pockets or within arm’s reach in the top region. Water filters and small electronics should be stored here to prevent water damage and streamline retrieval. Regularly review and reorganize the top layer to keep your most-needed items at your fingertips, minimizing the need to unpack your entire pack. Using organized storage solutions can further streamline access and keep your gear tidy. Additionally, understanding market shifts such as the significant new Bitcoin holders controlling 50% of supply can help you anticipate potential changes in the value of your digital assets while on the move.
Essential Gear Placement
Placing essential gear at the top of your pack guarantees you can access it quickly when needed. Keep items like rain jackets, first-aid kits, and trail snacks in the top compartment for quick-access during sudden weather changes or emergencies. Use compression straps to secure bulky but infrequently used gear, such as extra clothing layers or a headlamp, and position them in the top zone to maintain balance and keep the pack centered. Store valuables and electronics in waterproof dry bags or designated compartments to protect them from moisture. External or top pockets are perfect for essential navigation tools like maps and compasses, allowing easy retrieval without unpacking everything. Regularly review and reorganize this area to ensure you can swiftly reach items you need most during your hike.
Optimizing the Brain/Lid and Hip Belt Compartments
Maximizing the use of your pack’s lid or brain and external hip belt pockets can substantially improve access and efficiency during your trip. Use the lid compartment for quick-access items like maps, navigation tools, or a rain poncho, keeping them organized with small pouches or ziplocks. Store frequently used small items such as snacks, lip balm, or a flashlight in the hip belt pockets for easy reach without opening the main compartment. This setup prevents you from digging through your pack during breaks or emergencies. Removing the lid during short excursions transforms it into a handy daypack for quick access to essentials. Proper organization of these compartments ensures your main compartment stays clutter-free and your most needed items are always within reach.
Using Compression Straps and External Attachments

Start by loosening all compression straps to create space for your gear and make loading easier. Once everything is packed, tighten the main and side straps to stabilize your load and prevent shifting. Use external lash points and daisy chains to secure bulky items like trekking poles or tents, but avoid overloading to keep your pack balanced and manageable.
Proper Strap Adjustment Techniques
Proper strap adjustment is essential for a comfortable and stable load during multi-day tours. Start by loosening all straps before packing, making it easier to load your gear and achieve an ideal fit. Once packed, tighten the main compression straps evenly to stabilize the load and prevent shifting. Use side compression straps to distribute weight evenly and keep gear snug against the pack’s frame, reducing strain. Secure external gear with compression straps and daisy chains to ensure items stay stable without causing imbalance or snagging. After adjusting the straps, walk with your loaded pack to check for comfort and balance. Make further tweaks as needed for load stabilization, ensuring your straps are snug but not overly tight for maximum comfort on the trail.
External Gear Securing Methods
Using compression straps and external attachments is key to keeping your gear secure and balanced during multi-day tours. Compression straps help tighten and stabilize the load, reducing pack sway and preventing gear from shifting during movement. Secure long or bulky items, like trekking or tent poles, with daisy chains, lash-on points, or gear loops to keep them accessible yet out of the way. Minimize external gear to avoid snagging on branches or rocks, attaching only essentials like water bottles or lightweight shelter components. Use carabiners, webbing, or cord to firmly attach gear to external lash points, ensuring items are secure and evenly balanced. Remember to regularly check external attachments and adjust straps as needed to maintain pack stability and prevent gear loss.
Managing Hydration and Efficient Packing Techniques
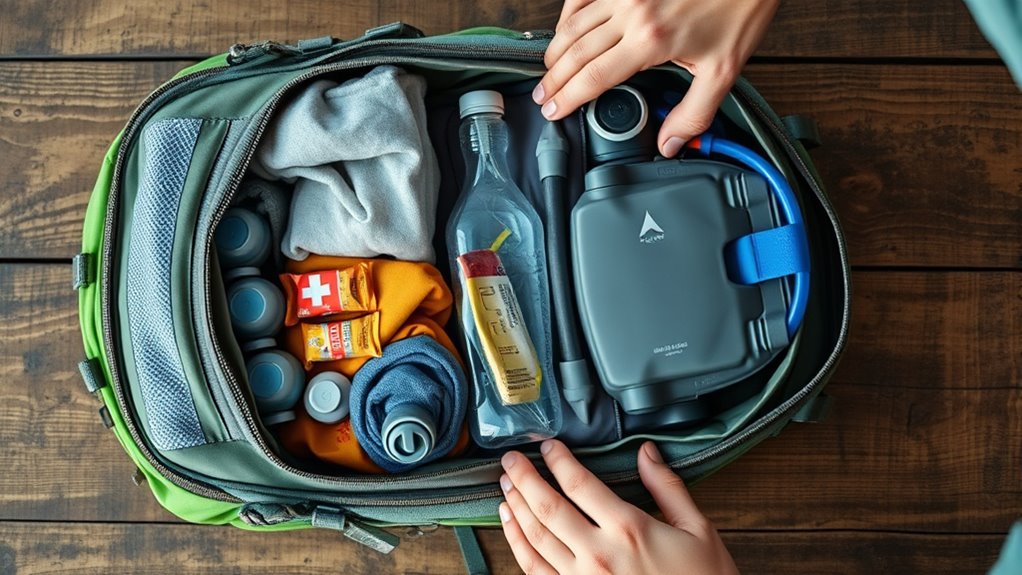
Efficiently managing hydration during multi-day tours requires thoughtful packing techniques that balance accessibility and weight distribution. Use lightweight, foldable water bottles or soft reservoirs to keep weight low and guarantee quick access. Fill water bottles before packing to prevent spills and position them near the core or top of your waterproof backpack for easy reach. Carry multiple small water bottles instead of one large container to simplify refilling and improve balance. Incorporate packing cubes or compression sacks to organize gear and free up space for water supplies. Securing bottles with external compression straps prevents shifting, maintaining pack stability. Remember to use water filters or purifiers like the MSR MiniWorks or LifeStraw to safely source water from natural sources, reducing the need for bulky bottled water and enhancing hydration management.
Final Tips for a Well-Balanced and Accessible Pack
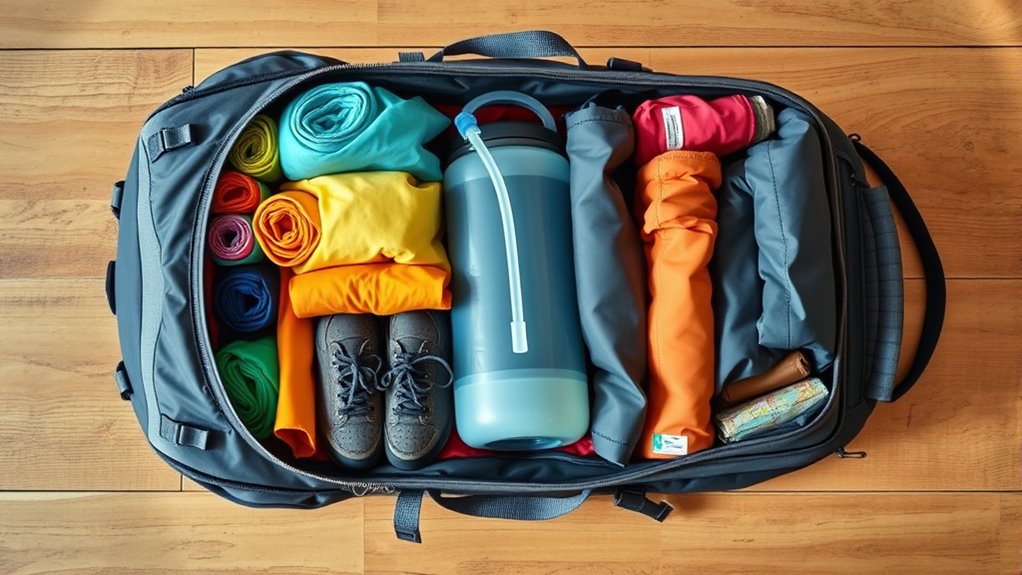
To keep your pack well-balanced and easy to access, focus on strategic placement of your gear. Distribute weight evenly by placing the heaviest items, like food and water, close to your back and centered for maximum balance, reducing fatigue. Pack frequently accessed items—such as rain jackets, snacks, and first-aid kits—at the top or in external pockets for quick access. Use compression straps and external lash points to stabilize the load, preventing shifting and maintaining pack integrity during movement. Fill gaps with soft gear like clothing or tents to improve weight distribution and prevent discomfort. Keep essential items in easily accessible external pockets or the lid, so you don’t have to unpack everything during breaks or emergencies. Proper packing ensures comfort, stability, and convenience on your multi-day tour.
Frequently Asked Questions
How to Pack a Multi Day Backpack?
When packing a multi-day backpack, you should organize your gear into zones: sleeping items at the bottom, heavy items like food and cookware in the middle, and quick-access essentials at the top. Use compression sacks and packing cubes to save space and balance weight. Keep items like snacks and rain gear accessible in external pockets. Line your pack with a waterproof liner to protect everything from rain and moisture.
How to Pack for a 4 Day Trip in a Backpack?
For a 4-day trip, pack versatile layers in lightweight, quick-drying fabrics, using packing cubes to minimize bulk. Include travel-sized toiletries in a waterproof bag, and store food and gear in a dedicated, compact sack with high-calorie options. Distribute heavier items like food and water near your back to balance the load. Keep essentials like rain gear, snacks, and first aid accessible in external pockets and compression straps.
How Big of a Backpack Do I Need for a 3 Day Trip?
Did you know most travelers find a 40 to 50-liter backpack perfect for a 3-day trip? You’ll want a pack that’s big enough to carry your essentials comfortably without overloading. If you pack efficiently, a 40-liter might do, but for extra gear or bulky clothing, a 50-liter provides more space. Choose based on your packing style and how much gear you prefer to bring along.
What Size Backpack for Multi Day Hikes?
For multi-day hikes, you should pick a backpack between 50 and 70 liters. This size gives you enough room for clothes, gear, and food without being too bulky. Most hikers going for 3 to 5 days opt for a 55 to 65-liter pack. Remember, your comfort depends on a good fit and proper weight distribution, so choose a pack with adjustable straps and enough capacity to keep things balanced.
Conclusion
Remember, a well-packed backpack is key to a successful multi-day tour. Keep things balanced and accessible, so you’re not fumbling in the dark. By taking the time to organize your gear properly, you’ll travel lighter and smarter. As the saying goes, “A place for everything, and everything in its place.” With these tips, you’ll be ready to hit the trail confident and prepared—happy trekking!