
To set up your gravel bike for mixed-surface adventures, choose handlebars that match your control needs, and select wheel and tire sizes suited to varied terrain—wider, knobby tires for rough trails and smoother tires for pavement. Adjust your gear ratios for climbing ease, refine your fit for comfort, and set tire pressures based on surfaces. Add racks or fenders for versatility, fine-tune brakes and shifters, and assemble a compact repair kit to handle common issues. Keep exploring to learn how to perfect your setup.
Key Takeaways
- Choose handlebar width and flare to balance control, comfort, and maneuverability based on terrain and riding style.
- Select appropriate wheel size and tire tread pattern for mixed surfaces, optimizing traction and ride comfort.
- Adjust tire pressure according to terrain—lower for rough, higher for smooth pavement—to enhance grip and efficiency.
- Fine-tune drivetrain gear ratios and brake/shifter adjustments for smooth shifting and reliable stopping on varied terrain.
- Organize a compact repair kit with essential tools and spare parts for quick fixes during mixed-surface adventures.
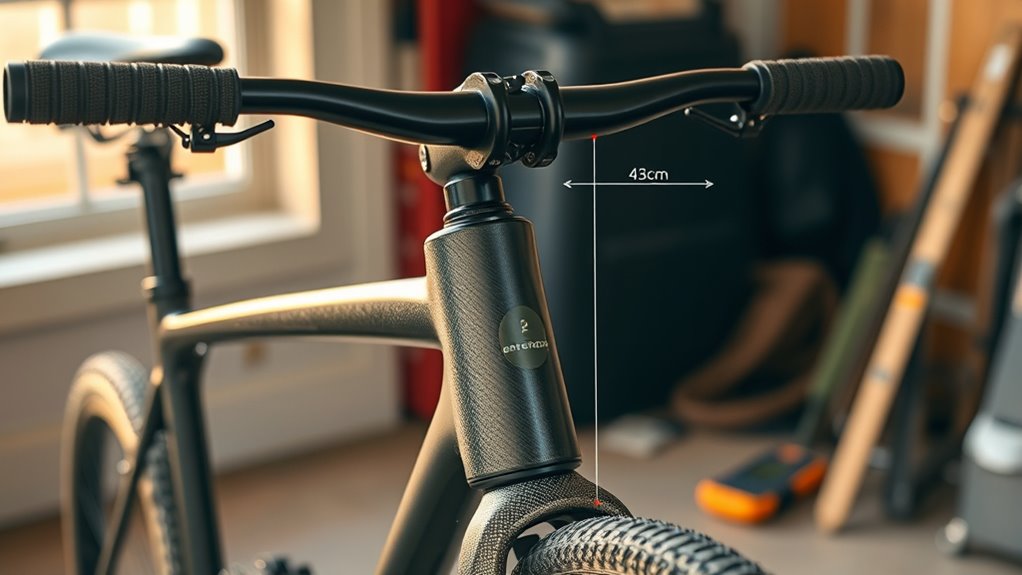
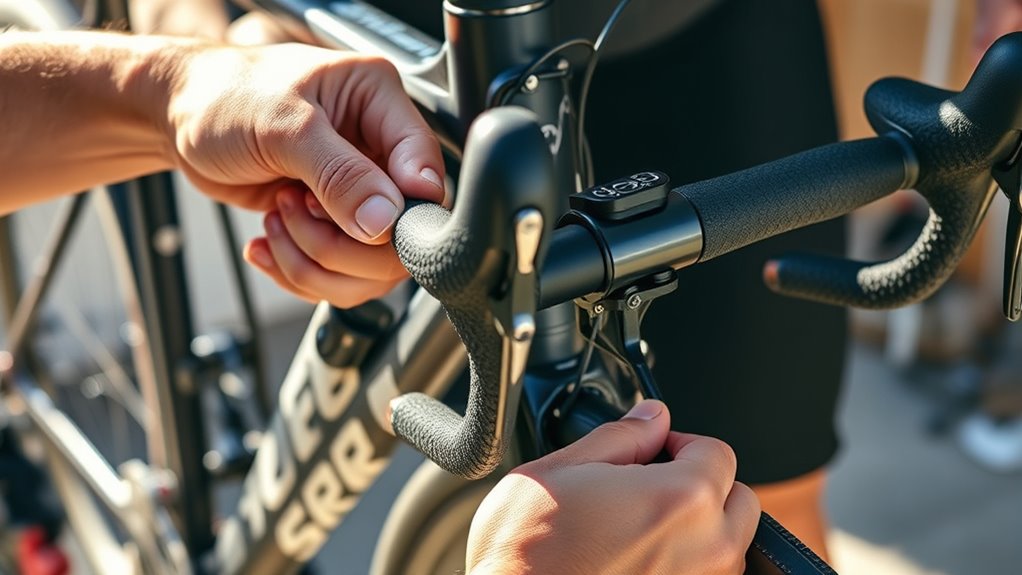
Choosing the Right Handlebar Width and Design
How do you choose the right handlebar width and design for your gravel bike? Start by matching your handlebar width to your shoulder width for better control and comfort on mixed surfaces. Wider handlebars, around 42cm or more, boost stability on technical terrain, but can cause discomfort or reach issues if they’re too broad. Flared handlebars with a 38-42cm width at the drops offer enhanced control and clearance for handlebar bags and off-road handling. If you prefer tight turns or climbing, narrower bars around 38cm or less give you increased maneuverability. Remember, proper handlebar ergonomics involve balancing width, flare, and shape to optimize control, reduce fatigue, and suit your riding style. Selecting the appropriate handlebar design also involves considering the aesthetic and functional aspects to ensure it complements your bike’s overall setup and your riding needs. Additionally, paying attention to handlebar material and shape can influence weight, comfort, and durability, further customizing your riding experience. Incorporating ergonomic considerations can help prevent strain and enhance overall riding comfort.
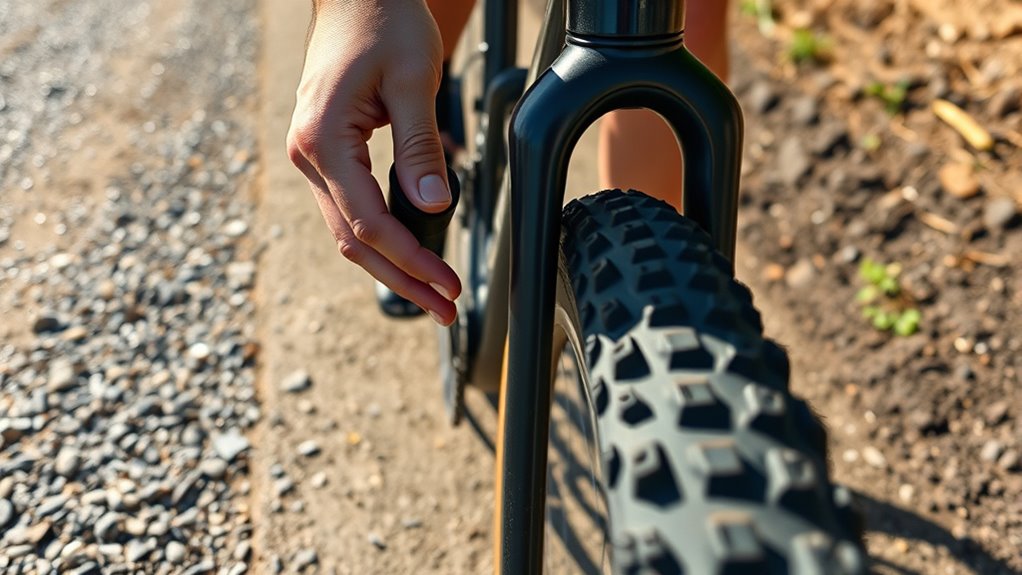
Selecting Wheel Size and Tire Tread for Varying Terrains
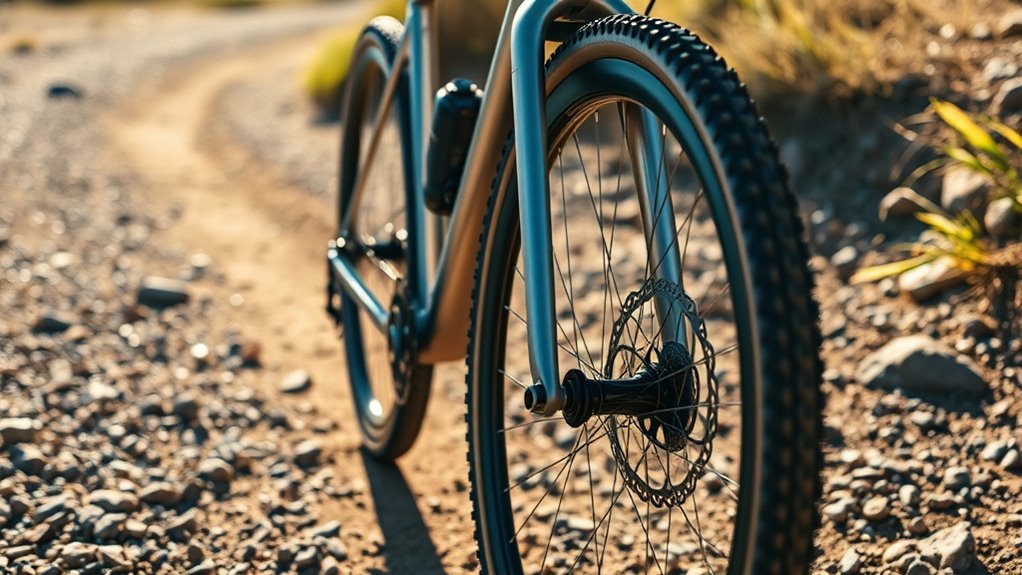
Choosing the right wheel size and tire tread is essential for optimizing your gravel bike’s performance across different terrains. 700c wheels are common, offering smooth rides on paved and packed gravel surfaces. However, 650b wheels allow for larger tires, providing better traction and clearance on rougher, technical terrain. When selecting tire tread, wider tires (35mm or more) with knobby patterns improve grip and stability on loose, rocky, or muddy trails. For mixed surfaces, opt for tires with a versatile tread pattern that balances smoothness on pavement with grip on dirt. Always check your bike’s clearance and compatibility before upgrading, since wheel sizes and tire tread impact ride comfort, control, and compatibility across varying terrains.
Adjusting Gear Ratios for Climbing and Load Carrying

Adjusting your gear ratios is essential for tackling steep climbs and carrying loads comfortably. A 2x drivetrain with a wide-range cassette, like 11-34 or 11-36, offers versatile gear ratios for both ascending and descending. Opt for smaller chainrings, such as 30T or 32T, to lower gear inches, making climbing loaded or technical terrain easier. Consider a mullet setup with a mountain bike rear derailleur and a gravel-specific crank to maximize gear options for climbing while carrying gear. Confirm your front and rear derailleurs are properly indexed for smooth shifting, especially in lower ratios. When loaded or facing steep terrain, lower gear ratios—around 22 gear inches or less—reduce rider fatigue and improve control, making your ride more manageable and enjoyable. Incorporating multi-functional furniture can also help optimize space and reduce clutter, enhancing your overall riding experience by creating a dedicated and organized area for bike maintenance and storage. Additionally, paying attention to gear ratio adjustments can significantly improve your efficiency and comfort on mixed-surface adventures. Regularly checking your drivetrain and component compatibility ensures smooth shifting and prevents issues during critical climbs. Properly adjusting your gear indexing is fundamental for seamless gear changes and overall riding performance. Furthermore, understanding sound vibrations and their effects can help you fine-tune your bike setup for optimal comfort and efficiency during long rides.
Optimizing Bike Fit: Stem Length, Head Angle, and Saddle Position
Optimizing your bike fit involves fine-tuning stem length, head angle, and saddle position to enhance comfort and handling on mixed terrain. Adjusting stem length impacts your bike fit by changing responsiveness and stability—shorter stems (60-80mm) boost agility, while longer ones (100-140mm) improve control on rough trails. A slacker head angle (around 68-70 degrees) increases stability, especially with wider tires. Proper saddle height, at 80-85% of your inseam, promotes efficient pedaling and reduces fatigue. The saddle fore-aft position should allow a slight knee bend (25-35 degrees) for optimal power. Fine-tuning handlebar height and reach, in tandem with stem length and head angle, creates a balanced riding position suitable for mixed surfaces. Knowing the local business hours can help you find the right time to visit a bike shop for professional adjustments or fittings. Additionally, understanding the best bike setup practices can further improve your riding experience on diverse terrains. Incorporating regular bike maintenance into your routine ensures your setup remains optimal over time.
Setting Up Tubeless Tires for Better Traction and Comfort
Getting your tubeless tires set up properly can make a big difference in traction and comfort. Start by applying sealant accurately and choosing the right pressure levels for your riding conditions. These steps help prevent flats and ensure a smooth, confident ride across mixed terrains. Regularly inspecting your setup and understanding maintenance requirements can also extend the longevity of your tires and improve safety. Additionally, paying attention to climate control ensures your tires look their best and can help in identifying potential issues early. Incorporating Kia Tuning techniques, such as upgrading components, can further enhance your vehicle’s overall performance and reliability. Furthermore, leveraging AI Discoveries for innovative solutions could revolutionize how you approach maintenance and upgrades.
Tire Sealant Application Techniques
Applying tire sealant correctly is essential for creating an effective tubeless setup that offers better traction and comfort. Start by applying the tire sealant to the inside of your gravel tires before mounting, ensuring an even coating for ideal sealing. Use a sealant compatible with your tire and rim system, typically latex-based, and follow manufacturer instructions for proper mixture ratios. Fill each tire with 2-4 ounces of sealant to effectively seal punctures and enhance grip. After application, rotate and shake the tire to distribute the sealant evenly across the internal surface and sidewalls. Regularly check and top up the sealant every 2-3 months or after significant rides to maintain its sealing properties and prevent drying out. Additionally, verify that the sealant is compatible with your regulatory environment to ensure compliance and safety. Proper application techniques can also improve the overall effectiveness of your tubeless setup and prolong its lifespan. Incorporating high-quality equipment can further boost the durability and performance of your tires, ensuring a smoother ride over mixed surfaces. To maximize the benefits of your setup, consider using a filtering system to prevent debris from clogging your sealant and valve. Regular maintenance and awareness of sealant properties are key to a reliable tubeless system.
Optimizing Tire Pressure Levels
Proper tire pressure is key to maximizing the benefits of your tubeless setup. For gravel riding, lowering your tires to around 20-30 psi increases surface contact, boosting traction on loose or uneven terrain. Slightly deflating tires helps them conform to terrain irregularities, improving both comfort and grip. Regularly check and maintain your sealant levels to prevent leaks and keep the pressure consistent during mixed-surface rides. Using a pressure gauge or a pump with a built-in gauge allows you to inflate your tires precisely, ensuring the perfect balance for different trail conditions. Adjusting tire pressure based on terrain and load helps reduce the risk of pinch flats and optimizes performance. By fine-tuning tire pressure, you’ll experience better control, comfort, and confidence on every gravel ride.
Deciding on Frame Material Based on Riding Style and Conditions
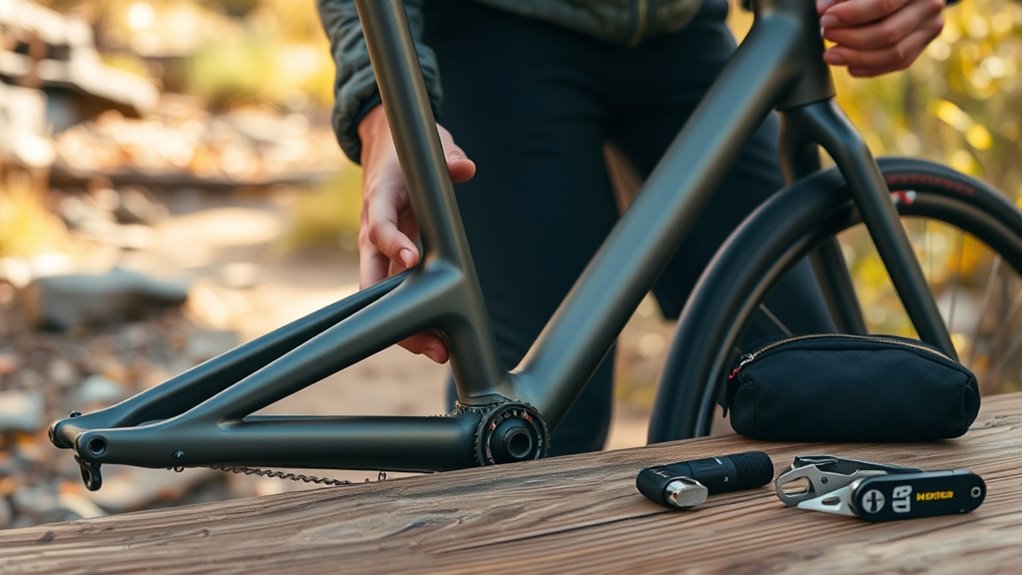
Choosing the right frame material depends on your riding style and the conditions you’ll face. You’ll want to contemplate how weight and durability balance out, as well as how much vibration absorption you need for comfort. Cost and maintenance also play a role in narrowing down your options for a gravel bike that fits your needs.
Weight and Durability Balance
Selecting the right frame material depends heavily on your riding style and terrain, as each offers a different balance of weight and durability. If you prioritize lightweight performance, carbon fiber frames deliver excellent vibration damping and high strength-to-weight ratios, ideal for technical routes. Steel frames, known for their durability and shock absorption, suit long-distance and rough terrain adventures. Aluminum frames provide a responsive and affordable option, balancing weight and durability effectively. Hybrid materials combine benefits—like carbon’s lightness with steel’s resilience—maximizing both factors for diverse conditions.
- Carbon: lightweight, high strength-to-weight, vibration damping
- Steel: durable, shock-absorbing, long-lasting
- Aluminum: responsive, affordable, good durability
- Hybrid: balanced weight and durability
- Consider terrain to match material qualities for ideal performance
Vibration Absorption and Comfort
When riding over rough terrain or long distances, the frame material plays a key role in absorbing vibrations and ensuring comfort. Steel frames naturally dampen vibrations, offering a smoother ride on uneven surfaces. Carbon fiber can be engineered for vibration-damping, but often emphasizes weight savings over shock absorption. Aluminum frames are lightweight and stiff, transmitting more vibrations, which may reduce comfort during extended or technical rides. To enhance vibration absorption, consider features like suspension forks or elastomers. Here’s a quick comparison:
| Frame Material | Vibration Absorption | Ideal For |
|---|---|---|
| Steel | Excellent | Comfort, durability |
| Carbon Fiber | Good, engineering-based | Performance, reduced fatigue |
| Aluminum | Moderate | Balanced, cost-effective |
| Titanium | Very good | Long-distance comfort |
| Composites | Varies | Custom vibration damping |
Choosing the right material depends on your riding style and conditions for *ideal* comfort.
Cost and Maintenance Needs
Your riding style and conditions play a crucial role in determining the best frame material for your gravel bike, especially when considering cost and maintenance. If you’re on a budget or want low upkeep, aluminum frames are ideal—they’re affordable, lightweight, and require minimal maintenance. Carbon fiber offers excellent vibration damping and performance but comes with higher initial costs and potential repair expenses. Steel frames are durable and easier to repair in the field, though they tend to be heavier and need rust prevention.
- Aluminum: cost-effective, low maintenance, lightweight
- Carbon fiber: high performance, higher cost, delicate repairs
- Steel: durable, easy repairs, heavier
- Maintenance frequency varies by material
- Rugged conditions may favor steel or aluminum
Mounting Racks, Fenders, and Accessories for Versatility
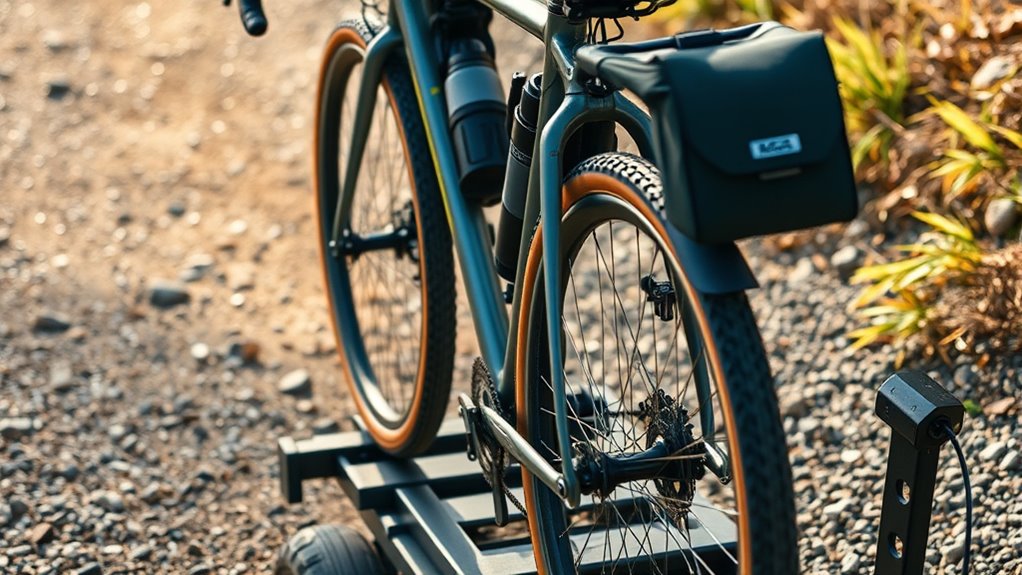
Mounting racks, fenders, and accessories are essential for enhancing the versatility of your gravel bike, allowing you to carry gear and stay comfortable on mixed surfaces. Mounting racks, whether front or rear, typically require frame mounts or eyelets, often found on touring or gravel-specific bikes, to securely attach your gear. Fenders with designated mounting points on the fork and seat stays provide protection from mud and water, keeping you dry during wet rides. Choosing lightweight, durable options like aluminum or carbon racks and fenders can improve performance without adding unnecessary weight. Additional accessories such as frame bags, handlebar rolls, and bottle cages expand your storage options and accessibility. Proper installation and compatibility checks ensure racks, fenders, and accessories don’t interfere with tires, brakes, or shifting components.
Fine-Tuning Brake and Shifter Performance
To guarantee your gravel bike performs at its best, regularly fine-tune your brake and shifter systems. Proper adjustments ensure smooth gear changes and reliable stopping power. Start by checking and adjusting cable tension for both the brake and shifter cables, which improves modulation and shifting accuracy. Use a torque wrench to tighten bolts on brake calipers and shifters to manufacturer specs, preventing misalignment. Keep derailleur and brake pulleys clean and lubricated to reduce friction and maintain responsiveness. Fine-tune derailleur indexing with the barrel adjuster to eliminate chain rub and ensure crisp gear changes. Periodically bleed hydraulic brake systems to remove air bubbles, maintaining optimal braking power and lever feel. Regular maintenance keeps your gravel bike performing confidently on mixed surfaces.
- Adjust cable tension for brake and shifter.
- Use torque wrench for bolt tightening.
- Clean and lubricate pulleys.
- Fine-tune derailleur indexing.
- Bleed hydraulic brake systems.
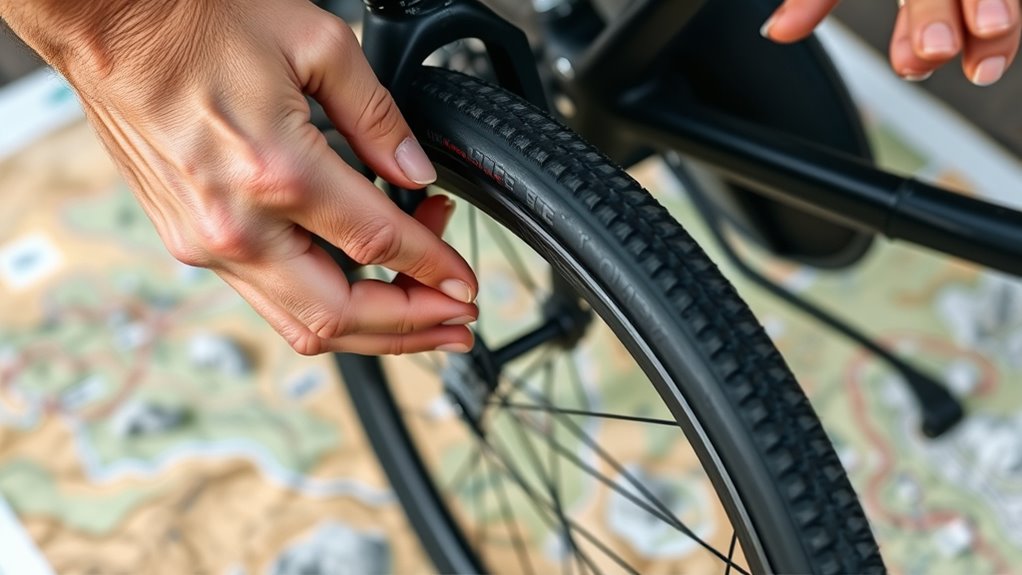
Ensuring Proper Tire Pressure for Different Surfaces
Adjusting tire pressure appropriately for different surfaces is essential to optimize your gravel bike’s performance and comfort. For rough terrain, deflate your tires slightly to improve traction and shock absorption, making your ride smoother and more controlled. When riding on smooth pavement, keep your tire pressure higher—around 80-100 psi—to minimize rolling resistance and boost efficiency. For technical or uneven surfaces, lower your tire pressure further, around 30-50 psi, to enhance grip and absorb shocks better. Always check your tire’s sidewall for the maximum recommended pressure and avoid exceeding it to prevent blowouts. Using a reliable pressure gauge ensures you maintain precise tire pressure tailored to each surface, helping you ride confidently across mixed terrains.
Assembling a Compact and Efficient Repair Kit

Creating a compact and efficient repair kit is essential for handling common bike issues on the trail. You want your repair kit to be organized, lightweight, and ready for on-the-go repairs. Include a multi-tool with various Allen wrenches, screwdrivers, and a chain breaker compatible with your bike’s components. Pack spare inner tubes, tire levers, a mini pump or CO2 inflator, and patches for flats. Carry a small selection of replacement chain links, derailleur cables, and housing to fix issues quickly. Use a durable, organized container or saddlebag to keep everything accessible and prevent loss. This setup ensures you’re prepared for most problems, so you can focus on enjoying your ride without worry. A well-prepared repair kit is your safety net on mixed-surface adventures.
Frequently Asked Questions
How Do You Ride an Adventure Bike on Gravel?
When riding an adventure bike on gravel, you want to stay relaxed and alert. Keep a steady cadence and choose gears suited to the terrain to avoid fatigue. Use wider tires with lower pressure for better grip, and keep your weight centered and slightly back for stability. Hold the handlebars firmly, adjust your speed as surface conditions change, and stay attentive to navigate loose or rough gravel safely.
Can I Use a Gravel Bike for Touring?
Imagine your gravel bike as a sturdy ship ready to sail distant horizons. Yes, you can use it for touring; its long wheelbase, stable geometry, and mounting points act like a ship’s deck for gear. With versatile gearing, durable frame materials, and proper setup, your bike becomes a reliable vessel for long journeys across varied terrains. Just guarantee it’s equipped to handle racks, fenders, and heavy loads for smooth sailing.
Can a Gravel Bike Handle Trails?
Yes, your gravel bike can handle trails, especially if it has wider tires (35mm+), relaxed geometry, and good disc brakes. These features give you better control and traction on uneven surfaces. Make sure to choose tires with off-road tread, and adjust your tire pressure for comfort. Using lower gears helps with climbs and technical sections, making your trail riding smoother and more enjoyable.
What Are the Downsides of a Gravel Bike?
Like a sturdy ship maneuvering rocky waters, your gravel bike offers versatility but comes with downsides. You might find it less responsive on smooth pavement due to its slack angles and longer wheelbase. It’s also heavier because of wider tires and robust frames, which can slow you down. Plus, the design sacrifices some aerodynamics, leading to more drag, and extra mounting points may reduce frame stiffness, impacting ride precision.
Conclusion
With the right setup, your gravel bike becomes a versatile adventure machine. You might worry about complexity, but taking the time to fine-tune your components guarantees smoother rides and fewer surprises on tough terrains. Remember, small adjustments make a big difference—so don’t hesitate to experiment. Trust in your setup, hit the trail, and enjoy the thrill of exploring mixed surfaces with confidence and comfort. Happy riding!
Related Posts:


Olivia’s writing is not only informative but also inspiring. She has a knack for telling stories that capture the essence of cycling and the joy it brings to people’s lives. Her writing has been praised by readers and industry experts alike for its clarity, depth, and authenticity.
In addition to her writing, Olivia is also an avid cyclist. She enjoys exploring new trails and routes and has participated in several cycling events and races. Her first-hand experience with cycling gives her a unique perspective on the sport, reflected in her writing.
Overall, Olivia is a talented writer passionate about cycling and dedicated to producing high-quality content for FlatironBike. Her contributions to the magazine have helped make it a go-to source for cycling enthusiasts worldwide.