Connect with us

Bike

What Is A Gravel Bike Uk

Published

on

An image capturing the essence of a Gravel Bike UK: A sleek, robust bicycle with wide tires, designed for off-road adventures

Ever thought about what sets a gravel bike apart in the United Kingdom?

Well, get ready to embark on an exhilarating journey as we explore the ins and outs of this versatile two-wheeled wonder.

From its purpose-built design to its adaptability on various terrains, a gravel bike offers an exciting blend of road and mountain biking.

Join me as we uncover the benefits, safety considerations, training tips, and future trends that make gravel biking a thrilling adventure in the United Kingdom.

Key Takeaways

  • Gravel bikes are versatile bikes designed for both pavement and off-road terrain, offering a balance between versatility and performance.
  • Key features of a gravel bike include wider tires (35-45mm) for better traction, disc brakes for reliable stopping power, a relaxed geometry for better control and comfort, and multiple mounting points for racks and panniers.
  • Gravel bikes are adaptable to different terrains, including smooth roads and rough gravel paths, thanks to their wide tires and disc brakes.
  • Riding a gravel bike in the UK offers benefits such as less maintenance, specific accessories available, the ability to explore a wide variety of landscapes, and versatility for riders who switch between road cycling and off-road adventures.

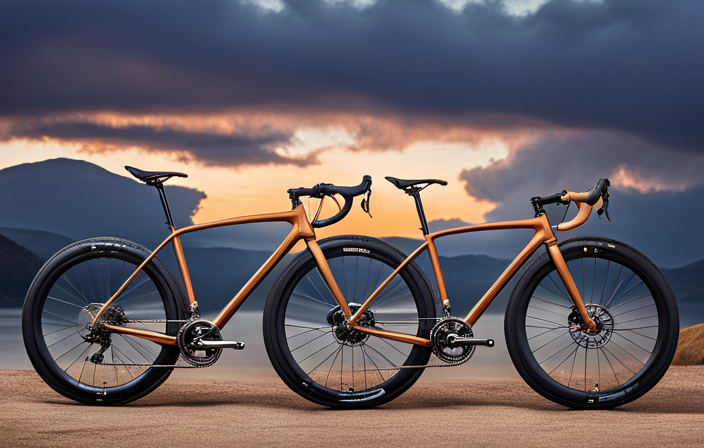
The Definition and Purpose of a Gravel Bike

Advertisement

If you’re in the UK and looking for a versatile bike that can handle both pavement and off-road terrain, a gravel bike is exactly what you need. Gravel bikes are designed to offer the perfect balance between versatility and performance, making them ideal for riders who want to explore various terrains without compromising on speed or comfort.

One of the key advantages of owning a gravel bike is its ability to handle different types of surfaces. Whether you’re riding on smooth roads, rough trails, or even gravel paths, these bikes provide a stable and comfortable ride. They typically feature wider tires with more tread patterns, which offer better traction and control on loose or uneven surfaces.

When it comes to maintenance and repairs, gravel bikes are relatively easy to take care of. Regular cleaning after rides and occasional lubrication are usually sufficient to keep them in good condition. Additionally, most components on gravel bikes are similar to those found on road bikes, making them easily replaceable if needed.

Now let’s move onto the key features and components of a gravel bike without any further delay.

Key Features and Components of a Gravel Bike

To get the best out of your gravel riding experience, you’ll want to know about the essential features and components found on these versatile machines. A gravel bike is designed to handle a variety of terrains, from rough gravel roads to smooth pavement and everything in between. Its key features and components are specifically tailored to provide versatility benefits and ensure a comfortable ride.

Advertisement

One important feature of a gravel bike is its wider tires, typically around 35-45mm. These wider tires offer more traction and stability on loose surfaces, allowing you to confidently tackle gravel paths or dirt trails. Additionally, most gravel bikes come equipped with disc brakes for reliable stopping power in all weather conditions.

Another crucial component is the frame construction. Gravel bikes often have a more relaxed geometry compared to road bikes, providing a more upright riding position for better control and comfort during long rides. The frames are also built with durability in mind, as they need to withstand the rigors of off-road adventures.

In terms of maintenance, it’s important to keep your gravel bike clean after each ride, especially if you’ve been riding through mud or dirt. Regularly inspecting the chain for wear and ensuring proper lubrication will also help prolong its lifespan.

With their versatility and adaptability for different terrains, gravel bikes open up a world of possibilities for exploration and adventure.

Versatility and Adaptability for Different Terrains

Advertisement

When riding a gravel bike, you’ll appreciate its versatility and adaptability for tackling various terrains. Gravel bikes are designed to handle a wide range of surfaces, from smooth roads to rough gravel paths. Here are three key features that make gravel bikes so versatile:

  • Wide Tires: Gravel bikes typically come with wider tires than road bikes, usually around 35mm to 45mm. These wider tires provide better traction and stability on loose surfaces like gravel or dirt.

  • Disc Brakes: Most gravel bikes are equipped with disc brakes, which offer reliable stopping power in all weather conditions. This is especially important when riding off-road or in wet conditions where rim brakes may struggle to perform.

  • Mounting points: Gravel bikes often have multiple mounting points for racks and panniers, making them ideal for bikepacking adventures. You can easily carry all your gear and supplies for long-distance rides or multi-day trips.

Whether you’re looking to tackle challenging terrain or participate in gravel bike races, a gravel bike’s versatility will help you conquer any obstacle along the way.

Now let’s explore the benefits of riding a gravel bike in the UK without delay.

Benefits of Riding a Gravel Bike in the UK

Get ready to experience the numerous advantages of riding a gravel bike in the UK. Not only are gravel bikes incredibly versatile and adaptable for different terrains, but they also offer a range of benefits that make them ideal for riding in the UK.

Advertisement

One advantage is that gravel bikes require less maintenance compared to other types of bikes. Thanks to their sturdy construction and durable components, they can handle rough terrain without needing frequent repairs or adjustments. Additionally, there are many accessories available specifically designed for gravel biking in the UK. These include fenders to protect against muddy conditions, bikepacking bags for long-distance adventures, and wider tires for added stability on loose surfaces.

Riding a gravel bike in the UK allows you to explore a wide variety of landscapes and environments. From winding country lanes to rugged off-road trails, these bikes can handle it all. They provide a smooth ride on paved roads while still offering enough traction and control on unpaved surfaces. This versatility makes them perfect for riders who want to switch between road cycling and off-road adventures without needing multiple bikes.

Now let’s delve into how gravel bikes compare to road bikes and mountain bikes…

Comparison to Road Bikes and Mountain Bikes

Advertisement

If you’re considering different types of bikes, it’s important to compare gravel bikes to road bikes and mountain bikes.

When comparing a road bike vs gravel bike, there are a few key differences to consider. Road bikes are designed for speed and efficiency on paved roads. They have skinny tires, lightweight frames, and drop handlebars that allow the rider to maintain an aerodynamic position. Gravel bikes, on the other hand, are built for versatility. They have wider tires with more aggressive tread patterns, which provide better traction on off-road surfaces like gravel and dirt trails. Gravel bikes also typically have more relaxed geometry compared to road bikes, providing a more comfortable riding position.

When it comes to mountain bike features, gravel bikes share some similarities but also have their own distinct characteristics. Both types of bikes have wider tires compared to road bikes for improved stability and grip off-road. However, mountain bikes generally have even wider tires with more pronounced knobs for maximum traction in rough terrain. Mountain bikes also feature suspension systems that absorb bumps and shocks from uneven surfaces.

In conclusion, comparing gravel bikes to road and mountain bikes reveals their unique attributes suited for different terrains and riding preferences.

Now let’s move on to choosing the right gravel bike for your needs…

Advertisement

Choosing the Right Gravel Bike for Your Needs

To choose the right gravel bike for your needs, consider factors such as your riding style, terrain preferences, and desired level of comfort.

The first thing to think about is bike fit. A properly fitted gravel bike will ensure that you are comfortable and efficient while riding. Take into account your body measurements, flexibility, and riding position when selecting the frame size and adjusting the saddle height.

Next, think about the type of terrain you plan on riding. Gravel bikes come in various designs suited for different conditions. If you’ll be tackling rougher terrains with more technical features, opt for a bike with wider tires, lower bottom bracket height, and a longer wheelbase for stability. On the other hand, if you plan on covering long distances on smoother roads or tracks, a gravel bike with narrower tires and a more aggressive geometry may be more suitable.

Lastly, consider how much maintenance you are willing to do. Gravel bikes require regular cleaning due to the dirt and debris they encounter. Look for models with easy-to-clean components like sealed bearings or internal cable routing.

In conclusion, choosing the right gravel bike involves considering factors such as bike fit and terrain preference while also thinking about how much maintenance you are willing to perform. This will ensure that you find a bike that suits your needs perfectly.

Advertisement

Now let’s move on to some tips for maintaining and caring for your gravel bike without compromising its performance.

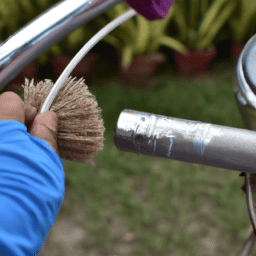
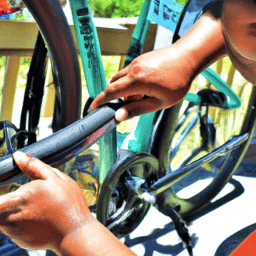
Tips for Maintaining and Caring for Your Gravel Bike

For optimal performance and longevity, it’s important to regularly maintain and care for your gravel bike. By following a few simple maintaining techniques and cleaning procedures, you can keep your bike in top shape for all your off-road adventures.

One key aspect of maintenance is keeping your drivetrain clean. The chain, cassette, and derailleur should be regularly cleaned with a degreaser and a brush. This will prevent the build-up of dirt and grime that can cause shifting issues. Additionally, it’s essential to keep your tires properly inflated and check them for any signs of wear or damage.

Cleaning the frame is also crucial to maintain its appearance and prevent rusting. Use a mild soap or bicycle-specific cleaner along with a soft cloth to remove any dirt or mud from the frame. Pay special attention to hard-to-reach areas such as the bottom bracket shell and seat tube junction.

Lastly, don’t forget about the suspension fork if your gravel bike has one. Regularly inspect it for any leaks or damage, and follow the manufacturer’s guidelines on maintenance.

Advertisement

By implementing these maintaining techniques and cleaning procedures, you’ll ensure that your gravel bike stays in excellent condition throughout its lifespan.

Now let’s explore some popular gravel bike brands and models in the UK.

Popular Gravel Bike Brands and Models in the UK

When looking for a reliable off-road adventure companion, you’ll find a wide variety of popular gravel bike brands and models available in the UK. Here are three popular gravel bike brands in the UK that offer models for different budgets:

  1. Specialized: Specialized is known for its high-quality bikes and has a range of gravel bike models to suit various price points. Their Diverge series is particularly popular, offering both entry-level options and more advanced models with features like carbon frames and hydraulic disc brakes.

  2. Canyon: Canyon is a German brand that has gained popularity in recent years. They offer a range of gravel bikes, including the Grail series, which has innovative features such as their unique double-decker handlebar design for added comfort and control.

  3. Ribble: Ribble is a British brand that offers great value for money without compromising on quality. They have an extensive range of gravel bikes, including the CGR series, which offers versatile options suitable for both on and off-road riding.

These are just a few examples of the popular gravel bike brands available in the UK. Now let’s move on to discussing recommended accessories and gear for gravel bike riders…

Transition into next section: Now that we’ve explored some popular gravel bike brands in the UK, let’s take a look at recommended accessories and gear for gravel bike riders.

Advertisement

Recommended Accessories and Gear for Gravel Bike Riders

Now that you’ve chosen your ideal gravel bike from the popular brands and models available in the UK, it’s time to make sure you have all the necessary accessories and gear for a successful ride.

As a gravel bike rider myself, I understand the importance of being well-prepared on every adventure.

First and foremost, investing in safety equipment such as a helmet, reflective clothing, and lights is crucial for visibility on the road. Additionally, having puncture repair kits and basic maintenance tools will save you from unexpected mishaps during your ride. To stay fueled and hydrated, consider carrying nutrition and hydration products specifically designed for endurance sports.

If you’re planning longer rides or bikepacking trips, essential gear includes navigation tools like GPS devices or smartphone apps, as well as storage solutions such as saddlebags or frame packs. Lastly, don’t forget about proper clothing to suit different weather conditions.

By equipping yourself with these recommended accessories and gear, you’ll be ready to explore the best gravel bike routes in the UK with confidence.

Advertisement

So let’s dive into our next section where we’ll uncover some of these incredible routes that await us!

Exploring the Best Gravel Bike Routes in the UK

Let’s delve into some of the amazing routes in the UK that are perfect for exploring on your trusty gravel bike! Whether you’re a seasoned rider or just starting out, these routes offer a mix of challenging terrain and breathtaking scenery. One of the best things about riding a gravel bike is the versatility it provides, allowing you to venture off-road and explore places that other bikes simply can’t reach.

When it comes to choosing a gravel bike brand, there are several top contenders in the market. Some of the best gravel bike brands include Specialized, Cannondale, Trek, and Giant. These brands offer reliable bikes that can handle all types of terrain and provide comfort during long rides.

As for the actual routes, there are plenty of options to choose from in the UK. Some popular gravel bikepacking routes include The South Downs Way in England, which stretches across 100 miles of stunning countryside and offers both challenging climbs and fast descents. Another great option is The Highland 550 in Scotland, a demanding route that covers over 550 miles through remote wilderness areas.

Exploring these routes not only allows you to enjoy nature at its finest but also gives you an opportunity to connect with fellow gravel bike enthusiasts. Joining gravel bike clubs and communities is a fantastic way to share experiences, learn new skills, and make lasting friendships on two wheels.

Advertisement

So let’s dive into this exciting world by discovering some incredible UK routes!

Joining Gravel Bike Clubs and Communities

If you’re looking to connect with other enthusiasts and build lasting friendships, joining gravel bike clubs and communities is a fantastic way to do so. These clubs offer a supportive and inclusive environment where you can share your passion for gravel biking with like-minded individuals. Not only will you get the chance to meet new people who share your interests, but you’ll also have access to a wealth of knowledge and experience that can help improve your skills on the bike.

When joining gravel bike clubs, one of the biggest benefits is being able to find local gravel bike routes. Members often organize group rides or share information about their favorite routes, making it easier for you to discover new trails in your area. Whether you’re a beginner or an experienced rider, these routes cater to all skill levels, ensuring that everyone can find something suitable.

By participating in these club rides, you’ll not only have an opportunity to explore new trails but also learn from more experienced riders. They can provide valuable insights into technique, gear selection, and maintenance tips that will help enhance your overall riding experience.

Once you’ve joined a gravel bike club and found some local routes that suit your preferences, it’s time to focus on improving your training and fitness levels.

Advertisement

Training and Fitness Tips for Gravel Bike Riding

Improving your training and fitness levels is essential for maximizing your enjoyment of gravel biking. Gravel bike training involves a combination of endurance, strength, and skill-building exercises. To help you get started, here are some fitness tips to keep in mind:

  1. Endurance Training: Focus on building up your cardiovascular fitness by incorporating long rides into your training schedule. Gradually increase the duration and intensity of these rides to improve your stamina.

  2. Strength Training: Strengthening your lower body muscles will help you tackle challenging terrains with ease. Include exercises like squats, lunges, and deadlifts in your routine to target key muscle groups used in gravel biking.

  3. Core Stability: A strong core is crucial for maintaining balance and stability while riding on uneven surfaces. Incorporate exercises like planks, Russian twists, and bicycle crunches to strengthen your core muscles.

  4. Skill-Building Exercises: Practice handling skills such as cornering, descending, and navigating rough terrain to enhance your overall riding ability.

Remember to listen to your body and gradually progress with each workout session. By following these gravel bike training tips, you’ll be well-prepared for the challenges that lie ahead.

Now let’s move on to the next section about safety considerations and precautions for gravel bike riders…

Safety Considerations and Precautions for Gravel Bike Riders

Ensure your safety while riding on gravel by taking necessary precautions and considering important factors. One of the most crucial aspects for gravel bike riders is having a proper bike fit. A well-fitted bike can greatly enhance your riding experience and reduce the risk of injuries. It’s important to ensure that the frame size, saddle height, and handlebar position are all adjusted correctly for your body proportions. This will not only improve your comfort but also optimize power transfer and handling on uneven terrain.

In addition to a proper bike fit, it is essential to have the right safety gear when riding on gravel. Helmet is an absolute must-have item for all gravel enthusiasts as it protects your head in case of an accident or fall. Gloves provide better grip and protect your hands from blisters, while knee pads offer extra protection during challenging descents or unexpected obstacles.

Advertisement

As you transition into the subsequent section about ‘gravel bike events and competitions in the UK’, remember that participating in these events can be a great way to challenge yourself and showcase your skills as a gravel rider. However, it’s important to keep in mind that safety should always be your top priority while enjoying this exciting sport.

Gravel Bike Events and Competitions in the UK

Get ready to experience the thrill of gravel bike events and competitions in the UK! These events are a fantastic way to test your skills, push your limits, and connect with fellow gravel bike enthusiasts. Whether you’re a seasoned rider or just starting out, there’s something for everyone in these exciting gatherings.

  1. Adrenaline-pumping races: Feel the rush as you compete against other riders in thrilling gravel bike races. From short sprints to long-distance challenges, these events will get your heart racing and your adrenaline pumping.

  2. Breathtaking routes: Explore the stunning landscapes of the UK on specially designed gravel bike routes. Ride through picturesque countryside, tackle challenging terrains, and marvel at breathtaking views along the way.

  3. Community spirit: Immerse yourself in a vibrant community of like-minded individuals who share your passion for gravel biking. Connect with fellow riders, exchange tips and tricks, and forge lifelong friendships that extend beyond the racecourse.

As gravel biking continues to gain popularity in the UK, these events are only set to grow bigger and better. The future trends and developments in the gravel bike industry promise even more exhilarating competitions, innovative equipment advancements, and unforgettable experiences on two wheels. So lace up those cycling shoes and get ready for an incredible journey into the world of gravel biking!

Future Trends and Developments in the Gravel Bike Industry

The future of the gravel biking industry promises exciting advancements in equipment and unforgettable experiences on two wheels. As more and more people discover the joy of riding off-road, manufacturers are constantly developing new technologies to enhance the gravel bike experience.

One of the future innovations we can expect to see is improved suspension systems. Gravel bikes are known for their versatility, allowing riders to tackle a variety of terrains. However, rough trails can be challenging without proper suspension. Manufacturers are working on developing lightweight yet effective suspension systems that will provide a smoother ride without compromising the bike’s agile nature.

Advertisement

Another area where we can expect to see developments is in sustainability initiatives. With an increasing focus on environmental conservation, many gravel bike manufacturers are incorporating eco-friendly materials into their products. From recycled frame materials to sustainable packaging, companies are taking steps towards reducing their carbon footprint.

Additionally, there may be advancements in electronic shifting technology for gravel bikes. While this technology is already common in road cycling, it has not been widely adopted in the gravel biking world. However, as electronic shifting becomes more affordable and reliable, we may see an increase in its use within the gravel bike industry.

Overall, the future of the gravel biking industry looks promising with exciting innovations and a focus on sustainability initiatives. Whether you’re a seasoned rider or just getting started, these advancements will undoubtedly enhance your off-road adventures.

Frequently Asked Questions

Are gravel bikes suitable for beginners?

Gravel bikes are a great option for beginners who want more versatility than a traditional road bike.

When comparing gravel bikes to mountain bikes, it really depends on personal preference and the type of terrain you’ll be riding on.

Advertisement

Gravel bikes offer a smoother ride on paved roads while still being capable off-road.

To choose the right size gravel bike, consider your height, inseam length, and reach measurements.

It’s important to get properly fitted to ensure comfort and optimal performance.

Can I use a gravel bike for commuting?

Yes, you can definitely use a gravel bike for commuting. Gravel bikes have several advantages that make them suitable for everyday use.

They are designed to handle various terrains, from smooth roads to rough gravel paths, providing a comfortable ride. The wider tires offer stability and control, while the disc brakes ensure reliable stopping power.

Advertisement

However, it’s important to consider the cons as well, such as added weight and slower speeds compared to road bikes.

What type of tires should I use for different terrains?

When it comes to choosing the right gravel bike tires for different terrains, there are a few factors to consider.

First and foremost, tire pressure is crucial. Lower tire pressure helps with grip on loose surfaces like gravel or dirt, while higher pressure is better for smoother roads.

Additionally, the tread pattern plays a role in determining traction and handling. It’s important to find a balance that suits your riding style and the specific terrain you’ll be encountering.

How often should I maintain and service my gravel bike?

I recommend following a regular maintenance schedule for your gravel bike to ensure optimal performance and longevity.

Advertisement

Generally, it’s advised to have your bike serviced at least once a year or every 1,000 miles, whichever comes first.

This includes checking and adjusting components such as brakes, gears, and bearings.

Common gravel bike issues may include chain wear, brake pad replacement, and tire pressure adjustments for different terrains.

Regular maintenance will help identify and address these issues promptly.

Is it necessary to wear specific safety gear while riding a gravel bike?

Oh, absolutely not! Who needs safety gear when riding a gravel bike? Just throw caution to the wind and hope for the best, right?

Advertisement

Well, actually, that couldn’t be further from the truth. Safety should always be a top priority when riding any type of bike, including gravel bikes.

Proper bike fit is crucial for stability and control on rough terrain. Additionally, choosing the right helmet designed specifically for gravel biking can provide essential protection in case of falls or accidents.

So please, don’t skimp on safety gear!

Conclusion

In conclusion, a gravel bike in the UK is not just any ordinary bicycle. It’s a versatile and adaptable machine designed to conquer diverse terrains.

With its key features and components, it provides riders with an exhilarating experience like no other. From smooth roads to rugged trails, a gravel bike handles it all with finesse.

Advertisement

So, whether you’re seeking adventure or fitness, hop on your gravel bike and let the wind whip through your hair as you explore the great outdoors.

Get ready for a wild ride!

Ralf is a devoted husband and father who loves spending time with his family. He enjoys riding his bicycle as much as possible, and takes every opportunity he can to get out on the open road. Ralf is a kind and gentle person who wants only the best for those around him.

Continue Reading
Advertisement

Bike

How To Motorize A Bicycle

Published

on

By

An image showcasing a bicycle with its frame modified to include a powerful electric motor, complete with a sleek battery pack mounted near the rear wheel and a set of futuristic LED headlights

Imagine elevating your cycling experience by transforming your ordinary bicycle into a powerful machine that effortlessly propels you forward.

In this article, I will guide you through the detailed process of motorizing your bicycle, step by step. From choosing the right motor kit to ensuring safety measures, you will learn everything you need to know to create your very own motorized bicycle.

Get ready to embark on an exciting journey of innovation and adventure.

Key Takeaways

  • Familiarize yourself with local laws and regulations
  • Understand the required equipment for riding
  • Learn where motorized bicycles are allowed
  • Avoid legal issues by following regulations

Choose the Right Motor Kit for Your Bicycle

You should choose the right motor kit for your bicycle. Choosing the right motor kit can greatly enhance your riding experience and make your commute more efficient.

Advertisement

When considering motor power, factors such as terrain, weight, and desired speed need to be taken into account. For hilly terrains or heavier bicycles, a higher motor power will be required to ensure smooth operation and adequate speed. On the other hand, if you plan to use your motorized bicycle mainly on flat surfaces, a lower motor power may suffice.

Additionally, when it comes to battery capacity, it is important to explore the different options available and choose the right capacity based on your riding needs and distance requirements. A larger battery capacity will allow for longer rides without needing to recharge.

Now that we have discussed choosing the right motor kit, let’s move on to gathering the necessary tools and materials for the installation process.

Gather the Necessary Tools and Materials

To get started, it’s important to gather all the tools and materials needed for the project. Here are the essential items you’ll need:

  • Wrench set: You’ll need a set of wrenches to loosen and tighten bolts on your bicycle.
  • Screwdriver set: A variety of screwdrivers will be necessary for removing and installing parts.
  • Wire cutter/stripper: This tool will come in handy when dealing with electrical connections.
  • Allen wrench set: Many motor kits require the use of Allen wrenches for assembly.
  • Battery and charger: Make sure to choose a battery that is compatible with your motor kit.
  • Motor kit: This is the heart of your motorization project. Choose a kit that suits your needs and budget.

Choosing the right motor kit is crucial to ensure a smooth installation process. Additionally, be prepared to troubleshoot common motorization issues that may arise during the project.

Once you have gathered all the necessary tools and materials, you can proceed to prepare your bicycle for motorization by following the next steps.

Advertisement

Prepare Your Bicycle for Motorization

Before starting, make sure that your bike is in good condition and ready for the motor installation. Inspect the frame, wheels, and brakes for any signs of damage or wear. Check the tire pressure and ensure that they’re properly inflated.

Remove any accessories or attachments that may interfere with the motor installation process.

Next, determine the type of bike modification you want to do, whether it’s a gas-powered engine or an electric bike conversion. This will dictate the specific steps and materials needed for the motorization process.

Advertisement

Additionally, make sure you have all the necessary tools and equipment on hand.

Once your bike is prepared, you can move on to the next section and install the motor kit onto your bicycle, transforming it into a motorized ride.

Install the Motor Kit onto Your Bicycle

Once the motor kit is installed onto your bike, it will be transformed into a motorized ride. To install the electric motor, begin by removing the rear wheel from the bicycle frame. Next, attach the motor bracket onto the frame using the provided screws and secure it tightly. Place the motor onto the bracket, aligning the mounting holes, and fasten it securely. Connect the motor’s wiring to the battery and controller according to the provided instructions, ensuring proper connections. Once everything is connected, double-check all the connections and tighten any loose screws. To troubleshoot motor issues, refer to the troubleshooting section in the motor kit manual. Now, we can move on to the next step and connect the motor to the bicycle’s drive system, allowing it to propel the bike forward effortlessly.

Connect the Motor to the Bicycle’s Drive System

Advertisement

Now you can connect the motor to your bike’s drive system and start enjoying effortless propulsion.

To connect the motor to the bicycle’s drivetrain, follow these steps:

  • First, locate the motor mounting bracket on your bike frame. Ensure it is securely attached.
  • Next, align the motor’s sprocket with the bike’s chainring. Use a chain tool to remove the necessary links from the bike’s chain if needed.
  • Connect the motor’s sprocket to the bike’s chainring using a chain connector.
  • Double-check the alignment and tension of the chain. Ensure it is neither too loose nor too tight.
  • Once connected, test the motor by pedaling the bike. The motor should engage and provide assistance.

If you encounter any issues during this process, such as chain slipping or misalignment, consult the motor kit’s troubleshooting guide for assistance.

With the motor now connected to the bicycle’s drive system, we can move on to installing the throttle and control mechanisms.

Install the Throttle and Control Mechanisms

To begin the installation process, attach the throttle and control mechanisms to your bike’s handlebars. The throttle allows you to control the speed of the motor, while the control mechanisms enable you to activate the motor and make necessary adjustments. Proper installation of these components is crucial for a smooth and efficient motorization system.

Below is a table that illustrates the installation steps for the throttle and control mechanisms:

Advertisement
Step Procedure
1 Position the throttle grip on the handlebars and secure it using the provided clamp.
2 Connect the throttle cable to the motor. Ensure a secure and tight connection.
3 Adjust the throttle sensitivity according to your preference using the provided throttle adjustment feature.

Once the throttle and control mechanisms are securely installed, you can proceed to test and adjust the motorization system. This will ensure that everything is functioning properly and any troubleshooting issues can be resolved before hitting the road.

Transitioning into the next section, it is important to thoroughly test and adjust the motorization system to guarantee optimal performance.

Test and Adjust the Motorization System

After securely installing the throttle and control mechanisms, it is essential to thoroughly test and adjust the motorization system for optimal performance. Here are the steps to follow:

  1. Testing the Motor: Start by engaging the motor and observing its response. Ensure it starts smoothly and accelerates without any hitches. Listen for any unusual noises or vibrations.

  2. Adjusting Motor Performance: Fine-tune the motor’s power output by adjusting the throttle. Increase or decrease the throttle sensitivity to achieve the desired speed and responsiveness.

  3. Troubleshooting Common Motorization Issues: Monitor the motor for overheating or excessive battery drain. Inspect all connections for loose wires or faulty components. Resolve any issues promptly to prevent further damage.

  4. Test Ride and Fine-tuning: Take the motorized bicycle for a test ride, paying attention to its overall performance and handling. Make any necessary adjustments to the motor or control mechanisms to improve the riding experience.

Now that the motorization system has been tested and adjusted, it is crucial to ensure safety measures are in place for worry-free riding.

Ensure Safety Measures are in Place

Make sure you have all the necessary safety measures in place to ensure a worry-free riding experience. The importance of wearing protective gear cannot be emphasized enough when motorizing a bicycle. A helmet, knee pads, and elbow pads are essential to protect yourself from potential accidents and injuries.

Advertisement

Additionally, it is crucial to understand and abide by local laws and regulations regarding motorized bicycles. Different jurisdictions may have specific rules about speed limits, required equipment, and where motorized bicycles are allowed to be ridden. Familiarize yourself with these regulations to avoid any legal issues.

By prioritizing safety and following the rules, you can enjoy the benefits of a motorized bicycle without compromising your well-being or breaking the law.

Now, let’s move on to learning how to operate and maintain your motorized bicycle smoothly.

Learn How to Operate and Maintain Your Motorized Bicycle

Learning how to operate and maintain your motorized bike is essential for a smooth and hassle-free riding experience. To ensure that your motorized bicycle functions optimally, here are three key tips:

  1. Troubleshooting common issues with motorized bicycles: Familiarize yourself with common problems such as engine starting issues, fuel system malfunctions, or electrical failures. This knowledge will help you diagnose and fix problems efficiently.

  2. Tips for increasing the lifespan of your motorized bicycle: Regularly check and change the engine oil, clean the air filter, and inspect the spark plug. Additionally, avoid overloading the bike and adhere to the manufacturer’s recommended maintenance schedule.

  3. Properly maintaining the bike’s components: Regularly lubricate the chain, inspect the brakes, and ensure the tires are inflated to the correct pressure. These simple maintenance tasks will ensure your motorized bicycle performs at its best.

By following these guidelines, you can enjoy the benefits of your motorized bicycle without any interruptions.

Advertisement

Enjoy the Benefits of Your Motorized Bicycle

To fully experience the advantages of your motorized bike, you’ll love the increased speed and convenience it brings to your daily commute.

Riding a motorized bicycle in your daily commute has numerous benefits. Firstly, it allows you to travel at a faster pace, reducing travel time and making your commute more efficient. With the added power of the motor, you can easily navigate through traffic and reach your destination faster.

Additionally, using a motorized bicycle is a sustainable and eco-friendly option, reducing your carbon footprint and contributing to a cleaner environment.

To ensure the longevity of your motorized bicycle, it is essential to follow best practices for maintenance. Regularly inspect and clean the bike, check tire pressure, and lubricate the chain. Proper maintenance will not only enhance the performance but also extend the lifespan of your motorized bicycle, allowing you to enjoy its benefits for years to come.

Frequently Asked Questions

How much does a motor kit for a bicycle typically cost?

Motor kits for bicycles typically range in cost from around $200 to $1500, depending on the type of motor. There are various types available, including electric hub motors and mid-drive motors.

Advertisement

Are there any legal requirements or restrictions for using a motorized bicycle?

Sure, let’s dive into the legal requirements and restrictions for using a motorized bicycle. In terms of registration, it depends on your location, but some places require you to register your motorized bicycle. As for speed limits, again, it varies, but typically motorized bicycles are subject to the same speed limits as regular bicycles.

Can any type of bicycle be motorized, or are there specific requirements?

Any type of bicycle can be motorized, but there are specific requirements. Motorizing mountain bikes involves adding a motor and battery to the frame, while converting road bikes requires installing a motor kit onto the existing bike.

What kind of maintenance is required for a motorized bicycle?

Maintenance tips for a motorized bicycle include regular oil changes, checking spark plugs, and inspecting the chain for wear. Troubleshooting common issues such as starting problems or strange noises may require adjusting the carburetor or cleaning the fuel system.

Are there any safety concerns or precautions to be aware of when operating a motorized bicycle?

Motorized bicycle safety concerns are critical to understand. It is essential to prioritize safety precautions, such as wearing a helmet, using reflectors, maintaining brakes, and following traffic rules, to ensure a safe and enjoyable ride.

Conclusion

In conclusion, as I reflect on my journey of motorizing my bicycle, I can’t help but feel a sense of liberation and excitement.

Advertisement

Like a phoenix rising from the ashes, my bicycle has transformed into a powerful steed, ready to conquer any path ahead.

The precision and attention to detail required in this process have not only enhanced my technical skills but also my appreciation for the beauty of mechanics.

Now, as I ride into the sunset, I am filled with a sense of pride and joy, knowing that I have unlocked a new world of possibilities with my motorized companion.

Continue Reading

Bike

How To Change Gears On A Gravel Bike

Published

on

By

An image capturing a close-up of a rider's gloved hand gripping a gravel bike's gear lever, fingers delicately adjusting it

Prepare yourself to enhance your gravel biking abilities with this in-depth guide on mastering gear changes like a professional.

Mastering the art of gear shifting is crucial for any cyclist, especially when tackling unpredictable terrains.

In this article, I will walk you through the ins and outs of understanding your bike’s gear system, perfecting your technique, troubleshooting common issues, and ultimately enjoying a smooth ride with perfectly timed gear changes.

So grab your helmet and let’s dive in!

Key Takeaways

  • Gravel bikes have a wide range of gears for different terrains.
  • Proper gear shifting technique ensures a smooth and efficient ride.
  • Familiarize yourself with the gear levers and their correct operation.
  • Choose the correct gear ratio based on the anticipated terrain changes.

Understanding the Gear System on a Gravel Bike

Advertisement

To change gears on your gravel bike, you’ll need to understand the gear system. The gear selection on a gravel bike is crucial for optimizing performance and ensuring a smooth ride on various terrains.

Gravel bikes typically come with a wide range of gears to accommodate different riding conditions, including steep climbs and fast descents.

One important aspect of the gear system is the gear ratios. Gear ratios determine how much power is transferred from your legs to the wheels. Higher gear ratios provide more power but require more effort, making them suitable for flat or downhill sections. Lower gear ratios, on the other hand, offer less power but are easier to pedal, making them ideal for climbing steep hills or navigating rough terrain.

Understanding how to select the right gear ratio for each situation is essential in maximizing efficiency and preventing unnecessary strain on your body. By choosing an appropriate gear ratio, you can maintain a consistent cadence while adapting to changes in terrain without exerting excessive force.

Proper gear shifting technique plays a vital role in achieving seamless transitions between gears without interruption or damage to the drivetrain components.

Advertisement

Importance of Proper Gear Shifting Technique

Remember, it’s crucial to use the correct technique when shifting gears on your gravel bike. Proper gear shifting technique not only ensures a smoother and more efficient ride but also prevents unnecessary wear and tear on your drivetrain. By following these guidelines, you can optimize your gear shifting experience and reap the benefits of efficient gear shifting.

One key aspect of proper gear shifting technique is timing. It’s important to anticipate shifts in terrain or cadence and initiate gear changes before they become necessary. This allows for a seamless transition between gears, minimizing any disruption to your pedaling rhythm.

Another important factor is maintaining consistent pedal pressure while shifting gears. Applying too much force when changing gears can cause the chain to jump or slip, leading to potential damage. On the other hand, releasing pedal pressure entirely can result in a loss of momentum. Finding the right balance between applying pressure and easing up slightly will ensure a smooth transition from one gear to another.

To further emphasize this point, consider the following table:

Gear Shifting Technique Benefits
Anticipating shifts Smoother transitions
Consistent pedal pressure Prevents chain slippage
Balancing pressure Maintains momentum

By implementing these techniques, you’ll experience improved efficiency and durability in your gravel biking adventures.

Advertisement

Transitioning into the subsequent section about familiarizing yourself with the gear levers, it’s essential to understand how they function to make precise gear changes effortlessly.

Familiarize Yourself with the Gear Levers

Before getting started, it’s important to know how the gear levers on your gravel bike work. Familiarizing yourself with the gear lever functions and proper hand placement will ensure smooth and efficient gear shifting while riding.

Most gravel bikes are equipped with a combination of two gear levers, one for controlling the front derailleur and the other for the rear derailleur. The left lever is responsible for shifting between the chainrings, which control the bike’s front gears. On the other hand, the right lever controls the rear gears by moving the derailleur across different cogs on the cassette.

Advertisement

To shift gears using these levers, place your hands firmly on both hoods of your handlebars. Your index fingers should rest lightly on top of each lever, ready to initiate shifts when needed. When you want to shift to an easier gear (a smaller cog or a smaller chainring), push either lever sideways using your thumb or index finger. For harder gears (larger cogs or larger chainrings), pull back on either lever.

Understanding how to operate these gear levers and maintaining proper hand placement is crucial in achieving optimal performance and preventing any potential damage to your gravel bike’s drivetrain components.

With this knowledge in mind, let’s move onto starting with the right gear ratio…

Start with the Right Gear Ratio

Begin with the correct gear ratio to ensure optimal performance and prevent potential damage to your drivetrain components. Gear selection is crucial when changing gears on a gravel bike. By choosing the right gear ratio, you can maximize efficiency and power transfer while minimizing unnecessary strain on your bike’s components.

To start with the right gear ratio, it’s important to consider the terrain you’ll be riding on. If you’re facing a steep climb or challenging off-road section, it’s best to select a lower gear that provides more torque for easier pedaling. On the other hand, if you’re riding on flat or downhill sections, choosing a higher gear will allow you to maintain speed without excessive spinning of the pedals.

Advertisement

Finding the ideal gear ratio may require some trial and error, especially when encountering varying terrains during your ride. Pay close attention to how your bike responds to different gears and adjust accordingly. Anticipate terrain changes by smoothly shifting gears before reaching them, ensuring a seamless transition between ratios.

By starting with the right gear ratio and adjusting as needed, you can optimize your gear selection for maximum efficiency and enjoy a smoother ride on your gravel bike. Anticipating terrain changes will further enhance your overall biking experience.

Anticipate Terrain Changes

To optimize your riding experience, it’s important to anticipate shifts in terrain while on your gravel bike. Understanding the terrain and adapting your gear strategy accordingly can greatly enhance your performance and enjoyment. By being proactive in adjusting gears before encountering changes in the landscape, you can maintain a steady cadence and ensure smooth transitions.

Advertisement

To help you understand how to adapt your gear strategy based on terrain, refer to the table below:

Terrain Type Recommended Gear Strategy
Uphill Shift to a lower gear for easier pedaling
Downhill Shift to a higher gear for increased speed
Flat Maintain a comfortable gear ratio
Loose Gravel Shift to a lower gear for better traction
Sand or Mud Shift to an even lower gear for stability

By anticipating these terrain changes and adjusting gears accordingly, you’ll be able to maintain optimal control of your gravel bike. Remember, it’s always better to shift before you need to rather than struggling with shifting under pressure during challenging sections. This will not only improve your overall riding experience but also prevent unnecessary strain on yourself and the bike. Transitioning into the next section about ‘shift before you need to’ will further enhance your understanding of proper gear management on a gravel bike.

Shift Before You Need to

Make sure you shift gears on your gravel bike in anticipation of upcoming terrain changes. Anticipating terrain changes is essential to maintaining a steady pedaling cadence and ensuring a smooth ride.

Here are four crucial tips for shifting gears effectively:

  • Pay attention to the road ahead: Keep your eyes focused on the trail, looking out for any obstacles or changes in terrain that may require gear adjustments.

  • Shift before you need to: Don’t wait until you’re struggling to pedal uphill or losing control on a descent. Shift gears proactively, allowing yourself enough time to adjust smoothly without interrupting your flow.

  • Know your bike’s gear range: Familiarize yourself with the different gear combinations available on your gravel bike. Understand which gears are best suited for climbing, descending, and cruising on flat terrain.

  • Practice shifting techniques: Experiment with shifting both up and down the gears while riding at varying speeds. This will help you develop a feel for how your bike responds and ensure seamless transitions between gears.

Maintaining a steady pedaling cadence is crucial for efficient riding and preventing unnecessary strain or fatigue. Transitioning into the next section about ‘maintain a steady pedaling cadence,’ it is equally important to find the right gear ratio that allows you to maintain an optimal cadence throughout different terrains.

Advertisement

Maintain a Steady Pedaling Cadence

When it comes to changing gears on a gravel bike, one important aspect to consider is maintaining a steady pedaling cadence. This not only helps in improving your efficiency but also ensures a smoother transition between gears.

To maintain cadence, it is crucial to anticipate gear changes and shift before you actually need to. By doing so, you can avoid sudden spikes or drops in resistance that can disrupt your rhythm. Instead, aim for seamless transitions that allow you to keep spinning at a consistent cadence.

Maintaining a steady pedaling cadence has several benefits. Firstly, it reduces the strain on your muscles and joints by distributing the workload evenly across different gears. Secondly, it allows you to generate power consistently without wasting energy due to abrupt gear changes.

By focusing on maintaining cadence while changing gears on your gravel bike, you will find yourself riding with greater efficiency and endurance. So remember, smooth shifts are key!

In the next section about using both front and rear gears, we will explore another essential technique for optimizing gear changes without any interruption in your ride flow.

Advertisement

Use Both Front and Rear Gears

Using both the front and rear gears on your gravel bike is essential for achieving optimal gear changes without any interruption in your ride flow. When it comes to front gear selection, you have multiple options available.

The smaller chainring is ideal for climbing steep hills or tackling difficult terrain, as it provides a lower gear ratio that allows for easier pedaling. On the other hand, the larger chainring is great for riding on flat roads or when you want to go faster, as it offers a higher gear ratio that maximizes your speed.

In terms of rear gear selection, your gravel bike typically has a wide range of gears to choose from. The smaller cogs provide easier pedaling and are perfect for uphill climbs or rough surfaces where you need more control. Conversely, the larger cogs offer higher resistance and are suitable for riding on flat roads or when you want to pick up speed.

By utilizing both front and rear gears effectively, you can optimize your riding experience by seamlessly transitioning between different terrains and conditions. However, it’s important to note that you should avoid ‘cross chaining,’ which refers to using extreme combinations such as the small chainring with the smallest cog or the large chainring with the largest cog. This can cause excessive wear on your drivetrain components and may result in poor shifting performance.

Transitioning into the next section about ‘don’t cross-chain,’ it’s crucial to understand how improper gear selection can negatively impact your ride quality and potentially damage your bicycle’s drivetrain components.

Advertisement

Don’t Cross Chain

Avoiding cross-chaining is important to maintain the performance and longevity of your drivetrain components. Cross-chaining occurs when you use the extreme combination of gears, such as using the big chainring in the front and the biggest cog in the rear, or vice versa. This puts excessive stress on your chain and can lead to premature wear and tear. Additionally, cross-chaining reduces efficiency and can cause poor shifting.

To prevent cross-chaining, it is essential to understand your gear ratios and make conscious decisions when shifting. When riding on a gravel bike, it’s recommended to avoid extreme gear combinations that strain your drivetrain unnecessarily. Instead, aim for a balanced use of gears that allows for smooth transitions between them.

Regularly inspecting and maintaining your gears is also crucial for optimal performance. Clean your drivetrain regularly to remove dirt and grime that can affect shifting quality. Lubricate the chain appropriately to minimize friction.

By avoiding cross-chaining and practicing good gear maintenance habits, you can ensure a longer lifespan for your drivetrain components while optimizing your cycling experience.

Now let’s delve into adjusting gear shifters for comfort without compromising functionality.

Advertisement

Adjusting Gear Shifters for Comfort

To achieve a more comfortable riding experience, it’s important to make adjustments to your gear shifters. Proper gear shifter maintenance and adjusting gear cable tension are crucial for smooth and efficient shifting.

Here are two key steps you can take to optimize the performance of your gear shifters:

  1. Check and adjust the gear cable tension: Begin by shifting your bike into the highest gear (smallest cog). Locate the barrel adjuster on the derailleur or shifter body. Turn it clockwise to increase tension or counterclockwise to decrease tension until the shifting feels crisp and precise.
  • Fine-tune while riding: Take your bike for a spin around a quiet area, such as an empty parking lot. Shift through all gears while paying attention to any hesitation or lag in shifting. If needed, make additional adjustments using the barrel adjuster until you achieve seamless shifting across all gears.
  1. Evaluate lever position and reach: Ensure that your shift levers are positioned comfortably within reach of your hands while gripping the handlebars. Adjust their angle if necessary, so you can easily access them without straining or stretching.

By maintaining and adjusting your gear shifters correctly, you’ll enhance both comfort and performance on your gravel bike.

Now, let’s move on to practice shifting gears on different surfaces for even greater control during rides without compromising safety or efficiency.

Practice Shifting Gears on Different Surfaces

Start by practicing shifting gears on a variety of surfaces to improve your control and adaptability while riding. It’s important to become familiar with the different gear ratios and how they affect your bike’s performance. Shifting on loose gravel can be particularly challenging, as the surface provides less traction and stability. To navigate this terrain effectively, you need to anticipate changes in resistance and adjust your gears accordingly.

To help illustrate the concept, here is a table showing examples of suitable gear ratios for different surfaces:

Advertisement
Surface Gear Ratio
Paved road High gear (big chainring)
Gravel road Medium gear
Loose gravel Low gear (small chainring)
Uphill Low gear

When shifting on loose gravel, it’s crucial to smoothly transition between gears to avoid any sudden loss of traction. Start by approaching the shift with a steady pedal stroke, then quickly but gently shift into a lower gear before you encounter the loose section. This will allow you to maintain momentum without losing control.

As you practice shifting gears on different surfaces, pay attention to how your bike responds. Listening to your bike can provide valuable feedback about whether you need to make further adjustments or if everything is running smoothly.

Transitioning into the subsequent section about ‘listening to your bike,’ we’ll explore how understanding its cues can enhance your overall riding experience.

Listen to Your Bike

When you’re riding, it’s essential to listen closely to your bicycle for valuable feedback. Your bike can tell you a lot about its condition and how well it’s performing. By paying attention to the sounds it makes, you can detect any potential issues and address them before they become major problems.

Here are some key components of your gear system that you should listen for:

Advertisement
  • Chain noise: A noisy chain could indicate that it needs lubrication or that there is excessive wear.
  • Gear skipping: If your gears are skipping or jumping when you shift, it may be a sign of misalignment or cable tension issues.
  • Grinding sound: This could mean that your drivetrain components are not properly aligned or that there is dirt and debris causing friction.

By regularly listening to these sounds and identifying any abnormalities, you can take proactive steps in bike maintenance to keep your gear system running smoothly.

In the next section, we will discuss fine-tuning your gear shifting skills for an even better riding experience.

Fine-Tuning Your Gear Shifting Skills

Fine-tuning your gear shifting skills can greatly enhance your cycling experience. When it comes to gravel biking, mastering gear shifting techniques is crucial for maintaining control and maximizing efficiency on unpredictable terrain. The key to efficient gear shifting lies in anticipating changes in the trail ahead and adjusting your gears accordingly.

One important technique is preemptive shifting. By planning ahead and shifting into an appropriate gear before you encounter a steep climb or descent, you can maintain momentum and avoid stalling or spinning out. This requires paying close attention to the terrain ahead and using your knowledge of gear ratios to select the optimal gear.

Another technique is called cadence management. Maintaining a consistent pedaling rhythm not only improves efficiency but also reduces strain on your legs. To achieve this, you should shift gears based on your current cadence rather than relying solely on speed or intensity. Experiment with different cadences to find what feels most comfortable for you.

By honing these gear shifting techniques, you can improve your overall performance and enjoyment while riding a gravel bike.

Advertisement

Transitioning now into troubleshooting common gear shifting issues, understanding how to address these problems will ensure a smooth and uninterrupted ride experience without any hiccups along the way.

Troubleshooting Common Gear Shifting Issues

To troubleshoot common gear shifting issues, pay attention to any unusual noises or resistance while pedaling. Here are some common gear shifting problems and how to fix them:

  • Misalignment: If your gears aren’t shifting smoothly, they may be misaligned. To fix this, use the barrel adjuster on your derailleur to make small adjustments until the gears shift smoothly.

  • Chain skipping: If your chain is skipping over the teeth of the cassette or chainring, it could be due to a worn-out chain or cassette. Replace these components if necessary to resolve the issue.

  • Cable tension issues: If your gears aren’t shifting properly, it could be due to incorrect cable tension. Use the barrel adjuster on your shifter or derailleur to fine-tune the cable tension for smooth gear changes.

  • Bent derailleur hanger: A bent derailleur hanger can cause poor shifting performance. Inspect the hanger for any signs of damage and replace if necessary.

By troubleshooting these common gear shifting problems, you can ensure that your gravel bike performs optimally. Enjoy the smooth ride with perfectly timed gear changes in the subsequent section about ‘enjoying the smooth ride with perfectly timed gear changes.’

Enjoy the Smooth Ride with Perfectly Timed Gear Changes

Achieve a smooth and enjoyable ride by mastering the art of perfectly timed gear shifts. When riding a gravel bike, it is essential to have precise control over your gears to navigate various terrains. Perfecting gear transitions allows you to maintain an optimal cadence and power output, ensuring efficiency and comfort throughout your ride.

To achieve perfect gear changes, start by understanding the concept of optimal gear ratios. This involves finding the right balance between the front chainring and rear cassette gears. The goal is to select a combination that provides enough resistance for efficient pedaling without straining your muscles or causing unnecessary fatigue. Experiment with different combinations on different terrains to find what works best for you.

Advertisement

Timing is crucial when shifting gears. Anticipate changes in terrain or gradient ahead of time, allowing yourself ample time to shift smoothly. Avoid shifting under heavy load as this can cause mechanical stress on your drivetrain components. Instead, ease off the pedals momentarily while making the transition.

When executing a gear change, apply steady pressure on the shifter while simultaneously releasing pressure on the pedals momentarily. This allows for smoother shifting as the chain moves from one gear to another seamlessly.

By practicing and perfecting your gear transitions, you will enjoy a smoother ride with optimal power delivery and reduced strain on your body. Remember that mastering this skill takes time and experience, so don’t be discouraged if it doesn’t come naturally at first. Keep experimenting with different techniques until you find what works best for you and enjoy every moment of your gravel bike adventures!

Frequently Asked Questions

What are the different types of gear ratios available on a gravel bike?

There are various gear ratios available on a gravel bike to cater to different riding conditions. Gear ratio selection is crucial as it determines the ease or difficulty of pedaling.

Lower gear ratios, such as 1:1 or 0.8:1, provide more torque for climbing steep hills or navigating rough terrain.

Advertisement

Higher gear ratios, like 2:1 or 2.5:1, offer greater speed on flat surfaces and descents.

Choosing the right gear ratio can optimize efficiency and power output while riding a gravel bike.

How do I know if I’m using the correct gear ratio for a specific terrain?

To determine if you’re using the correct gear ratio for a specific terrain, there are a few factors to consider.

Firstly, observe your cadence (the speed at which you pedal). If it feels too easy or difficult, you may need to adjust the gear ratios accordingly.

Additionally, monitor your speed and power output. If you’re struggling to maintain speed or exerting excessive effort, troubleshooting gear shifting and adjusting gear ratios can help optimize your performance on different terrains.

Advertisement

Can I shift gears while standing up on my gravel bike?

Yes, you can shift gears while standing up on your gravel bike. When climbing steep terrain, it’s important to use the correct shifting technique to maintain momentum and efficiency.

As you approach a climb, anticipate the gear change by slightly easing off the pedals. Then, shift to a lower gear smoothly and quickly, using both your hands and body weight to apply pressure on the pedals.

This will ensure a seamless transition and allow you to conquer those challenging ascents with ease.

How often should I clean and lubricate my gear shifters?

I clean and lubricate my gear shifters regularly to ensure optimal performance and prolong their lifespan.

It is recommended to clean and lubricate the gear shifters every 100-200 miles or whenever they become dirty or sticky.

Advertisement

Start by wiping them down with a damp cloth, then apply a small amount of lubricant to the moving parts.

This will keep the gear shifters functioning smoothly and prevent any unnecessary wear or damage.

Are there any specific techniques for shifting gears smoothly and quickly on a gravel bike?

Shifting gears on a gravel bike requires finesse and precision, much like conducting a symphony. The key is to anticipate the terrain ahead and choose the appropriate gear ratio.

By mastering this art, you can seamlessly transition between gears, ensuring optimum power transfer and a smooth riding experience.

Correct gear ratios allow you to conquer various terrains effortlessly. Whether it’s climbing steep hills or navigating through loose gravel, the right technique is your ticket to gravel biking nirvana.

Advertisement

Conclusion

In conclusion, mastering the art of gear shifting on a gravel bike is essential for a smooth and enjoyable ride.

By understanding the gear system, familiarizing yourself with the levers, and anticipating terrain changes, you can ensure that your gear changes are perfectly timed.

Just like a well-oiled machine, your bike will respond seamlessly to your commands, allowing you to conquer any trail with ease.

So why wait? Embrace the thrill of gravel biking and let your gears dance in perfect harmony as you embark on new adventures.

Advertisement

Continue Reading

Bike

What Equipment Must A Bicycle Have When Used At Night?

Published

on

By

An image showcasing a bicycle equipped with a front and rear light, reflectors on pedals, spokes, and front/rear tires, along with a reflective vest worn by the cyclist, ensuring maximum visibility and safety during nighttime rides

Like a single bright star in the night sky, a bicycle with the appropriate gear guarantees safe travels once the sun goes down. Being an experienced cyclist, I understand the significance of being visible on the road, particularly during nighttime.

In this article, I will guide you through the essential equipment that every bicycle must have when used at night, from powerful lights and reflectors to reflective clothing and properly inflated tires.

Let’s embark on this journey of knowledge to enhance your nighttime cycling experience.

Key Takeaways

  • Reflective gear, such as reflective tape and decals, is essential for increased visibility when cycling at night.
  • High-visibility accessories like flags and vests should be used to maximize visibility.
  • Properly inflated tires and good tread are important for optimal control and safety.
  • Consider the terrain and choose a tread pattern accordingly, and regularly check tire pressure for safe night riding.

White Front Light

You must have a white front light on your bicycle when riding at night. It is essential for your safety and the safety of others on the road.

Advertisement

A white front light helps you see what’s ahead, making sure you can spot any potential hazards, obstacles, or changes in the road surface. Additionally, it allows other road users to see you coming from a distance, reducing the risk of accidents.

A good quality white front light will have a strong beam, illuminating the path ahead effectively. It is important to choose a light that meets the legal requirements for brightness and visibility.

Once you have your white front light secured, the next step is to ensure you have a red rear light, which I will discuss in the next section.

Red Rear Light

A bicycle at night should be equipped with a red rear light. The importance of a red rear light cannot be overstated when it comes to ensuring the safety of both the cyclist and other road users.

Not only does it allow drivers to easily spot the bicycle from a distance, but it also helps them determine the direction in which the cyclist is traveling. In many countries, including the United States, it is a legal requirement for bicycles to have a red rear light when riding at night. This is because it significantly reduces the risk of accidents and enhances visibility.

Advertisement

However, simply having a red rear light is not enough. Reflectors on the front, rear, pedals, and wheels are also crucial in maximizing visibility. These reflectors work in conjunction with the red rear light to make the bicycle more visible from all angles and ensure a safe ride.

Reflectors on the Front, Rear, Pedals, and Wheels

Reflectors on the front, rear, pedals, and wheels are essential for maximizing visibility and ensuring a safe ride. When it comes to reflectors, placement and regulations are important factors to consider.

In most places, bicycles are required to have a white reflector on the front, a red reflector on the rear, and amber reflectors on the pedals. Additionally, reflectors on the wheels can provide extra visibility, especially when they are in motion. These reflective accessories work by bouncing back light from other sources, making you more visible to drivers and pedestrians. By using reflectors in accordance with regulations, you can greatly reduce the risk of accidents while cycling at night. They are a simple yet effective way to enhance your safety on the road.

Advertisement

Transitioning into the next topic, reflective clothing also plays a crucial role in increasing visibility during nighttime rides.

Reflective Clothing

Wearing reflective clothing is essential for increasing visibility and ensuring a safe ride at night. When cycling in the dark, it is crucial to be seen by motorists and other cyclists, and reflective clothing plays a vital role in achieving this. The importance of wearing reflective clothing cannot be overstated. It can make a significant difference in preventing accidents and ensuring your safety on the road.

To choose the right reflective clothing for night time cycling, opt for garments with built-in reflective strips or patches. Look for materials that reflect light well, such as fluorescent or bright colors. Additionally, consider wearing accessories like reflective arm or leg bands to enhance your visibility further. These simple measures can greatly enhance your safety while cycling at night.

Transitioning into the next section, let’s now discuss the importance of wearing a helmet with reflective strips.

Helmet with Reflective Strips

Advertisement

Make sure you choose a helmet that has reflective strips to increase your visibility while cycling at night. Helmet safety is essential, and having reflective strips on your helmet can greatly enhance your safety on the road. These reflective strips are designed to catch the light from car headlights, making you more visible to drivers.

When choosing a helmet, look for ones that have strategically placed reflective strips on the sides, front, and back. This will ensure that you are visible from all angles. Additionally, there are various reflective gear options available that you can attach to your helmet to further enhance your visibility. These include reflective stickers, bands, or even LED lights.

With the right helmet and reflective gear, you can significantly reduce the risk of accidents while cycling at night. As you focus on helmet safety, don’t forget to consider adding a bell or horn for audible signaling, ensuring that you have multiple ways to alert others of your presence on the road.

Bell or Horn for Audible Signaling

Don’t forget to attach a bell or horn to your helmet for audible signaling while cycling. It is important to have a way to alert others of your presence, especially when riding at night. In addition to the helmet with reflective strips and reflective clothing, an audible signaling device is crucial for your safety. To help you visualize the necessary equipment, refer to the table below:

Advertisement
Equipment Importance
Bell or Horn Essential for signaling
Reflective Clothing Increases visibility
Helmet with Reflective Strips Ensures safety
Rearview Mirror Enhances awareness
High Visibility Flag or Vest Promotes visibility
Properly Inflated Tires Ensures a smooth ride
Good Tread Provides better traction
Reflective Tape Enhances visibility
Front Light Illuminates the path ahead
Rear Light Increases visibility from behind
Reflectors Enhance visibility from all angles

By having all these equipment and taking necessary precautions, you can ensure your visibility and safety while cycling at night. Now, let’s discuss the next important aspect: the rearview mirror for increased awareness.

Rearview Mirror for Increased Awareness

Using a rearview mirror while cycling increases awareness of surrounding traffic. It is an essential equipment for night riding, as it allows me to keep an eye on vehicles approaching from behind without having to turn my head. The benefits of using a rearview mirror are numerous.

Firstly, it enhances my safety by providing a constant visual reference of what’s happening behind me.

Secondly, it allows me to anticipate potential hazards and make informed decisions while on the road.

Thirdly, it helps me maintain a steady and straight line while riding, as I can easily adjust my position based on the traffic behind me.

Advertisement

Lastly, it gives me peace of mind knowing that I have a clear view of my surroundings at all times.

Other alternative rearview options include helmet-mounted mirrors and handlebar-mounted mirrors. These options provide similar benefits but may vary in terms of comfort and ease of use.

Now, let’s move on to the next section about reflective tape on the frame and forks.

Reflective Tape on the Frame and Forks

Reflective tape on the frame and forks increases visibility and helps cyclists stay safe on the road. When riding at night, it is crucial to have equipment that enhances visibility, and reflective tape does just that. The tape reflects light from car headlights, making the bicycle more visible to drivers. This is especially important when riding on poorly lit roads or in areas with heavy traffic.

Reflective tape is an effective way to enhance nighttime visibility because it can be easily applied to the frame and forks of a bicycle. It comes in various colors, such as white, silver, or fluorescent, which further increases visibility. Additionally, the tape is durable and weather-resistant, ensuring its effectiveness even in harsh conditions.

Advertisement

While reflective tape is a popular choice, there are alternatives available for improving visibility on bicycle frames and forks. Some cyclists opt for reflective decals or stickers, which can be customized to suit their preferences. These decals work similarly to reflective tape by reflecting light and increasing visibility.

Transitioning into the subsequent section about the high-visibility flag or vest for added visibility, cyclists can further enhance their safety by incorporating a high-visibility flag or vest. These additional measures ensure maximum visibility and alert drivers to the presence of the cyclist on the road.

High-Visibility Flag or Vest for Added Visibility

One effective way to increase visibility and promote cyclist safety on the road is by incorporating high-visibility accessories such as a flag or vest. These accessories are designed to make cyclists more visible to motorists, especially in low-light conditions.

High-visibility flags can be attached to the rear of the bicycle or the back of the cyclist, while vests can be worn over clothing to enhance visibility from all angles. The importance of reflective gear cannot be overstated, as it significantly reduces the risk of accidents by making cyclists more easily seen by drivers.

In addition to reflective tape on the frame and forks, incorporating a high-visibility flag or vest is crucial for cyclists who ride at night or in low-light conditions. By increasing visibility, cyclists can greatly enhance their safety on the road.

Advertisement

Moving on to the next section, it is also important to have properly inflated tires with good tread for optimal control and safety.

Properly inflated tires with good tread for optimal control and safety

When it comes to riding a bicycle at night, ensuring optimal control and safety is crucial. One important aspect to consider is the condition of your tires. Properly inflated tires with good tread are essential for a smooth and safe ride. Maintaining the correct tire pressure is key to achieving optimal performance and control. Underinflated tires can make it difficult to maneuver, while overinflated tires can affect traction and stability. Additionally, choosing the right tread pattern for different road conditions is important. A tire with a more aggressive tread pattern can provide better grip on wet or uneven surfaces, while a smoother tread pattern is more suitable for dry roads. So, before hitting the road at night, take some time to check your tire pressure and tread condition to ensure a safe and enjoyable ride.

Now let’s dive into a more detailed discussion about tire pressure maintenance and choosing the right tread pattern for different road conditions:

Tire Pressure Maintenance Choosing the Right Tread Pattern
1. Regularly check your tire pressure using a gauge. Consider the type of terrain you will be riding on.
2. Consult the manufacturer’s guidelines for the recommended tire pressure range. Look for tires with deeper treads for better grip on wet surfaces.
3. Adjust the pressure accordingly using a pump with a pressure gauge. Opt for tires with a smoother tread pattern for dry roads.
4. Remember to check the pressure before each ride. Experiment with different tread patterns to find the one that suits your needs best.

Frequently Asked Questions

How can I ensure that my bicycle is visible to other road users at night?

To ensure my bicycle is visible to other road users at night, I prioritize the use of reflective gear. Reflective clothing, stickers, and lights are essential for enhancing visibility and ensuring my safety on the road.

Is it necessary to have both a front and rear light on my bike when riding at night?

Yes, it is necessary to have both a front and rear light on your bike when riding at night. The front light ensures visibility and helps me see the road ahead, while the rear light increases my visibility to other road users.

Advertisement

Are there any specific laws or regulations regarding the use of reflective clothing while cycling at night?

Yes, there are laws regarding reflective clothing when cycling at night. It is important to wear reflective clothing as it increases visibility and safety for both the cyclist and other road users.

What are the benefits of using a rearview mirror on a bicycle?

Using a rearview mirror on my bike has been a game-changer. It enhances safety by providing a clear view of approaching vehicles, allowing me to react quickly. The benefits are immense and unquestionable.

Can reflective tape be applied to any part of the bike frame, or are there specific areas where it should be placed for maximum effectiveness?

When applying reflective tape to the bike frame, focus on key areas for maximum effectiveness. These include the front and rear forks, seatstays, chainstays, and rims. Additionally, consider using reflective accessories and lights to further enhance bike visibility at night.

Conclusion

As I pedal through the darkened streets, I am grateful for the equipment that guides and protects me on my nighttime cycling adventures. The white front light illuminates my path, while the red rear light signals my presence to those behind me. Reflectors on my bike and clothing shimmer like stars, capturing the attention of passing drivers.

With a helmet adorned with reflective strips, I feel like a shining knight, ready to conquer any obstacle that comes my way. A rearview mirror grants me a glimpse into the world behind, increasing my awareness and ensuring my safety. Reflective tape on the frame and forks adds an extra layer of visibility, while a high-visibility flag or vest boldly announces my presence.

Advertisement

Lastly, properly inflated tires with good tread provide the control and stability I need to navigate the roads with confidence. As I ride under the moonlit sky, I am a symbol of safety, preparedness, and adventure, embracing the beauty of the night with every turn of the pedals.

Continue Reading
Advertisement

Affiliate disclaimer

As an affiliate, we may earn a commission from qualifying purchases. We get commissions for purchases made through links on this website from Amazon and other third parties.

About us

We are a passionate team driven by the belief that cycling is a fantastic and accessible way to stay active while enjoying the beauty of the outdoors. Our mission is to share our love for cycling with as many people as possible. We provide a welcoming environment for individuals of all ages, abilities, and backgrounds to come together and ride bikes. With Ralf’s visionary leadership, Zane’s expertise in cycling adventures, and Olivia’s dedication to community building, we strive to create a vibrant space where everyone can experience the joy of cycling. Through group rides, workshops, and inclusive events, we inspire and empower individuals to embrace an active lifestyle. Join us in our quest to pedal together, embrace the joy of cycling, and foster connections that last a lifetime.

Advertisement

Trending