
Whether you’re just starting out or a pro, wheel truing stands offer a range of features to suit your needs. Entry-level stands are simple, lightweight, and support basic adjustments for common wheel sizes. Professional models provide high precision, durable materials, and advanced gauges for accurate tuning. Compatibility with various hub and axle types, like thru-axle adapters, is essential for effective truing. Keep exploring to discover how selecting the right stand can make wheel maintenance easier and more precise.
Key Takeaways
- Entry-level stands support basic wheel sizes, while professional models handle wider rims and offer precise adjustments.
- Thru-axle adapters (10mm, 12mm, 15mm, 20mm) ensure compatibility with various hub standards.
- Professional stands feature high-quality materials and advanced measurement tools for accurate truing.
- Support for different wheel sizes and hub types enhances stability and minimizes errors during truing.
- Choosing the right stand depends on skill level, wheel compatibility, and need for precision.

WEIZE Road Bike, 700C Wheel City Commuter Bicycle, 14 Speed Drop Bar, Racing Adult Bike with Caliper Brakes, High-Carbon Steel Hybrid Bikes, Urban Adult Bicycle for Men and Women,White
Caliper brake system: The road bike adopts a dual caliper brake design, which is lighter in overall weight...
As an affiliate, we earn on qualifying purchases.
Exploring Basic Wheel Truing Stand Features and Functions
Understanding the features and functions of basic wheel truing stands is essential for effective wheel maintenance. When you stand a little closer to your Wheel Truing Stands, you’ll notice they support wheels up to 29 inches, making them versatile for many bikes. These stands often include adapters for different thru-axle sizes like 10mm, 12mm, 15mm, and 20mm, ensuring compatibility across various hubs. They feature a stable base, whether a steel plate or integrated mounting points, to keep the wheel steady during truing. Basic functions include adjusting rim alignment side-to-side, fixing rim roundness, and tensioning spokes. Many entry-level stands also come with built-in gauges for measurement, and their straightforward design makes them ideal for beginners and casual wheel builders. Additionally, fostering digital literacy can help users access tutorials and online resources to improve their truing skills. Recognizing the importance of different types of wheel supports can further enhance your ability to perform precise adjustments. Moreover, understanding basic maintenance techniques can help prevent common issues and prolong the lifespan of your wheels. Recognizing the importance of proper maintenance techniques can also extend the lifespan and performance of your wheels.

Schwinn Network 1 Hybrid Bike, 700c Mens and Womens Bike, 21-Speed Hybrid Bicycle, Aluminum Frame, Suspension Fork, Alloy Linear Pull Brakes, Adult Bicycle
HYBRID BICYCLE: Ride confidently on or off the pavement in the Network 1 by Schwinn. With 700c wheels,...
As an affiliate, we earn on qualifying purchases.
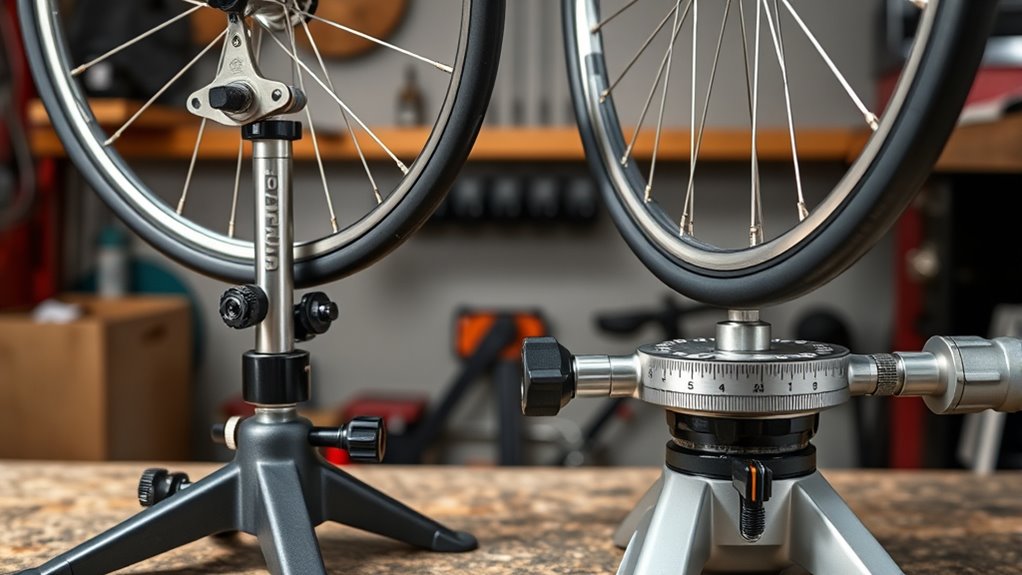
Key Differences Between Entry-Level and Professional Truing Stands
Entry-level and professional wheel truing stands differ markedly in their design, capabilities, and intended use. Here’s what sets them apart:
- Support and adjustments: Entry-level stands typically support wheels up to 29 inches with basic adjustments, while professional stands accommodate wider rims and offer precise tuning features.
- Build quality: Professional truing stands use high-quality materials like machined aluminum and steel for durability and stability, unlike the simpler constructions of entry-level models.
- Measurement tools: Professional stands feature advanced gauges, dial indicators, and multi-point measurement systems, making it easier to build wheels accurately compared to the basic mechanisms of entry-level stands.
If you build wheels regularly or need precision, investing in a professional truing stand makes a significant difference.

AVASTA 700C Road Adult Step-Over Gravel Hybrid Bike Bicycle for Men Woman Male Female,Lightweight Aluminum Alloy Frame with 21-Speed Gearing for City Commuting,Dual Disc Brakes,19 inch Frame,White
🚴♂️【Durable Aluminum Alloy Frame】This lightweight yet strong frame is built to last, offering a perfect balance of durability...
As an affiliate, we earn on qualifying purchases.
Adapting Truing Stands for Various Hub and Axle Types

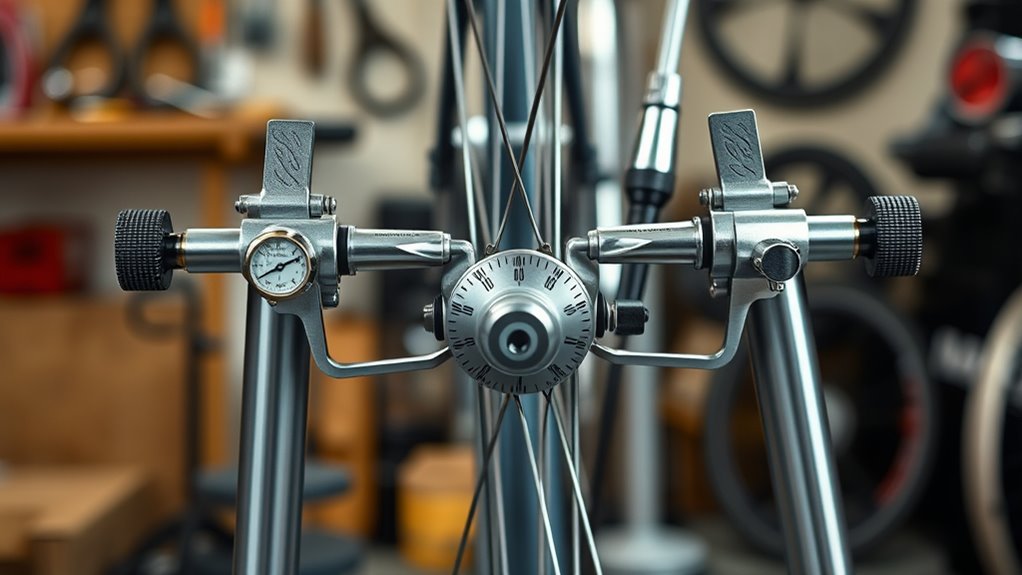
Adapting your truing stand to handle various hub and axle types guarantees you can accurately true a wide range of wheels. Thru axle adapters are essential for securely mounting thru-axle wheels, as many stands only accommodate quick-release or bolt-on hubs directly. These adapters come in different sizes—such as 10mm, 12mm, 15mm, and 20mm—and must match your hub’s diameter for proper fit and stability during wheel truing. Proper installation involves pressing the adapter into the hollow axle or securing it in the stand’s thru-axle holder. Using the correct thru-axle adapter ensures your wheel is stable and aligned, allowing for precise wheel truing, especially with modern wide-bodied hubs and boost spacing. This versatility makes your stand suitable for all hub types. Additionally, understanding the tax implications of different hub and axle configurations can help you plan your maintenance and upgrades more effectively. Being aware of the varieties of hubs and their specific requirements can further streamline your setup process and improve your overall workflow. Recognizing the compatibility issues between adapters and hub standards is also crucial for ensuring a secure connection and achieving accurate truing results. Moreover, selecting the right adapter materials can enhance durability and ease of use in various environments.

SAVADECK Carbon Gravel Bike - T800 Carbon Frame & Fork | Shimano U6000 11-Speed Groupset | Hydraulic Disc Brakes | 700CX40mm All-Terrain Tires | Men & Women Road/Off-Road Bicycle (Gray, 53cm)
【Ultralight T800 Carbon Performance】: Featuring a premium T800 R21 carbon fiber frame and fork weighing just 10.4kg (22.92...
As an affiliate, we earn on qualifying purchases.
Essential Tools and Accessories for Effective Wheel Maintenance
Having the right tools and accessories is essential for maintaining your wheels effectively, ensuring they stay true, durable, and safe to ride. Key items include:
- Thru-axle adapters: These secure through-axle wheels in your truing stand, providing stability during wheel work, especially with disc brake setups. Using proper adapters ensures compatibility with various wheel standards and prevents damage during truing.
- Spoke wrenches: Precise adjustments help keep your wheel true and even tensioned.
- Calipers and tension meters: These tools measure and maintain proper spoke tension, ensuring durability and performance.
- High-pressure air pumps and airless paint sprayers are examples of tools that utilize high-pressure application for efficient results, similar to how proper tensioning ensures wheel integrity. Regular use of a truing stand with compatible thru-axle adapters makes wheel truing and tensioning straightforward, even with modern wide hub or Super Boost wheels. Proper tools prevent unnecessary disassembly and help you achieve professional results.
Tips for Accurate Wheel Truing and Common Troubleshooting

Before you start truing, make sure your hub and axle are in good shape, with no damage or bending. Use an indicator to measure wobble and roundness, making small adjustments for accuracy. Regularly check the integrity of your components to prevent persistent issues and guarantee your wheel stays true. Additionally, ensuring your filter replacements are up to date can help maintain optimal performance of your bike’s components. Being aware of relationships between different parts can also aid in troubleshooting and achieving a precise wheel alignment. Properly inspecting your suspension upgrades can prevent uneven wear and improve overall handling during the truing process. Understanding how indoor air quality can impact component longevity is also beneficial in maintaining your bike’s performance over time.
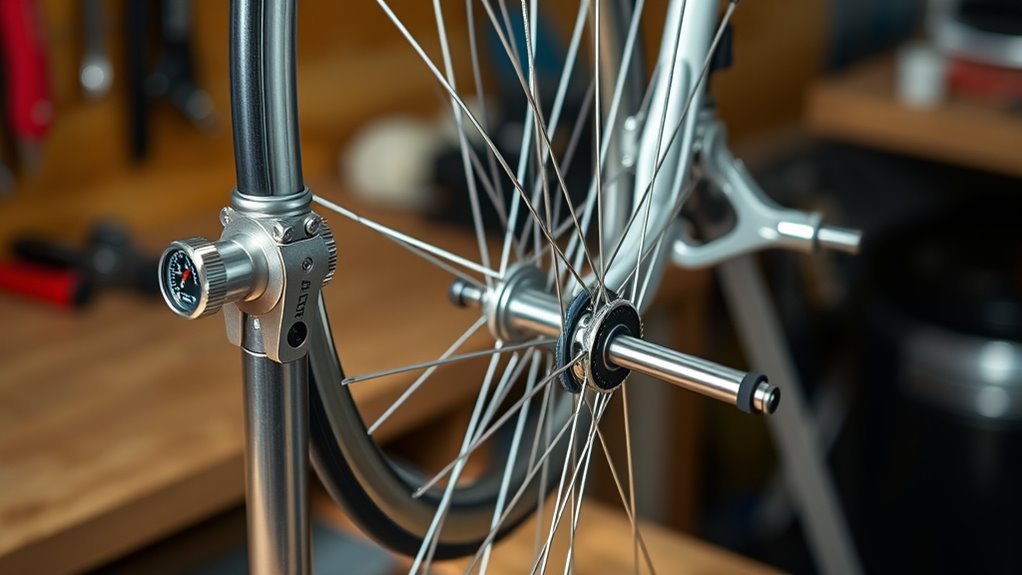
Ensuring Hub and Axle Integrity
Are you ensuring that your hub and axle are in top condition before you start truing your wheel? Proper hub integrity and axle alignment are vital for accurate results. To verify this:
- Check that the hub axle is straight, free of bends or cracks, using a magnifying glass or dial indicator.
- Tighten all hub cones and locknuts securely to eliminate play and prevent wheel wobble.
- Inspect the hub bearings for looseness, damage, or wear, replacing or servicing them if needed.
- Ensure that the bearing system is functioning correctly, as worn or damaged bearings can affect wheel stability and truing accuracy. Regular maintenance and inspection of bearing systems are essential for consistent performance.
- Confirm that the hub and axle are properly aligned and free of defects to maintain wheel stability under load. Additionally, verifying the axle straightness can help prevent issues during the truing process.
Fine-Tuning for True Results
To achieve accurate wheel truing, you need to make small, precise adjustments and double-check your work frequently. Use the indicator to identify high and low spots on the rim, then fine-tune spokes gradually to avoid overcorrecting. Loosen spokes on high spots and tighten those on low spots with small turns, checking tension often to prevent warping. When adjusting for roundness, focus on consistent, gentle turns to avoid new wobbling. Ensure the wheel is properly seated in the stand and the hub is straight before starting. If persistent wobbles occur, double-check hub alignment and stand fittings. Here’s a quick guide:
| Tip | Action | Focus Point |
|---|---|---|
| Verify fit | Ensure proper seating | Accurate adjustments |
| Use indicator | Spot high/low spots | Precise fine-tuning |
| Make small turns | Adjust spokes gradually | Prevent overcorrection |
| Check hub | Confirm alignment | Consistent true results |
Additionally, understanding wheel truing stands can help you achieve better precision and consistency during the process.
Selecting the Right Truing Stand to Match Your Skill Level and Needs
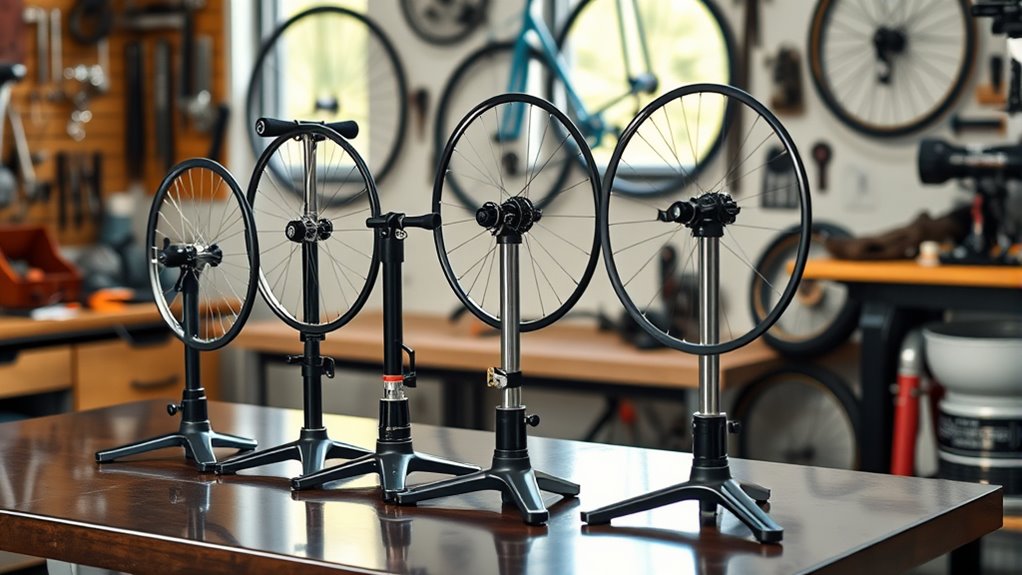
Choosing the right truing stand depends on your skill level and how you plan to use it. To make sure you pick the best fit, consider these key points:
- If you’re a beginner or only need a bike stand for occasional use, a simple, lightweight model with basic adjustments will do.
- For frequent or professional work, invest in a stand with precise indicators, adjustable gauges, and compatibility with various hub types.
- Make certain the stand supports your wheel size and axle standards, ensuring it fits your specific bike and makes wheel truing easier.
Matching your skill level with the stand’s features helps you avoid frustration and ensures accurate, efficient wheel work.
Frequently Asked Questions
Is a Wheel Truing Stand Worth It?
You might wonder if a wheel truing stand is worth it. If you care about precise, stable support for wheel adjustments, then yes, it’s a smart investment. It helps you achieve accurate truing, extends your wheel’s lifespan, and boosts your confidence in maintenance. While entry-level options are affordable for DIYers, professionals benefit from advanced features that save time and increase accuracy. Overall, it’s a valuable tool for better wheel performance.
How Much Does Rim Truing Cost?
Rim truing costs can be like a rollercoaster ride—ranging from $10 for simple tools to $150 or more for professional stands. If you’re just fixing minor bends, a basic truing gauge or tool might suffice. But for precise, consistent results, investing in a quality stand between $50 and $200 pays off. Higher-end options offer advanced features, making wheel maintenance smoother and more reliable for serious cyclists.
How to Calibrate a Truing Stand?
To calibrate your truing stand, first place it on a flat, stable surface and assemble it correctly. Use a dial indicator or a straight reference to check alignment of the uprights and measurement arms. Adjust the calibration screws or knobs until the readings are zeroed or aligned with the reference. Confirm accuracy by measuring a known straight object or a previously trued wheel, then recalibrate regularly for consistent results.
What Is the Difference Between Lateral and Radial Truing?
Lateral truing fixes side-to-side wobble by adjusting individual spokes clockwise or counterclockwise, making the rim run straight. Radial truing, on the other hand, corrects up-and-down hops by evenly tensioning spokes to make the rim round and smooth. Both are essential for a safe, smooth ride, ensuring your wheel is properly aligned and balanced. You’ll need to perform both to achieve a true, reliable wheel.
Conclusion
As you stand before your truing stand, the wheels in your mind spin with possibilities. Will you master the delicate dance of tension and alignment? With the right stand, tools, and a steady hand, you’re on the brink of transforming your bike’s performance. The next turn of the wheel could reveal secrets only true mechanics uncover. Are you ready to unfasten the full potential of your ride? The journey to perfect wheels starts now.