Connect with us

Bike

Where Is The Best Place To Sell My Bicycle

Published

on

An image showcasing a bustling marketplace with a diverse array of bicycle enthusiasts of all ages, inspecting, haggling, and exchanging bikes

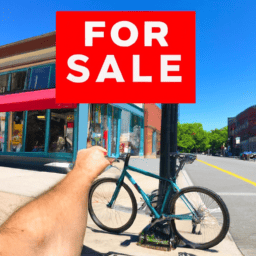
Are you thinking about selling your bike but don’t know where to begin? Look no further! In this article, I will guide you through the top places to sell your cherished two-wheeler.

From online marketplace platforms to local bicycle shops, bike swap events to social media groups, we’ll explore a range of options to help you find the perfect buyer.

So, whether you’re a seasoned cyclist or just looking to upgrade, let’s dive in and discover the ideal place to sell your bicycle!

Key Takeaways

  • Online marketplace platforms like eBay, Craigslist, Facebook Marketplace, and local buy/sell groups offer a wide reach and potential buyers from all over. They provide detailed listings with pictures, specifications, and pricing information, as well as built-in messaging systems for communication.
  • Local bicycle shops provide the convenience and assistance in the selling process, with knowledgeable staff for bike assessment. They may also offer bike repair services and trade-in programs for credit towards a new bike. Supporting local cycling shops also promotes the local cycling community.
  • Bike swap events, flea markets, and community events are great opportunities to connect with fellow cyclists and potential buyers. These events attract a targeted audience of knowledgeable and passionate buyers, often including cycling clubs and enthusiasts. Some events may also offer bike repair workshops to showcase the quality of the bikes.
  • Social media groups, forums, and classified ads provide a wide reach and connection with potential buyers. Utilizing social media influencers and creating a personal website can increase visibility. Engaging with an active community of bike enthusiasts and placing traditional classified ads in local newspapers can also be effective strategies.

Online Marketplace Platforms

The best place to sell my bicycle online is on marketplace platforms. These online auction platforms provide a wide reach and attract potential buyers from all over. Platforms like eBay and Craigslist have established themselves as reliable and popular choices for selling used items, including bicycles. Utilizing social media marketplace strategies, such as posting on Facebook Marketplace or joining local buy/sell groups, can also increase visibility and attract interested buyers. By using these platforms, I can easily create a detailed listing with pictures, specifications, and pricing information. Additionally, these platforms often have built-in messaging systems that allow for easy communication between buyers and sellers.

Advertisement

Now, let’s explore another option for selling my bicycle: local bicycle shops.

Local Bicycle Shops

Local bicycle shops are a good option for selling your bike. They offer several benefits that can make the process easier and more convenient. Here are some reasons why you should consider selling your bike at a local shop:

  • Expertise: Local bike shops have knowledgeable staff who can provide accurate assessments of your bike’s value and help you set a fair price.

  • Convenience: You can simply bring your bike to the shop and let them handle the selling process for you.

  • Local bike repair services: If your bike needs any repairs or maintenance before selling, the shop can take care of it.

  • Bike trade-in programs: Some shops offer trade-in programs where you can exchange your old bike for credit towards a new one.

Selling your bike at a local shop not only ensures a hassle-free experience but also supports your local cycling community.

Speaking of community, another option to consider is participating in bike swap events and flea markets.

Bike Swap Events and Flea Markets

Advertisement

When it comes to selling my bicycle, I’ve found that bike swap events and flea markets can be great options. These local community events are a perfect opportunity to connect with fellow cyclists and potential buyers.

To make sure I don’t miss out on any upcoming events, I always check event listings in my area. It’s a convenient way to find out where and when these events are happening so I can plan accordingly.

Local community events

One great place to sell my bicycle is at a community event. These events often attract a diverse crowd of people who are interested in bikes and cycling.

At these events, you can find bike repair workshops where enthusiasts gather to learn and share their knowledge about bike maintenance and repairs. It’s a great opportunity to showcase the quality and condition of your bike to potential buyers.

Advertisement

Additionally, many cycling clubs often participate in these events, which means there will be enthusiasts who are actively looking for new bikes to add to their collection. So, by selling your bicycle at a community event, you can reach a targeted audience of bike lovers who are knowledgeable and passionate about cycling.

After exploring the local community events, the next step is to check event listings to find specific events that cater to bike enthusiasts.

Check event listings

If you want to find specific events that cater to bike enthusiasts, you should check event listings. This is a great way to discover local events such as bike races, bike swaps, or group rides that are happening in your area.

Event listings can be found online, on community bulletin boards, or in local newspapers. By checking these listings regularly, you can stay updated on upcoming events and plan accordingly.

Additionally, exploring online classifieds can also be helpful in finding events related to bicycles. Many people advertise bike-related events on these platforms, making it easier for you to find events that interest you.

Advertisement

By checking event listings and online classifieds, you can ensure that you don’t miss out on any exciting bike-related events happening near you.

Moving forward, another valuable resource for finding potential buyers for your bicycle are social media groups and forums.

Social Media Groups and Forums

Selling my bicycle on social media groups and forums is the best option. These platforms provide a wide reach and allow me to connect with potential buyers who are actively interested in purchasing bicycles. Utilizing social media influencers can greatly enhance the visibility of my listing, as their followers trust their recommendations. Additionally, creating a personal website dedicated to selling bicycles can give me a professional edge and provide a centralized location for interested buyers to find information about the bike I am selling.

To emphasize the benefits of selling on social media groups and forums, consider the following table:

Advantages Disadvantages
Wide reach of potential buyers Dealing with low-ball offers
Active community of bike enthusiasts Negotiating prices
Ability to showcase the bike’s features with photos and videos Potential for scammers

Moving on to the next section about classified ads in local newspapers…

Advertisement

Classified Ads in Local Newspapers

Classified ads in local newspapers can provide a traditional yet effective method for reaching potential buyers for my bicycle. Placing a classified ad in a local newspaper allows me to target a specific audience within my community who may be interested in purchasing a bicycle. These ads often reach a wide range of individuals, including those who may not be actively searching online or browsing social media groups. By highlighting the key features and benefits of my bicycle, I can grab the attention of potential buyers and increase the chances of a successful sale.

However, it’s important to keep in mind that classified ads in local newspapers may have a limited reach compared to online platforms.

Transitioning to the next section, bicycle co-ops and nonprofit organizations can also be a great avenue for selling my bicycle.

Bicycle Co-ops and Nonprofit Organizations

When considering what to do with your bicycle, one option is to donate it to a nonprofit organization. Not only will you be helping a cause, but you’ll also be giving your bike a new life and purpose.

Additionally, some organizations offer consignment services, allowing you to sell your bike while supporting a good cause. This can be a great way to ensure that your bike goes to someone who’ll truly appreciate it, while also benefiting a nonprofit organization.

Advertisement

Donate your bike for a cause

Consider donating your bike to a cause and make a positive impact on someone’s life. Donating your bicycle for charity is a great way to give back to the community and help those in need. By donating, you can support organizations that organize bike drives to provide transportation for those who cannot afford it.

Here are five reasons why donating your bike is a worthwhile option:

  • Help someone in need by providing them with a means of transportation.
  • Reduce waste and promote sustainability by giving your bike a second life.
  • Support local nonprofit organizations that strive to improve the community.
  • Make a difference in the lives of disadvantaged individuals who may rely on bikes for daily transportation.
  • Feel a sense of fulfillment and joy knowing that your bike is being used for a good cause.

Some organizations offer consignment services, providing another option for selling your bike.

Some organizations offer consignment services

Some organizations also offer consignment services, giving you another option to sell your bike. Consignment services work by allowing you to leave your bike with the organization, who will then sell it on your behalf. This can be a great option if you don’t have the time or expertise to sell your bike yourself.

One of the benefits of consignment services is that the organization will handle all the marketing and selling for you. They will take professional photos of your bike, write a compelling description, and handle all the inquiries from potential buyers. Additionally, consignment services often have a wide network of potential buyers, increasing the chances of selling your bike quickly.

If you’re interested in exploring consignment services, keep in mind that they usually take a commission from the final sale price.

Advertisement

Now, let’s talk about another option: online auctions.

Online Auctions

When it comes to selling your bicycle online, there are a few key points to consider.

Bidding platforms like Proxibid offer a wide range of options for buyers and sellers, making it a popular choice for those looking to sell their bikes.

Additionally, specialized bicycle auction websites cater specifically to the cycling community, providing a targeted audience for your listing.

These platforms provide a convenient and effective way to reach potential buyers and maximize the value of your bicycle.

Advertisement

Bidding platforms like Proxibid

Bidding platforms like Proxibid are a great option to sell my bicycle. I have found that these platforms offer a unique and exciting live bidding experience for both buyers and sellers. It allows me to showcase my bicycle to a wide audience of potential buyers who are actively engaged in the bidding process.

One of the advantages of using bidding platforms is the transparency in seller fees. Unlike other online auction sites, Proxibid clearly outlines the fees associated with selling my bicycle, ensuring that there are no hidden surprises. This allows me to accurately calculate my potential earnings from the sale.

Furthermore, bidding platforms like Proxibid provide a sense of security and trust for both buyers and sellers. The platform has a reputation for hosting reputable sellers and buyers, making it a reliable place to sell my bicycle.

Transitioning into the subsequent section about ‘specialized bicycle auction websites’, there are also other options available for selling my bicycle.

Specialized bicycle auction websites

If you’re looking for a more targeted audience, specialized bicycle auction websites offer a focused platform to showcase your bike. These websites cater specifically to bicycle enthusiasts and collectors, ensuring that your bike will be seen by people who appreciate its value and quality. Specialized bicycle forums are a great place to start, as they attract individuals with a deep knowledge and passion for cycling. Additionally, high-end bicycle consignment platforms provide a way to sell your bike at a premium price, as they specialize in connecting sellers with buyers who are willing to pay top dollar for high-quality bicycles. By utilizing these specialized platforms, you can increase your chances of finding the right buyer for your bike.

Advertisement

Transitioning into the next section, another effective way to sell your bike is through word of mouth.

Word of Mouth

You should ask your friends and family for recommendations on the best place to sell your bicycle. Referrals and recommendations are a powerful way to find trustworthy options.

When it comes to selling your bicycle, word of mouth can be incredibly helpful in finding the right platform or buyer. By reaching out to those you trust, you can gather valuable insights and experiences from people who have already navigated the process. Building a reputation through word of mouth is essential, as it ensures that you are connecting with reliable buyers who have a genuine interest in purchasing your bicycle.

Once you have gathered these recommendations, you can explore local online classifieds to expand your reach and find potential buyers beyond your immediate circle.

Local Online Classifieds

Consider exploring local online classifieds to expand your reach and connect with potential buyers in your area. Online classifieds are a convenient and effective way to sell your bicycle quickly. Through these platforms, you can showcase your bike’s features, provide detailed descriptions, and upload high-quality photos to attract interested buyers. Additionally, online classifieds allow you to communicate directly with potential buyers, negotiate prices, and arrange meetups. To further enhance your selling experience, you can also consider reaching out to local bicycle co-ops. These community-based organizations often have a strong network of cyclists who may be interested in purchasing your bike. By leveraging both online classifieds and bicycle co-ops, you can increase your chances of finding the right buyer for your bicycle. Moving forward, let’s explore another option: bicycle rental companies.

Advertisement

Bicycle Rental Companies

One option for expanding your reach and connecting with potential buyers in your area is to check out local bicycle rental companies. These companies often have a customer base that is interested in cycling and may be looking to purchase a bike of their own. By reaching out to these companies, you can inquire about the possibility of advertising your bicycle for sale to their customers. This can be a great way to target individuals who are already interested in cycling and may be in the market for a new bike.

In addition to exploring local online classifieds, reaching out to bicycle rental companies can help you maximize your chances of finding the right buyer for your bicycle.

Transitioning into the next section, another option to consider is utilizing university or college bulletin boards.

University or College Bulletin Boards

When it comes to selling a bicycle, one potential avenue to explore is university or college bulletin boards. These bulletin boards are a popular place for students to post flyers or ads for various items, including bicycles.

By posting a flyer or ad on campus, you can reach a wide audience of potential buyers who are already on the lookout for items like bicycles.

Advertisement

Additionally, it may be worth checking if there are any specific cycling groups or clubs at the university or college. They may have their own bulletin boards or online forums where you can advertise your bicycle for sale.

Post flyers or ads on campus

You should definitely try posting flyers or ads on campus to sell your bicycle. This method can be highly effective in reaching a targeted audience of potential buyers who are already in the market for a bike.

Post flyers in high-traffic areas like bulletin boards, student centers, and dorms. Be sure to include all the necessary details about your bike, such as its make, model, and price.

Additionally, consider using social media advertising to extend your reach beyond the campus community. Platforms like Facebook, Instagram, and Twitter allow you to target specific demographics and geographic areas. By utilizing these online platforms, you can potentially reach a larger pool of interested buyers.

Once you’ve posted your flyers and ads, don’t forget to check if there are any specific cycling groups on campus that might be interested in purchasing your bicycle. This can further increase your chances of finding a buyer quickly.

Advertisement

Check if there are any specific cycling groups

After considering the option of posting flyers or ads on campus, I realized that there might be even more effective ways to sell my bicycle. One idea that came to mind was to check if there are any specific cycling groups in my area. Joining these clubs not only allows me to connect with fellow cyclists, but it also provides a platform to promote my bike for sale. By participating in bike races organized by these groups, I can showcase the quality and performance of my bicycle to potential buyers. To evoke emotion in the audience, I have created a table below that highlights the benefits of joining cycling clubs and participating in bike races.

Benefits of Joining Cycling Clubs Benefits of Participating in Bike Races
Networking with fellow cyclists Improving cycling skills
Access to potential buyers Gaining exposure to a larger audience
Sharing knowledge and experiences Building a reputation as a serious cyclist

Now, let’s explore another effective way to sell my bicycle – social media marketplaces.

Social Media Marketplaces

When it comes to selling my bicycle, I’ve found that Facebook groups dedicated to buying and selling are a great option. These groups provide a platform for connecting with local buyers who are specifically interested in purchasing bikes.

Additionally, I’ve also come across Instagram accounts that are solely focused on selling bikes. This can be another effective way to reach potential buyers.

Facebook groups dedicated to buying and selling

For selling your bicycle, try checking out Facebook groups specifically for buying and selling. These groups provide a convenient platform where you can connect with local buyers who are actively searching for bikes. Here are three reasons why Facebook groups can be a great option when it comes to selling your bicycle:

Advertisement

1) Wide Reach: Facebook has a vast user base, and these buying and selling groups attract a large number of potential buyers. This increases the chances of finding the right buyer for your bicycle.

2) Active Community: These groups are dedicated to buying and selling, meaning you’ll find a community of people who are actively looking for bikes. This increases the likelihood of receiving inquiries and offers quickly.

3) Safety and Trust: Unlike Craigslist and other online platforms, Facebook groups have a more secure environment. You can view the profiles of potential buyers, check their credibility, and even interact with them before finalizing the sale.

When it comes to selling bikes, Facebook groups are just the beginning. Another effective avenue is through Instagram accounts dedicated to selling bikes.

Instagram accounts for selling bikes

Instagram accounts dedicated to selling bikes provide an additional platform where cyclists can connect with potential buyers. With the rise of social media influencers, many bike enthusiasts have turned to Instagram to market and sell their bicycles. These influencers, with their large following and engaged audience, can effectively promote and showcase bikes for sale. They often use strategic marketing strategies, such as high-quality photography, captivating captions, and engaging stories to attract potential buyers.

Advertisement

By leveraging their influence and reach, Instagram accounts dedicated to selling bikes can effectively target and reach a specific audience of cycling enthusiasts. However, while Instagram offers a convenient and visually appealing platform for selling bikes, it is important to note that it may not offer the same level of expertise and customer service as specialty bicycle shops. Nonetheless, it can be a valuable tool in the overall process of selling a bicycle.

Specialty Bicycle Shops

When it comes to finding specialty bicycle shops, one key point to consider is whether they specialize in vintage or unique bikes. These shops often have a wide selection of bikes that are not commonly found in regular bike stores.

Another important aspect to check is if these specialty shops buy used bikes. This can be a great option if you’re looking to sell your old bike and upgrade to something new and unique.

Shops that specialize in vintage or unique bikes

If you’re looking to sell your vintage or unique bike, the best place would be a specialized bike shop. These shops have a deep understanding and appreciation for vintage bike restoration and unique bike customization. They have the knowledge and expertise to accurately assess the value of your bike and attract potential buyers who share your passion for these one-of-a-kind rides.

Here are a few reasons why specialized bike shops are the ideal place to sell your vintage or unique bike:

Advertisement
  • Expertise: Specialized bike shops have a team of experts who understand the intricacies of vintage bike restoration and unique bike customization.

  • Targeted Audience: These shops attract a specific audience interested in vintage or unique bikes, increasing your chances of finding the right buyer.

  • Valuation: Specialized bike shops can accurately assess the value of your bike, ensuring you get a fair price.

  • Networking: These shops have connections within the biking community, allowing them to promote and market your bike effectively.

Before heading to a specialized bike shop, it’s important to check if they buy used bikes, ensuring a smooth selling process.

Check if they buy used bikes

To ensure a smooth selling process, make sure to check if the specialized bike shop buys used bikes. This is crucial because not all shops that specialize in vintage or unique bikes also purchase used ones. It’s important to know if they are interested in buying your bike before making the trip.

Additionally, understanding the current market conditions is essential. If it’s a buyer’s market, the shop may be more hesitant to offer a higher price. However, if it’s a seller’s market, you might have more leverage in negotiating prices.

Once you have explored the option of selling your bike at a specialized shop, it’s time to consider online bicycle community platforms, where you can reach a wider audience and potentially get a better deal.

Online Bicycle Community Platforms

The best place to sell my bicycle online would be through an online bicycle community platform. These platforms, such as online bicycle forums and online bicycle communities, provide a dedicated space where cycling enthusiasts gather to discuss, buy, and sell bikes. They offer a targeted audience of potential buyers who are specifically interested in bicycles, increasing the chances of a successful sale.

Advertisement

These platforms often have categories or sections specifically for buying and selling used bikes, making it easy to navigate and find the right audience for your bicycle. Additionally, these communities often have active members who are knowledgeable about bikes and can provide valuable advice or assistance during the selling process.

Moving on to local buy and sell apps, they offer a different approach to selling your bicycle locally.

Local Buy and Sell Apps

When it comes to local buy and sell apps, four popular options are Letgo, OfferUp, VarageSale, and Shpock.

Letgo is known for its user-friendly interface and wide range of categories.

OfferUp offers a secure platform for buying and selling items, with features like ratings and reviews.

Advertisement

VarageSale focuses on creating local communities and fostering a safe buying and selling experience.

Shpock, on the other hand, stands out for its unique approach of combining online and offline shopping.

Overall, these apps provide convenient platforms for individuals to buy and sell items locally.

Letgo

Selling my bicycle on Letgo would be a great option. Letgo is a popular local buy and sell app that offers a convenient platform for buying and selling various items, including bicycles. When selling on Letgo, it is important to take safety precautions.

Always meet in a public place, preferably during daylight hours, and bring a friend along for added security. Additionally, it is crucial to negotiate prices effectively to get the best deal. Start by researching the market value of your bicycle to have a better idea of its worth. Be confident but also willing to compromise to reach a fair price.

Advertisement

With Letgo, you can easily connect with potential buyers and find the perfect match for your bicycle.

Transitioning to the next section, another great option for selling your bicycle is OfferUp.

OfferUp

OfferUp provides a convenient platform for connecting with potential buyers and finding a new home for your bicycle. With its user-friendly interface and wide reach, it’s an excellent option for selling your bike. One of the benefits of using OfferUp is its integration with various online payment methods, making transactions smooth and secure. Additionally, OfferUp offers shipping options, allowing you to sell your bicycle to buyers outside your local area. This expands your potential buyer pool and increases the chances of finding the right buyer for your bike.

To further explore different selling options, let’s move on to VarageSale, another popular platform for selling items locally.

VarageSale

If you’re looking for another option to connect with local buyers and find a new home for your bicycle, VarageSale is a great platform to consider. It is widely regarded as one of the best online marketplaces for bicycles, offering a user-friendly interface and a large community of potential buyers.

Advertisement

To sell your bicycle on VarageSale, simply create an account and post a detailed listing with clear photos and an accurate description. Be sure to include relevant information such as the brand, model, and condition of the bike. VarageSale also allows you to communicate directly with interested buyers, making it easy to negotiate a fair price and arrange for pickup or delivery.

With its reputation for reliability and a wide range of cycling enthusiasts, VarageSale is an excellent choice for selling your bicycle.

Now, let’s move on to the next platform, ‘shpock,’ where you can explore more selling opportunities.

Shpock

When you’re ready to connect with local buyers and find a new home for your bicycle, Shpock offers a convenient platform for listing and selling your item. Shpock is a mobile marketplace that allows you to sell your bicycle quickly and easily.

One of the advantages of using Shpock is its user-friendly interface, making it simple to create a listing and upload photos of your bicycle. Additionally, Shpock connects you with local buyers, which means you can arrange for a quick and easy pickup or delivery.

Advertisement

However, there are some disadvantages to consider. As a mobile app, Shpock may not have as large of a user base as other online marketplaces. Additionally, because it is a local marketplace, you may have limited reach and potential buyers.

Overall, Shpock can be a great option for selling your bicycle, especially if you prioritize convenience and local connections.

Frequently Asked Questions

What are some tips for safely selling a bicycle online?

When selling a bicycle online, it’s important to take safety precautions. Always meet in a public place, verify the buyer’s identity, and accept cash or secure payment methods.

How can I determine the value of my used bicycle before selling it?

To determine the value of your used bicycle, research sources like online marketplaces and bicycle pricing guides. According to BicycleBlueBook, the average depreciation rate for a used bicycle is around 20-30% per year.

Are there any specific requirements or guidelines for participating in bike swap events and flea markets?

To participate effectively in bike swap events and flea markets, follow these guidelines: research the event’s requirements, prepare your bike for sale, set a competitive price, bring necessary tools and equipment, and engage with potential buyers.

Advertisement

How can I effectively promote my bicycle for sale on social media groups and forums?

To effectively promote my bicycle for sale on social media groups and forums, I can create eye-catching posts with clear photos and detailed descriptions. By doing so, I can reach a wider audience and increase the chances of finding a buyer.

Are there any legal considerations or regulations when selling a bicycle through classified ads in local newspapers?

When selling a bicycle through classified ads in local newspapers, it is important to be aware of any legal considerations and regulations. These may vary depending on your location, so it’s crucial to research and comply with the necessary guidelines.

Conclusion

Overall, finding the perfect place to sell my bicycle can be a bit of a challenge. However, I’ve discovered numerous options that offer great opportunities to find the right buyer.

From online marketplace platforms to local buy and sell apps, there are plenty of avenues to explore. Whether you prefer the convenience of online platforms or the personalized service of local bicycle shops, there’s a solution out there for everyone.

So don’t fret, with a little research and patience, you’ll soon find the ideal place to sell your beloved bicycle.

Advertisement

Zane rides her bike because she loves it, but also because she is mindful of the need to leave a better world for her children.

Continue Reading
Advertisement

Bike

How To Motorize A Bicycle

Published

on

By

An image showcasing a bicycle with its frame modified to include a powerful electric motor, complete with a sleek battery pack mounted near the rear wheel and a set of futuristic LED headlights

Imagine elevating your cycling experience by transforming your ordinary bicycle into a powerful machine that effortlessly propels you forward.

In this article, I will guide you through the detailed process of motorizing your bicycle, step by step. From choosing the right motor kit to ensuring safety measures, you will learn everything you need to know to create your very own motorized bicycle.

Get ready to embark on an exciting journey of innovation and adventure.

Key Takeaways

  • Familiarize yourself with local laws and regulations
  • Understand the required equipment for riding
  • Learn where motorized bicycles are allowed
  • Avoid legal issues by following regulations

Choose the Right Motor Kit for Your Bicycle

You should choose the right motor kit for your bicycle. Choosing the right motor kit can greatly enhance your riding experience and make your commute more efficient.

Advertisement

When considering motor power, factors such as terrain, weight, and desired speed need to be taken into account. For hilly terrains or heavier bicycles, a higher motor power will be required to ensure smooth operation and adequate speed. On the other hand, if you plan to use your motorized bicycle mainly on flat surfaces, a lower motor power may suffice.

Additionally, when it comes to battery capacity, it is important to explore the different options available and choose the right capacity based on your riding needs and distance requirements. A larger battery capacity will allow for longer rides without needing to recharge.

Now that we have discussed choosing the right motor kit, let’s move on to gathering the necessary tools and materials for the installation process.

Gather the Necessary Tools and Materials

To get started, it’s important to gather all the tools and materials needed for the project. Here are the essential items you’ll need:

  • Wrench set: You’ll need a set of wrenches to loosen and tighten bolts on your bicycle.
  • Screwdriver set: A variety of screwdrivers will be necessary for removing and installing parts.
  • Wire cutter/stripper: This tool will come in handy when dealing with electrical connections.
  • Allen wrench set: Many motor kits require the use of Allen wrenches for assembly.
  • Battery and charger: Make sure to choose a battery that is compatible with your motor kit.
  • Motor kit: This is the heart of your motorization project. Choose a kit that suits your needs and budget.

Choosing the right motor kit is crucial to ensure a smooth installation process. Additionally, be prepared to troubleshoot common motorization issues that may arise during the project.

Once you have gathered all the necessary tools and materials, you can proceed to prepare your bicycle for motorization by following the next steps.

Advertisement

Prepare Your Bicycle for Motorization

Before starting, make sure that your bike is in good condition and ready for the motor installation. Inspect the frame, wheels, and brakes for any signs of damage or wear. Check the tire pressure and ensure that they’re properly inflated.

Remove any accessories or attachments that may interfere with the motor installation process.

Next, determine the type of bike modification you want to do, whether it’s a gas-powered engine or an electric bike conversion. This will dictate the specific steps and materials needed for the motorization process.

Advertisement

Additionally, make sure you have all the necessary tools and equipment on hand.

Once your bike is prepared, you can move on to the next section and install the motor kit onto your bicycle, transforming it into a motorized ride.

Install the Motor Kit onto Your Bicycle

Once the motor kit is installed onto your bike, it will be transformed into a motorized ride. To install the electric motor, begin by removing the rear wheel from the bicycle frame. Next, attach the motor bracket onto the frame using the provided screws and secure it tightly. Place the motor onto the bracket, aligning the mounting holes, and fasten it securely. Connect the motor’s wiring to the battery and controller according to the provided instructions, ensuring proper connections. Once everything is connected, double-check all the connections and tighten any loose screws. To troubleshoot motor issues, refer to the troubleshooting section in the motor kit manual. Now, we can move on to the next step and connect the motor to the bicycle’s drive system, allowing it to propel the bike forward effortlessly.

Connect the Motor to the Bicycle’s Drive System

Advertisement

Now you can connect the motor to your bike’s drive system and start enjoying effortless propulsion.

To connect the motor to the bicycle’s drivetrain, follow these steps:

  • First, locate the motor mounting bracket on your bike frame. Ensure it is securely attached.
  • Next, align the motor’s sprocket with the bike’s chainring. Use a chain tool to remove the necessary links from the bike’s chain if needed.
  • Connect the motor’s sprocket to the bike’s chainring using a chain connector.
  • Double-check the alignment and tension of the chain. Ensure it is neither too loose nor too tight.
  • Once connected, test the motor by pedaling the bike. The motor should engage and provide assistance.

If you encounter any issues during this process, such as chain slipping or misalignment, consult the motor kit’s troubleshooting guide for assistance.

With the motor now connected to the bicycle’s drive system, we can move on to installing the throttle and control mechanisms.

Install the Throttle and Control Mechanisms

To begin the installation process, attach the throttle and control mechanisms to your bike’s handlebars. The throttle allows you to control the speed of the motor, while the control mechanisms enable you to activate the motor and make necessary adjustments. Proper installation of these components is crucial for a smooth and efficient motorization system.

Below is a table that illustrates the installation steps for the throttle and control mechanisms:

Advertisement
Step Procedure
1 Position the throttle grip on the handlebars and secure it using the provided clamp.
2 Connect the throttle cable to the motor. Ensure a secure and tight connection.
3 Adjust the throttle sensitivity according to your preference using the provided throttle adjustment feature.

Once the throttle and control mechanisms are securely installed, you can proceed to test and adjust the motorization system. This will ensure that everything is functioning properly and any troubleshooting issues can be resolved before hitting the road.

Transitioning into the next section, it is important to thoroughly test and adjust the motorization system to guarantee optimal performance.

Test and Adjust the Motorization System

After securely installing the throttle and control mechanisms, it is essential to thoroughly test and adjust the motorization system for optimal performance. Here are the steps to follow:

  1. Testing the Motor: Start by engaging the motor and observing its response. Ensure it starts smoothly and accelerates without any hitches. Listen for any unusual noises or vibrations.

  2. Adjusting Motor Performance: Fine-tune the motor’s power output by adjusting the throttle. Increase or decrease the throttle sensitivity to achieve the desired speed and responsiveness.

  3. Troubleshooting Common Motorization Issues: Monitor the motor for overheating or excessive battery drain. Inspect all connections for loose wires or faulty components. Resolve any issues promptly to prevent further damage.

  4. Test Ride and Fine-tuning: Take the motorized bicycle for a test ride, paying attention to its overall performance and handling. Make any necessary adjustments to the motor or control mechanisms to improve the riding experience.

Now that the motorization system has been tested and adjusted, it is crucial to ensure safety measures are in place for worry-free riding.

Ensure Safety Measures are in Place

Make sure you have all the necessary safety measures in place to ensure a worry-free riding experience. The importance of wearing protective gear cannot be emphasized enough when motorizing a bicycle. A helmet, knee pads, and elbow pads are essential to protect yourself from potential accidents and injuries.

Advertisement

Additionally, it is crucial to understand and abide by local laws and regulations regarding motorized bicycles. Different jurisdictions may have specific rules about speed limits, required equipment, and where motorized bicycles are allowed to be ridden. Familiarize yourself with these regulations to avoid any legal issues.

By prioritizing safety and following the rules, you can enjoy the benefits of a motorized bicycle without compromising your well-being or breaking the law.

Now, let’s move on to learning how to operate and maintain your motorized bicycle smoothly.

Learn How to Operate and Maintain Your Motorized Bicycle

Learning how to operate and maintain your motorized bike is essential for a smooth and hassle-free riding experience. To ensure that your motorized bicycle functions optimally, here are three key tips:

  1. Troubleshooting common issues with motorized bicycles: Familiarize yourself with common problems such as engine starting issues, fuel system malfunctions, or electrical failures. This knowledge will help you diagnose and fix problems efficiently.

  2. Tips for increasing the lifespan of your motorized bicycle: Regularly check and change the engine oil, clean the air filter, and inspect the spark plug. Additionally, avoid overloading the bike and adhere to the manufacturer’s recommended maintenance schedule.

  3. Properly maintaining the bike’s components: Regularly lubricate the chain, inspect the brakes, and ensure the tires are inflated to the correct pressure. These simple maintenance tasks will ensure your motorized bicycle performs at its best.

By following these guidelines, you can enjoy the benefits of your motorized bicycle without any interruptions.

Advertisement

Enjoy the Benefits of Your Motorized Bicycle

To fully experience the advantages of your motorized bike, you’ll love the increased speed and convenience it brings to your daily commute.

Riding a motorized bicycle in your daily commute has numerous benefits. Firstly, it allows you to travel at a faster pace, reducing travel time and making your commute more efficient. With the added power of the motor, you can easily navigate through traffic and reach your destination faster.

Additionally, using a motorized bicycle is a sustainable and eco-friendly option, reducing your carbon footprint and contributing to a cleaner environment.

To ensure the longevity of your motorized bicycle, it is essential to follow best practices for maintenance. Regularly inspect and clean the bike, check tire pressure, and lubricate the chain. Proper maintenance will not only enhance the performance but also extend the lifespan of your motorized bicycle, allowing you to enjoy its benefits for years to come.

Frequently Asked Questions

How much does a motor kit for a bicycle typically cost?

Motor kits for bicycles typically range in cost from around $200 to $1500, depending on the type of motor. There are various types available, including electric hub motors and mid-drive motors.

Advertisement

Are there any legal requirements or restrictions for using a motorized bicycle?

Sure, let’s dive into the legal requirements and restrictions for using a motorized bicycle. In terms of registration, it depends on your location, but some places require you to register your motorized bicycle. As for speed limits, again, it varies, but typically motorized bicycles are subject to the same speed limits as regular bicycles.

Can any type of bicycle be motorized, or are there specific requirements?

Any type of bicycle can be motorized, but there are specific requirements. Motorizing mountain bikes involves adding a motor and battery to the frame, while converting road bikes requires installing a motor kit onto the existing bike.

What kind of maintenance is required for a motorized bicycle?

Maintenance tips for a motorized bicycle include regular oil changes, checking spark plugs, and inspecting the chain for wear. Troubleshooting common issues such as starting problems or strange noises may require adjusting the carburetor or cleaning the fuel system.

Are there any safety concerns or precautions to be aware of when operating a motorized bicycle?

Motorized bicycle safety concerns are critical to understand. It is essential to prioritize safety precautions, such as wearing a helmet, using reflectors, maintaining brakes, and following traffic rules, to ensure a safe and enjoyable ride.

Conclusion

In conclusion, as I reflect on my journey of motorizing my bicycle, I can’t help but feel a sense of liberation and excitement.

Advertisement

Like a phoenix rising from the ashes, my bicycle has transformed into a powerful steed, ready to conquer any path ahead.

The precision and attention to detail required in this process have not only enhanced my technical skills but also my appreciation for the beauty of mechanics.

Now, as I ride into the sunset, I am filled with a sense of pride and joy, knowing that I have unlocked a new world of possibilities with my motorized companion.

Continue Reading

Bike

How To Change Gears On A Gravel Bike

Published

on

By

An image capturing a close-up of a rider's gloved hand gripping a gravel bike's gear lever, fingers delicately adjusting it

Prepare yourself to enhance your gravel biking abilities with this in-depth guide on mastering gear changes like a professional.

Mastering the art of gear shifting is crucial for any cyclist, especially when tackling unpredictable terrains.

In this article, I will walk you through the ins and outs of understanding your bike’s gear system, perfecting your technique, troubleshooting common issues, and ultimately enjoying a smooth ride with perfectly timed gear changes.

So grab your helmet and let’s dive in!

Key Takeaways

  • Gravel bikes have a wide range of gears for different terrains.
  • Proper gear shifting technique ensures a smooth and efficient ride.
  • Familiarize yourself with the gear levers and their correct operation.
  • Choose the correct gear ratio based on the anticipated terrain changes.

Understanding the Gear System on a Gravel Bike

Advertisement

To change gears on your gravel bike, you’ll need to understand the gear system. The gear selection on a gravel bike is crucial for optimizing performance and ensuring a smooth ride on various terrains.

Gravel bikes typically come with a wide range of gears to accommodate different riding conditions, including steep climbs and fast descents.

One important aspect of the gear system is the gear ratios. Gear ratios determine how much power is transferred from your legs to the wheels. Higher gear ratios provide more power but require more effort, making them suitable for flat or downhill sections. Lower gear ratios, on the other hand, offer less power but are easier to pedal, making them ideal for climbing steep hills or navigating rough terrain.

Understanding how to select the right gear ratio for each situation is essential in maximizing efficiency and preventing unnecessary strain on your body. By choosing an appropriate gear ratio, you can maintain a consistent cadence while adapting to changes in terrain without exerting excessive force.

Proper gear shifting technique plays a vital role in achieving seamless transitions between gears without interruption or damage to the drivetrain components.

Advertisement

Importance of Proper Gear Shifting Technique

Remember, it’s crucial to use the correct technique when shifting gears on your gravel bike. Proper gear shifting technique not only ensures a smoother and more efficient ride but also prevents unnecessary wear and tear on your drivetrain. By following these guidelines, you can optimize your gear shifting experience and reap the benefits of efficient gear shifting.

One key aspect of proper gear shifting technique is timing. It’s important to anticipate shifts in terrain or cadence and initiate gear changes before they become necessary. This allows for a seamless transition between gears, minimizing any disruption to your pedaling rhythm.

Another important factor is maintaining consistent pedal pressure while shifting gears. Applying too much force when changing gears can cause the chain to jump or slip, leading to potential damage. On the other hand, releasing pedal pressure entirely can result in a loss of momentum. Finding the right balance between applying pressure and easing up slightly will ensure a smooth transition from one gear to another.

To further emphasize this point, consider the following table:

Gear Shifting Technique Benefits
Anticipating shifts Smoother transitions
Consistent pedal pressure Prevents chain slippage
Balancing pressure Maintains momentum

By implementing these techniques, you’ll experience improved efficiency and durability in your gravel biking adventures.

Advertisement

Transitioning into the subsequent section about familiarizing yourself with the gear levers, it’s essential to understand how they function to make precise gear changes effortlessly.

Familiarize Yourself with the Gear Levers

Before getting started, it’s important to know how the gear levers on your gravel bike work. Familiarizing yourself with the gear lever functions and proper hand placement will ensure smooth and efficient gear shifting while riding.

Most gravel bikes are equipped with a combination of two gear levers, one for controlling the front derailleur and the other for the rear derailleur. The left lever is responsible for shifting between the chainrings, which control the bike’s front gears. On the other hand, the right lever controls the rear gears by moving the derailleur across different cogs on the cassette.

Advertisement

To shift gears using these levers, place your hands firmly on both hoods of your handlebars. Your index fingers should rest lightly on top of each lever, ready to initiate shifts when needed. When you want to shift to an easier gear (a smaller cog or a smaller chainring), push either lever sideways using your thumb or index finger. For harder gears (larger cogs or larger chainrings), pull back on either lever.

Understanding how to operate these gear levers and maintaining proper hand placement is crucial in achieving optimal performance and preventing any potential damage to your gravel bike’s drivetrain components.

With this knowledge in mind, let’s move onto starting with the right gear ratio…

Start with the Right Gear Ratio

Begin with the correct gear ratio to ensure optimal performance and prevent potential damage to your drivetrain components. Gear selection is crucial when changing gears on a gravel bike. By choosing the right gear ratio, you can maximize efficiency and power transfer while minimizing unnecessary strain on your bike’s components.

To start with the right gear ratio, it’s important to consider the terrain you’ll be riding on. If you’re facing a steep climb or challenging off-road section, it’s best to select a lower gear that provides more torque for easier pedaling. On the other hand, if you’re riding on flat or downhill sections, choosing a higher gear will allow you to maintain speed without excessive spinning of the pedals.

Advertisement

Finding the ideal gear ratio may require some trial and error, especially when encountering varying terrains during your ride. Pay close attention to how your bike responds to different gears and adjust accordingly. Anticipate terrain changes by smoothly shifting gears before reaching them, ensuring a seamless transition between ratios.

By starting with the right gear ratio and adjusting as needed, you can optimize your gear selection for maximum efficiency and enjoy a smoother ride on your gravel bike. Anticipating terrain changes will further enhance your overall biking experience.

Anticipate Terrain Changes

To optimize your riding experience, it’s important to anticipate shifts in terrain while on your gravel bike. Understanding the terrain and adapting your gear strategy accordingly can greatly enhance your performance and enjoyment. By being proactive in adjusting gears before encountering changes in the landscape, you can maintain a steady cadence and ensure smooth transitions.

Advertisement

To help you understand how to adapt your gear strategy based on terrain, refer to the table below:

Terrain Type Recommended Gear Strategy
Uphill Shift to a lower gear for easier pedaling
Downhill Shift to a higher gear for increased speed
Flat Maintain a comfortable gear ratio
Loose Gravel Shift to a lower gear for better traction
Sand or Mud Shift to an even lower gear for stability

By anticipating these terrain changes and adjusting gears accordingly, you’ll be able to maintain optimal control of your gravel bike. Remember, it’s always better to shift before you need to rather than struggling with shifting under pressure during challenging sections. This will not only improve your overall riding experience but also prevent unnecessary strain on yourself and the bike. Transitioning into the next section about ‘shift before you need to’ will further enhance your understanding of proper gear management on a gravel bike.

Shift Before You Need to

Make sure you shift gears on your gravel bike in anticipation of upcoming terrain changes. Anticipating terrain changes is essential to maintaining a steady pedaling cadence and ensuring a smooth ride.

Here are four crucial tips for shifting gears effectively:

  • Pay attention to the road ahead: Keep your eyes focused on the trail, looking out for any obstacles or changes in terrain that may require gear adjustments.

  • Shift before you need to: Don’t wait until you’re struggling to pedal uphill or losing control on a descent. Shift gears proactively, allowing yourself enough time to adjust smoothly without interrupting your flow.

  • Know your bike’s gear range: Familiarize yourself with the different gear combinations available on your gravel bike. Understand which gears are best suited for climbing, descending, and cruising on flat terrain.

  • Practice shifting techniques: Experiment with shifting both up and down the gears while riding at varying speeds. This will help you develop a feel for how your bike responds and ensure seamless transitions between gears.

Maintaining a steady pedaling cadence is crucial for efficient riding and preventing unnecessary strain or fatigue. Transitioning into the next section about ‘maintain a steady pedaling cadence,’ it is equally important to find the right gear ratio that allows you to maintain an optimal cadence throughout different terrains.

Advertisement

Maintain a Steady Pedaling Cadence

When it comes to changing gears on a gravel bike, one important aspect to consider is maintaining a steady pedaling cadence. This not only helps in improving your efficiency but also ensures a smoother transition between gears.

To maintain cadence, it is crucial to anticipate gear changes and shift before you actually need to. By doing so, you can avoid sudden spikes or drops in resistance that can disrupt your rhythm. Instead, aim for seamless transitions that allow you to keep spinning at a consistent cadence.

Maintaining a steady pedaling cadence has several benefits. Firstly, it reduces the strain on your muscles and joints by distributing the workload evenly across different gears. Secondly, it allows you to generate power consistently without wasting energy due to abrupt gear changes.

By focusing on maintaining cadence while changing gears on your gravel bike, you will find yourself riding with greater efficiency and endurance. So remember, smooth shifts are key!

In the next section about using both front and rear gears, we will explore another essential technique for optimizing gear changes without any interruption in your ride flow.

Advertisement

Use Both Front and Rear Gears

Using both the front and rear gears on your gravel bike is essential for achieving optimal gear changes without any interruption in your ride flow. When it comes to front gear selection, you have multiple options available.

The smaller chainring is ideal for climbing steep hills or tackling difficult terrain, as it provides a lower gear ratio that allows for easier pedaling. On the other hand, the larger chainring is great for riding on flat roads or when you want to go faster, as it offers a higher gear ratio that maximizes your speed.

In terms of rear gear selection, your gravel bike typically has a wide range of gears to choose from. The smaller cogs provide easier pedaling and are perfect for uphill climbs or rough surfaces where you need more control. Conversely, the larger cogs offer higher resistance and are suitable for riding on flat roads or when you want to pick up speed.

By utilizing both front and rear gears effectively, you can optimize your riding experience by seamlessly transitioning between different terrains and conditions. However, it’s important to note that you should avoid ‘cross chaining,’ which refers to using extreme combinations such as the small chainring with the smallest cog or the large chainring with the largest cog. This can cause excessive wear on your drivetrain components and may result in poor shifting performance.

Transitioning into the next section about ‘don’t cross-chain,’ it’s crucial to understand how improper gear selection can negatively impact your ride quality and potentially damage your bicycle’s drivetrain components.

Advertisement

Don’t Cross Chain

Avoiding cross-chaining is important to maintain the performance and longevity of your drivetrain components. Cross-chaining occurs when you use the extreme combination of gears, such as using the big chainring in the front and the biggest cog in the rear, or vice versa. This puts excessive stress on your chain and can lead to premature wear and tear. Additionally, cross-chaining reduces efficiency and can cause poor shifting.

To prevent cross-chaining, it is essential to understand your gear ratios and make conscious decisions when shifting. When riding on a gravel bike, it’s recommended to avoid extreme gear combinations that strain your drivetrain unnecessarily. Instead, aim for a balanced use of gears that allows for smooth transitions between them.

Regularly inspecting and maintaining your gears is also crucial for optimal performance. Clean your drivetrain regularly to remove dirt and grime that can affect shifting quality. Lubricate the chain appropriately to minimize friction.

By avoiding cross-chaining and practicing good gear maintenance habits, you can ensure a longer lifespan for your drivetrain components while optimizing your cycling experience.

Now let’s delve into adjusting gear shifters for comfort without compromising functionality.

Advertisement

Adjusting Gear Shifters for Comfort

To achieve a more comfortable riding experience, it’s important to make adjustments to your gear shifters. Proper gear shifter maintenance and adjusting gear cable tension are crucial for smooth and efficient shifting.

Here are two key steps you can take to optimize the performance of your gear shifters:

  1. Check and adjust the gear cable tension: Begin by shifting your bike into the highest gear (smallest cog). Locate the barrel adjuster on the derailleur or shifter body. Turn it clockwise to increase tension or counterclockwise to decrease tension until the shifting feels crisp and precise.
  • Fine-tune while riding: Take your bike for a spin around a quiet area, such as an empty parking lot. Shift through all gears while paying attention to any hesitation or lag in shifting. If needed, make additional adjustments using the barrel adjuster until you achieve seamless shifting across all gears.
  1. Evaluate lever position and reach: Ensure that your shift levers are positioned comfortably within reach of your hands while gripping the handlebars. Adjust their angle if necessary, so you can easily access them without straining or stretching.

By maintaining and adjusting your gear shifters correctly, you’ll enhance both comfort and performance on your gravel bike.

Now, let’s move on to practice shifting gears on different surfaces for even greater control during rides without compromising safety or efficiency.

Practice Shifting Gears on Different Surfaces

Start by practicing shifting gears on a variety of surfaces to improve your control and adaptability while riding. It’s important to become familiar with the different gear ratios and how they affect your bike’s performance. Shifting on loose gravel can be particularly challenging, as the surface provides less traction and stability. To navigate this terrain effectively, you need to anticipate changes in resistance and adjust your gears accordingly.

To help illustrate the concept, here is a table showing examples of suitable gear ratios for different surfaces:

Advertisement
Surface Gear Ratio
Paved road High gear (big chainring)
Gravel road Medium gear
Loose gravel Low gear (small chainring)
Uphill Low gear

When shifting on loose gravel, it’s crucial to smoothly transition between gears to avoid any sudden loss of traction. Start by approaching the shift with a steady pedal stroke, then quickly but gently shift into a lower gear before you encounter the loose section. This will allow you to maintain momentum without losing control.

As you practice shifting gears on different surfaces, pay attention to how your bike responds. Listening to your bike can provide valuable feedback about whether you need to make further adjustments or if everything is running smoothly.

Transitioning into the subsequent section about ‘listening to your bike,’ we’ll explore how understanding its cues can enhance your overall riding experience.

Listen to Your Bike

When you’re riding, it’s essential to listen closely to your bicycle for valuable feedback. Your bike can tell you a lot about its condition and how well it’s performing. By paying attention to the sounds it makes, you can detect any potential issues and address them before they become major problems.

Here are some key components of your gear system that you should listen for:

Advertisement
  • Chain noise: A noisy chain could indicate that it needs lubrication or that there is excessive wear.
  • Gear skipping: If your gears are skipping or jumping when you shift, it may be a sign of misalignment or cable tension issues.
  • Grinding sound: This could mean that your drivetrain components are not properly aligned or that there is dirt and debris causing friction.

By regularly listening to these sounds and identifying any abnormalities, you can take proactive steps in bike maintenance to keep your gear system running smoothly.

In the next section, we will discuss fine-tuning your gear shifting skills for an even better riding experience.

Fine-Tuning Your Gear Shifting Skills

Fine-tuning your gear shifting skills can greatly enhance your cycling experience. When it comes to gravel biking, mastering gear shifting techniques is crucial for maintaining control and maximizing efficiency on unpredictable terrain. The key to efficient gear shifting lies in anticipating changes in the trail ahead and adjusting your gears accordingly.

One important technique is preemptive shifting. By planning ahead and shifting into an appropriate gear before you encounter a steep climb or descent, you can maintain momentum and avoid stalling or spinning out. This requires paying close attention to the terrain ahead and using your knowledge of gear ratios to select the optimal gear.

Another technique is called cadence management. Maintaining a consistent pedaling rhythm not only improves efficiency but also reduces strain on your legs. To achieve this, you should shift gears based on your current cadence rather than relying solely on speed or intensity. Experiment with different cadences to find what feels most comfortable for you.

By honing these gear shifting techniques, you can improve your overall performance and enjoyment while riding a gravel bike.

Advertisement

Transitioning now into troubleshooting common gear shifting issues, understanding how to address these problems will ensure a smooth and uninterrupted ride experience without any hiccups along the way.

Troubleshooting Common Gear Shifting Issues

To troubleshoot common gear shifting issues, pay attention to any unusual noises or resistance while pedaling. Here are some common gear shifting problems and how to fix them:

  • Misalignment: If your gears aren’t shifting smoothly, they may be misaligned. To fix this, use the barrel adjuster on your derailleur to make small adjustments until the gears shift smoothly.

  • Chain skipping: If your chain is skipping over the teeth of the cassette or chainring, it could be due to a worn-out chain or cassette. Replace these components if necessary to resolve the issue.

  • Cable tension issues: If your gears aren’t shifting properly, it could be due to incorrect cable tension. Use the barrel adjuster on your shifter or derailleur to fine-tune the cable tension for smooth gear changes.

  • Bent derailleur hanger: A bent derailleur hanger can cause poor shifting performance. Inspect the hanger for any signs of damage and replace if necessary.

By troubleshooting these common gear shifting problems, you can ensure that your gravel bike performs optimally. Enjoy the smooth ride with perfectly timed gear changes in the subsequent section about ‘enjoying the smooth ride with perfectly timed gear changes.’

Enjoy the Smooth Ride with Perfectly Timed Gear Changes

Achieve a smooth and enjoyable ride by mastering the art of perfectly timed gear shifts. When riding a gravel bike, it is essential to have precise control over your gears to navigate various terrains. Perfecting gear transitions allows you to maintain an optimal cadence and power output, ensuring efficiency and comfort throughout your ride.

To achieve perfect gear changes, start by understanding the concept of optimal gear ratios. This involves finding the right balance between the front chainring and rear cassette gears. The goal is to select a combination that provides enough resistance for efficient pedaling without straining your muscles or causing unnecessary fatigue. Experiment with different combinations on different terrains to find what works best for you.

Advertisement

Timing is crucial when shifting gears. Anticipate changes in terrain or gradient ahead of time, allowing yourself ample time to shift smoothly. Avoid shifting under heavy load as this can cause mechanical stress on your drivetrain components. Instead, ease off the pedals momentarily while making the transition.

When executing a gear change, apply steady pressure on the shifter while simultaneously releasing pressure on the pedals momentarily. This allows for smoother shifting as the chain moves from one gear to another seamlessly.

By practicing and perfecting your gear transitions, you will enjoy a smoother ride with optimal power delivery and reduced strain on your body. Remember that mastering this skill takes time and experience, so don’t be discouraged if it doesn’t come naturally at first. Keep experimenting with different techniques until you find what works best for you and enjoy every moment of your gravel bike adventures!

Frequently Asked Questions

What are the different types of gear ratios available on a gravel bike?

There are various gear ratios available on a gravel bike to cater to different riding conditions. Gear ratio selection is crucial as it determines the ease or difficulty of pedaling.

Lower gear ratios, such as 1:1 or 0.8:1, provide more torque for climbing steep hills or navigating rough terrain.

Advertisement

Higher gear ratios, like 2:1 or 2.5:1, offer greater speed on flat surfaces and descents.

Choosing the right gear ratio can optimize efficiency and power output while riding a gravel bike.

How do I know if I’m using the correct gear ratio for a specific terrain?

To determine if you’re using the correct gear ratio for a specific terrain, there are a few factors to consider.

Firstly, observe your cadence (the speed at which you pedal). If it feels too easy or difficult, you may need to adjust the gear ratios accordingly.

Additionally, monitor your speed and power output. If you’re struggling to maintain speed or exerting excessive effort, troubleshooting gear shifting and adjusting gear ratios can help optimize your performance on different terrains.

Advertisement

Can I shift gears while standing up on my gravel bike?

Yes, you can shift gears while standing up on your gravel bike. When climbing steep terrain, it’s important to use the correct shifting technique to maintain momentum and efficiency.

As you approach a climb, anticipate the gear change by slightly easing off the pedals. Then, shift to a lower gear smoothly and quickly, using both your hands and body weight to apply pressure on the pedals.

This will ensure a seamless transition and allow you to conquer those challenging ascents with ease.

How often should I clean and lubricate my gear shifters?

I clean and lubricate my gear shifters regularly to ensure optimal performance and prolong their lifespan.

It is recommended to clean and lubricate the gear shifters every 100-200 miles or whenever they become dirty or sticky.

Advertisement

Start by wiping them down with a damp cloth, then apply a small amount of lubricant to the moving parts.

This will keep the gear shifters functioning smoothly and prevent any unnecessary wear or damage.

Are there any specific techniques for shifting gears smoothly and quickly on a gravel bike?

Shifting gears on a gravel bike requires finesse and precision, much like conducting a symphony. The key is to anticipate the terrain ahead and choose the appropriate gear ratio.

By mastering this art, you can seamlessly transition between gears, ensuring optimum power transfer and a smooth riding experience.

Correct gear ratios allow you to conquer various terrains effortlessly. Whether it’s climbing steep hills or navigating through loose gravel, the right technique is your ticket to gravel biking nirvana.

Advertisement

Conclusion

In conclusion, mastering the art of gear shifting on a gravel bike is essential for a smooth and enjoyable ride.

By understanding the gear system, familiarizing yourself with the levers, and anticipating terrain changes, you can ensure that your gear changes are perfectly timed.

Just like a well-oiled machine, your bike will respond seamlessly to your commands, allowing you to conquer any trail with ease.

So why wait? Embrace the thrill of gravel biking and let your gears dance in perfect harmony as you embark on new adventures.

Advertisement

Continue Reading

Bike

What Equipment Must A Bicycle Have When Used At Night?

Published

on

By

An image showcasing a bicycle equipped with a front and rear light, reflectors on pedals, spokes, and front/rear tires, along with a reflective vest worn by the cyclist, ensuring maximum visibility and safety during nighttime rides

Like a single bright star in the night sky, a bicycle with the appropriate gear guarantees safe travels once the sun goes down. Being an experienced cyclist, I understand the significance of being visible on the road, particularly during nighttime.

In this article, I will guide you through the essential equipment that every bicycle must have when used at night, from powerful lights and reflectors to reflective clothing and properly inflated tires.

Let’s embark on this journey of knowledge to enhance your nighttime cycling experience.

Key Takeaways

  • Reflective gear, such as reflective tape and decals, is essential for increased visibility when cycling at night.
  • High-visibility accessories like flags and vests should be used to maximize visibility.
  • Properly inflated tires and good tread are important for optimal control and safety.
  • Consider the terrain and choose a tread pattern accordingly, and regularly check tire pressure for safe night riding.

White Front Light

You must have a white front light on your bicycle when riding at night. It is essential for your safety and the safety of others on the road.

Advertisement

A white front light helps you see what’s ahead, making sure you can spot any potential hazards, obstacles, or changes in the road surface. Additionally, it allows other road users to see you coming from a distance, reducing the risk of accidents.

A good quality white front light will have a strong beam, illuminating the path ahead effectively. It is important to choose a light that meets the legal requirements for brightness and visibility.

Once you have your white front light secured, the next step is to ensure you have a red rear light, which I will discuss in the next section.

Red Rear Light

A bicycle at night should be equipped with a red rear light. The importance of a red rear light cannot be overstated when it comes to ensuring the safety of both the cyclist and other road users.

Not only does it allow drivers to easily spot the bicycle from a distance, but it also helps them determine the direction in which the cyclist is traveling. In many countries, including the United States, it is a legal requirement for bicycles to have a red rear light when riding at night. This is because it significantly reduces the risk of accidents and enhances visibility.

Advertisement

However, simply having a red rear light is not enough. Reflectors on the front, rear, pedals, and wheels are also crucial in maximizing visibility. These reflectors work in conjunction with the red rear light to make the bicycle more visible from all angles and ensure a safe ride.

Reflectors on the Front, Rear, Pedals, and Wheels

Reflectors on the front, rear, pedals, and wheels are essential for maximizing visibility and ensuring a safe ride. When it comes to reflectors, placement and regulations are important factors to consider.

In most places, bicycles are required to have a white reflector on the front, a red reflector on the rear, and amber reflectors on the pedals. Additionally, reflectors on the wheels can provide extra visibility, especially when they are in motion. These reflective accessories work by bouncing back light from other sources, making you more visible to drivers and pedestrians. By using reflectors in accordance with regulations, you can greatly reduce the risk of accidents while cycling at night. They are a simple yet effective way to enhance your safety on the road.

Advertisement

Transitioning into the next topic, reflective clothing also plays a crucial role in increasing visibility during nighttime rides.

Reflective Clothing

Wearing reflective clothing is essential for increasing visibility and ensuring a safe ride at night. When cycling in the dark, it is crucial to be seen by motorists and other cyclists, and reflective clothing plays a vital role in achieving this. The importance of wearing reflective clothing cannot be overstated. It can make a significant difference in preventing accidents and ensuring your safety on the road.

To choose the right reflective clothing for night time cycling, opt for garments with built-in reflective strips or patches. Look for materials that reflect light well, such as fluorescent or bright colors. Additionally, consider wearing accessories like reflective arm or leg bands to enhance your visibility further. These simple measures can greatly enhance your safety while cycling at night.

Transitioning into the next section, let’s now discuss the importance of wearing a helmet with reflective strips.

Helmet with Reflective Strips

Advertisement

Make sure you choose a helmet that has reflective strips to increase your visibility while cycling at night. Helmet safety is essential, and having reflective strips on your helmet can greatly enhance your safety on the road. These reflective strips are designed to catch the light from car headlights, making you more visible to drivers.

When choosing a helmet, look for ones that have strategically placed reflective strips on the sides, front, and back. This will ensure that you are visible from all angles. Additionally, there are various reflective gear options available that you can attach to your helmet to further enhance your visibility. These include reflective stickers, bands, or even LED lights.

With the right helmet and reflective gear, you can significantly reduce the risk of accidents while cycling at night. As you focus on helmet safety, don’t forget to consider adding a bell or horn for audible signaling, ensuring that you have multiple ways to alert others of your presence on the road.

Bell or Horn for Audible Signaling

Don’t forget to attach a bell or horn to your helmet for audible signaling while cycling. It is important to have a way to alert others of your presence, especially when riding at night. In addition to the helmet with reflective strips and reflective clothing, an audible signaling device is crucial for your safety. To help you visualize the necessary equipment, refer to the table below:

Advertisement
Equipment Importance
Bell or Horn Essential for signaling
Reflective Clothing Increases visibility
Helmet with Reflective Strips Ensures safety
Rearview Mirror Enhances awareness
High Visibility Flag or Vest Promotes visibility
Properly Inflated Tires Ensures a smooth ride
Good Tread Provides better traction
Reflective Tape Enhances visibility
Front Light Illuminates the path ahead
Rear Light Increases visibility from behind
Reflectors Enhance visibility from all angles

By having all these equipment and taking necessary precautions, you can ensure your visibility and safety while cycling at night. Now, let’s discuss the next important aspect: the rearview mirror for increased awareness.

Rearview Mirror for Increased Awareness

Using a rearview mirror while cycling increases awareness of surrounding traffic. It is an essential equipment for night riding, as it allows me to keep an eye on vehicles approaching from behind without having to turn my head. The benefits of using a rearview mirror are numerous.

Firstly, it enhances my safety by providing a constant visual reference of what’s happening behind me.

Secondly, it allows me to anticipate potential hazards and make informed decisions while on the road.

Thirdly, it helps me maintain a steady and straight line while riding, as I can easily adjust my position based on the traffic behind me.

Advertisement

Lastly, it gives me peace of mind knowing that I have a clear view of my surroundings at all times.

Other alternative rearview options include helmet-mounted mirrors and handlebar-mounted mirrors. These options provide similar benefits but may vary in terms of comfort and ease of use.

Now, let’s move on to the next section about reflective tape on the frame and forks.

Reflective Tape on the Frame and Forks

Reflective tape on the frame and forks increases visibility and helps cyclists stay safe on the road. When riding at night, it is crucial to have equipment that enhances visibility, and reflective tape does just that. The tape reflects light from car headlights, making the bicycle more visible to drivers. This is especially important when riding on poorly lit roads or in areas with heavy traffic.

Reflective tape is an effective way to enhance nighttime visibility because it can be easily applied to the frame and forks of a bicycle. It comes in various colors, such as white, silver, or fluorescent, which further increases visibility. Additionally, the tape is durable and weather-resistant, ensuring its effectiveness even in harsh conditions.

Advertisement

While reflective tape is a popular choice, there are alternatives available for improving visibility on bicycle frames and forks. Some cyclists opt for reflective decals or stickers, which can be customized to suit their preferences. These decals work similarly to reflective tape by reflecting light and increasing visibility.

Transitioning into the subsequent section about the high-visibility flag or vest for added visibility, cyclists can further enhance their safety by incorporating a high-visibility flag or vest. These additional measures ensure maximum visibility and alert drivers to the presence of the cyclist on the road.

High-Visibility Flag or Vest for Added Visibility

One effective way to increase visibility and promote cyclist safety on the road is by incorporating high-visibility accessories such as a flag or vest. These accessories are designed to make cyclists more visible to motorists, especially in low-light conditions.

High-visibility flags can be attached to the rear of the bicycle or the back of the cyclist, while vests can be worn over clothing to enhance visibility from all angles. The importance of reflective gear cannot be overstated, as it significantly reduces the risk of accidents by making cyclists more easily seen by drivers.

In addition to reflective tape on the frame and forks, incorporating a high-visibility flag or vest is crucial for cyclists who ride at night or in low-light conditions. By increasing visibility, cyclists can greatly enhance their safety on the road.

Advertisement

Moving on to the next section, it is also important to have properly inflated tires with good tread for optimal control and safety.

Properly inflated tires with good tread for optimal control and safety

When it comes to riding a bicycle at night, ensuring optimal control and safety is crucial. One important aspect to consider is the condition of your tires. Properly inflated tires with good tread are essential for a smooth and safe ride. Maintaining the correct tire pressure is key to achieving optimal performance and control. Underinflated tires can make it difficult to maneuver, while overinflated tires can affect traction and stability. Additionally, choosing the right tread pattern for different road conditions is important. A tire with a more aggressive tread pattern can provide better grip on wet or uneven surfaces, while a smoother tread pattern is more suitable for dry roads. So, before hitting the road at night, take some time to check your tire pressure and tread condition to ensure a safe and enjoyable ride.

Now let’s dive into a more detailed discussion about tire pressure maintenance and choosing the right tread pattern for different road conditions:

Tire Pressure Maintenance Choosing the Right Tread Pattern
1. Regularly check your tire pressure using a gauge. Consider the type of terrain you will be riding on.
2. Consult the manufacturer’s guidelines for the recommended tire pressure range. Look for tires with deeper treads for better grip on wet surfaces.
3. Adjust the pressure accordingly using a pump with a pressure gauge. Opt for tires with a smoother tread pattern for dry roads.
4. Remember to check the pressure before each ride. Experiment with different tread patterns to find the one that suits your needs best.

Frequently Asked Questions

How can I ensure that my bicycle is visible to other road users at night?

To ensure my bicycle is visible to other road users at night, I prioritize the use of reflective gear. Reflective clothing, stickers, and lights are essential for enhancing visibility and ensuring my safety on the road.

Is it necessary to have both a front and rear light on my bike when riding at night?

Yes, it is necessary to have both a front and rear light on your bike when riding at night. The front light ensures visibility and helps me see the road ahead, while the rear light increases my visibility to other road users.

Advertisement

Are there any specific laws or regulations regarding the use of reflective clothing while cycling at night?

Yes, there are laws regarding reflective clothing when cycling at night. It is important to wear reflective clothing as it increases visibility and safety for both the cyclist and other road users.

What are the benefits of using a rearview mirror on a bicycle?

Using a rearview mirror on my bike has been a game-changer. It enhances safety by providing a clear view of approaching vehicles, allowing me to react quickly. The benefits are immense and unquestionable.

Can reflective tape be applied to any part of the bike frame, or are there specific areas where it should be placed for maximum effectiveness?

When applying reflective tape to the bike frame, focus on key areas for maximum effectiveness. These include the front and rear forks, seatstays, chainstays, and rims. Additionally, consider using reflective accessories and lights to further enhance bike visibility at night.

Conclusion

As I pedal through the darkened streets, I am grateful for the equipment that guides and protects me on my nighttime cycling adventures. The white front light illuminates my path, while the red rear light signals my presence to those behind me. Reflectors on my bike and clothing shimmer like stars, capturing the attention of passing drivers.

With a helmet adorned with reflective strips, I feel like a shining knight, ready to conquer any obstacle that comes my way. A rearview mirror grants me a glimpse into the world behind, increasing my awareness and ensuring my safety. Reflective tape on the frame and forks adds an extra layer of visibility, while a high-visibility flag or vest boldly announces my presence.

Advertisement

Lastly, properly inflated tires with good tread provide the control and stability I need to navigate the roads with confidence. As I ride under the moonlit sky, I am a symbol of safety, preparedness, and adventure, embracing the beauty of the night with every turn of the pedals.

Continue Reading
Advertisement

Affiliate disclaimer

As an affiliate, we may earn a commission from qualifying purchases. We get commissions for purchases made through links on this website from Amazon and other third parties.

About us

We are a passionate team driven by the belief that cycling is a fantastic and accessible way to stay active while enjoying the beauty of the outdoors. Our mission is to share our love for cycling with as many people as possible. We provide a welcoming environment for individuals of all ages, abilities, and backgrounds to come together and ride bikes. With Ralf’s visionary leadership, Zane’s expertise in cycling adventures, and Olivia’s dedication to community building, we strive to create a vibrant space where everyone can experience the joy of cycling. Through group rides, workshops, and inclusive events, we inspire and empower individuals to embrace an active lifestyle. Join us in our quest to pedal together, embrace the joy of cycling, and foster connections that last a lifetime.

Advertisement

Trending